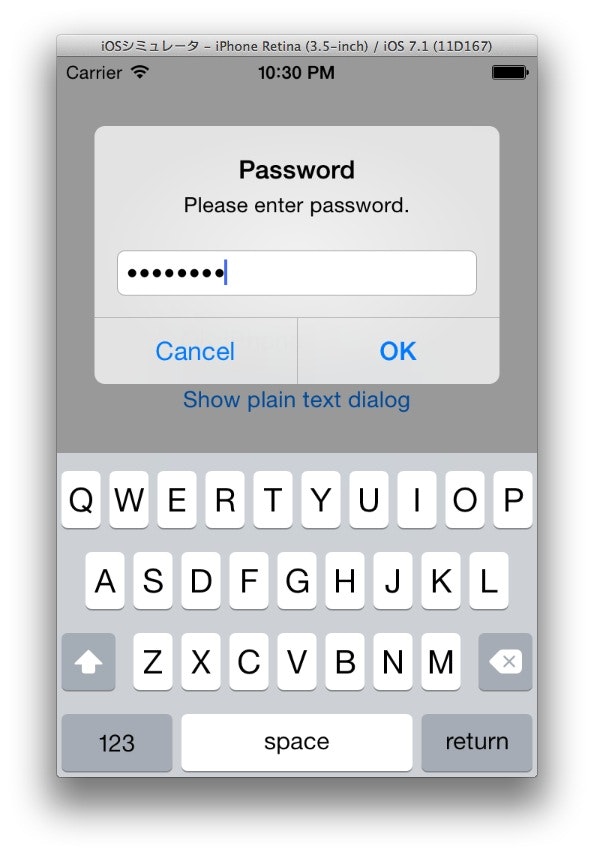
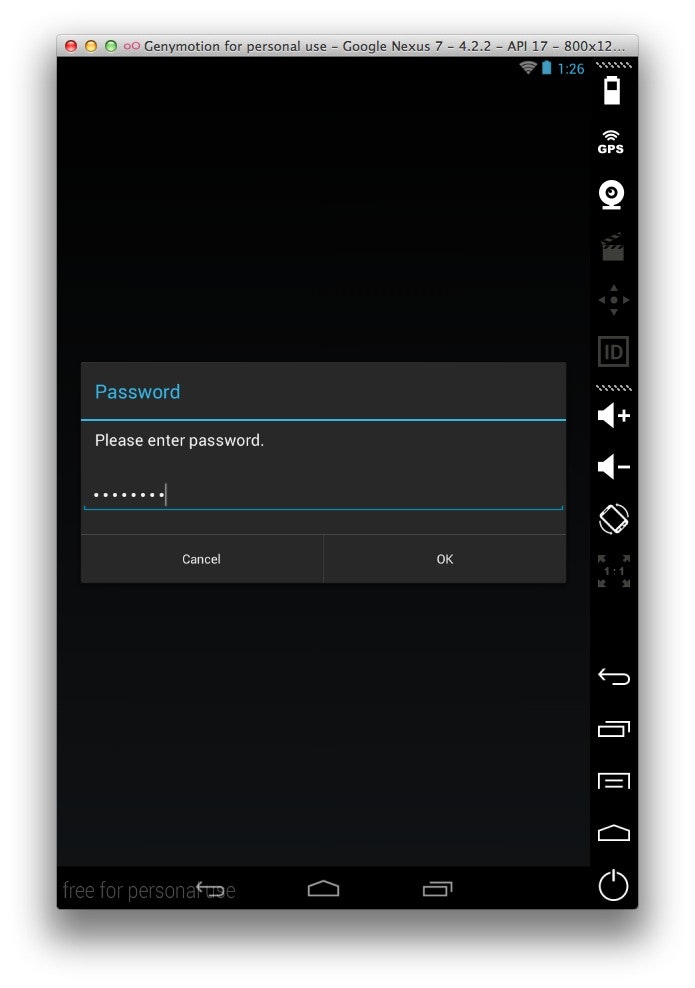
Xamarin.Forms にはシンプルなポップアップダイアログを表示する手段が標準で提供されています。
とてもシンプルであるため、この方法で取得できるのは"Yes/No"、または"複数ある内のどのボタンが押されたか"だけです。
そこで、この記事ではDependencyServiceを使って"パスワード入力などに利用可能なダイアログを表示する方法"をご紹介します。
プロジェクトの作成
新規にソリューションを作成します。種類はBlank Apps (Xamarin.Forms Portable)、名前はEntryAlertSampleにします。
PCLプロジェクト
EntryAlertSampleプロジェクトに空のインターフェースIEntryAlertService.csを新規作成し、中身を以下のように書きます。ShowメソッドのisPasswordパラメータの設定で入力テキストを隠せるようにします。
EntryAlertResultは押されたボタンと入力テキストを返すためのデータクラスです。
using System.Threading.Tasks;

namespace EntryAlertSample
{
	public interface IEntryAlertService
	{
		Task<EntryAlertResult> Show(string title, string message,
			string accepte, string cancel, bool isPassword = false);
	}

	public class EntryAlertResult
	{
		public string PressedButtonTitle { get; set; }
		public string Text { get; set; }
	}
}
MainPage.csを追加し、動作検証用のボタンとラベルを持ったMainPageクラスを定義します。
using Xamarin.Forms;

namespace EntryAlertSample
{
	public class MainPage : ContentPage
	{
		public MainPage ()
		{
			var label = new Label ();
			var plainTextButton = new Button { Text = "Show plain text dialog" };
			var passwordButton = new Button { Text = "Show password dialog" };

			plainTextButton.Clicked += async (sender, e) => {
				var result = await DependencyService.Get<IEntryAlertService>().Show(
					"Prain text", "Please enter text.", "OK", "Cancel", false);
				label.Text = string.Format("{0}:{1}", result.PressedButtonTitle, result.Text);
			};

			passwordButton.Clicked += async (sender, e) => {
				var result = await DependencyService.Get<IEntryAlertService>().Show(
					"Password", "Please enter password.", "OK", "Cancel", true);
				label.Text = string.Format("{0}:{1}", result.PressedButtonTitle, result.Text);
			};

			Content =  new StackLayout {
				Orientation = StackOrientation.Vertical,
				VerticalOptions = LayoutOptions.CenterAndExpand,
				HorizontalOptions = LayoutOptions.CenterAndExpand,
				Children = { label, plainTextButton, passwordButton }
			};
		}
	}
}
最後にApp.csファイルを次のように修正します。
...省略
public class App
{
	public static Page GetMainPage()
	{
		return new MainPage();
	}
}
iOSプロジェクト
EntryAlertSample.iOSプロジェクトにEntryAlertService.csを新規作成し、EntryAlertSampleプロジェクトで定義したIEntryAlertServiceインターフェースを実装します。[assembly: Dependency (typeof(EntryAlertService))]の記述により、PCLプロジェクトからDependencyService経由でEntryAlertServiceのインスタンスを取得することが可能になります。
using EntryAlertSample;
using EntryAlertSample.iOS;
using Xamarin.Forms;
using MonoTouch.UIKit;
using System.Threading.Tasks;

[assembly: Dependency (typeof(EntryAlertService))]

namespace EntryAlertSample.iOS
{
	public class EntryAlertService : IEntryAlertService
	{
		public Task<EntryAlertResult> Show (string title, string message,
		                                    string accepte, string cancel, bool isPassword = false)
		{
			var tcs = new TaskCompletionSource<EntryAlertResult> ();

			UIApplication.SharedApplication.InvokeOnMainThread (() => {
				var alert = new UIAlertView (title, message, null, cancel, new[]{ accepte });

				if (isPassword) {
					alert.AlertViewStyle = UIAlertViewStyle.SecureTextInput;
				} else {
					alert.AlertViewStyle = UIAlertViewStyle.PlainTextInput;
				}

				alert.Clicked += (sender, e) => tcs.SetResult (new EntryAlertResult {
					PressedButtonTitle = alert.ButtonTitle (e.ButtonIndex),
					Text = alert.GetTextField (0).Text
				});
				alert.Show ();
			});

			return tcs.Task;
		}
	}
}
ポイントはTaskCompletionSource<T>を使用していることです。ボタンが押された際にTaskCompletionSource<T>.SetResult(T)を実行することにより、IEntryAlertService.Showの呼び出し側でダイアログの入力完了を待機可能になります。ダイアログの表示にはUIAlertViewを使います。
Androidプロジェクト
EntryAlertSample.AndroidプロジェクトもiOSプロジェクトと同様にEntryAlertService.csを新規作成し、EntryAlertSampleプロジェクトで定義したIEntryAlertServiceインターフェースを実装します。
using System.Threading.Tasks;
using Android.App;
using Android.Widget;
using Xamarin.Forms;

using EntryAlertSample;
using EntryAlertSample.Android;

[assembly: Dependency (typeof(EntryAlertService))]

namespace EntryAlertSample.Android
{
	public class EntryAlertService : IEntryAlertService
	{
		public Task<EntryAlertResult> Show (string title, string message,
		                                    string accepte, string cancel, bool isPassword = false)
		{
			var tcs = new TaskCompletionSource<EntryAlertResult> ();

			var editText = new EditText (Forms.Context);
			if (isPassword) {
				editText.InputType = global::Android.Text.InputTypes.TextVariationPassword
				| global::Android.Text.InputTypes.ClassText;
			}

			new AlertDialog.Builder (Forms.Context)
				.SetTitle (title)
				.SetMessage (message)
				.SetView (editText)
				.SetNegativeButton (cancel, (o, e) => tcs.SetResult (new EntryAlertResult {
				PressedButtonTitle = cancel,
				Text = editText.Text
			}))
				.SetPositiveButton (accepte, (o, e) => tcs.SetResult (new EntryAlertResult {
				PressedButtonTitle = accepte,
				Text = editText.Text
			}))
				.Show ();

			return tcs.Task;
		}
	}
}
EditTextやAlertDialog.Builderのコンストラクタで必要なコンテキストはForms.Contextから取得します。Androidから始まる名前空間がEntryAlertSample.Androidと認識されてしまうためglobal::から始める必要があります。
実行結果
実行すると次の画面のようになります。

