はじめに
Power Apps から API どうやって叩くの?
結論:Power Automate使えばいい
今回やりたいこと
Power Apps から直接 API は叩けないので、Power Automate を利用します。
APIを使用する方法としては、Power Apps のカスタムコネクタを利用する方法もありますが、今回は簡易的に利用するだけなので Power Automate で POST する方法をとります。
Power Apps から API を使う一連の操作の練習として、Azure の Face API を使って感情分析をしてみます。
具体的には、Power Apps で写真とる→ Face API に画像投げる→返ってきた分析結果を Power Apps で表示
という簡易的なアプリを作成したいと思います。
Face API 立ち上げ方法は今回は割愛します。
API のエンドポイントとキーをメモっておいてください。
実装手順
- Power Automate で Face API 呼び出し分析結果取得
- Power Apps で撮った画像データをフローへ流す
- フローから出力された分析結果を Power Apps で表示
1. Power Automate で Face API 呼び出し分析結果取得
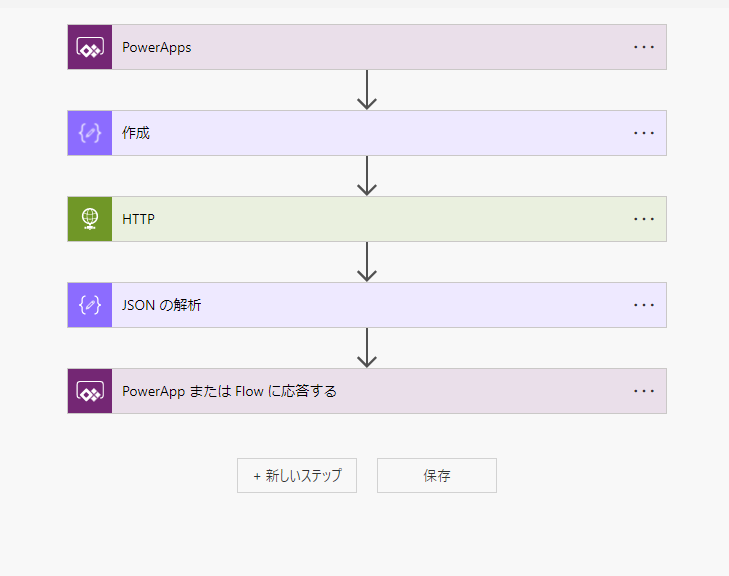
フローの全体像
フローの作成
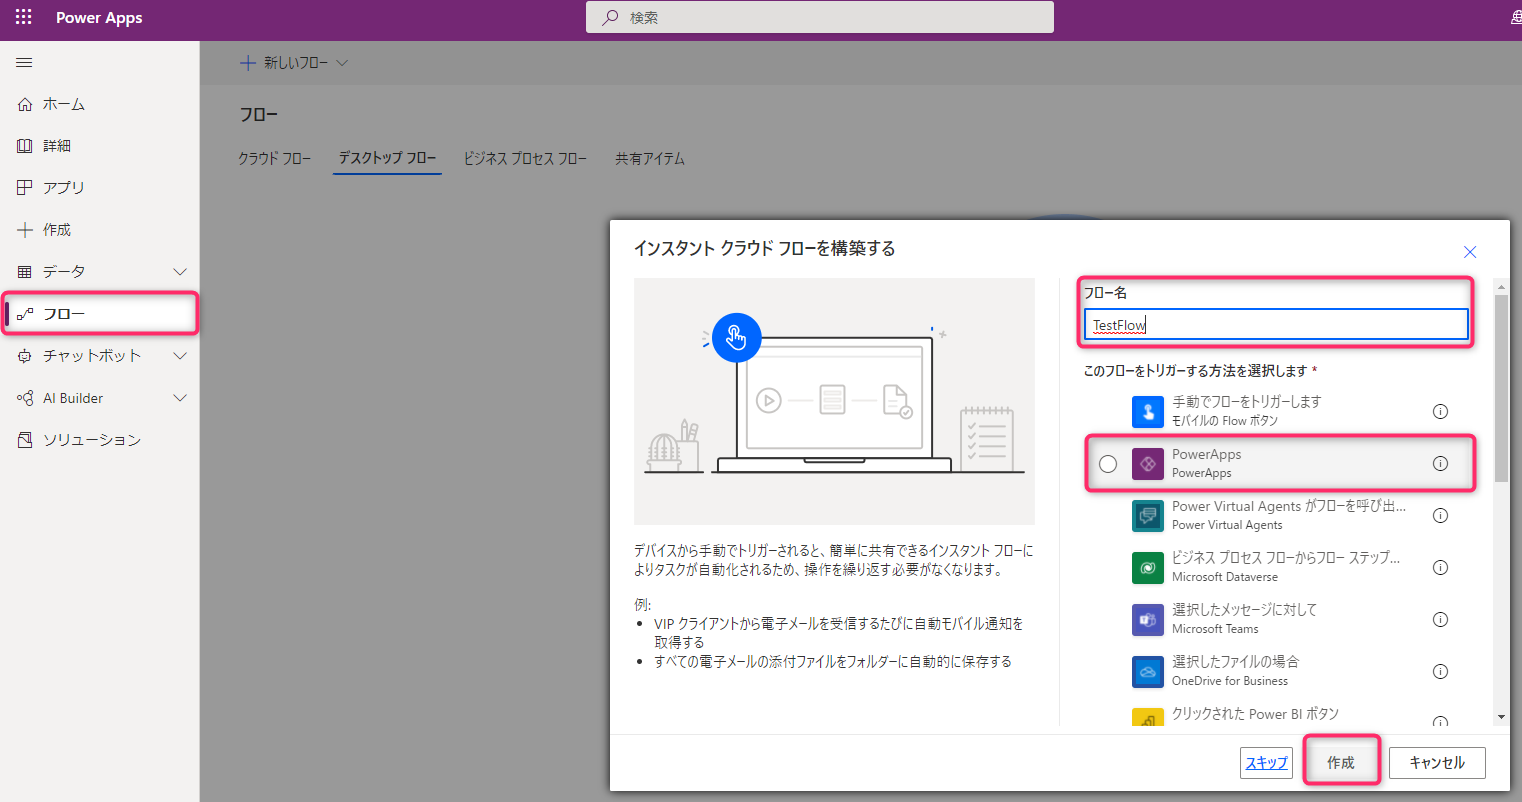
まず、Power Appsの編集画面(https://make.powerapps.com)で、サイドメニューからフローを選択します。
以下で入力して「作成」をクリックします。
フロー名:TestFlow
トリガーの方法:Power Apps
変数の作成
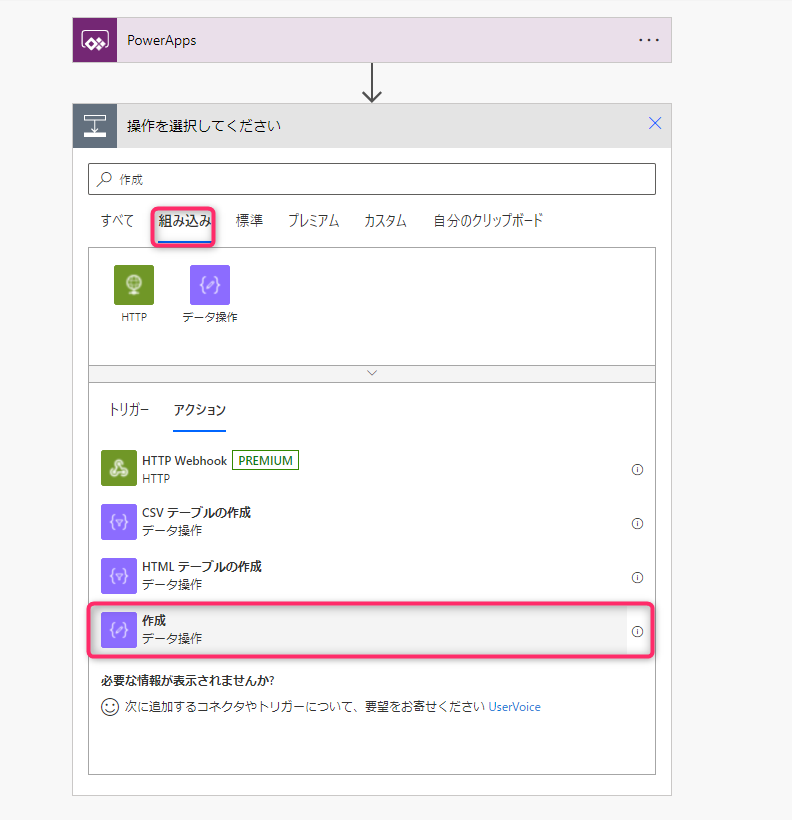
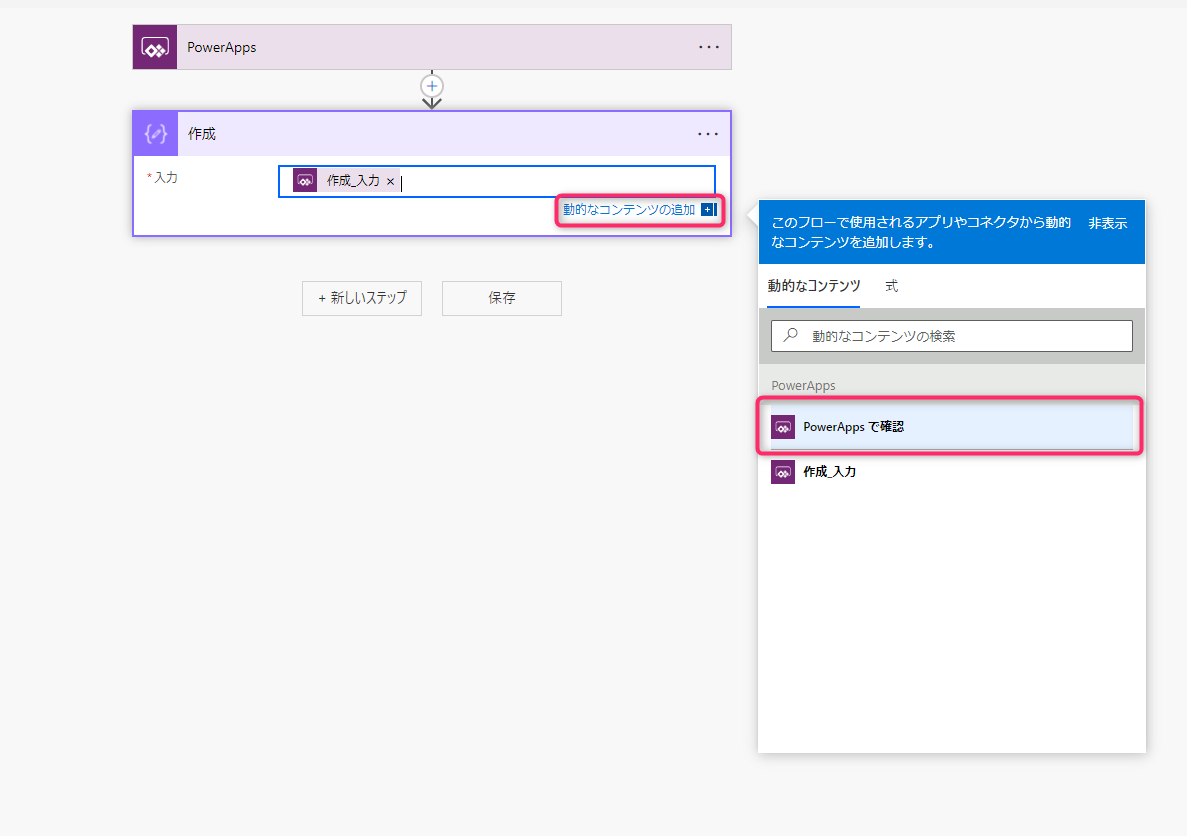
まず、Power Apps からの入力を Power Automate で利用できるよう変数を作成します。
「新しいステップ」を選択。「作成」と検索し以下の操作を選択してください
「動的なコンテンツ」をクリックし、「Power Apps で確認」を選択
API フローの作成
次に、Power Apps から受け取った画像データで API を叩くステップを作成します。
「新しいステップ」を選択。「http」と検索し以下の操作を選択してください。
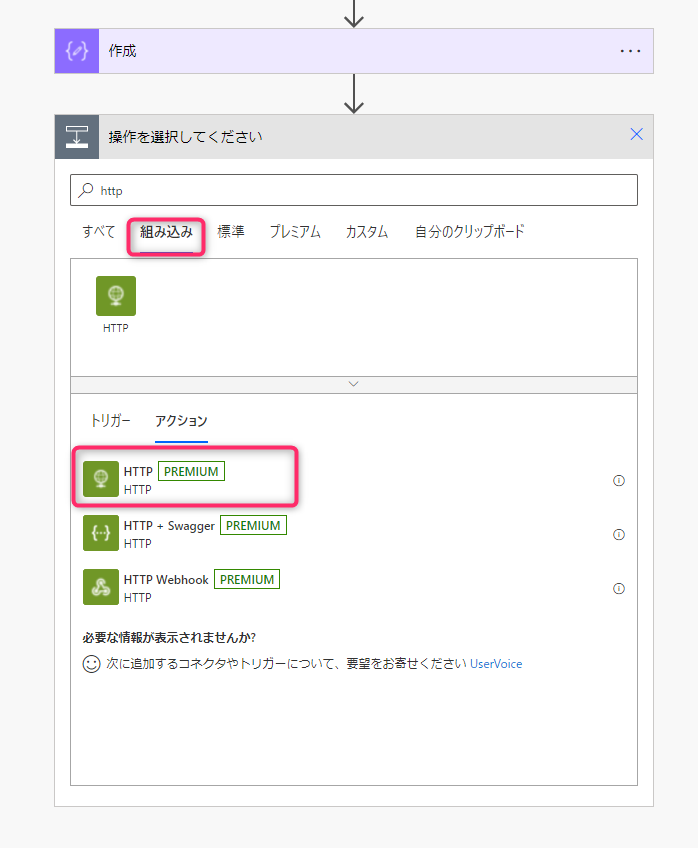
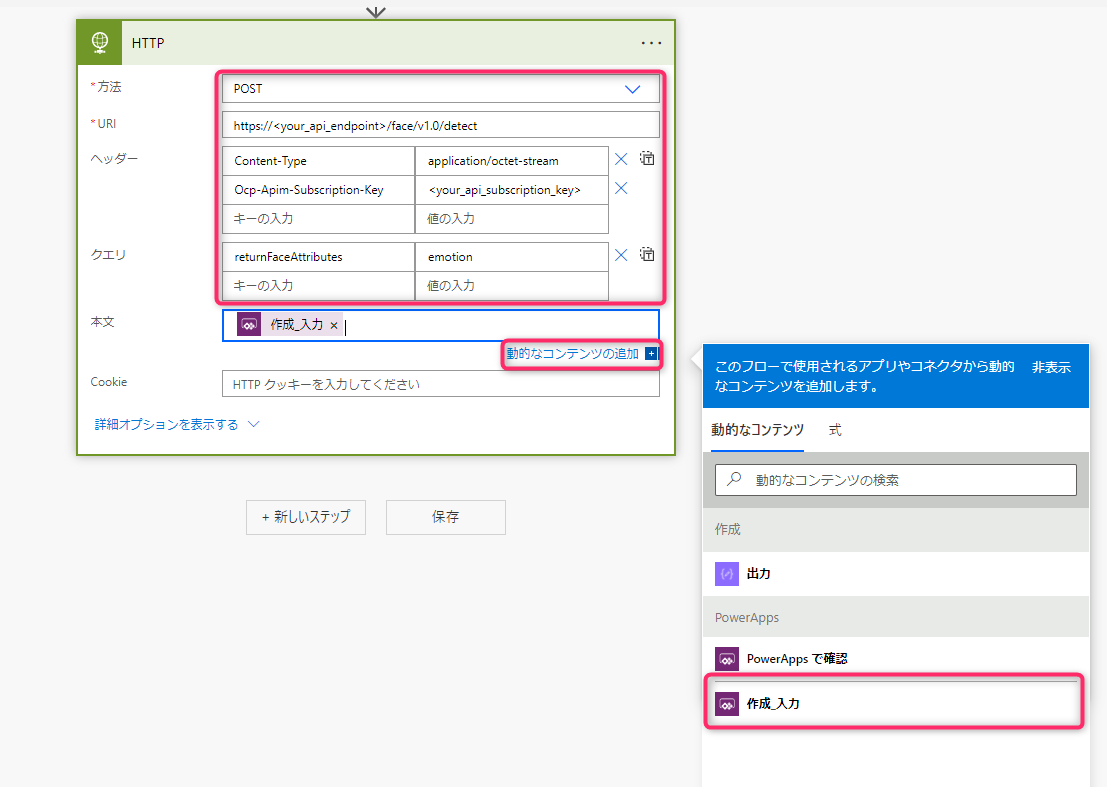
ここで、API を叩くことができます。
今回は Face API の感情分析を利用するので以下のように入力してください。
URI と KEY はご自身の値に変更してください。
返却結果の解析
次に、Face APIから帰ってきた JSONデータ を Power Automate で利用できるように、JSON解析を行います。
「新しいステップ」を選択。「json」と検索し以下の操作を選択してください。
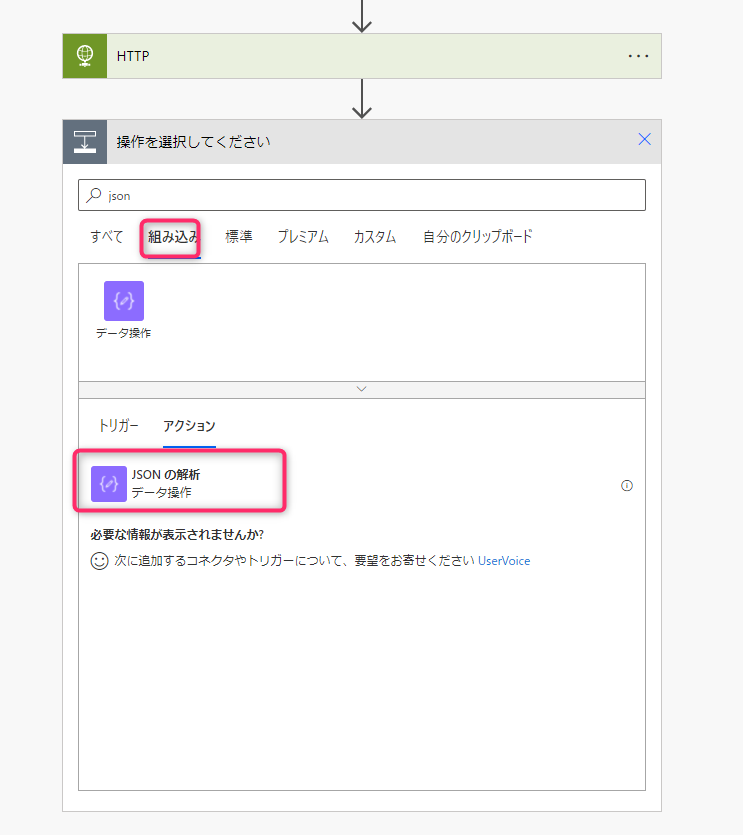
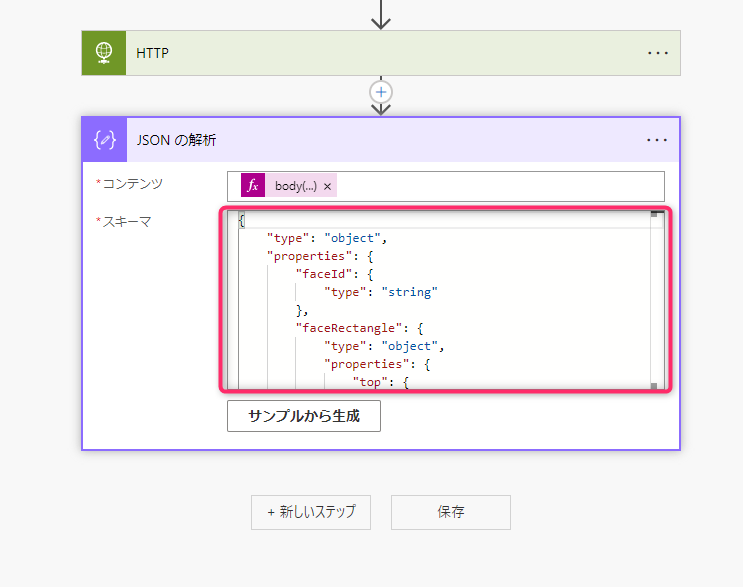
「動的なコンテンツの追加」で以下のように入力してください。
Face APIの仕様上、画像に移っている各人に対しての分析結果をリスト形式で返すため、今回は1人目の要素のみを指定しています。
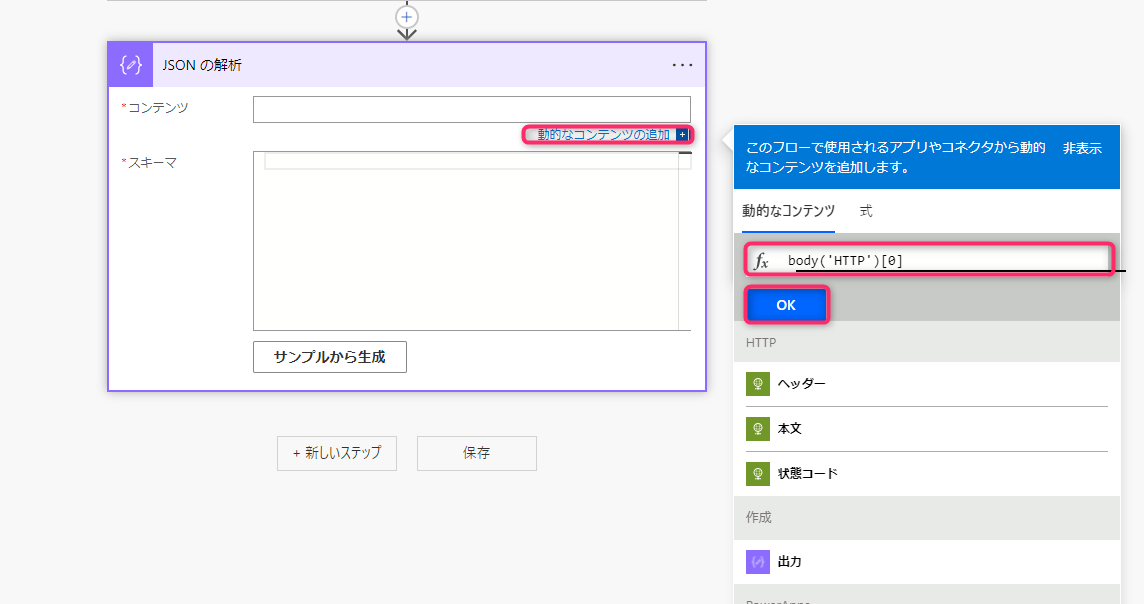
スキーマで想定しているJSONの構造を指定します。サンプルから生成もできます。
今回は以下のスキーマで定義しました。
{
    "type": "object",
    "properties": {
        "faceId": {
            "type": "string"
        },
        "faceRectangle": {
            "type": "object",
            "properties": {
                "top": {
                    "type": "integer"
                },
                "left": {
                    "type": "integer"
                },
                "width": {
                    "type": "integer"
                },
                "height": {
                    "type": "integer"
                }
            }
        },
        "faceAttributes": {
            "type": "object",
            "properties": {
                "emotion": {
                    "type": "object",
                    "properties": {
                        "anger": {
                            "type": "number"
                        },
                        "contempt": {
                            "type": "number"
                        },
                        "disgust": {
                            "type": "number"
                        },
                        "fear": {
                            "type": "number"
                        },
                        "happiness": {
                            "type": "number"
                        },
                        "neutral": {
                            "type": "number"
                        },
                        "sadness": {
                            "type": "number"
                        },
                        "surprise": {
                            "type": "number"
                        }
                    }
                }
            }
        }
    }
}
解析結果の出力
最後に、解析結果をPower Appsへ出力します。
「新しいステップ」を選択。「power apps」と検索し以下の操作を選択してください。
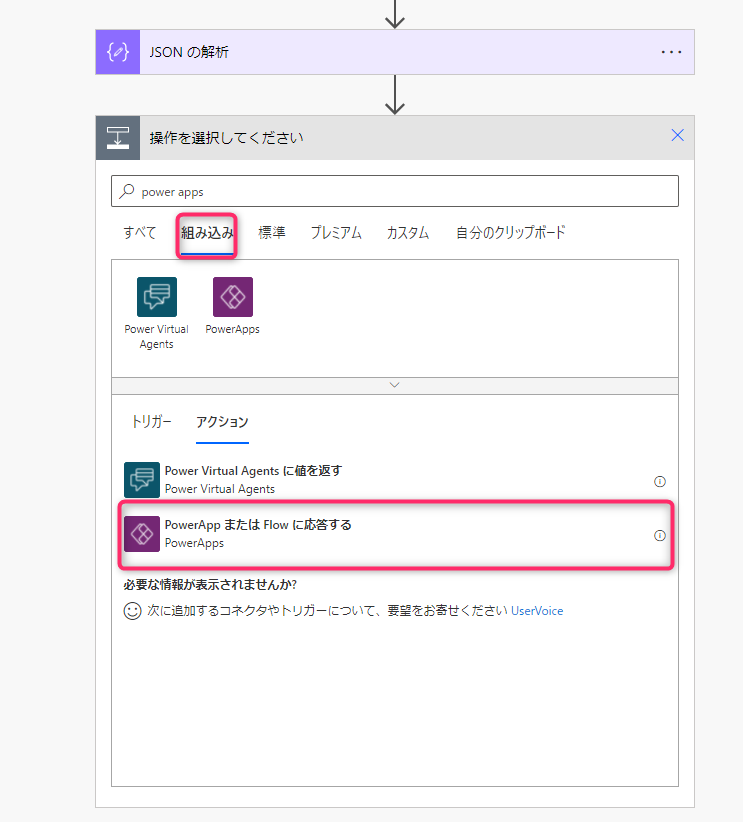
今回は各感情値を返すため以下のように作成しました。
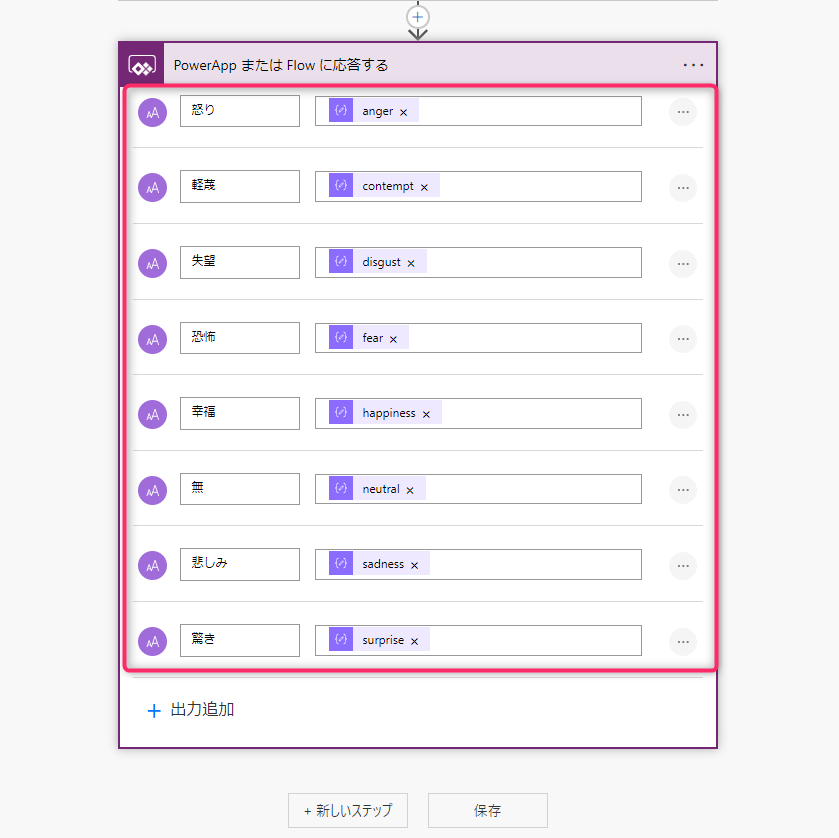
これで Power Automate で Face API を呼び出すことができました。
2. Power Apps で撮った画像データをフローへ流す
アプリの作成
まず、Power Appsの編集画面(https://make.powerapps.com)で、サイドメニューからアプリを選択します。
アプリ名を入力して、「作成」をクリックします。
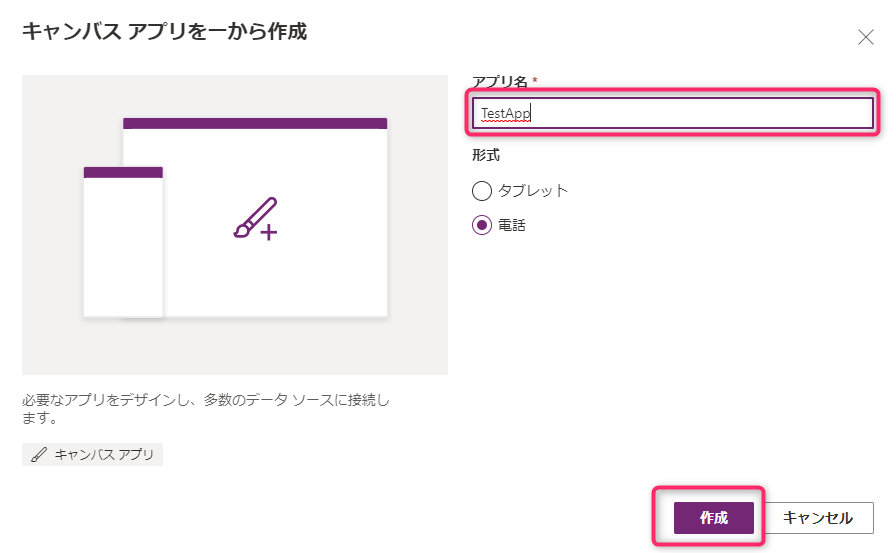
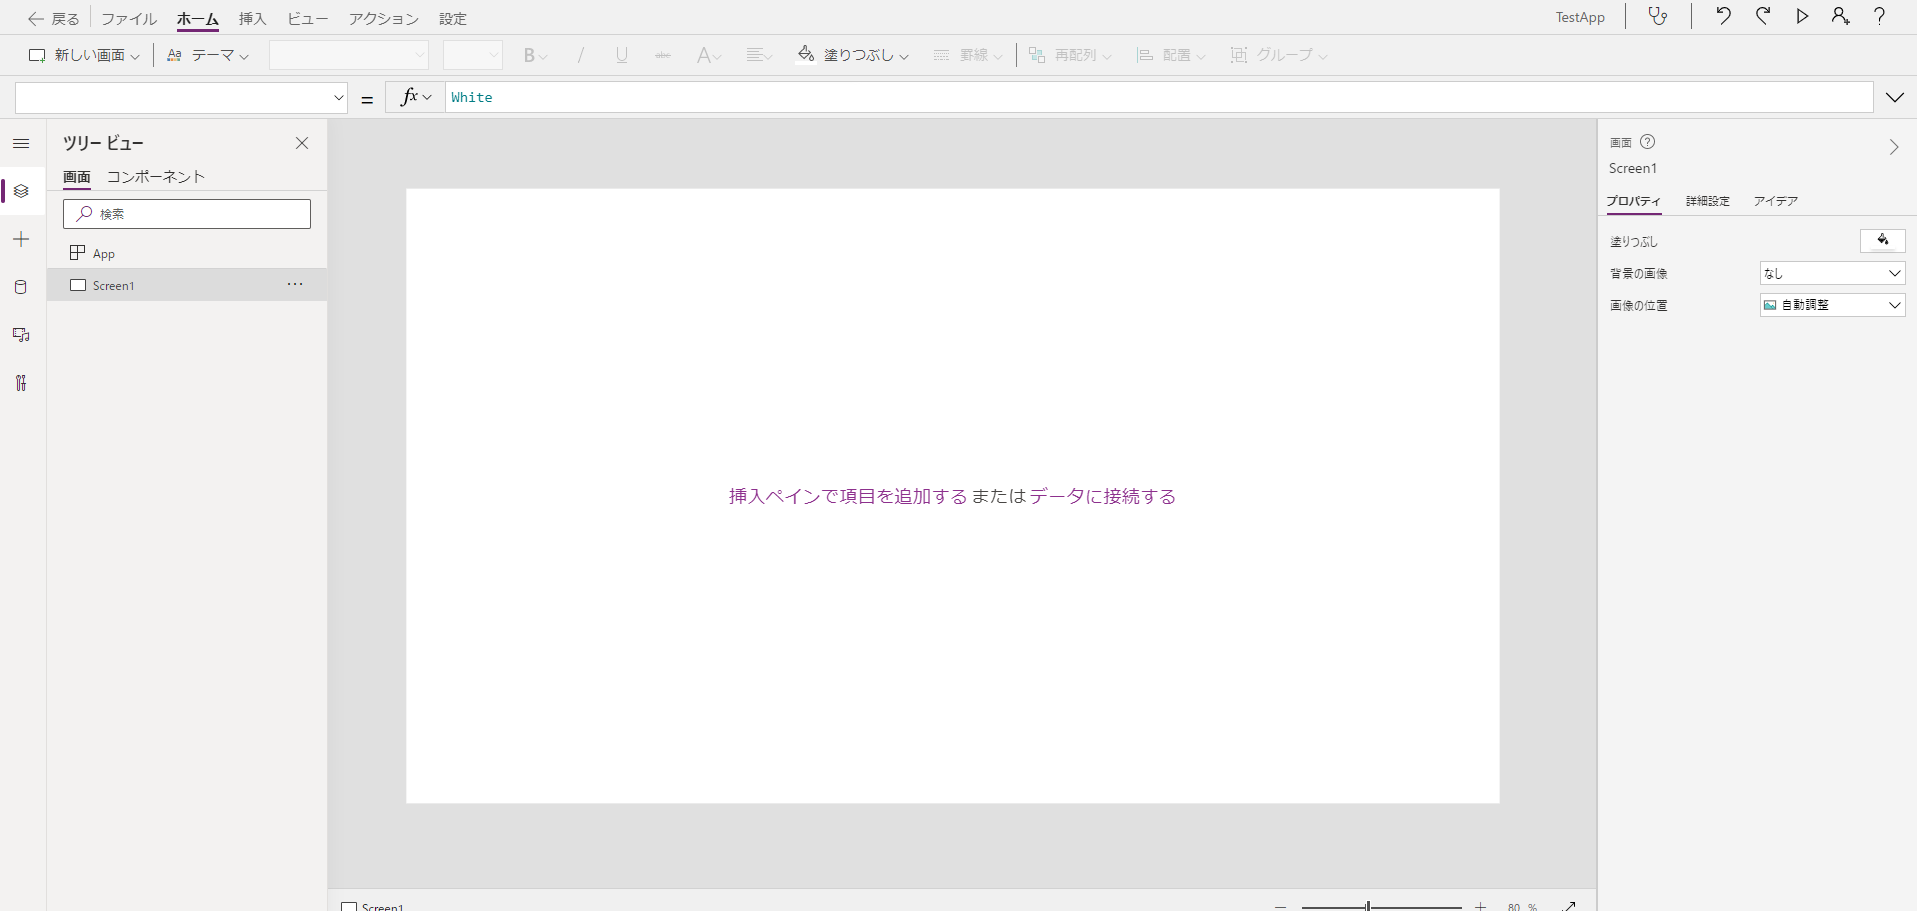
まっさらなアプリが立ち上がりました。
カメラの設置
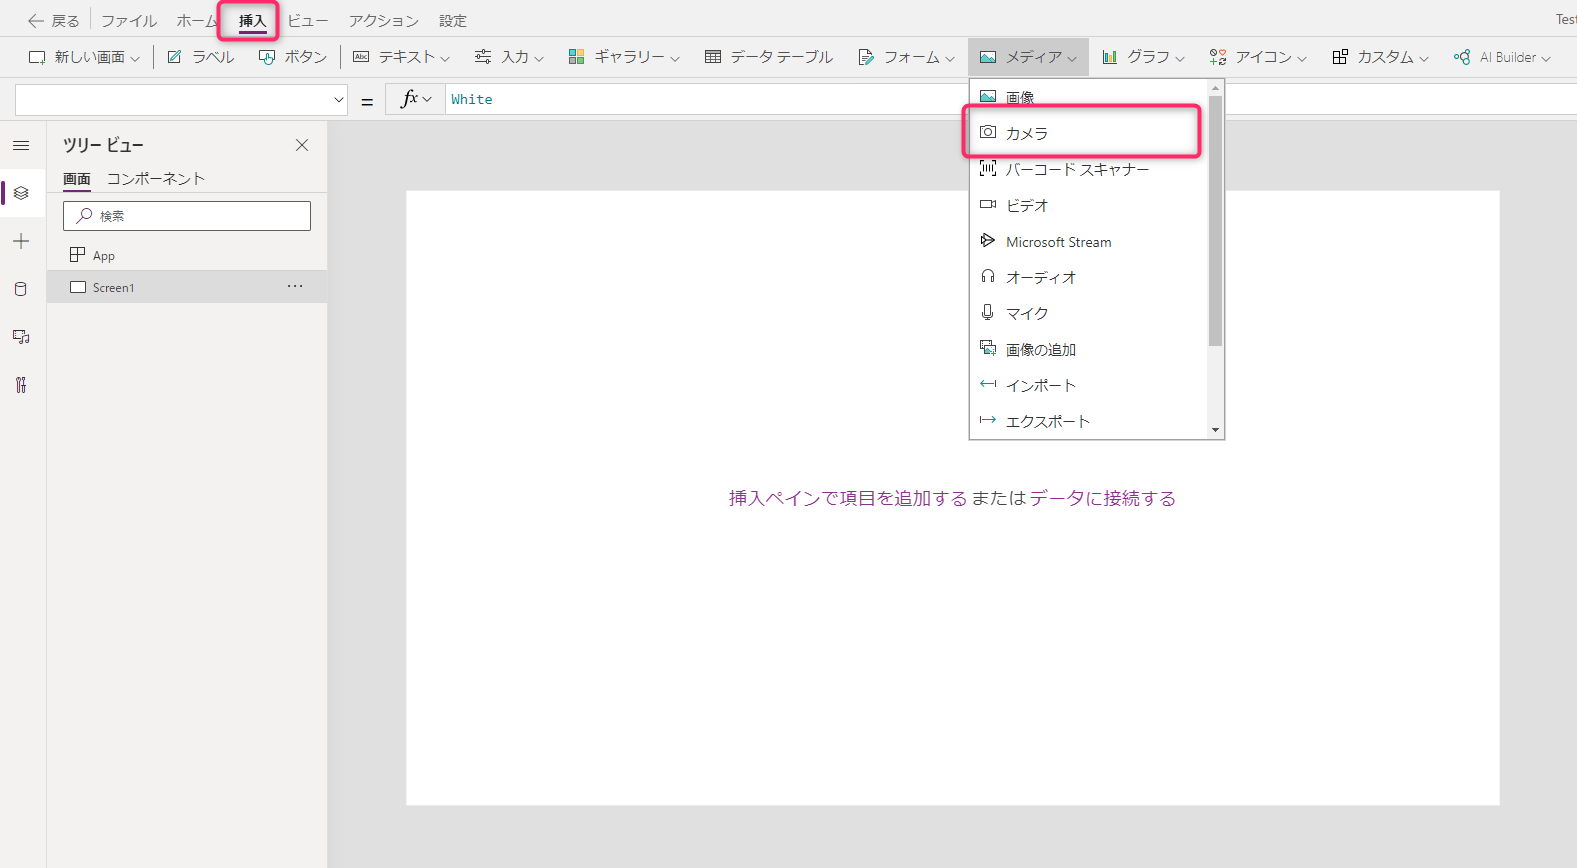
まず、写真を撮るためのカメラを設置します。
「挿入」→「カメラ」を選択します。
撮影時のアクション追加
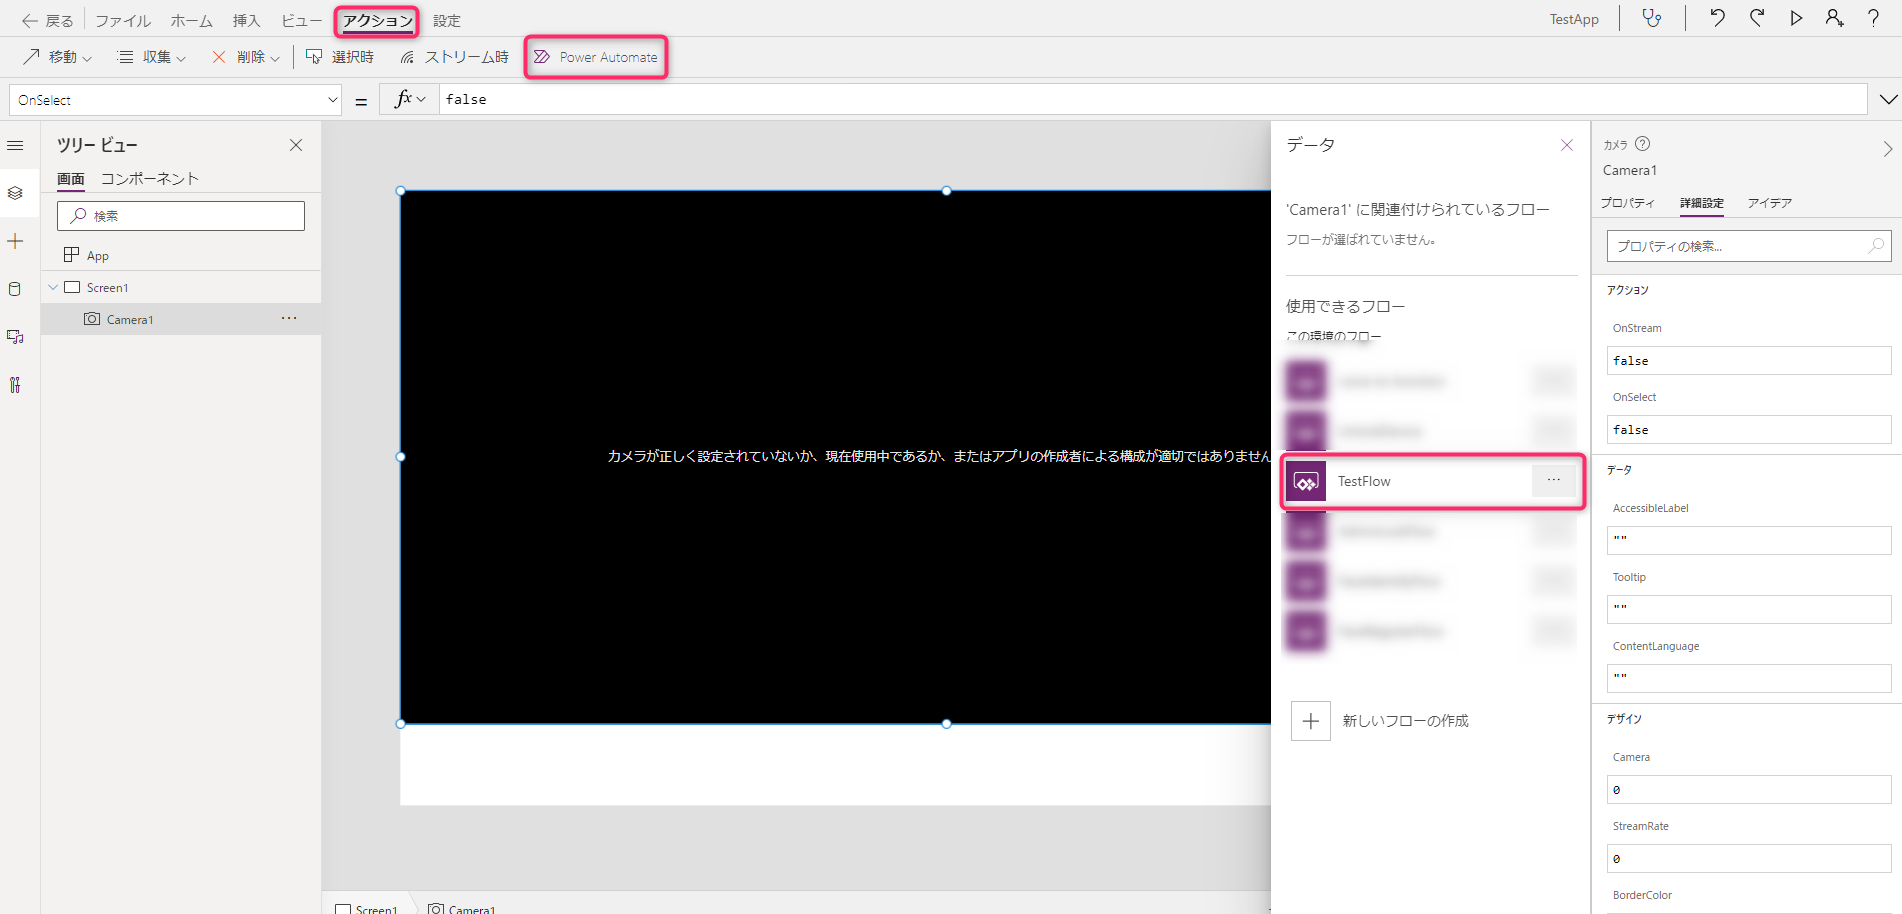
設置したカメラに先ほど作成したフローを呼び出す処理を追加します。
カメラの詳細設定から、「OnSelect」を選択します。
「アクション」→「Power Automate」→「TestFlow」(さっき作ったやつ)を選択します。
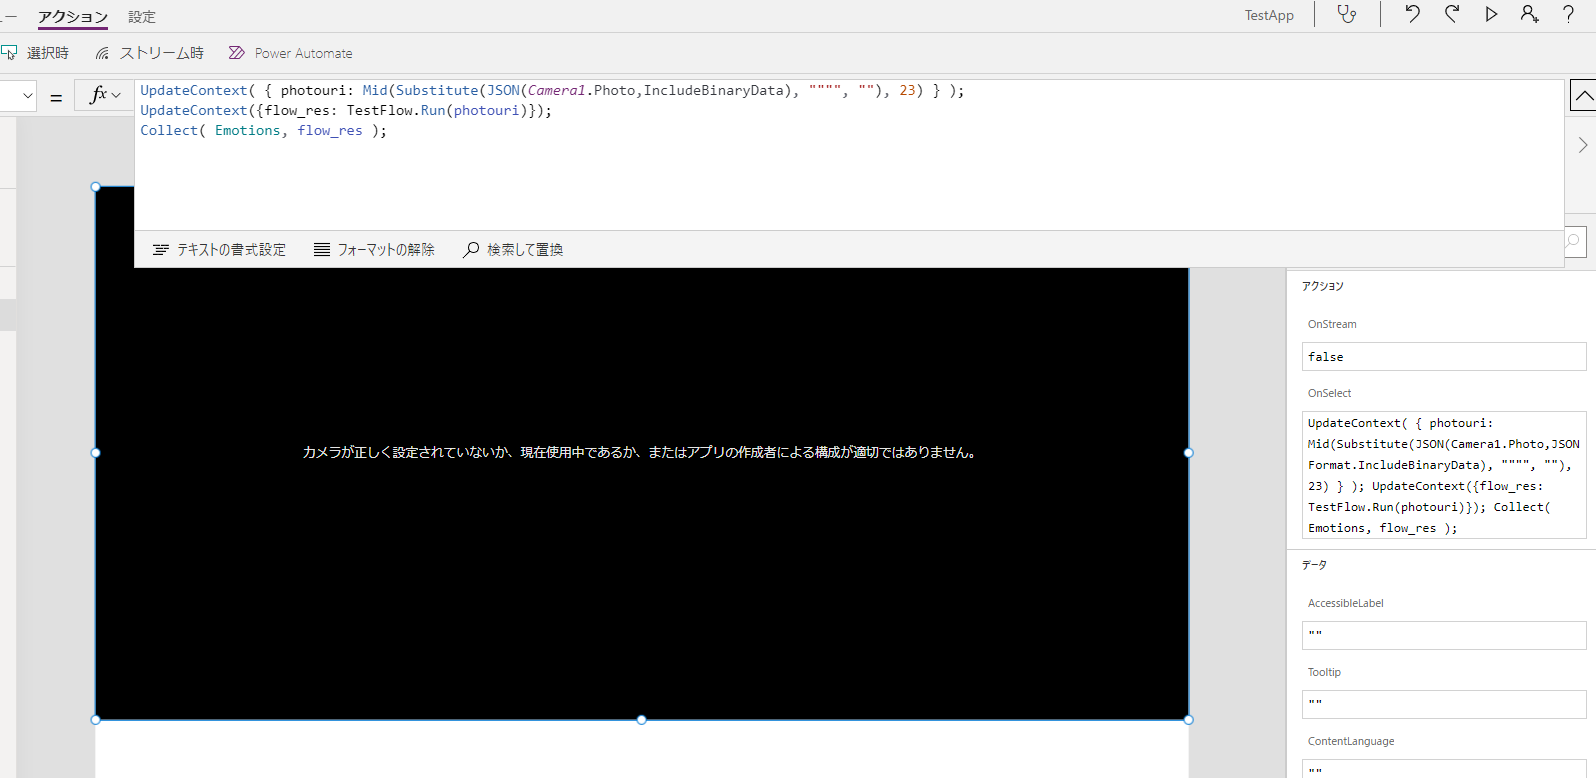
これでカメラとTest Flow が連携できたので、処理を追加していきます。
「OnSelect」に以下を入力します。
UpdateContext( { photouri: Mid(Substitute(JSON(Camera1.Photo,JSONFormat.IncludeBinaryData), """", ""), 23) } );
UpdateContext({flow_res: TestFlow.Run(photouri)});
Collect( Emotions, flow_res );
処理内容としては、
カメラで撮った画像データ(base64形式)から不要文字列を削除して、バイナリデータへ変換
画像バイナリデータをフローへ送信
データテーブルにフローの結果を格納
となっています。
Alt + クリック で写真を撮ることができます。
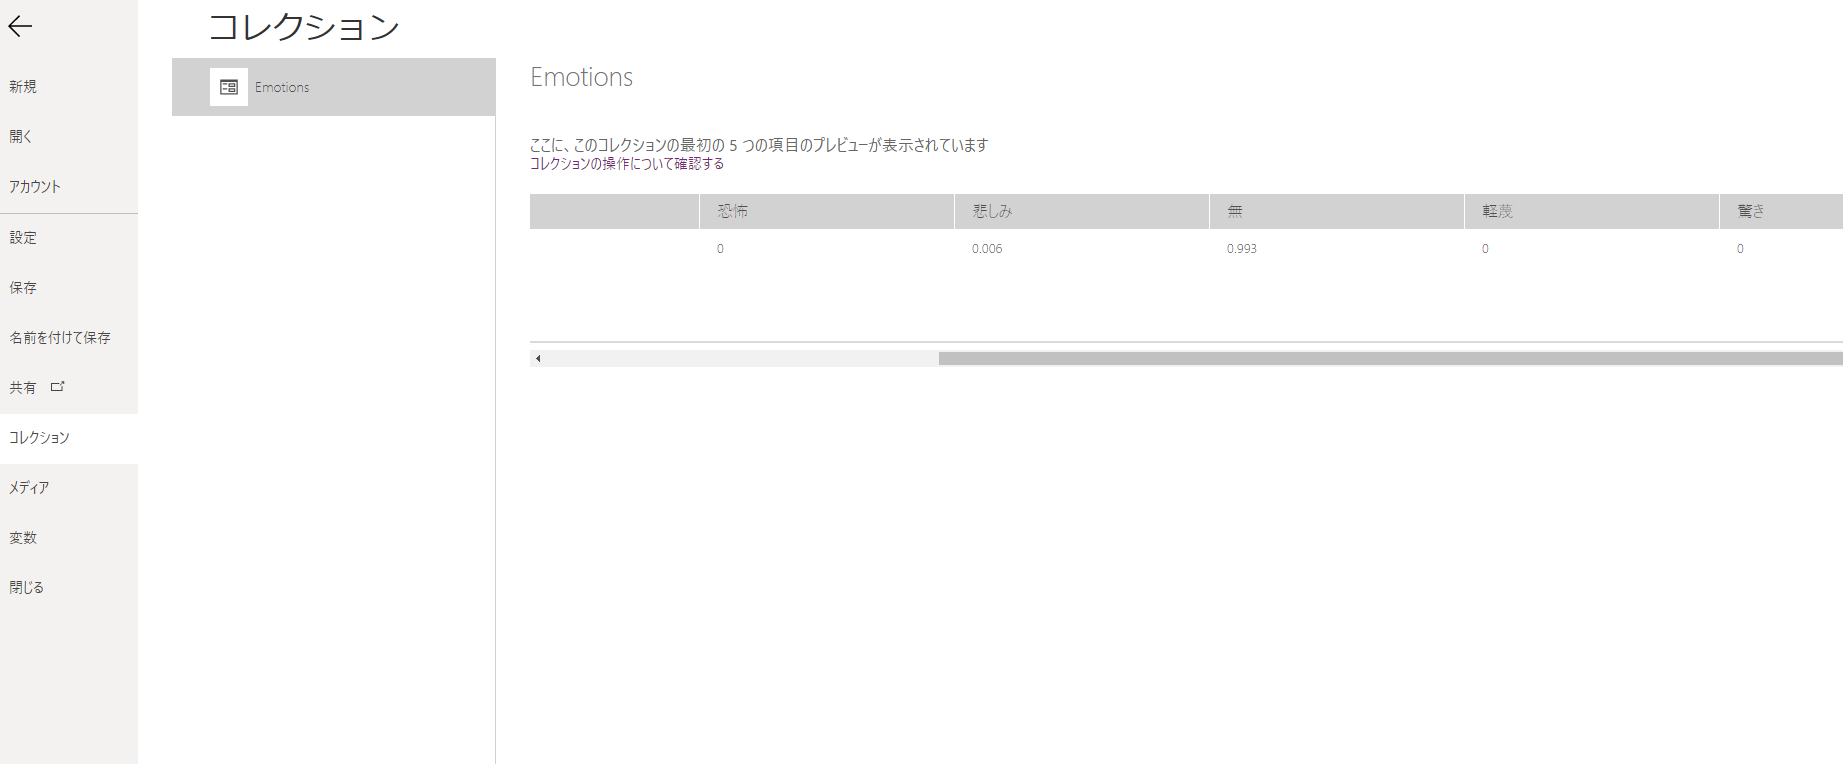
Power Appsのファイルタブからコレクションに移動すると、保管されているテーブルを確認することができます。
分析結果をしっかりと格納できていることが確認できました。
3. 分析結果をApps に表示
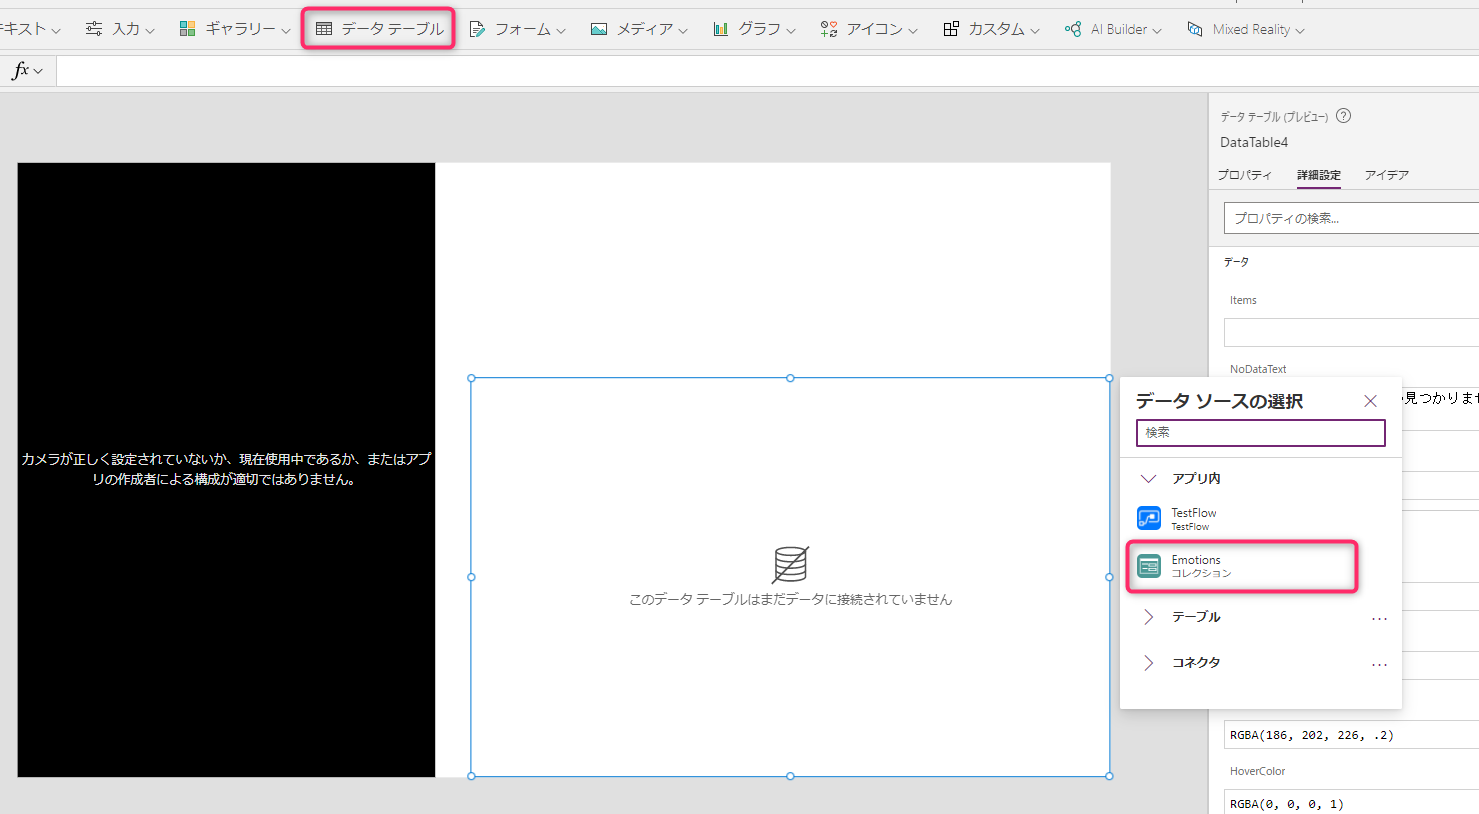
「データテーブル」を追加し、データソースに「Emotions」を選択します。
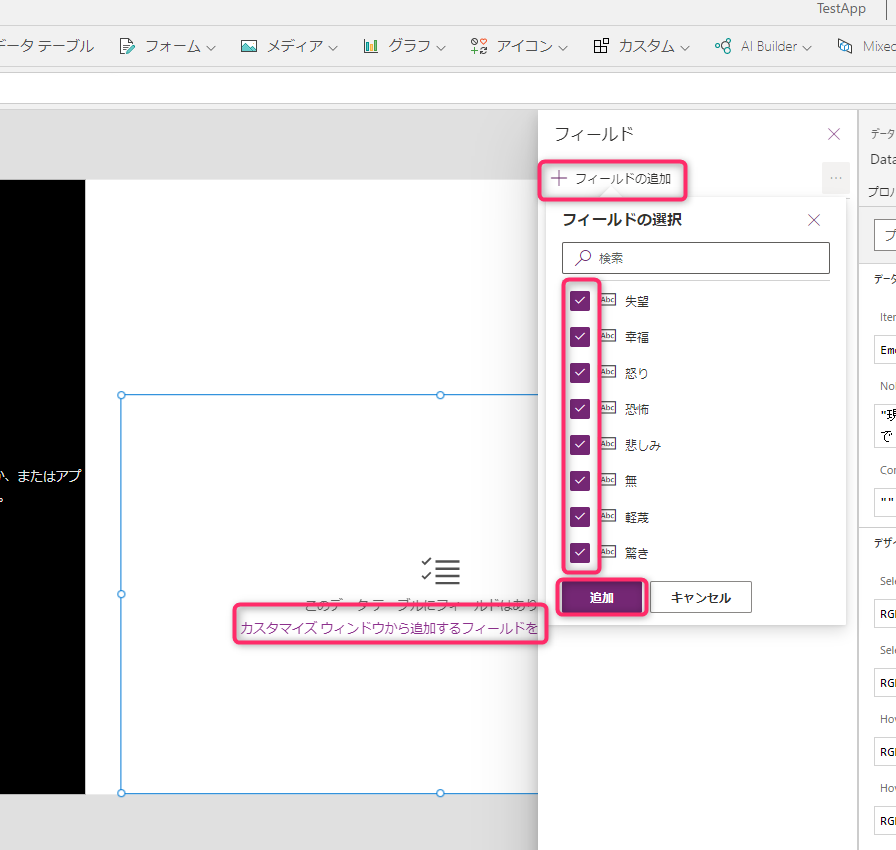
「カスタマイズウィンドウから~」を選択し、「フィールドの追加」ですべてにチェックを入れます。
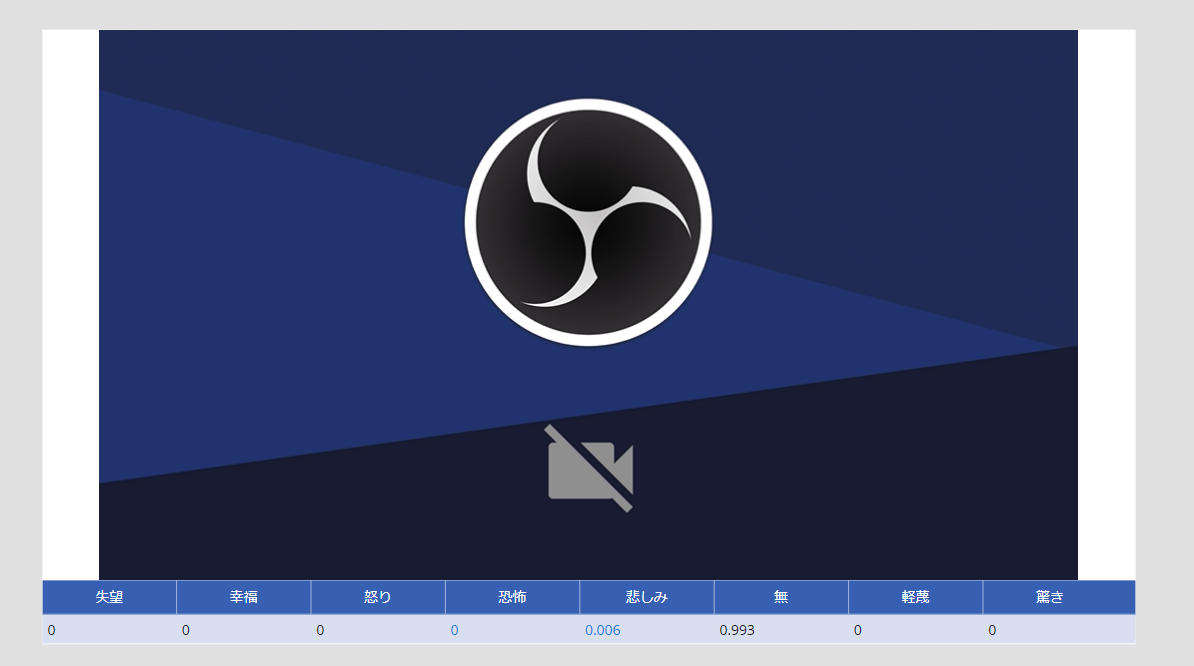
少し配置を整えて、完成です!
おわりに
Power Platform を相互に連携させることで幅広い機能を実現できそうです。
連携もかなり楽にできたので、思いついたことぱぱっと実現するのに最適なサービスだと思います。
次はPower BIも連携させたもの作ってみようかと思います!
参考ドキュメント
・Face API
https://westus.dev.cognitive.microsoft.com/docs/services/563879b61984550e40cbbe8d/operations/563879b61984550f30395236
・Power Apps
https://docs.microsoft.com/ja-jp/powerapps/maker/canvas-apps/
・Power Automate
https://docs.microsoft.com/ja-jp/powerapps/maker/canvas-apps/using-logic-flows
