nuxt.jsとfirebase連携で簡単なアプリを作る
記事の内容
- firebaseでのプロジェクト設定
- nuxtで作っているアプリとの連携(Cloud Firestore使用)
- デプロイして公開する
作るもの
今回はテキストをcloud firestore(データベース)に送信するだけの簡易的なものを作ります。
firebaseプロジェクト作成
はじめに、firebaseのTopから画面の指示に従いプロジェクトを作成します。


その後、>アイコンをクリック。
htmlに貼り付けるコードが出たらOKです。
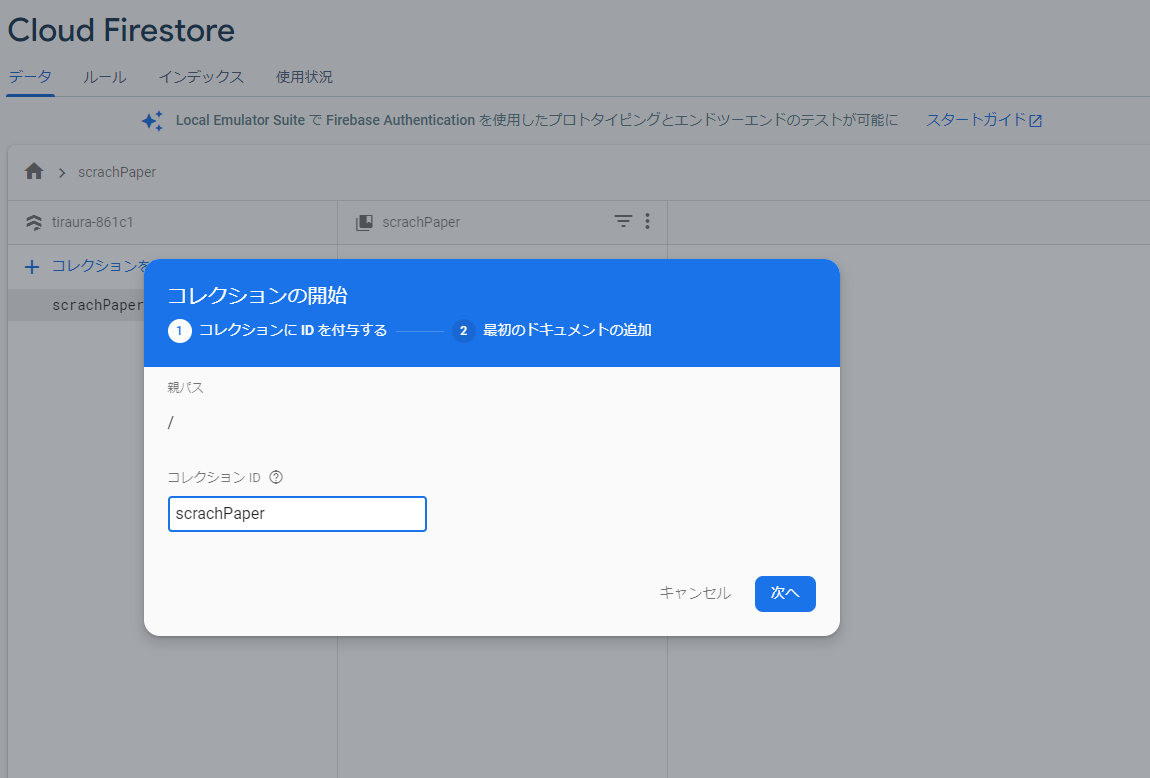
Cloud firestoreにコレクション追加
この時点で、firestoreにコレクションを追加しておきます。
firestoreはNoSQLのため、既存のSQLのようにテーブルや行は存在していません。
代わりにコレクションと呼ばれるものににデータの型などを定義し、ドキュメントと呼ばれるものに実際のデータを入れていきます。
firebaseコンソール左側のメニューからfirestoreを選択し、コレクションの追加から以下のようにコレクションとドキュメントを定義しましょう。

nodejsにfirebaseをインストール
下記コマンドを実行します。
npm install --save firebase
package.jsonに以下が追記されていることを確認しましょう。
下記は私の環境です。
  "dependencies": {
    "core-js": "^3.6.5",
    "firebase": "^8.1.1",
    "nuxt": "^2.14.6"
  },
pluginsにfirebaseの設定ファイルを配置
グーグル先生の指示通りにそのまま配置してもいいのですが、
利便性などを考えてプラグインとして配置してみましょう。
import Vue from 'vue'

//Vye.prototypeを先頭につけることでどこからでも呼べるようにする
Vue.prototype.$firebaseConfig = {
    apiKey: "XXX",
    authDomain: "XXX",
    databaseURL: "XXX",
    projectId: "XXX",
    storageBucket: "XXX",
    messagingSenderId: "XXX",
    appId: "XXX",
    measurementId: "XXX"
  };
  // Plugins to run before rendering page (https://go.nuxtjs.dev/config-plugins)
  plugins: [
    '@/plugins/firebase',
  ],
データベースに値を追加する
というわけで実装していきましょう。
デザインフレームワークにvuetifyを使用してます。
templateは使用するデザインフレームワークに合わせて変更してください。
タイトル、本文、日付を送信するコードを書きます。
<template>
  <div>
    <v-app>
      <v-container>
        <v-row>
          <v-text-field
            label="タイトル"
            counter="30"
            hint="最大30文字"
            color="blue-grey lighten-3"
            maxlength="30"
            v-model="title"
          >
          </v-text-field>
        </v-row>
        <v-row>
          <v-textarea
            label="本文"
            counter="2000"
            color="blue-grey lighten-2"
            maxlength="2000"
            v-model="text"
          >
          </v-textarea>
        </v-row>
        <v-row>
          <v-col class="text-right">
            <v-btn @click="postDiary"> 投稿 </v-btn>
          </v-col>
        </v-row>
      </v-container>
    </v-app>
  </div>
</template>
<script>
// import * as firebase from "firebase/app"; 公式クイックスタートの書き方だが何故かこっちは通らない
import firebase from "firebase/app";
import "firebase/auth";
import "firebase/firestore";
import "date-utils";

export default {
  data: () => ({
    title: "",
    text: "",
  }),
  methods: {
    postDiary() {
      if (!firebase.apps.length) {
        let firebaseApp = firebase.initializeApp(this.$firebaseConfig);
        console.log(firebaseApp);
      }
      let time = new Date();
      let db = firebase.firestore();
      let docRef = db.collection('scrachPaper').doc();
      let setScrachPaper = docRef.set({
        title: this.title,
        text: this.text,
        time: time.toFormat("YYYY/MM/DD HH24:MI:SS"),
      });

      console.log(`${this.title}`);
      console.log(`${this.text}`);
      console.log(time.toFormat("YYYY/MM/DD HH24:MI:SS"));

      //フォームを空にする
      this.title = "";
      this.text = "";
    },
  },
};
</script>
firebaseの初期化はここでいいのかとかもっとコンポーネント分けしたほうがいいんじゃないかとか
気になる点はありますし簡素なものではありますが、
これでひとまずfirestoretへのデータ送信ができているはずです。
エラーが出たのであれば以下へ。
FirebaseError: Missing or insufficient permissions
このエラーが出たということは、firebase側でデータ書き込みの許可がされていません。
firestoreのセキュリティールールを変更しましょう。
5行目のif文直後の値をfalseからtrueに変更してください。

デプロイ
ここまで来たのでひとまずデプロイしてサイトを公開してみましょう。
コンソールで以下を実行。
npm run generate # distフォルダに実行ファイルを生成
npm install -g firebase-tools #firebase CLIの導入
firebase init
以下のような物が出るので、スペースキーで必要なものを選択。
今回はfirestoreとHostingを選びます。
? Are you ready to proceed? Yes
? Which Firebase CLI features do you want to set up for this folder? Press Space to select features, then Enter to confirm your choices.
 ( ) Database: Deploy Firebase Realtime Database Rules
 (*) Firestore: Deploy rules and create indexes for Firestore
 ( ) Functions: Configure and deploy Cloud Functions
>(*) Hosting: Configure and deploy Firebase Hosting sites
 ( ) Storage: Deploy Cloud Storage security rules
 ( ) Emulators: Set up local emulators for Firebase features
 ( ) Remote Config: Get, deploy, and rollback configurations for Remote Config
下記の質問ではdistを入力してEnterを押してください。
? What do you want to use as your public directory? dist
また、nuxtでSPA(single page application)を作成している場合は以下でYes
? Configure as a single-page app (rewrite all urls to /index.html)? Yes
こっちはNoにしてください。
Yesの場合、firebaseデフォルトのページに差し替わります。
? File dist/index.html already exists. Overwrite? No
その後も色々と聞かれますが、基本的にはEnterですすめて問題ありません。
以下コマンドを実行してデプロイします。
firebase deploy
ちなみにデプロイ取り消しは以下のコマンド。
firebase hosting:disable
できたサイト
そんな感じで上記の内容に投稿した内容をプラスしたものが以下になります。
問題が起きたり不要になったりして削除するかもしれませんが、「こんなもの作れるんだ」というサンプルにでも。
参考サイト
公式クイックスタート firestoreの使い方
https://firebase.google.com/docs/firestore/quickstart?hl=ja#top_of_page
firestoreのセキュリティールール言語
https://firebase.google.com/docs/rules/rules-language?authuser=1