使用環境
ホストOS: Windows10 home
仮想環境OS: Ubuntu Bento/Bionic
Ruby:2.51
Rails:5.2.2
エディタ:nano
Scaffoldなしでの作成(rails routesまで)
前準備
- rails s new qiita_routes -d mysql
- Gemfileのminiracerコメントインして、bundle install
- config/database.ymlのpassword情報編集
- rails db:create
前提:知識
ページ作成に必要なもの
- view(@ /app/views/コントローラ名/
- 今日はしなかったので、今投稿には未記載
- viewの中身がブラウザに表示される内容
- controller(コントローラ
- ページ表示の際、controllerを経由して、viewをブラウザに返す。
- controllerで設定したactionは、controllerと同じ名前のviewフォルダの中から、actionと同じ名前のhtmlファイルを探してブラウザに返します(まだ理解しきれていない気がする。
- routing(ルーティング
- ブラウザとcontrollerを繋ぐ。
ページ表示の流れ
Routing => Controller => Model => View
modelはデータベース情報が必要な時だけ使用.今回は必要ではないので、とばす。
本段階
①controllerを作成
# rails generate controller コントローラ名 (+アクション名)
rails generate controller Users
# rails routes

 Prefix Verb URI Pattern                                                                              Controller#Action
       rails_service_blob GET  /rails/active_storage/blobs/:signed_id/*filename(.:format)                               active_storage/blobs#show
rails_blob_representation GET  /rails/active_storage/representations/:signed_blob_id/:variation_key/*filename(.:format) active_storage/representations#show
       rails_disk_service GET  /rails/active_storage/disk/:encoded_key/*filename(.:format)                              active_storage/disk#show
update_rails_disk_service PUT  /rails/active_storage/disk/:encoded_token(.:format)                                      active_storage/disk#update
     rails_direct_uploads POST /rails/active_storage/direct_uploads(.:format)                                           active_storage/direct_uploads#create
となる。また、rails serverを行うと、
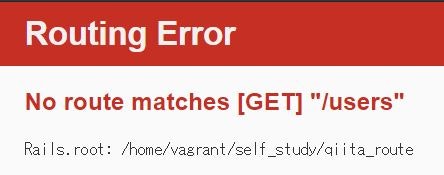
これは、routingを未だ設定していない為。
②routingの設定:ブラウザとコントローラをつなぐ
Rails.application.routes.draw do
  # For details on the DSL available within this file, see http://guides.rubyonrails.org/routing.html
  get 'users', action: :index, controller: 'users'
end
# rails routes

Prefix Verb URI Pattern                                                                              Controller#Action
users GET  /users(.:format)   #追加された行                                                                       users#index            #追加された行
2行が追加
rails sで確認

まだ、controllerを編集していない。
③controller:modelとviewをつなぐ
class UsersController < ApplicationController
    def index
        render plain: 'Hello'
      end
end
無事に、ブラウザ上でHelloが表示された。
renderメソッド
上controller編集時に用いた、renderメソッドは実際に画面に表示される内容を生成する。
今回のrenderのplainオプションを指定すると、文字列を直接表示できる。
Railsのcontrollerでrenderを省略すると、代わりにapp/views/コントローラ名/アクション名.html.erbを用いる
=>ということはcontroller作成コマンドは rails g controller コントローラ名 アクション名
明日以降やると思われること=Model、View
-
model
- データベースを操作する。
- app/models下に配置される
- データベースに含まれるテーブル毎に用意され、データの登録・取得・更新・削除などを行う
-
view
- app/views/users/に配置され、ファイル拡張子はhtml.erb
- viewの中身がブラウザに表示される内容。編集すると表示内容を変更することができる。
ーーーーーーーーーーーーーーーーーーーーーーーーーーーーーーーーーーーーーーーーーーーー
最後に、他の方のqiita投稿で、個人的に分かりやすいまとめ記述があり、引用させて頂きたい。
Ruby on Rails でページを作成する仕組み by @np_misaki氏
①/config..アプリケーションの設定情報を格納する
/routes.rb..ルーティングの設定を行う
/locales..辞書ファイル(グローバル対応等)
②/app ..アプリケーション開発中にメインで使用するディレクトリ
/controllers..Controller クラスを格納する
③/models.. Modelクラスを格納する
④/views..View クラスを格納する