はじめに
Angularチュートリアル:Tour of Heroesを読み進めていきます。
開発環境
- OS: Windows10
- Nodeバージョン: 18.18.0
- Angular CLI バージョン: 17.3.8
- エディタ: VSCode
2. リストの表示
2. リストの表示を読んでいきます。
ソースコードを読み解いてみる
アプリの構成
- Heroesインタフェースにのっとったデータ構造を持つmock-heores.tsを作成(データ自体はモック)
import { Hero } from './hero';

export const HEROES: Hero[] = [
  { id: 12, name: 'Dr. Nice' },
  { id: 13, name: 'Bombasto' },
  { id: 14, name: 'Celeritas' },
  { id: 15, name: 'Magneta' },
  { id: 16, name: 'RubberMan' },
  { id: 17, name: 'Dynama' },
  { id: 18, name: 'Dr. IQ' },
  { id: 19, name: 'Magma' },
  { id: 20, name: 'Tornado' }
];
- heroesコンポーネントから、mock-heores.tsをimport
/*
 * これをベースに追記していく.
 */
import { HEROES } from '../mock-heroes';
import { Hero } from '../hero';
...
export class HeroesComponent {
  heroes = HEROES;
}
*ngFor: ループ処理
*ngForを使うことでhtmlにてループ処理を行わせることができます。
<ul class="heroes">
    <li *ngFor="let hero of heroes">
        <button type="button">
            <span class="badge">{{ hero.id }}</span>
            <span class="name">{{ hero.name }}</span>
        </button>
    </li>
</ul>
*ngFor="let hero of heroes"の部分ですね。
- heroes配列の要素を順番に見ていく
- 要素1つ1つを取り出し、その変数をheroとする
…ということが書かれています。
書き方としてはPythonのループやJavaの拡張for文に似ているという印象です。
for(Product product : products) {
  System.out.println(product.getName());
}
for product in products:
  print(product.getName())
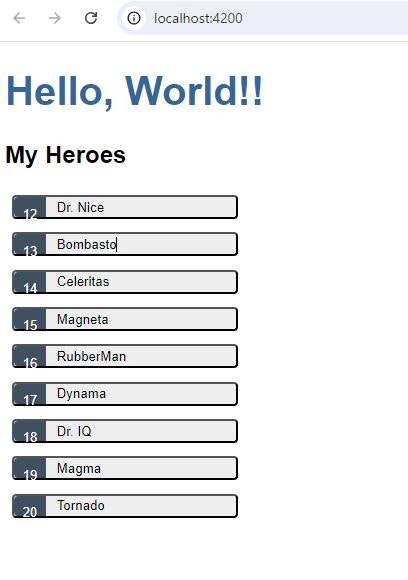
これにより、mock-heroes.tsで記載されたHeroインタフェースのオブジェクトの個数分だけidとnameが記載されたボタンが画面上に表示されます。
イベントバインディング
何かしらのイベントが発生したのをトリガーにして、特定の処理を実行させることができます。この仕組みを「イベントバインディング」といいます。
ボタンがclickされたことをトリガーとして、所定の処理が実行される(それ用のメソッドがコールされる)ところまで書いていきます。
(%トリガー%)=%実行したいメソッド名(引数)% という感じで書きます。
<ul class="heroes">
    <li *ngFor="let hero of heroes">
        <button type="button"
            (click)="onSelect(hero)">
            <span class="badge">{{ hero.id }}</span>
            <span class="name">{{ hero.name }}</span>
        </button>
    </li>
</ul>
(click)="onSelect(hero)"の部分がイベントバインディングです。
- buttonがclickされたら、heroオブジェクトを引数にして、onSelectメソッドを実行する
ということが書かれています。
onSelectメソッドの実装はsrc/app/heroes/heroes.component.tsに書いていきます。
...
export class HeroesComponent {
  heroes = HEROES;
  selectedHero?: Hero;

  //イベントバインディングによりコールされる
  onSelect(hero: Hero): void {
    this.selectedHero = hero;
  }
}
イベントバインディングによりonSelectメソッドが実行されたら、
- 引数としてわたってきた、Heroインタフェースのデータ構造にのっとっているオブジェクト(変数名:hero)を、自身のフィールドのselectedHero(型:Hero)に代入する
ということをしています。
*ngIf: 条件分岐
htmlでループ処理をしたいときは*ngForを使うと書きました。それのif版です。*ngIf="%条件%"という書き方をします。
...

<div *ngIf="selectedHero">
    <h2>{{ selectedHero.name }}</h2>
    <div>id: {{ selectedHero.id }}</div>
    <div>
        <label for="hero-name">Hero name: </label>
        <input id="hero-name" [(ngModel)]="selectedHero.name" placeholder="name">
    </div>
</div>
注目すべきは*ngIf="selectedHero" の部分。
- selectedHeroの値があれば、divで定義されているコンテンツを表示する
という意味です。
selectedHeroというのは、先ほどイベントバインディングのところで述べました。
つまり、この*ngIfの条件を深掘りすると、
- selectedHeroの値があれば(=buttonのclickによるイベントバインディングでselectedHeroの値が確定していれば=表示されている一覧から任意のボタンをクリックしたら)、divで定義されているコンテンツを表示する
ということになります。
クラスバインディング
表示の装飾の部分で言及されている、Angularのテクニックの一つです。
クラスバインディングについての、公式の解説についてはこちらに書かれています。
チュートリアルではhtmlとcssに手を加えます。
<ul class="heroes">
    <li *ngFor="let hero of heroes">
        <button [class.selected]="hero === selectedHero" type="button"
            (click)="onSelect(hero)">
            ...
        </button>
    </li>
</ul>

<div *ngIf="selectedHero">
    ...
</div>
[class.selected]="hero === selectedHero"の部分がクラスバインディングに該当します。
*ngForで色々なのボタンを表示しようとしているわけですが、
- 表示しようとしたボタンのHeroオブジェクト(hero)と、クリックしたボタンのHeroオブジェクト(selectedHero)が一致していれば、選択済み状態(selected)とする
ということが書かれています。
selected等については以下あたりも参考になるかも。
https://developer.mozilla.org/ja/docs/Web/HTML/Element/option#selected
...

.heroes button.selected {
  background-color: black;
  color: white;
}

...
チュートリアル内のcssの記載を流用すればいいですが、selectedになったときの挙動で関連するのはここでしょうか。
選択済みのボタンの背景色をblackにするという記載です。なのでここをredにすると、選択済みのボタンの背景色が赤色になります。
以上の編集により、このような感じになります。


