前置き
[A-Frame](https://aframe.io/)とはHTMLを利用した... 【クリックして展開】
[A-Frame](https://aframe.io/)とはHTMLを利用した、Web上でインタラクティブに編集が可能なWebVR空間を生成するウェブフレームワークである。[Oculus Quest2](https://www.oculus.com/quest-2/) の発売や[VIVE Focus 3](https://www.vive.com/jp/product/vive-focus3/overview/) など様々なVR機器が世に売り出され、VR市場が活発になっている。そのため、VRに興味を持つ人が増えるのではないだろうか。その際にVRに関する開発として手をつきやすいのがA-Frameだと思う(高度な物を作製する場合はUnity等の方が適切だと思う)。私がVRに関する研究するに当たってA-Frame学ぶ際に、様々なサイトを歩き回り勉強した。そのためこの先A-Frameに関して学びたい人が現れたときやVRに興味が持った方に簡単に始められる様にチュートリアルを記載する。学習の際にはぜひ参考にしていただきたい。 学習する上では関係ないが、宣伝も込めて記述する。 【クリックして展開】
執筆当時は武蔵野大学データサイエンス学部2年生であり1年の後期から2年の前期にかけてA-Frameを用いたVR空間を作製し研究を行った。制作物に関しては[デモページ](https://plum-chloride.jp/output/VR-CoPractice/index.html)にて公開している。プログラムの知識と技術があれば1年でこれくらいのVR空間は作れると思う。 また上記研究は**マルチメディア、分散、協調とモバイル DICOMO2021シンポジウム**にて**最優秀プレゼンテーション賞**を獲得した。本気で取り組みプロダクトとして何かしらのアプリケーションを作れば自分の実績にもつながるため、これから学習する人はぜひ頑張って欲しい。その1
- HTMLとA-Frameを用いてVR空間の作製
- オブジェクト及びテキストの配置
- JavaScriptを用いてオブジェクト、テキストの移動や色等をいじる。
チュートリアルその1完成デモページ(リロードで状態が変わる)
VR空間の作製
まず初めに何も設置物のないVR空間の作製を行う。
お好きなフォルダー(ディレクトリ)を作製してそこにテキストエディター等でindex.htmlを作製する。そのindex.htmlには下記を記述する。
<html>
  <head>
      <script src="https://aframe.io/releases/1.2.0/aframe.min.js"></script>
  </head>
  <body>
    <a-scene>
    </a-scene>
  </body>
</html>
これだけでA-FrameのWebVR空間の土台は完成している。参考までに開いてみると真っ白い空間が表示され、右下にVRモードに入るボタンが存在するページが出来ているはずだ。デモサイト
しかしこのままでは味気ない。そのため地面と空を配置しよう。
空に関してはa-skyタグ、地面に関してはa-planeタグを利用する。skyタグは空として利用するが、planeは平らな物体を作製するものだが、それを倒して地面として擬似的に利用している。
<a-sky color="#ECECEC"></a-sky>
<a-plane position="0 0 -4" rotation="-90 0 0" width="4" height="4" color="#7BC8A4"></a-plane>
このコードを先ほど記述したindex.htmlのa-sceneの子オブジェクトとして記述する。
a-skyタグはskyとついているが基本的には背景の色を定めるものである。特に何もオブジェクトを置かなかった場合は画面全部が指定した色に染まる。引数のcolorに希望の色を挿入する。なお引数として色を指定しなかった場合#FFFFFF(白)として認識している(a-skyタグを記述しなかった場合と同様の出力結果)。また応用として画像を背景にしたりと引数を利用すること様々なことができるが、ここでは割愛する(A-Frame ドキュメント a-plane)。
色の指定には上記の**color="#ECECEC"以外にも color=#ECECEC や color=rgb(236,236,236) , color="color: red" 等様々な記述法が可能である。
基本的にと書いたのはあくまでa-skyタグは半径500のドームを作製しているものでそれ以上遠い距離のオブジェクトを配置すると正常に描写されない(そのため球体画像を用いてVR空間を作製出来る)。上記制約が不便に感じた場合はa-scene**の開始タグを <a-scene background="#ECECEC"> と記載することで真の意味で背景を一色に染めることが出来る。
a-planeタグは薄い(引数にもよるが)板を定めるものである。このコードでは自分よりやや前にx軸方向-90度回転させた4*4の板を#7BC8A4色で配置するという意味意になっている。positionやrotationの三次元空間に関しては"x y z" で記載する。また間にカンマを入れて"x, y, z"と記載しても問題ない(A-Frame ドキュメント a-sky)。
A-Frameのポジションに関しては以下の通りである(特にカメラのrotationをいじっていない場合)。またrotationに関しては何軸を中心として回すかという意味である。
| 1 | 2 | 3 |
|---|---|---|
| 座標 | プラス | マイナス |
| x | 画面右側 | 画面左側 |
| y | 画面上側 | 画面下側 |
| z | 画面手前側 | 画面奥側 |
index.htmlコード 【クリックして展開】
<html>
  <head>
      <script src="https://aframe.io/releases/1.2.0/aframe.min.js"></script>
  </head>
  <body>
    <a-scene>
      <a-sky color="#ECECEC"></a-sky>
      <a-plane position="0 0 -4" rotation="-90 0 0" width="4" height="4" color="#7BC8A4"></a-plane>
    </a-scene>
  </body>
</html>
完成図 【クリックして展開】
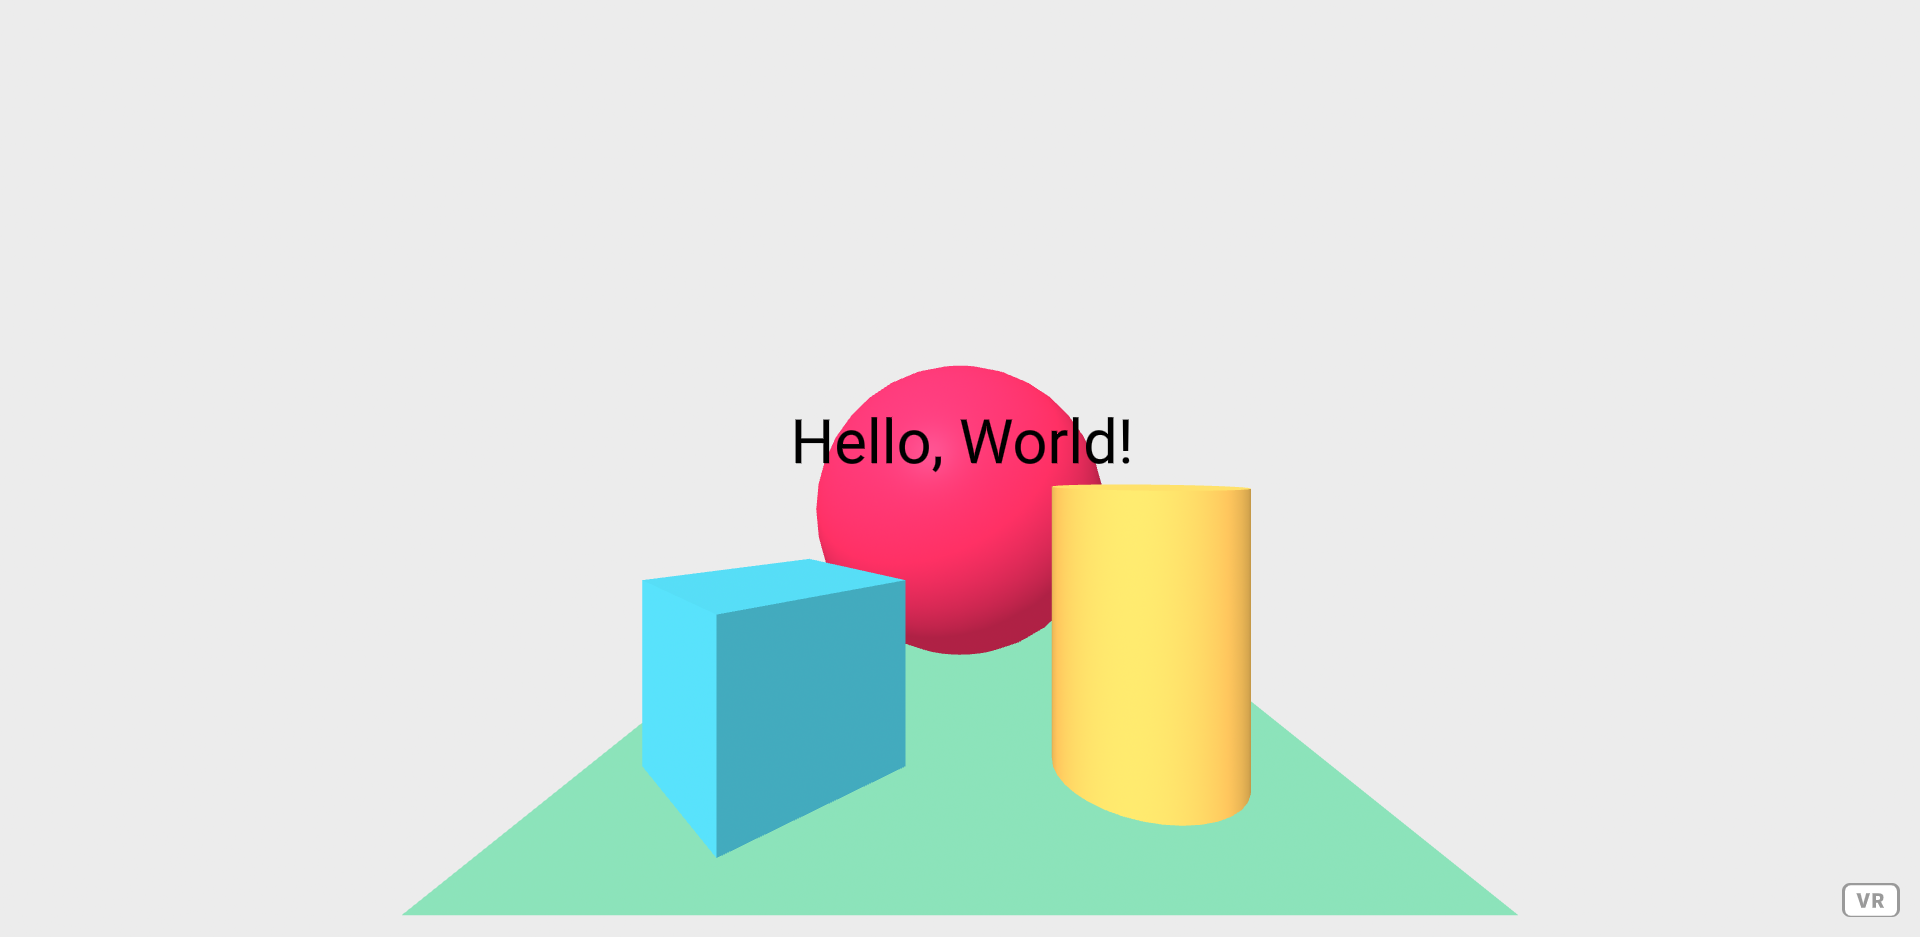
オブジェクトの配置
作製したVR空間にオブジェクトを配置する。今回は新たに四角形、球、円柱を配置する。
<a-box position="-1 0.5 -3" rotation="0 45 0" color="#4CC3D9" height="1" depth="1" width="1" ></a-box>
<a-sphere position="0 1.25 -5" radius="1.25" color="#EF2D5E"></a-sphere>
<a-cylinder position="1 0.75 -3" radius="0.5" height="1.5" color="#FFC65D"></a-cylinder>
<a-text position="0 1.7 -2" value="Hello, World!" align="center" color="#000" scale="1 1 1"></a-text>
a-boxタグは四角形を作製するものである。height="1" depth="1" width="1"のようにサイズを指定する(A-Frame ドキュメント a-box)。
a-sphereタグは球体を作製するものである。radius="1.25"のようにサイズを指定する(A-Frame ドキュメント a-sphere)。
a-cylinderタグは円柱を作製するものである。radius="0.5" height="1.5"のようにサイズを指定する。球ではなく六角形にしたり、円ではなく途中で閉じたり(パックマンみたいに)、中を空洞にしたり工夫する場合は右を参照(A-Frame ドキュメント a-cylinder)。
a-textタグは文字を表示するものである。value="Hello, World!"のようにテキストを指定する。改行したい場合は\nをvalue内の改行する箇所に記述することで改行できる。またscale="1 1 1"でサイズを指定している。現在日本語を入力することはできない。またこのテキストを裏側から見ると何も表示されない(反対向きに表示される訳ではない)ためrotation="90 0 0"等で回転させる必要がある。(A-Frame ドキュメント a-text)。
利用したことはないが下記手法で日本語を表示できる?
なお作製したページはpcの場合wasdで移動できる。
index.htmlコード 【クリックして展開】
<html>
  <head>
      <script src="https://aframe.io/releases/1.2.0/aframe.min.js"></script>
  </head>
  <body>
    <a-scene>
      <a-sky color=#ECECEC></a-sky>
      <a-plane position="0, 0, -4" width="4" height="4" rotation="-90 0 0"  color=#7BC8A4></a-plane>
      <a-box position="-1 0.5 -3" rotation="0 45 0" color="#4CC3D9" height="1" depth="1" width="1" ></a-box>
      <a-sphere position="0 1.25 -5" radius="1.25" color="#EF2D5E"></a-sphere>
      <a-cylinder position="1 0.75 -3" radius="0.5" height="1.5" color="#FFC65D"></a-cylinder>
      <a-text position="0 1.7 -2" value="Hello, World!" align="center" color="#000" scale="1 1 1"></a-text>
    </a-scene>
  </body>
</html>
完成図 【クリックして展開】
オブジェクトの移動
DOMと呼ばれるHTMLオブジェクトのデータを取得する際に利用するAPIが存在する。そのシステムとA-Frameの土台であるthree.jsの機能を用いてJavaScriptを用いて移動させたり、内部のデータを変更させることができる。(A-Frame ドキュメント position update)。
まず初めに移動させたいオブジェクトにidをつける。
<a-sphere id="moving_sphere" position="0 1.25 -5" radius="1.25" color="#EF2D5E"></a-sphere>
その後JavaScriptを記述する。その際記述法が2種類あるため両方紹介する。
JavaScript記述法 【クリックして展開】
1 インライン
HTMLの</body>の後ろに
  </body>
  <script>
    // This is JavaScript comment
  </script>
</html>
と追記する。
2 外部ファイル
外部ファイルとしてテキストエディター等でscript.jsを作製し、
// This is JavaScript comment
としてHTMLで
<html>
  <head>
      <script src="https://aframe.io/releases/1.2.0/aframe.min.js"></script>
      <script src="./script.js" defer></script>
      <!--- もしくは<script src="./js/script.js" defer></script> --->
  </head>
</html>
として記述する。
どちらもDOMを読み込んだ後JavaScriptファイルを読み込む必要があるため、bodyの後ろにscriptを記載したり、deferを入れる必要がある。どちらが良いかに関してはCSSやJavaScriptを外部ファイル化するメリットとデメリット等に記載してあるが、本解説ではファイルが一つですむ利便性からインライン表記を利用する。
その後、DOMを用いてこのエレメントを取得する
const $moving_sphere = document.getElementById("moving_sphere");
JavaScriptに関する解説 【クリックして展開】
- const
- 定数定義。 let を利用すると変数を定義できる
- $moving_sphere
- 定数名。その定数がDOMのオブジェクトの場合 \$ をつけて何の定数か分かりやすくしている(jQueryを用いた際に\$("DOM名")と宣言するから?)
- document
- HTMLのドキュメント全部から
- getElementById
- idを利用してelementを取得する
- "moving_sphere"
- moving_sphereというidのついたエレメントを取得する
- 文末の「; 」
- あってもなくても動くが、基本入れるべき。コードの切れ目を示している
このエレメントのポジションを取得して変更させるようにする。上記A-Frameのドキュメントに記載してあるとおりelement.setAttribute()をもちいる方法は推奨されていないため、three.jsの機能を利用して変更させる。
const random = Math.random();
$moving_sphere.object3D.position.set(0, (random)*2 + 1, -5);
// 個別に $moving_sphere.object3D.position.y += random; と記載する方法もある
JavaScriptに関する解説 【クリックして展開】
- Math.random
- 0~1のランダムな乱数生成
- .object3D
- 取得したelementのobject3Dに関して扱う
- .position
- 取得したelementのobject3Dのpositionに関して扱う
- .set()
- 値を()に定める
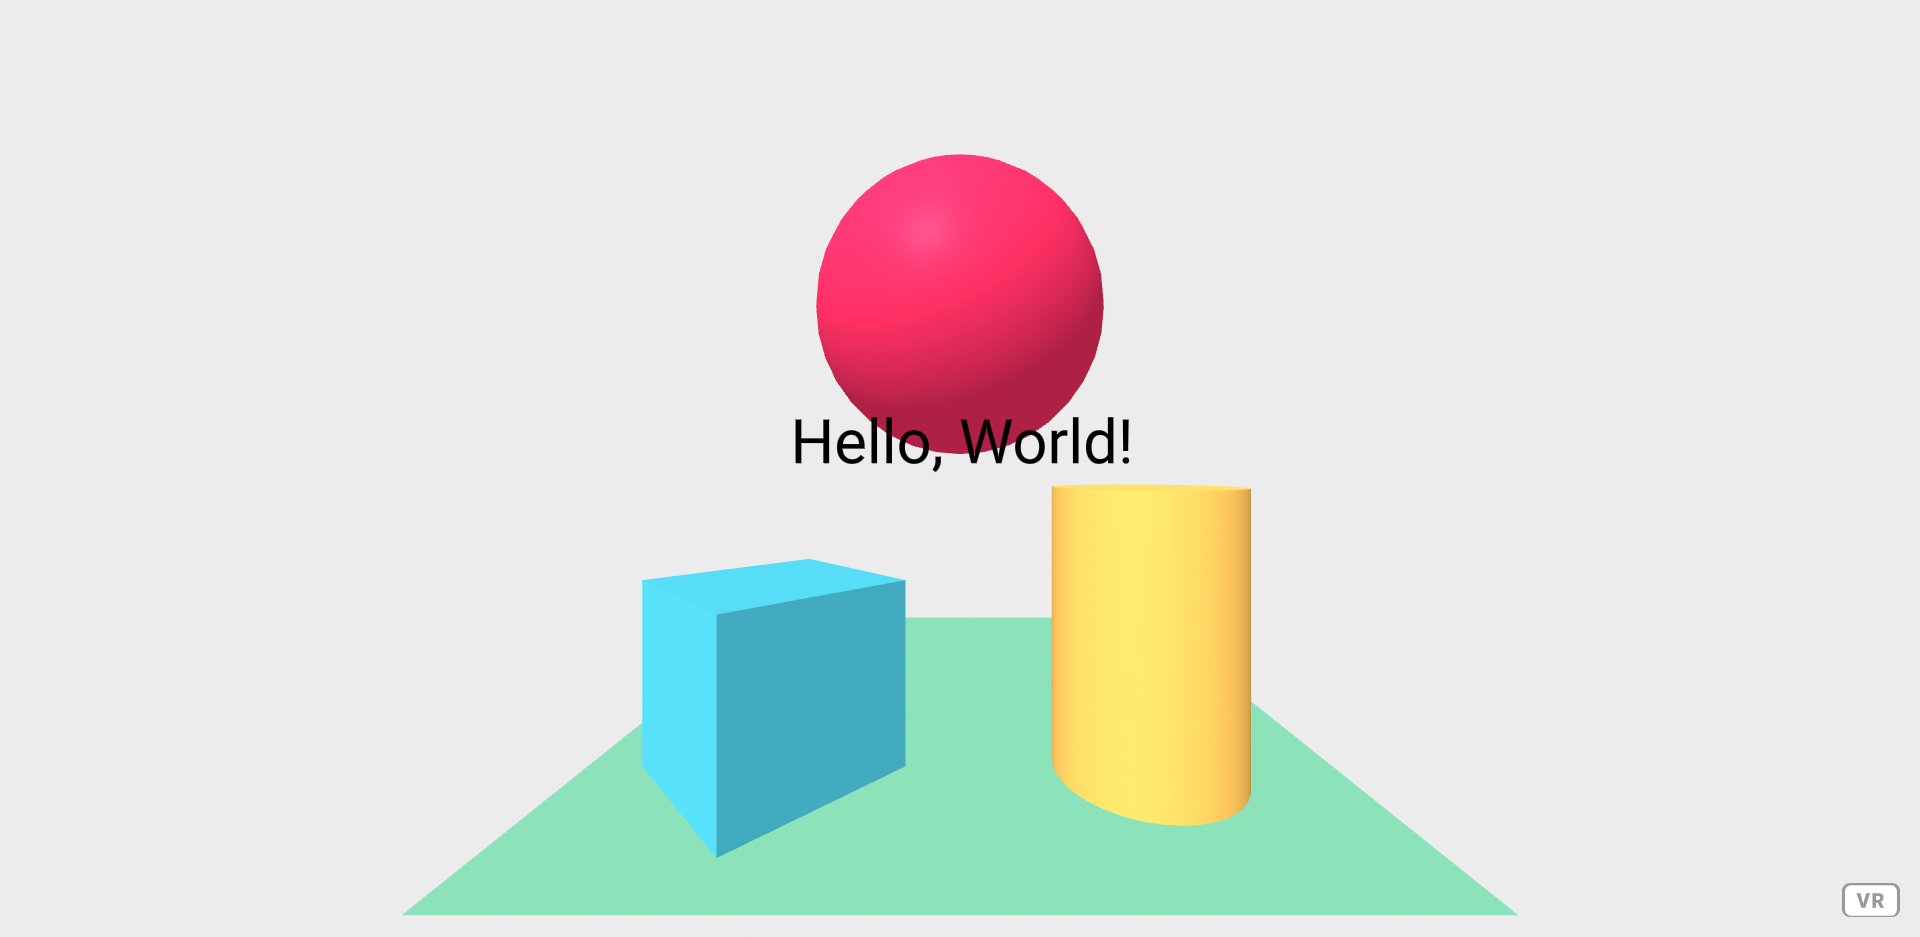
このコードにより、Webページをリロードするたびにランダムで球の高さが変わるようになった。
まとめてインライン表記する際には下記の通りである。
  </body>
  <script>
    const $moving_sphere = document.getElementById("moving_sphere");
    const random = Math.random();
    $moving_sphere.object3D.position.set(0, (random)*2 + 1, -5);
  </script>
</html>
index.htmlコード 【クリックして展開】
<html>
  <head>
      <script src="https://aframe.io/releases/1.2.0/aframe.min.js"></script>
  </head>
  <body>
    <a-scene>
      <a-sky color=#ECECEC></a-sky>
      <a-plane position="0, 0, -4" width="4" height="4" rotation="-90 0 0"  color=#7BC8A4></a-plane>
      <a-box position="-1 0.5 -3" rotation="0 45 0" color="#4CC3D9" height="1" depth="1" width="1" ></a-box>
      <a-sphere id="moving_sphere" position="0 1.25 -5" radius="1.25" color="#EF2D5E"></a-sphere>
      <a-cylinder position="1 0.75 -3" radius="0.5" height="1.5" color="#FFC65D"></a-cylinder>
      <a-text position="0 1.7 -2" value="Hello, World!" align="center" color="#000" scale="1 1 1"></a-text>
    </a-scene>
  </body>
  <script>
    const $moving_sphere = document.getElementById("moving_sphere");
    const random = Math.random();
    $moving_sphere.object3D.position.set(0, (random)*2 + 1, -5);
  </script>
</html>
完成図 【クリックして展開】
オブジェクトの回転
別のオブジェクトに対して回転をさせてみる。基本的にやり方は移動の時と同じである。
まず初めに回転させたいオブジェクトにidをつける。
<a-box id="rotation_box" position="-1 0.5 -3" rotation="0 45 0" color="#4CC3D9" height="1" depth="1" width="1" ></a-box>
回転は0~360度なので、その範囲に収まるようにランダムな数字を作製し適用させる。
  </body>
  <script>
    const $moving_sphere = document.getElementById("moving_sphere");
    const random = Math.random();
    $moving_sphere.object3D.position.set(0, (random)*2 + 1, -5);
    //ここから下が追加
    const $rotation_box = document.getElementById("rotation_box");
    $rotation_box.object3D.rotation.set(0, random*360, 0);
  </script>
</html>
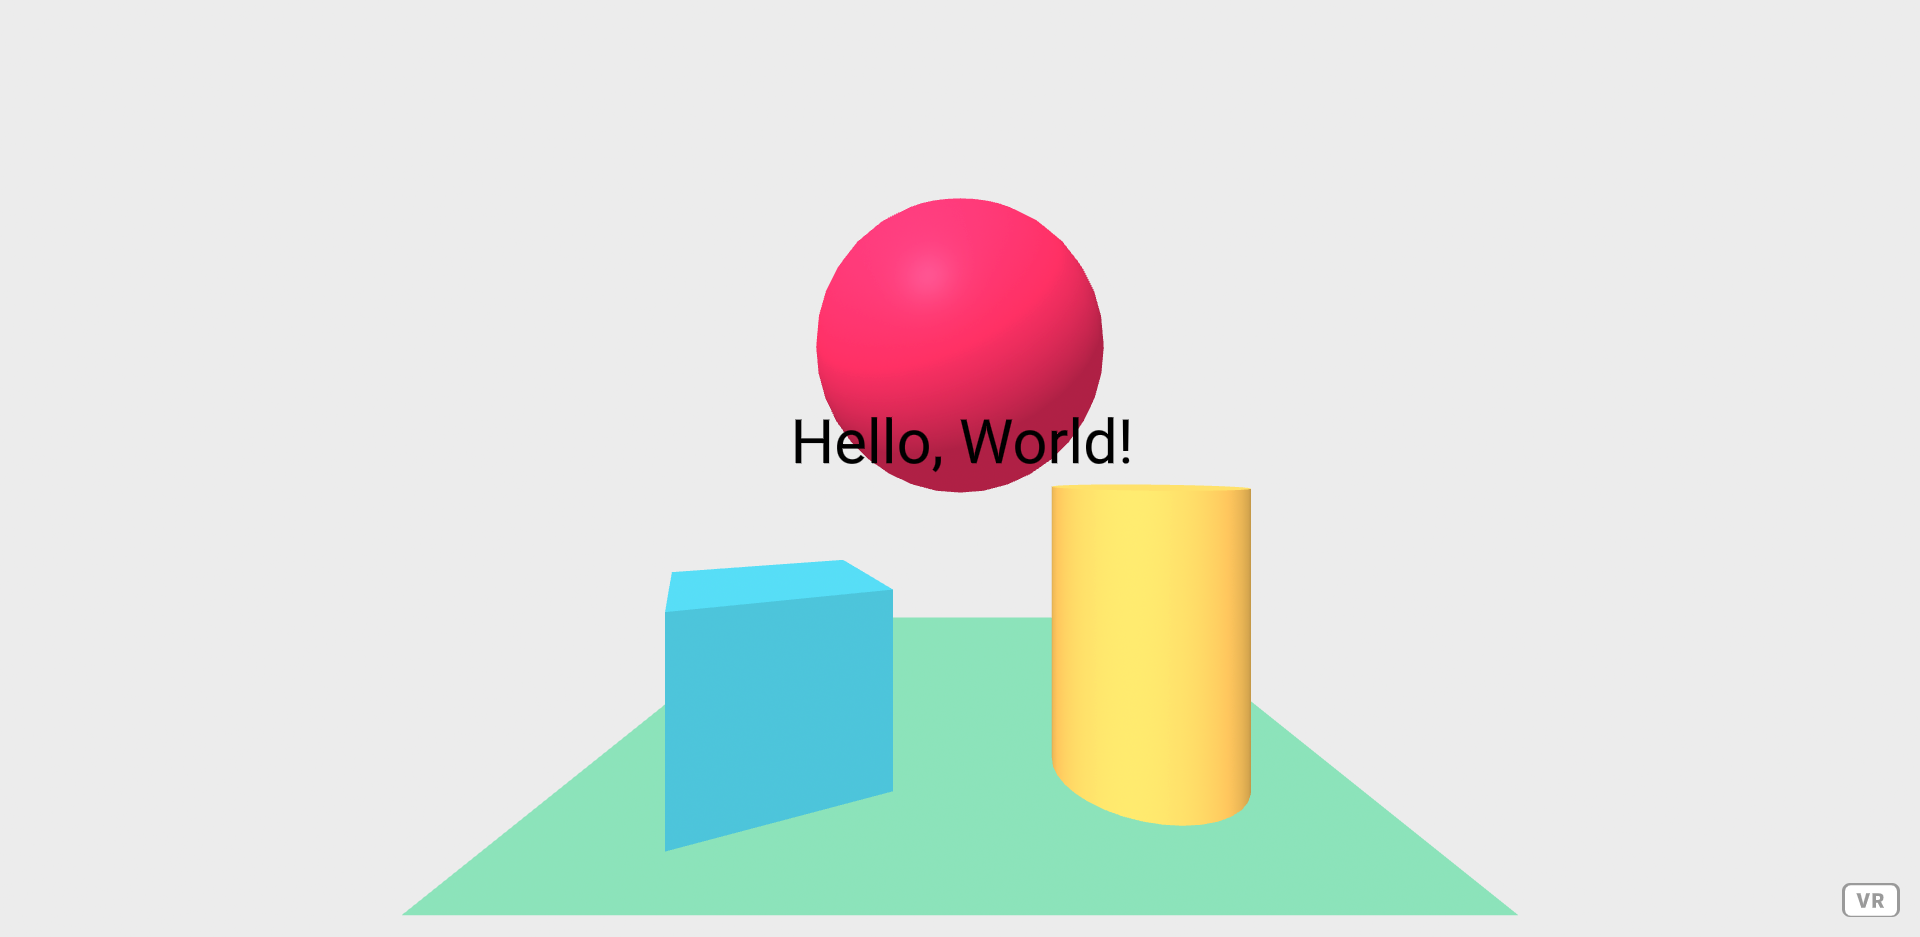
このコードによりランダムで球の高さが変わりつつboxが回転しているはずだ。
index.htmlコード 【クリックして展開】
<html>
  <head>
    <script src="https://aframe.io/releases/1.2.0/aframe.min.js"></script>
  </head>
  <body>
    <a-scene>
      <a-sky color=#ECECEC></a-sky>
      <a-plane position="0, 0, -4" width="4" height="4" rotation="-90 0 0"  color=#7BC8A4></a-plane>
      <a-box  id="rotation_box" position="-1 0.5 -3" rotation="0 45 0" color="#4CC3D9" height="1" depth="1" width="1" ></a-box>
      <a-sphere id="moving_sphere" position="0 1.25 -5" radius="1.25" color="#EF2D5E"></a-sphere>
      <a-cylinder position="1 0.75 -3" radius="0.5" height="1.5" color="#FFC65D"></a-cylinder>
      <a-text position="0 1.7 -2" value="Hello, World!" align="center" color="#000" scale="1 1 1"></a-text>
    </a-scene>
  </body>
  <script>
    //可読性をあげるために並び替えている
    const $moving_sphere = document.getElementById("moving_sphere");
    const $rotation_box = document.getElementById("rotation_box");
    const random = Math.random();
    $moving_sphere.object3D.position.set(0, (random)*2 + 1, -5);
    $rotation_box.object3D.rotation.set(0, random*360, 0);
  </script>
</html>
完成図 【クリックして展開】
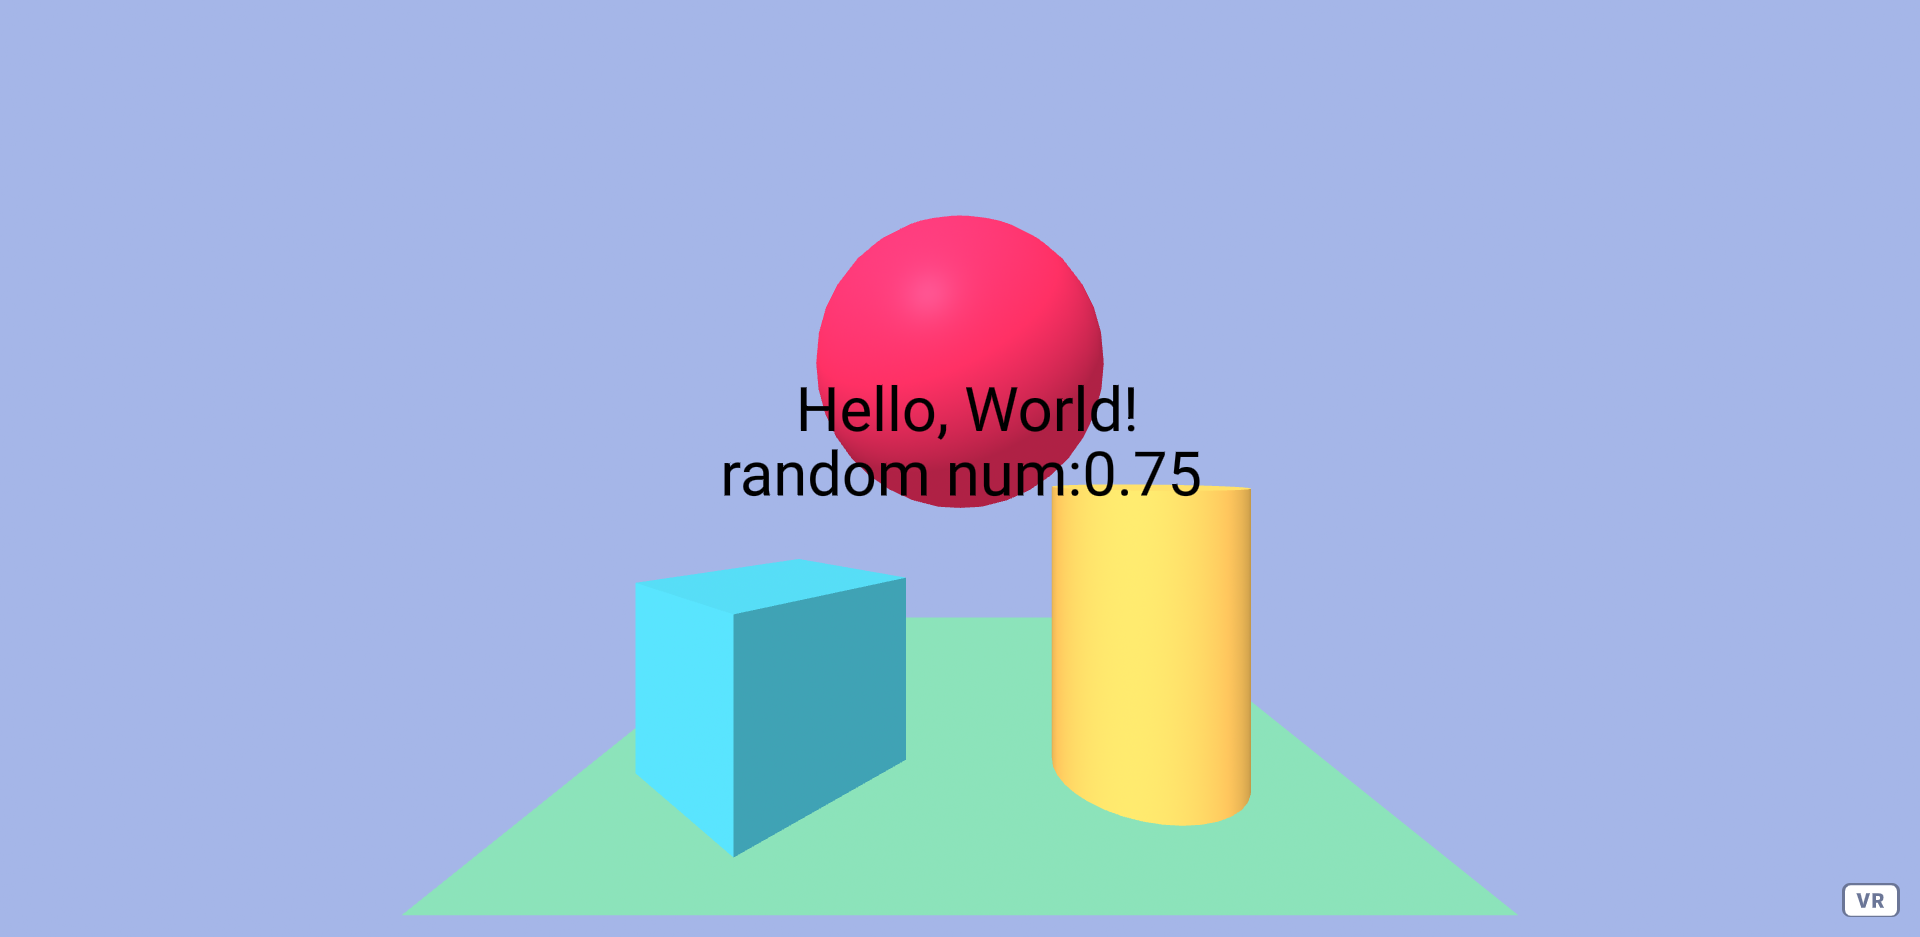
値・色変更
別のオブジェクトの色を変えたり、テキストを変えたりする。ランダムで空の色を変えつつ、球とboxの回転に利用したランダムな値をtextとして表示させる様にする。
同様にidを振る
<a-text id="front_text" position="0 1.7 -2" value="Hello, World!" align="center" color="#000" scale="1 1 1"></a-text>
<a-sky id="sky" color=#ECECEC></a-sky>
今度は3Dオブジェクトに関して扱うわけではないので、普通?にelement.setAttribute()を用いる。A-Frameのプログラム箇所はそれくらい。あとはだらだらとJavaScriptを記述。
  </body>
  <script>
    //可読性をあげるために並び替えている
    const $moving_sphere = document.getElementById("moving_sphere");
    const $rotation_box = document.getElementById("rotation_box");
    const random = Math.random();
    $moving_sphere.object3D.position.set(0, (random)*2 + 1, -5);
    $rotation_box.object3D.rotation.set(0, random*360, 0);
    //ここから下が追加
    const $front_text = document.getElementById("front_text");
    const $sky = document.getElementById("sky");
    $front_text.setAttribute("value","Hello, World! \n random num:"+String(random.toFixed(2)));
    $sky.setAttribute("color","rgb("+String(parseInt(255-Math.random()*100))+","+String(parseInt(255-Math.random()*100))+","+String(parseInt(255-Math.random()*100))+")");
  </script>
</html>
JavaScriptに関する解説 【クリックして展開】
- .setAttribute( 属性名 , 値 )
- Attributeつまり属性の値を定める。属性名にはcolorやvalue, scaleなど色々存在している。
- \n
- 改行コード。文字列を改行させてる
- String()
- 括弧内の値のtypeを文字列にする。Pythonでいうstr()
- .toFixed(x)
- .の前の数値をx桁の小数に変換する
- parseInt()
- 括弧内の値を整数にする
- String(parseInt(255-Math.random()*100))
- 155~255までのランダムな整数を計算している。色を混ぜたときにどぎつい色にならないようその範囲に定めた
index.htmlコード 【クリックして展開】
<html>
  <head>
    <script src="https://aframe.io/releases/1.2.0/aframe.min.js"></script>
  </head>
  <body>
    <a-scene>
      <a-sky id="sky" color=#ECECEC></a-sky>
      <a-plane position="0, 0, -4" width="4" height="4" rotation="-90 0 0"  color=#7BC8A4></a-plane>
      <a-box  id="rotation_box" position="-1 0.5 -3" rotation="0 45 0" color="#4CC3D9" height="1" depth="1" width="1" ></a-box>
      <a-sphere id="moving_sphere" position="0 1.25 -5" radius="1.25" color="#EF2D5E"></a-sphere>
      <a-cylinder position="1 0.75 -3" radius="0.5" height="1.5" color="#FFC65D"></a-cylinder>
      <a-text id="front_text" position="0 1.7 -2" value="Hello, World!" align="center" color="#000" scale="1 1 1"></a-text>
    </a-scene>
  </body>
  <script>
    //可読性をあげるために並び替えている
    const $moving_sphere = document.getElementById("moving_sphere");
    const $rotation_box = document.getElementById("rotation_box");
    const $front_text = document.getElementById("front_text");
    const $sky = document.getElementById("sky");
    const random = Math.random();

    $moving_sphere.object3D.position.set(0, (random)*2 + 1, -5);
    $rotation_box.object3D.rotation.set(0, random*360, 0);

    $front_text.setAttribute("value","Hello, World! \n random num:"+String(random.toFixed(2)));
    $sky.setAttribute("color","rgb("+String(parseInt(255-Math.random()*100))+","+String(parseInt(255-Math.random()*100))+","+String(parseInt(255-Math.random()*100))+")");
  </script>
</html>
完成図 【クリックして展開】
まとめ
A-Frameのオブジェクトの操作に関して軽く記述した。解説を添えつつ完成したコードも折りたたみの中に記述しているため、比較的容易に進められたと信じたい。
今回の技術に加えてJavaScriptのnew Date()を学べば、時刻を取得して擬似的な太陽を空に浮かべたり、時刻に応じてbackgroundのcolorを変更したりと様々な応用が利くと思う。
その2に関しては未定(7月中に出せたら良いな……)