Windows10でM5Stack開発環境構築を行った際の手順を記載します。
VSCodeにArduino機能拡張を導入します。
(Arduino IDE導入&VSCode導入は完了しているものとします。VSCode ver1.57.1)
(2021/6/21時点)
1. Arduino for Visual Studio Code をインストール
「Extensions」を選択し、検索窓に"arduino" と入力し、
Microsoft社のArduinoを選択してインストールします。

2. Arduino for Visual Studio Code初期設定
- 2-1.Path設定
[ファイル]→[ユーザ設定]→[設定] を選択します。

- [拡張機能]→[Arduino configuration] から Arduino:Path を探す
- Arduinoがインストールされているパス(C:\Program Files (x86)\Arduino)を指定します

- 2-2.IntelliSense (C/C++ 拡張機能)の初期設定
- 2-1.設定の検索窓に”IntelliSense engine” と入力
- 「Default」→「Tag Parser」へ変更します

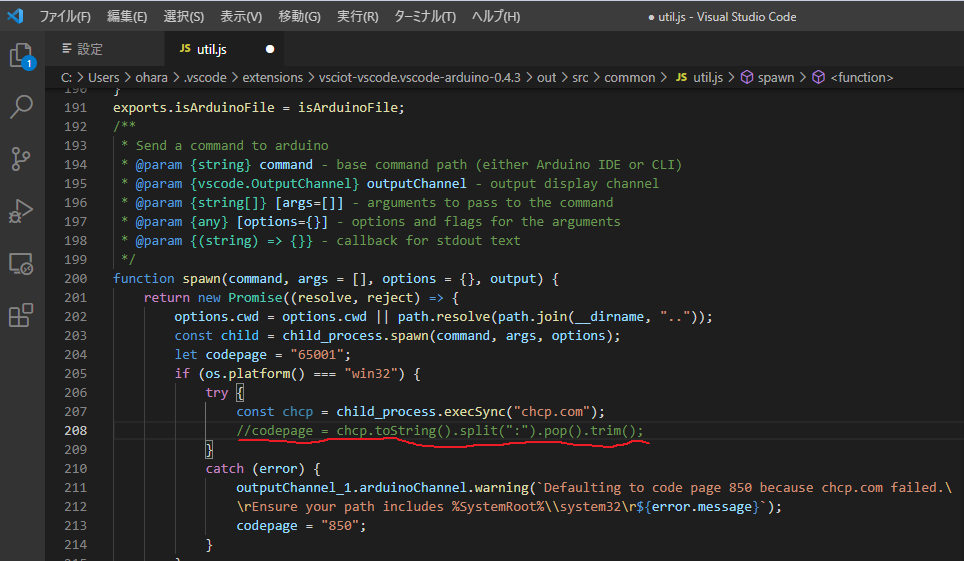
- 2-3.ターミナルのコンパイル出力文字化け対策
以下のJavaScriptファイルを編集します
C:\Users\username\.vscode\extensions\vsciot-vscode.vscode-arduino-0.4.3\out\src\common\util.js
(208行目をコメントアウトする)
3. Arduinoプロジェクト作成
-
3-1. プロジェクトフォルダ作成
-
[ファイル]→[フォルダを開く] から、任意のフォルダを新規作成し、開きます。
-
今回は"Sample"フォルダとしました。
C:\Users\username\Documents\Arduino\Sample -
その中にスケッチファイル"Sample.ino"を作成します
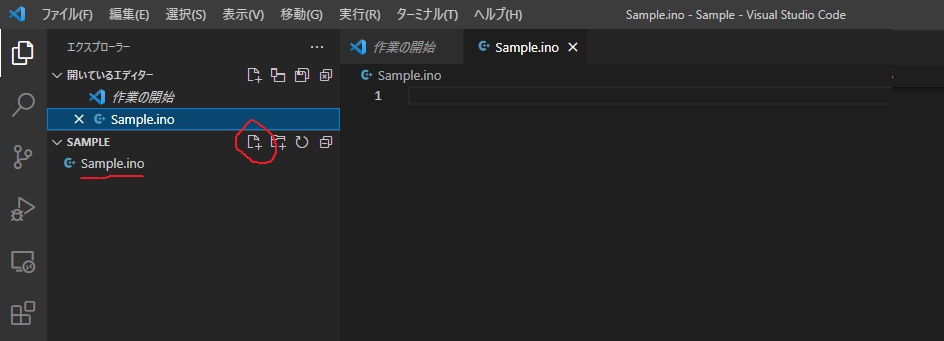
(Sample.inoにスケッチ例HelloWorldの内容を記載してみました)

-
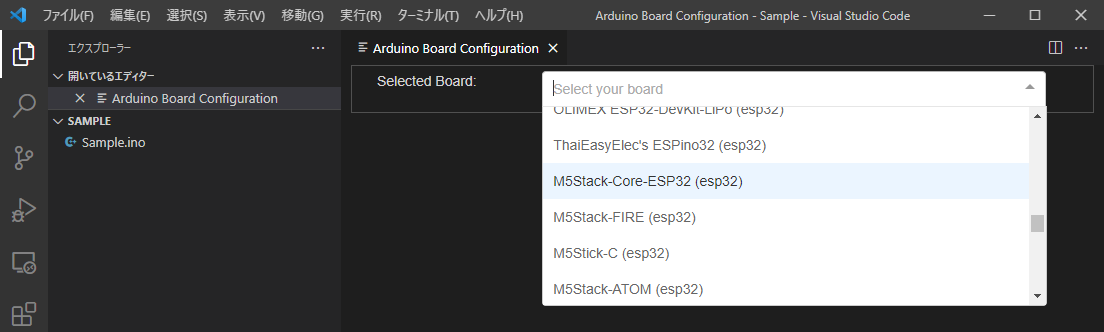
3-2. ボード種類選択
-
「Ctrl+Shift+P」でコマンドパレットを開いて
-
Arduino : Board Config を選択します
-
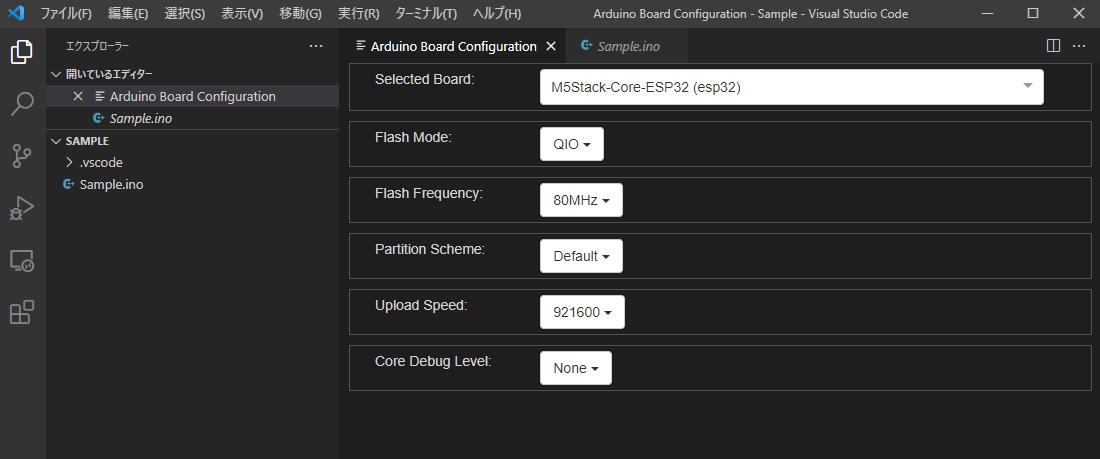
Selected Board で「M5Stack-Core-ESP32(esp32)」を指定します
その後、”Flash Mode”等の項目が自動で設定されます
-
3-3. C/C++拡張機能のパス追加
-
「Ctrl+Shift+P」 で、コマンドパレットを開いて
-
「C/Cpp: Edit configurations...」を選択します
-
「.vscode」 フォルダの中に 「c_cpp_properties.json」 ファイルが作成される
-
M5Stack.h利用のため、「c_cpp_properties.json」の"includePath"に下記のパスを追加します
C:\Users\username\Documents\Arduino\libraries\\**

4. M5Stack への書き込み
-
4-1. シリアルポートの設定
-
M5StackをUSB接続する
-
Ctrl+Shift+P にて、「Arduino : Select Serial Port」 を選択する
-
Silicon Labsを認識しているCOMポートを選択する
-
4-2. コンパイル実施
-
「Verify」アイコンを選択してコンパイル開始する

(コンパイルに時間かかります・・・)

(やっと完了です)

-
4-3. M5Stackへ書き込み
-
「Upload」ボタンを選択して書き込み開始します
(書き込みも時間かかります・・・)
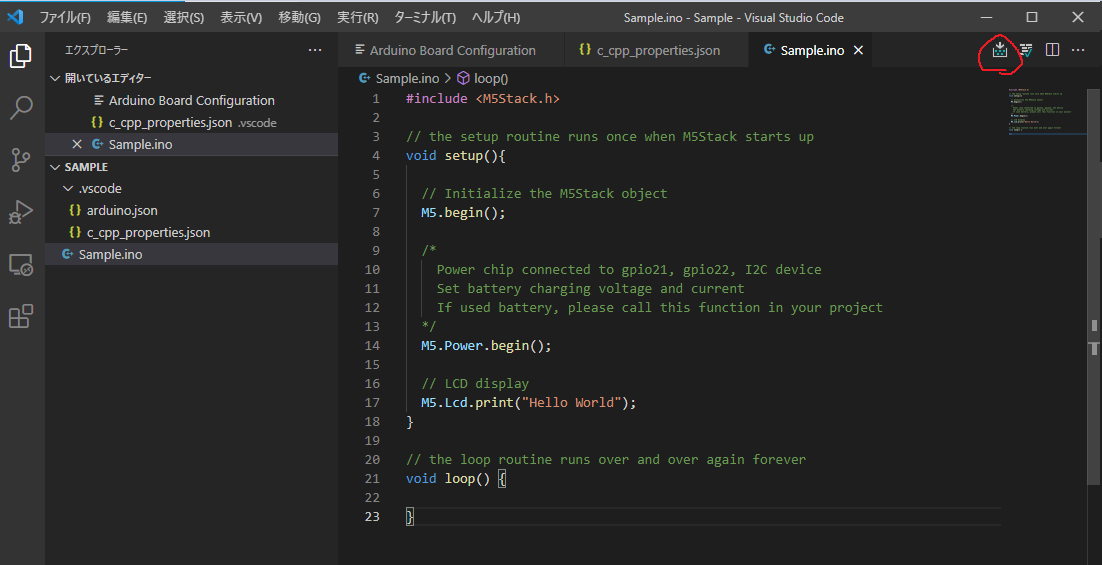
M5Stackの液晶画面にHello Worldが表示されれば成功です!