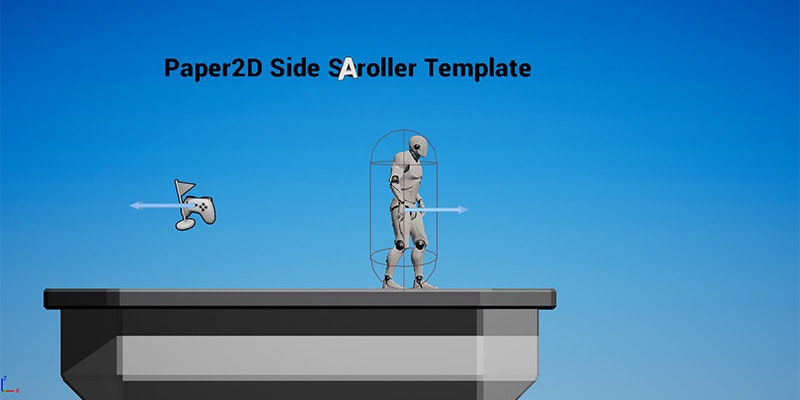
この記事の完成イメージ

GAS導入後の実装編はこちら≫UE4 Gameplay Ability System で2Dコンボ攻撃(2/2)実装編
はじめに
Paper2DのPaperCharacterに、Gameplay Ability System (以下GAS)を導入し、コンボ攻撃の作り方を記事にしようと思います。
- 内容は下記記事を足し算して、Paper2D用に改変。
という内容です。おかわりはくまい様、株式会社ヒストリア様。情報共有感謝致します。
≪Gameplay Ability Systemが何かについては、前記事を参照ください。
環境
バージョン UE4 4.25.4
プロジェクト名:GAS_Sprite
Microsoft Visual Studio Community 2019
ブループリントテンプレートで、2Dサイドスクロール を作成したところから始めます。

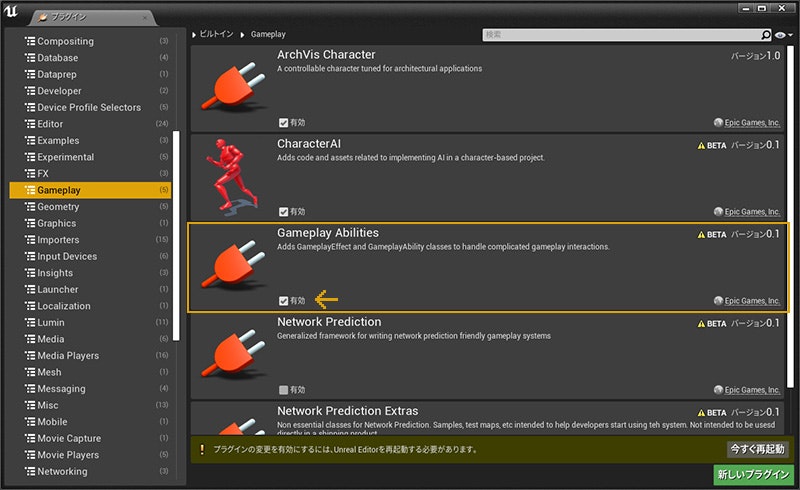
1. プラグインをオン

【設定】>【プラグイン】>【ビルトイン】>【Gameplay】>【Gameplay Abilities】
プラグインをオンにして、エディタを再起動します。
2. 新規C++クラス

再起動が完了したら、
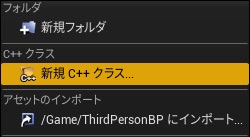
フォルダ内のどこでもいいので、右クリックから、【新規C++クラス】をクリック。

【全てのクラスを表示】のチェックを入れる。
paperと検索し、【PaperCharacter】を選択。【次へ】

ファイル名を【GAS_PaperCharacter(任意)】で作成します。

Visual Studioのライセンスが通っていれば、立ち上がると思います。
一旦UE4のエディタに戻ります。

【C++クラス】というフォルダが増えていて、【GAS_Sprite(プロジェクト名)】のフォルダの中に、
白い帯の【GAS_PaperCharacter】がいるのを確認しておきます。

ここで重要な点として、
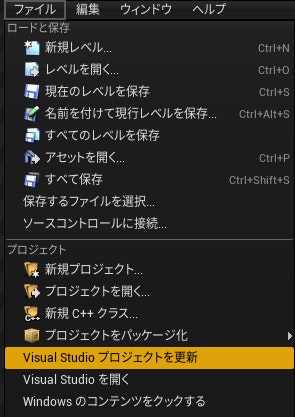
ファイルから【Visual Studio プロジェクトを更新】を押しておく必要があります。
この更新をすることで、プラグイン関連などの標準以外のシステムの紐づけがされるようです。
最初からC++プロジェクトで作成してる場合は、おそらく必要ありません。
3. Visual Studio 編集
GAS_Sprite.Build.cs
PublicDependencyModuleNames.AddRange の行に
, "GameplayAbilities", "GameplayTags", "GameplayTasks" を追加する。
【GAS_BP】の部分は、プロジェクト名なので、プロジェクトによって置き換える必要があります。
using UnrealBuildTool;

public class GAS_Sprite : ModuleRules
{
	public GAS_Sprite(ReadOnlyTargetRules Target) : base(Target)
	{
		PCHUsage = PCHUsageMode.UseExplicitOrSharedPCHs;

		PublicDependencyModuleNames.AddRange(new string[] { "Core", "CoreUObject", "Engine", "InputCore", "GameplayAbilities", "GameplayTags", "GameplayTasks" });

		PrivateDependencyModuleNames.AddRange(new string[] {  });

		// Uncomment if you are using Slate UI
		// PrivateDependencyModuleNames.AddRange(new string[] { "Slate", "SlateCore" });

		// Uncomment if you are using online features
		// PrivateDependencyModuleNames.Add("OnlineSubsystem");

		// To include OnlineSubsystemSteam, add it to the plugins section in your uproject file with the Enabled attribute set to true
	}
}
GAS_PaperCharacter.h
全文載せときます。 よくわからない人はコピペしてください。
# pragma once

# include "CoreMinimal.h"
# include "PaperCharacter.h"
# include "AbilitySystemInterface.h"
# include "GAS_PaperCharacter.generated.h"

UCLASS(config = Game)
class AGAS_PaperCharacter : public APaperCharacter, public IAbilitySystemInterface
{
	GENERATED_BODY()

public:
	AGAS_PaperCharacter();

	/** ability system */
	UPROPERTY(VisibleAnywhere, BlueprintReadOnly, Category = Abilities, meta = (AllowPrivateAccess = "true"))
		class UAbilitySystemComponent* AbilitySystem;
	UAbilitySystemComponent* GetAbilitySystemComponent() const
	{
		return AbilitySystem;
	};
	/** ability list */
	UPROPERTY(EditAnywhere, BlueprintReadWrite, Category = Abilities)
		TArray<TSubclassOf<class UGameplayAbility>> AbilityList;

	/** BeginPlay, PossessedBy override */
	virtual void BeginPlay() override;
	virtual void PossessedBy(AController* NewController) override;

};
【GAS_PaperCharacter】は、別の名前で作成している場合は、置き換える必要があります。
不要な文字列がある場合は、ご指摘いただければと思います。
GAS_PaperCharacter.cpp
全文載せておきます。よくわからない人はコピペしてください。
# include "GAS_PaperCharacter.h"
# include "GameFramework/CharacterMovementComponent.h"
# include "AbilitySystemComponent.h"

AGAS_PaperCharacter::AGAS_PaperCharacter()
{
	// ability system component
	AbilitySystem = CreateDefaultSubobject<UAbilitySystemComponent>(TEXT("AbilitySystem"));
}

void AGAS_PaperCharacter::BeginPlay()
{
	Super::BeginPlay();
	if (AbilitySystem)
	{
		int32 inputID(0);
		if (HasAuthority() && AbilityList.Num() > 0)
		{
			for (auto Ability : AbilityList) {
				if (Ability)
				{
					AbilitySystem->GiveAbility(FGameplayAbilitySpec(Ability.GetDefaultObject(), 1, inputID++));
				}
			}
		}
		AbilitySystem->InitAbilityActorInfo(this, this);
	}
}

void AGAS_PaperCharacter::PossessedBy(AController* NewController)
{
	Super::PossessedBy(NewController);

	AbilitySystem->RefreshAbilityActorInfo();
}
【GAS_Character】は、別の名前で作成している場合は、置き換える必要があります。
不要な文字列がある場合は、ご指摘いただければと思います。
C++プロジェクトビルド

ビルドから、【GAS_Spriteのビルド】を選び、今までの処理が間違っていなければ、正常終了すると思います。

エラーなどが出る場合は、どこか間違ったことをしている可能性があるので、
再度工程を確認し直してください。
エラー文など、日本語環境の初期状態だと文字化けするようなので、
下記サイトの工程を確認して、文字化けしないようにした方が良いかと思います。
4. GAS_PaperCharacterを継承

ブループリントの2DSideSclollerCharacterをダブルクリックして、開きます。

【クラス設定】をクリックし、詳細欄の親クラスに、【GAS_PaperCharacter】を指定します。
プレイボタンを押して、今まで通りグレイマンが動けば、
Gameplay Ability System の導入の基本は、完了です。
つづく
少し縦に長くなってきたので、導入編として、ここで一旦区切ります。
次の記事から、実装編を、進めていきます。
