目標
Vagrantを利用して、VirtualBox仮想マシンの構築、及びAnsibleによるプロビジョニング(Apacheインストール)を自動化する。
Vagrant内でのAnsible実行には、Ansible Localを利用する。
前回記事
【Vagrant】VirtualBox仮想マシンをWindows上に構築
Vagrant、Ansibleとは
本記事では参考記事の掲載のみと致します。
Vagrant
Vagrant + VirtualBoxでWindows上に開発環境をサクッと構築する
Ansible
Ansible実践入門
前提
Vagrant及びVirtualBoxがインストール済みで、Vagrant用作業フォルダの初期化(本記事ではCentOS7用のBoxでの初期化を前提)が実施済みであること(※)。
※【Vagrant】VirtualBox仮想マシンをWindows上に構築(Vagrantfileの作成)までの手順を実施することで前提は満たします。
利用環境
OS: Windows10(64ビット)
作業の流れ
| 項番 | タイトル |
|---|---|
| 1 | Ansible Local用プラグインをインストール |
| 2 | Playbookの作成 |
| 3 | Vagrantfileの編集 |
| 4 | 仮想マシンの作成 |
| 5 | 結果確認 |
手順
1.AnsibleLocal用プラグインをインストール
Ansible Localを利用することで、ホストOSにAnsibleをインストールすること無しに、ゲストOSにAnsibleをインストールさせ構成情報を適用させる…といった使い方が可能となります(ホストOS側に最低限必要なファイルはPlaybookのみとなります)。
Vagrantのプラグインであるvbguestをインストールすることで、VagrantでAnsible Localの機能を使うことが可能となります。
vagrant plugin install vagrant-vbguest
vagrant plugin listコマンドでvbguestがインストールされているか確認します。
c:\Vagranttest>vagrant plugin list
vagrant-vbguest (0.29.0, global)
2.Playbookの作成
利用するVagrantfileと同一階層のフォルダにAnsible Playbookを作成します。
Apacheをインストールし、起動及び自動起動を行う構成を定義しています。
- hosts: all
  become : true
  tasks:
    - name: install httpd
      yum: name=httpd state=latest
    - name: apache start / enable
      service: name=httpd state=started enabled=yes
3.Vagrantfileの編集
Vagrant.configure("2") do |config|
  if Vagrant.has_plugin?("vagrant-vbguest") then
    # Guest Additions自動更新の無効化設定
    config.vbguest.auto_update = false
  end

  # BoxはCentOS7ベース
  config.vm.box = "centos/7"

  # 共有フォルダの設定(ホストOSとゲストOS間のファイル同期実施)
  config.vm.synced_folder ".", "/vagrant",  create: true, owner: "vagrant", group: "vagrant"

  config.vm.define "ansibletest" do |server|
    # 仮想マシンのホスト名とIPアドレスを設定
    server.vm.hostname = "ansibletest"
    server.vm.network :private_network, ip: "192.168.33.20"

    # VirtualBoxのGUI上の名前を設定
    server.vm.provider "virtualbox" do |vb|
      vb.name = config.vm.box.gsub(/\//, "_") + "_" + server.vm.hostname
    end

     # Ansibleを利用したプロビジョニング実施
    server.vm.provision "ansible_local" do |ansible|
      ansible.playbook = "playbook.yml"
    end
  end
end
4.仮想マシンの作成
vagrant upコマンドを実行し仮想マシンを作成します。
vagrant up
出力画面より各種セットアップを実施後、Ansible LocalによってゲストOS側にAnsible本体がインストールされ、その後プロビジョニングが実施されていることが分かります。
c:\Vagranttest>vagrant up
Bringing machine 'ansibletest' up with 'virtualbox' provider...
==> ansibletest: Importing base box 'centos/7'...
==> ansibletest: Matching MAC address for NAT networking...
==> ansibletest: Checking if box 'centos/7' version '2004.01' is up to date...
==> ansibletest: Setting the name of the VM: centos_7_ansibletest
==> ansibletest: Fixed port collision for 22 => 2222. Now on port 2200.
==> ansibletest: Clearing any previously set network interfaces...
==> ansibletest: Preparing network interfaces based on configuration...
    ansibletest: Adapter 1: nat
    ansibletest: Adapter 2: hostonly
==> ansibletest: Forwarding ports...
    ansibletest: 22 (guest) => 2200 (host) (adapter 1)
==> ansibletest: Booting VM...
==> ansibletest: Waiting for machine to boot. This may take a few minutes...
    ansibletest: SSH address: 127.0.0.1:2200
    ansibletest: SSH username: vagrant
    ansibletest: SSH auth method: private key
    ansibletest:
    ansibletest: Vagrant insecure key detected. Vagrant will automatically replace
    ansibletest: this with a newly generated keypair for better security.
    ansibletest:
    ansibletest: Inserting generated public key within guest...
    ansibletest: Removing insecure key from the guest if it's present...
    ansibletest: Key inserted! Disconnecting and reconnecting using new SSH key...
==> ansibletest: Machine booted and ready!
==> ansibletest: Checking for guest additions in VM...
    ansibletest: No guest additions were detected on the base box for this VM! Guest
    ansibletest: additions are required for forwarded ports, shared folders, host only
    ansibletest: networking, and more. If SSH fails on this machine, please install
    ansibletest: the guest additions and repackage the box to continue.
    ansibletest:
    ansibletest: This is not an error message; everything may continue to work properly,
    ansibletest: in which case you may ignore this message.
==> ansibletest: Setting hostname...
==> ansibletest: Configuring and enabling network interfaces...
==> ansibletest: Rsyncing folder: /cygdrive/c/Vagranttest/ => /vagrant
==> ansibletest: Running provisioner: ansible_local...
    ansibletest: Installing Ansible...
    ansibletest: Running ansible-playbook...

PLAY [all] *********************************************************************

TASK [Gathering Facts] *********************************************************
ok: [ansibletest]

TASK [install httpd] ***********************************************************
changed: [ansibletest]

TASK [apache start / enable] ***************************************************
changed: [ansibletest]

PLAY RECAP *********************************************************************
ansibletest                : ok=3    changed=2    unreachable=0    failed=0    skipped=0    rescued=0    ignored=0
vagrant statusコマンドでansibletestという名前の仮想マシンがrunningになっていればOKです。
c:\Vagranttest>vagrant status
Current machine states:

ansibletest               running (virtualbox)

The VM is running. To stop this VM, you can run `vagrant halt` to
shut it down forcefully, or you can run `vagrant suspend` to simply
suspend the virtual machine. In either case, to restart it again,
simply run `vagrant up`.
5.結果確認
諸々の実行結果を確認していきます。
vagrant sshコマンドで作成した仮想マシンにログイン
vagrant ssh ansibletest
ホスト名が正常にセットアップされていることを確認
[vagrant@ansibletest ~]$ hostname
ansibletest
共有フォルダとして設定した/vagrantを確認するとホストOS内の作業フォルダに存在するplaybook.yml及びVagrantfileが配備され、正常にホストOS→ゲストOS間のフォルダ同期が実施されていることが確認できます。
[vagrant@ansibletest ~]$ ls -l /vagrant/
total 8
-rw-r--r--. 1 vagrant vagrant 190 Jan  4 02:41 playbook.yml
-rw-r--r--. 1 vagrant vagrant 942 Jan  7 02:18 Vagrantfile
[vagrant@ansibletest ~]$
systemctl status httpdで、AnsibleでプロビジョニングしたApacheのインストールと起動が有効になっていることが確認できます。
[vagrant@ansibletest ~]$ systemctl status httpd
● httpd.service - The Apache HTTP Server
   Loaded: loaded (/usr/lib/systemd/system/httpd.service; enabled; vendor preset: disabled)
   Active: active (running) since Thu 2021-01-07 02:22:42 UTC; 25min ago
     Docs: man:httpd(8)
           man:apachectl(8)
 Main PID: 3926 (httpd)
   Status: "Total requests: 0; Current requests/sec: 0; Current traffic:   0 B/sec"
   CGroup: /system.slice/httpd.service
           ├─3926 /usr/sbin/httpd -DFOREGROUND
           ├─3927 /usr/sbin/httpd -DFOREGROUND
           ├─3928 /usr/sbin/httpd -DFOREGROUND
           ├─3929 /usr/sbin/httpd -DFOREGROUND
           ├─3930 /usr/sbin/httpd -DFOREGROUND
           └─3931 /usr/sbin/httpd -DFOREGROUND
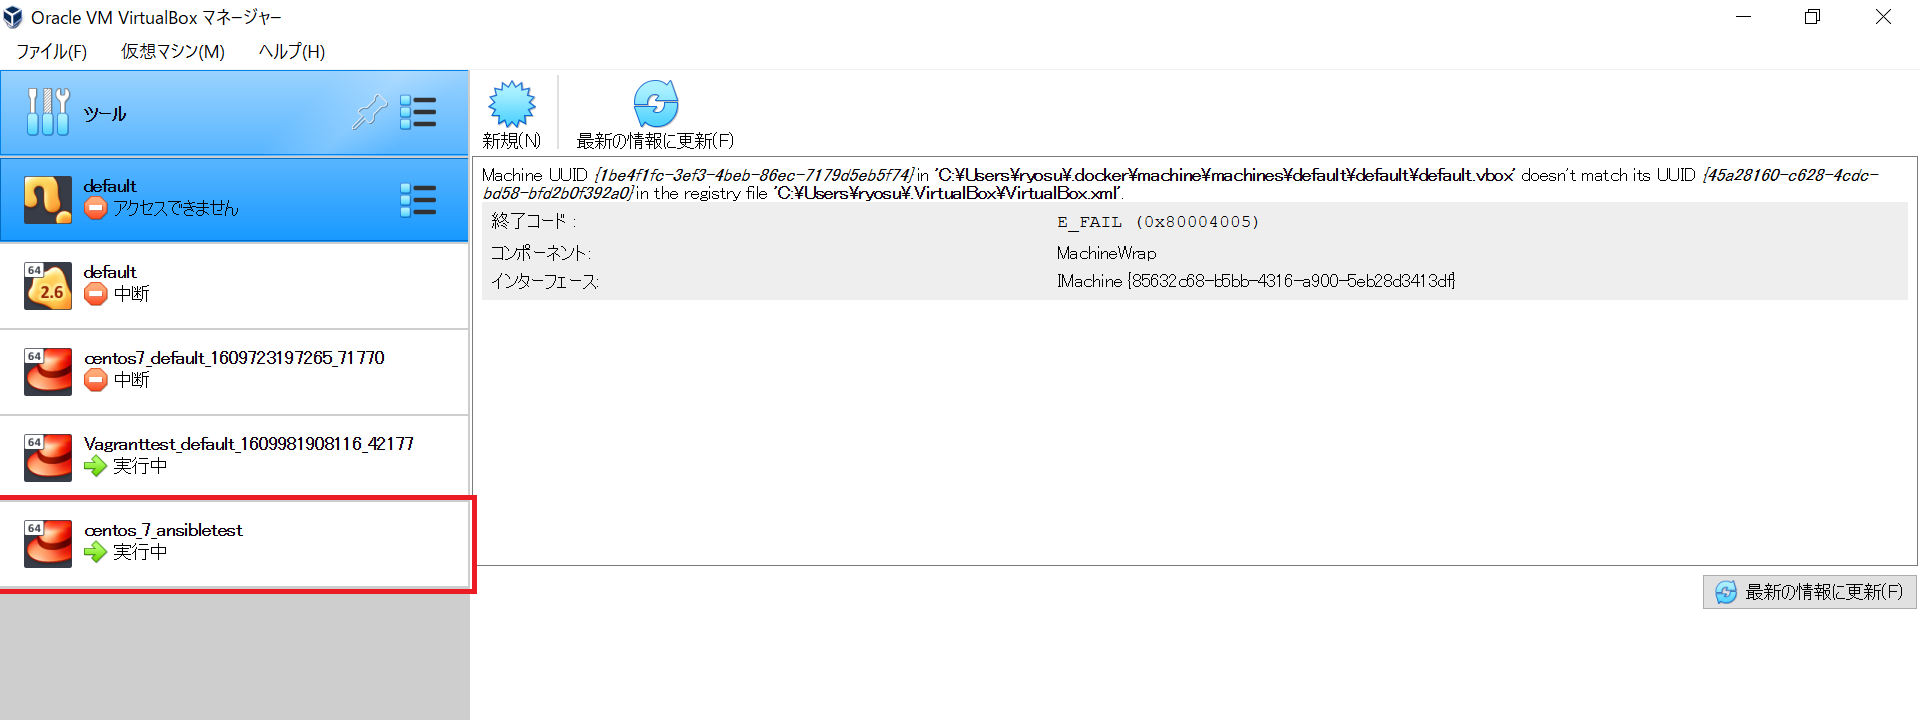
最後に、VirtualBoxのGUIコンソール上の名前がVagrantfile内で設定した書式通りになっていることを確認
