0
0

Delete article

Deleted articles cannot be recovered.

Draft of this article would be also deleted.

Are you sure you want to delete this article?

More than 3 years have passed since last update.

Figamaで可変のボックスを作る方法

Posted at

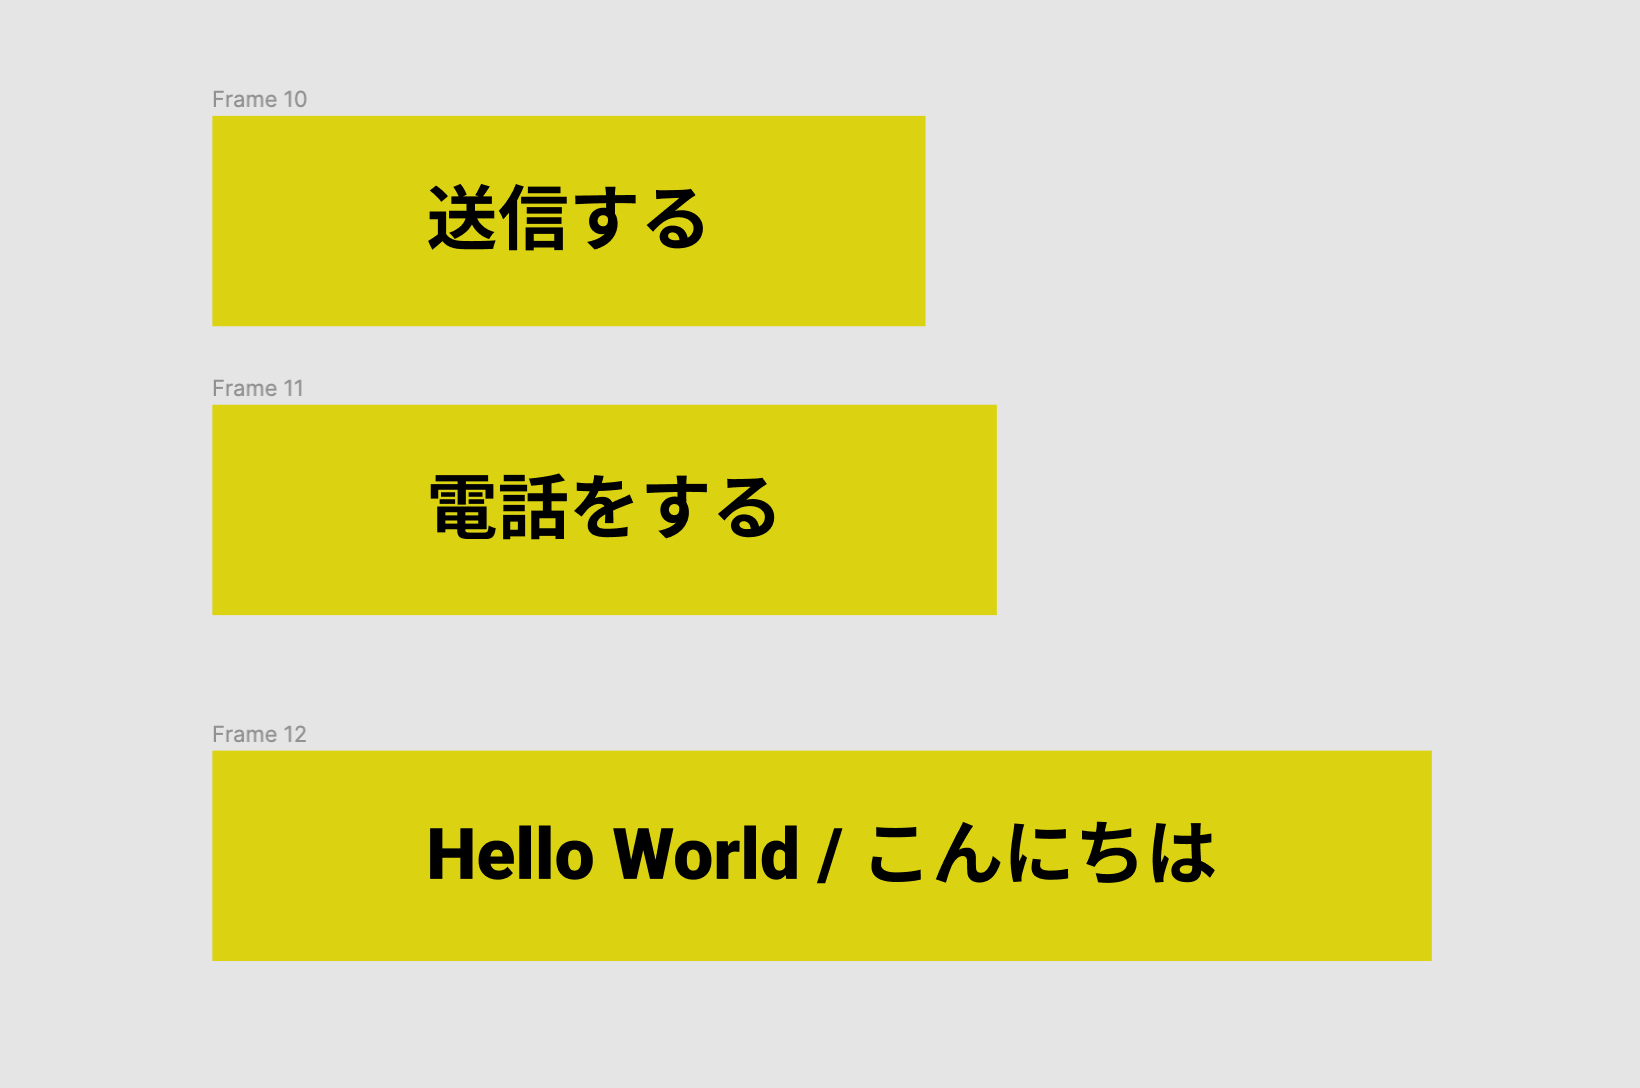
WEB制作をしていると、ボタンデザインの使い回しをすることが多々あります。
こんな感じに中の文字数だけが異なるパターンですね。
640ccd4cee96b9b8f1d1950c44ea7b23.png

これをFigmaで簡単に作る方法についてご紹介します。

#目指す形
こんな感じで文字数に合わせてボタンのサイズが変わります。
しかも、文字を入力後でも上下左右の余白(padding)を変更することができちゃいます。
2955c526105ed96edd508ba0aa41d909.gif

#STEP1 要素の作成
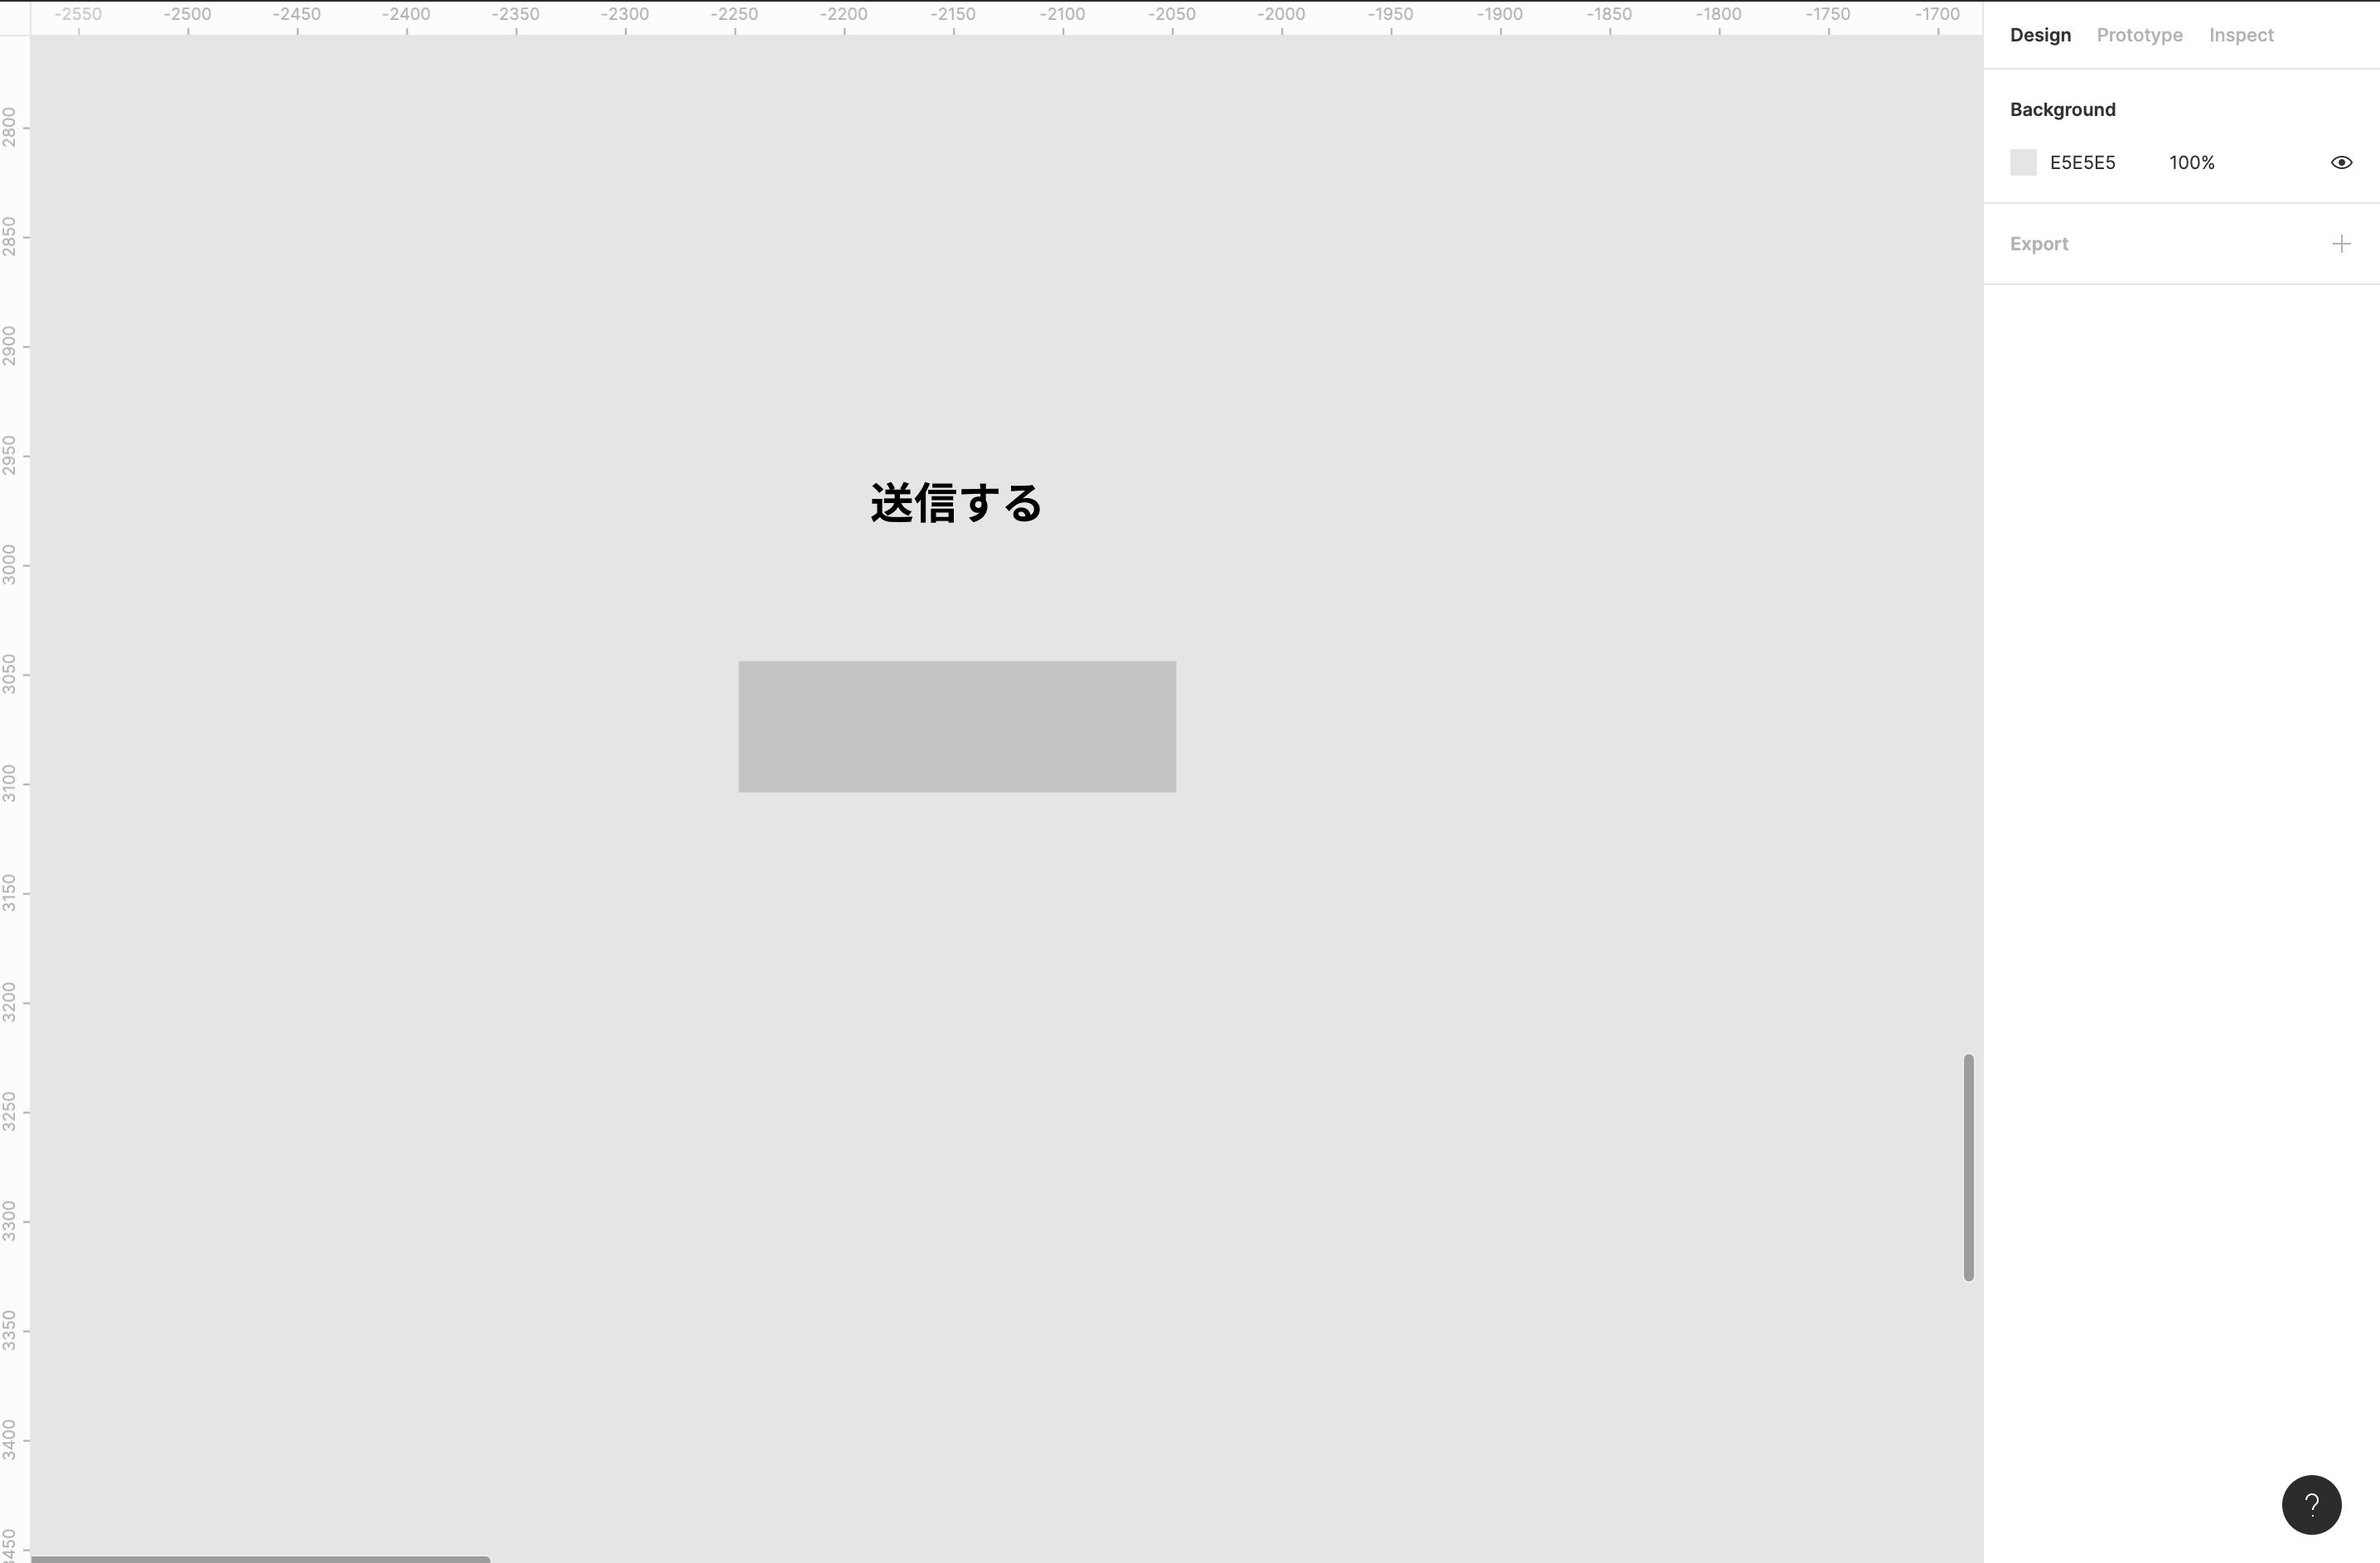
ボタンと文字を準備します。
1d14e0df8ab190f3432a0d88a5f97abb.png

#STEP2 Add Auto Layoutをする
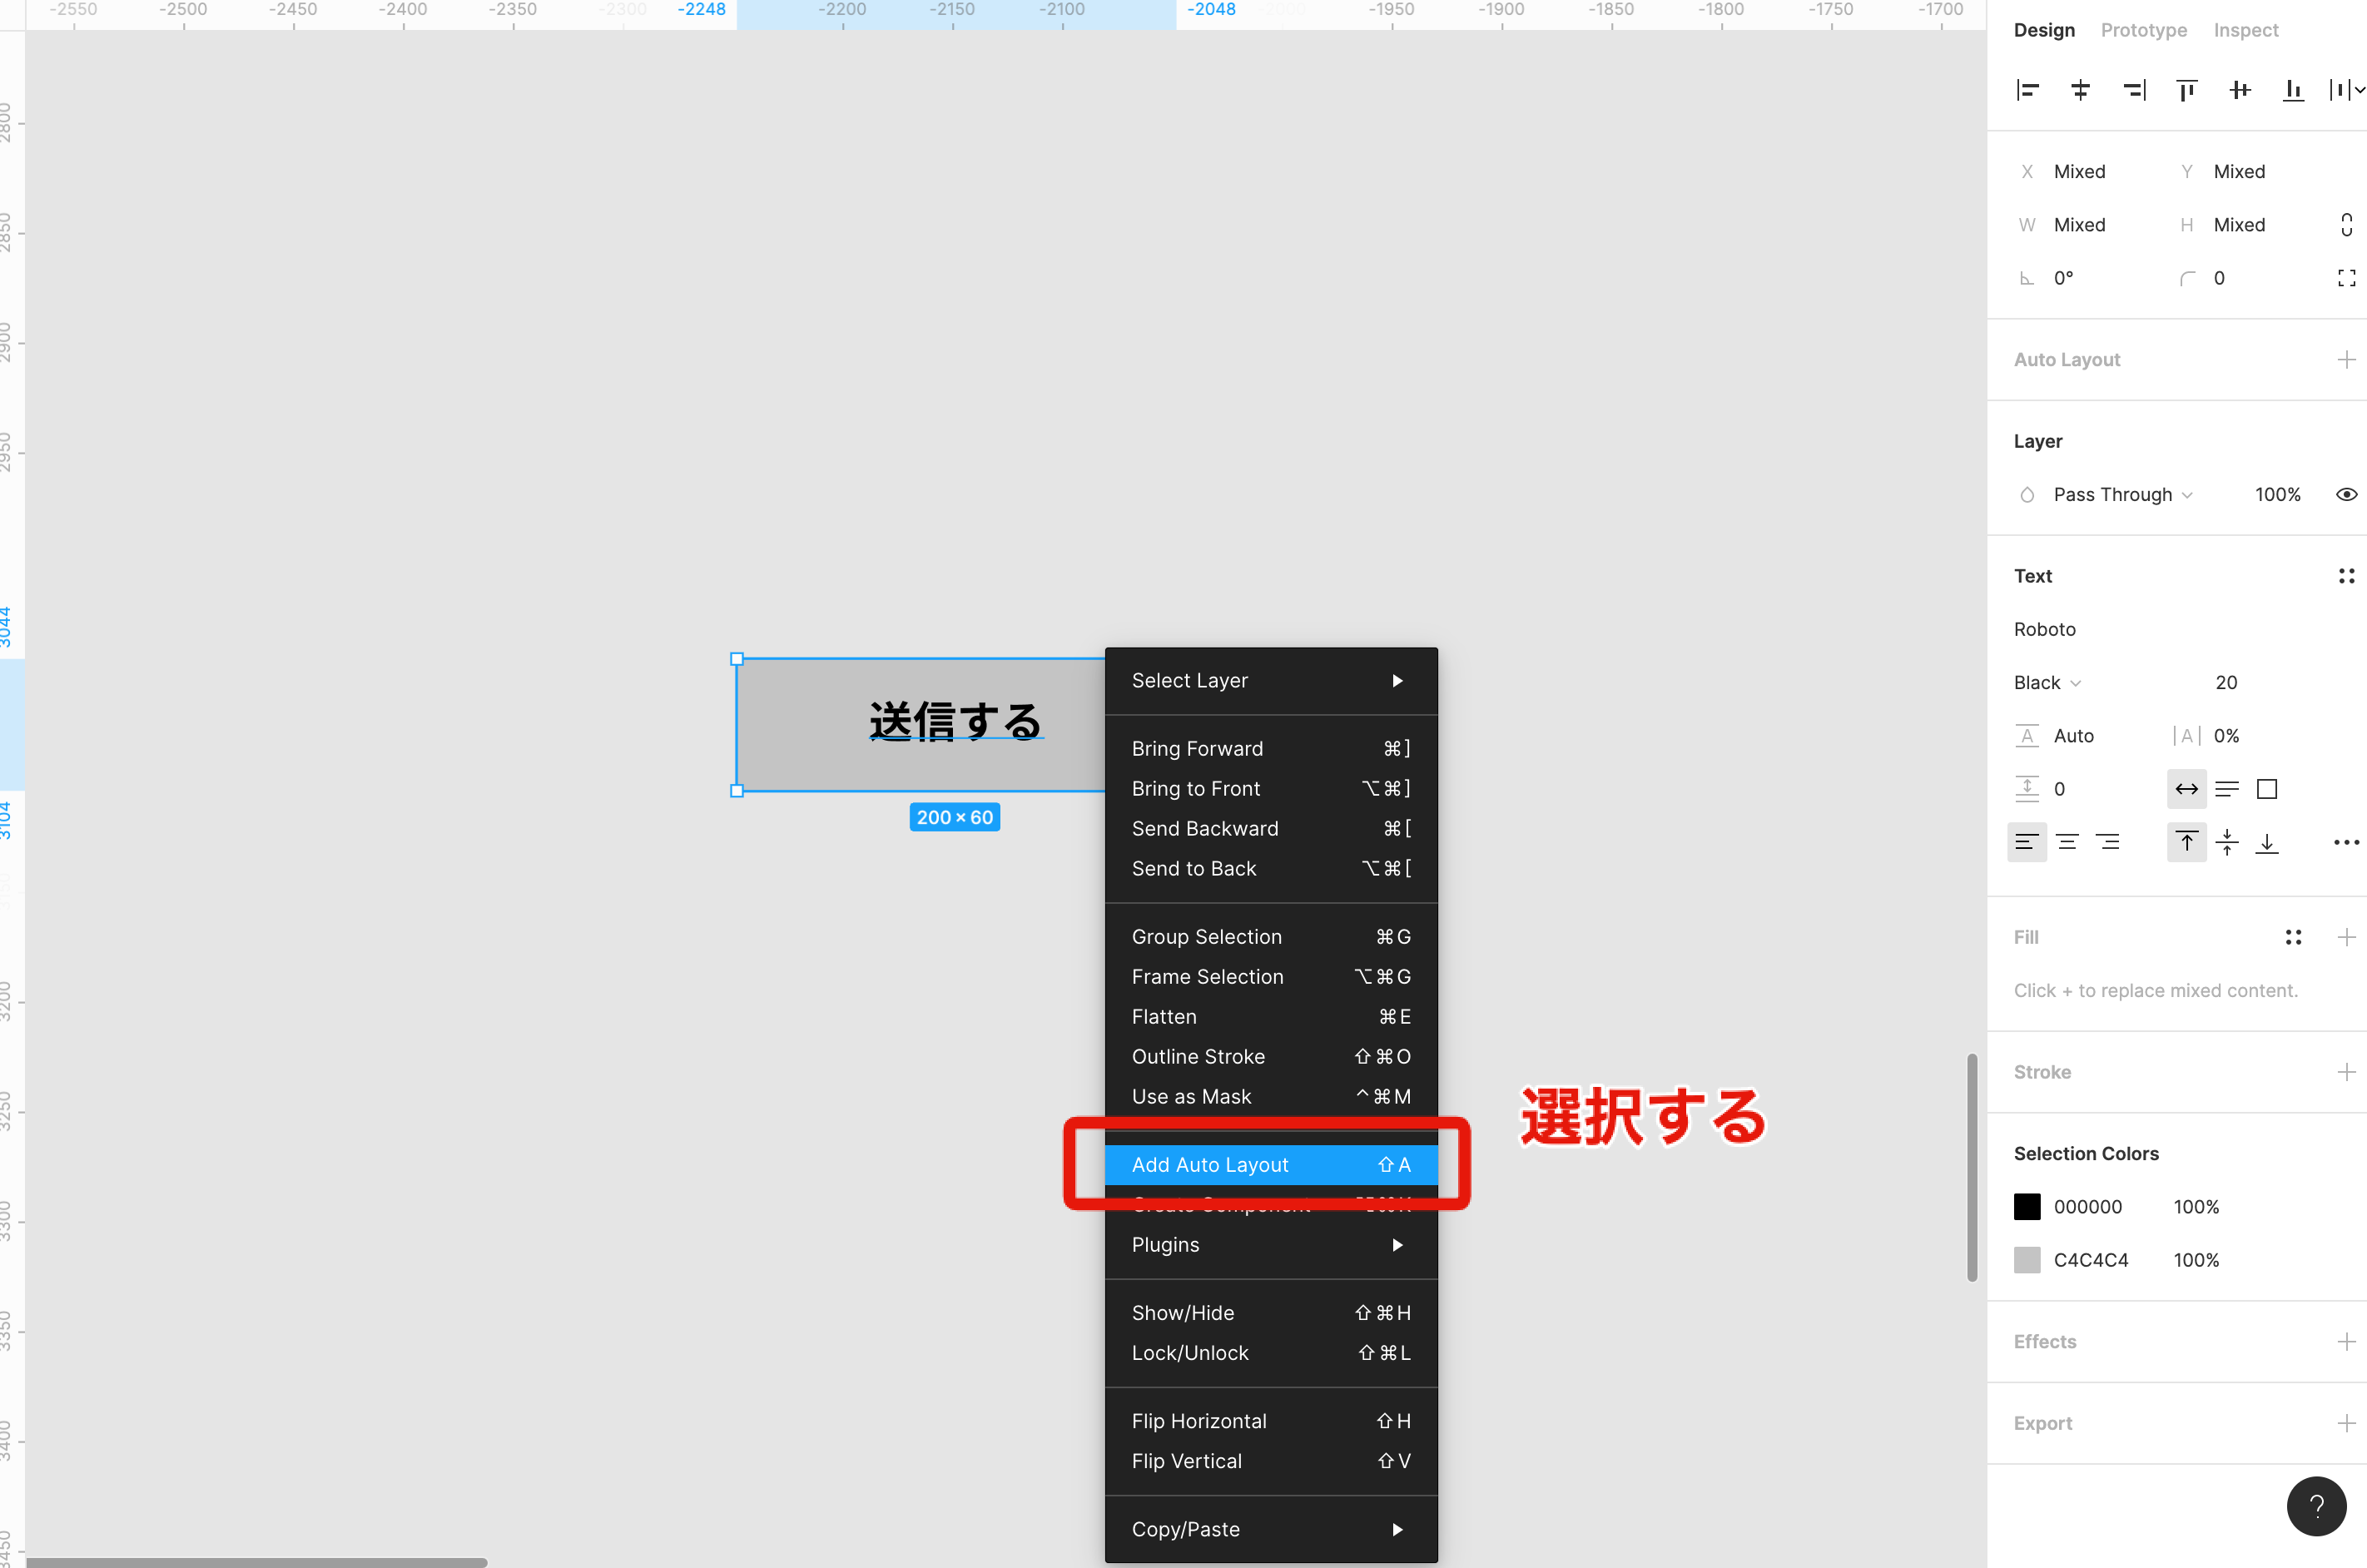
ここで文字とボタンを選択して、右クリックします。
赤色で囲ってある、Add Auto Layoutを選択します。
cf9e117d6e5e5b20f3e7aca1c7f385cc.png

#STEP3 完成
これで文字数に合わせて可変するボタンの出来上がりです。
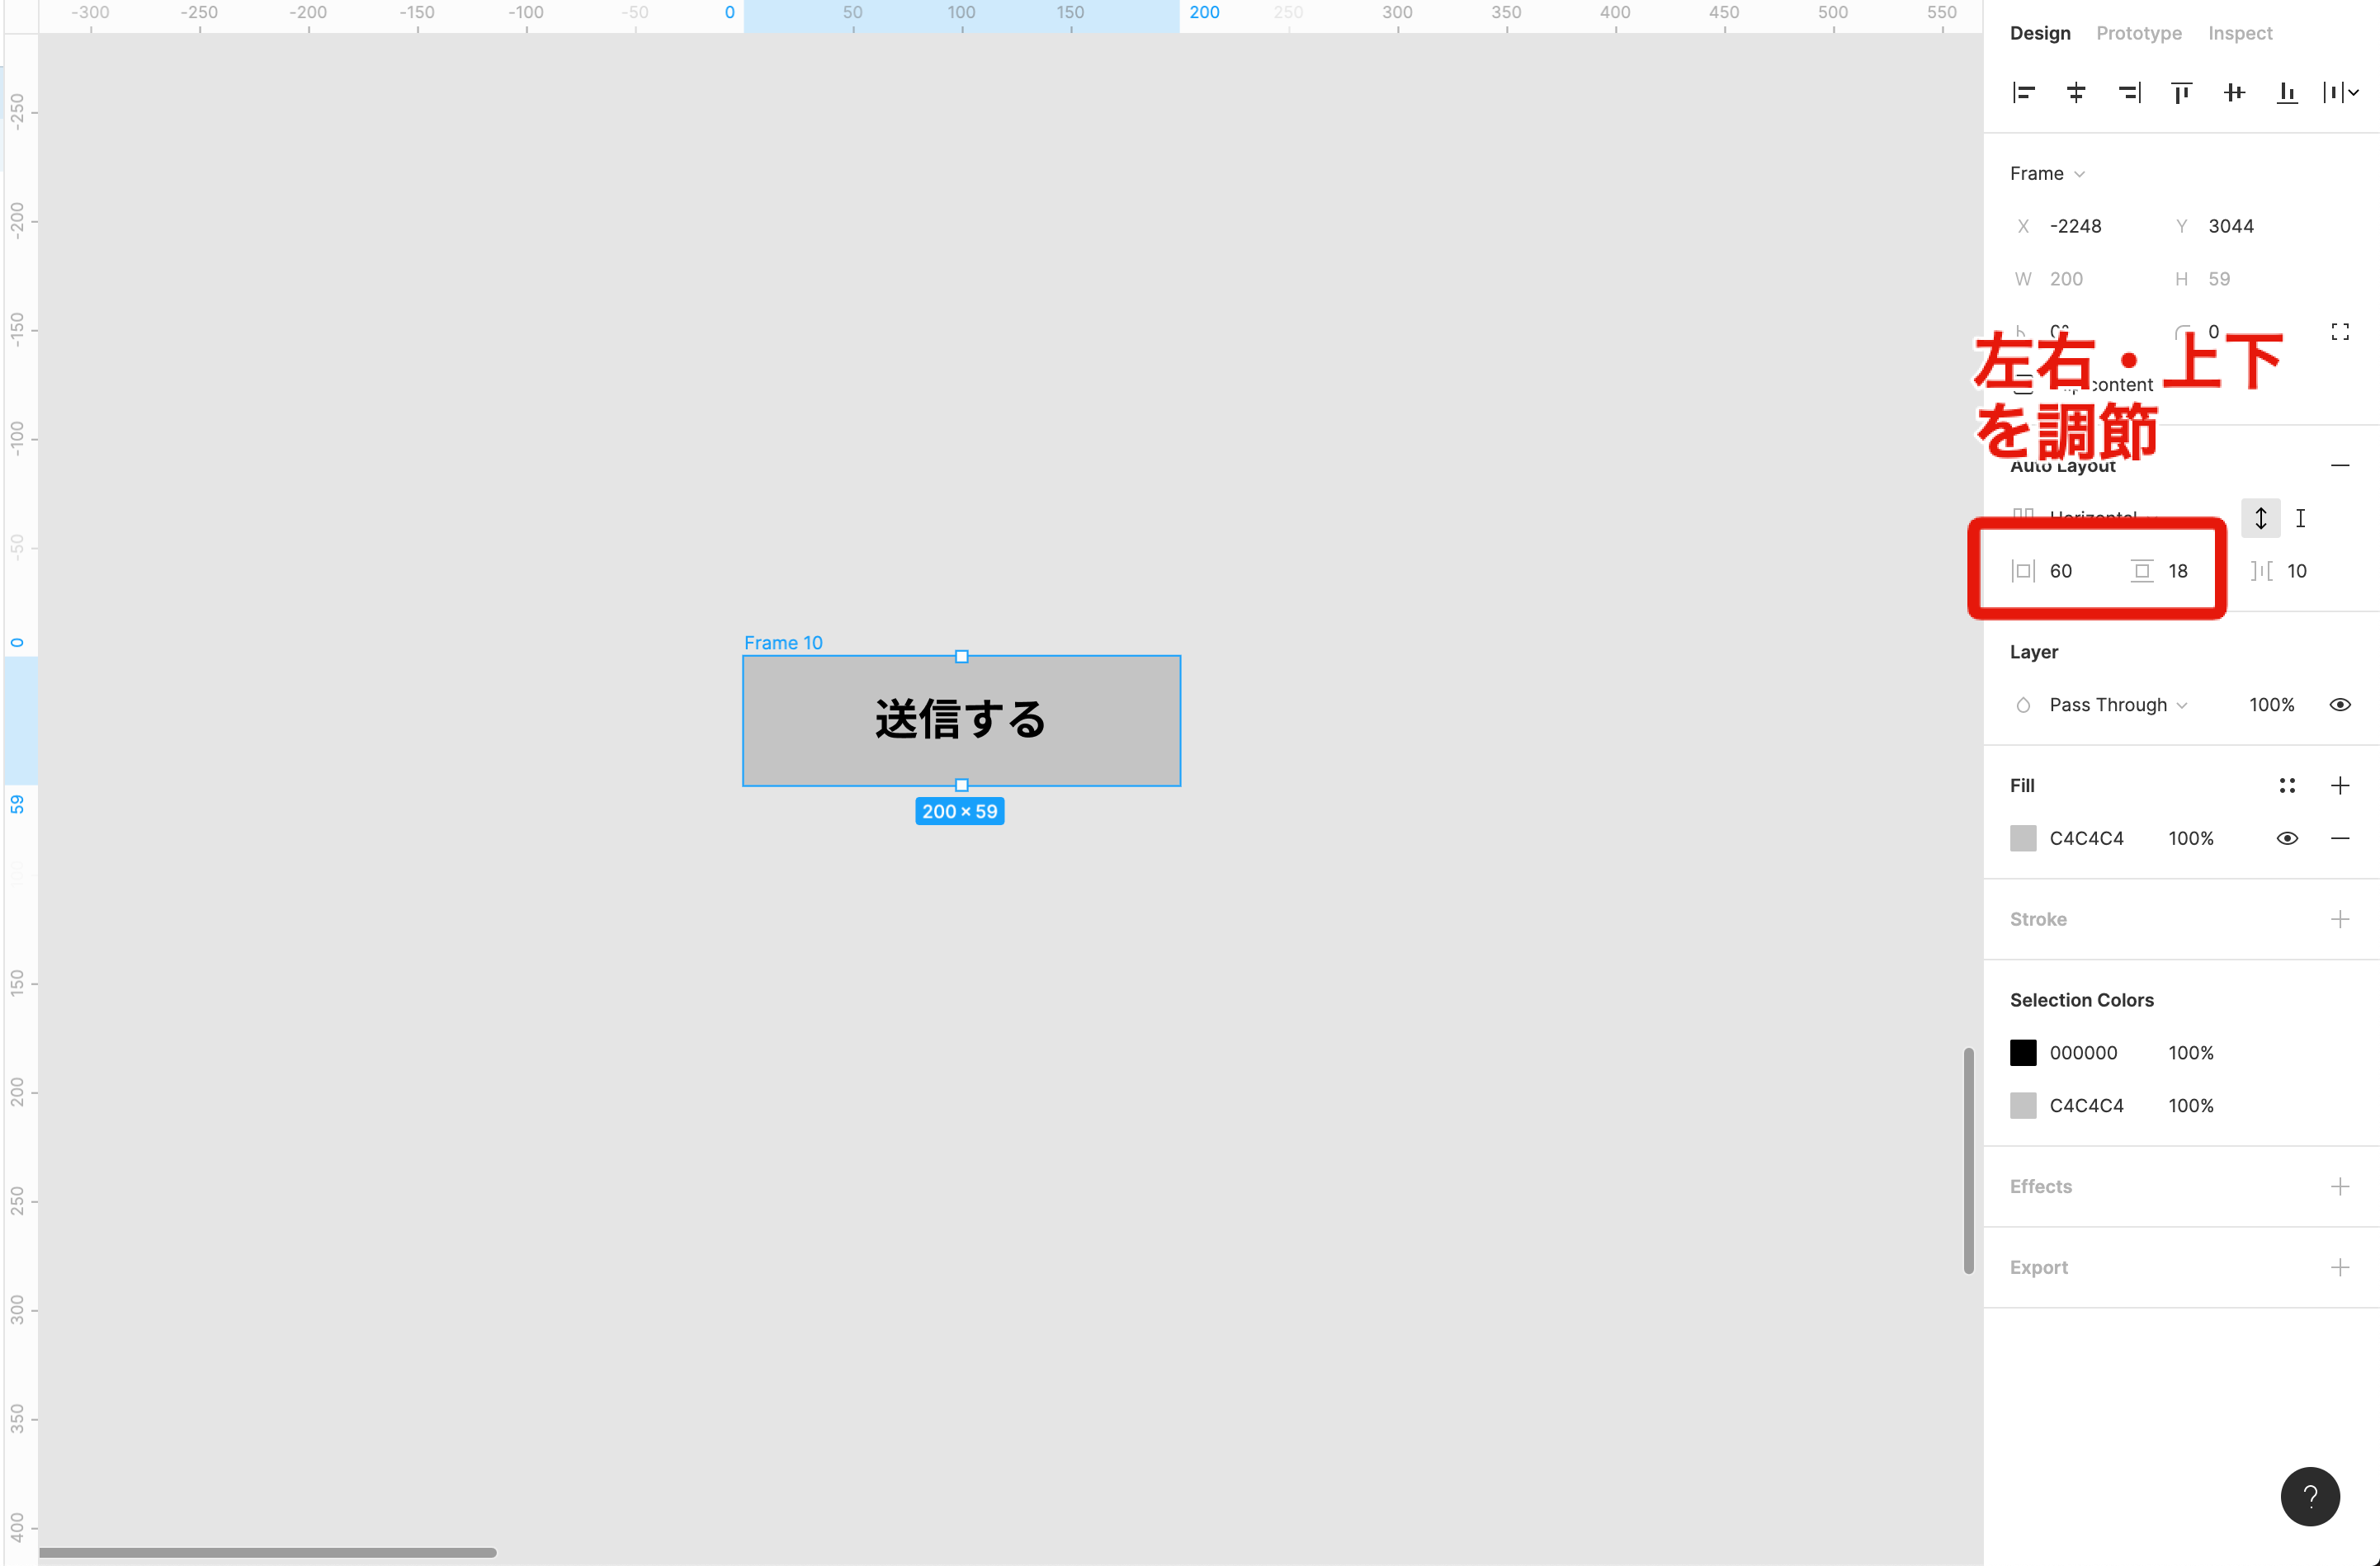
上下左右の余白は右側にあるパネルから編集が可能です。
c6489018c2aacb671bb6e81f4a5a1681.png

0
0
0

Register as a new user and use Qiita more conveniently

  1. You get articles that match your needs
  2. You can efficiently read back useful information
  3. You can use dark theme
What you can do with signing up
0
0

Delete article

Deleted articles cannot be recovered.

Draft of this article would be also deleted.

Are you sure you want to delete this article?