テスティングフレームワーク「Junit」を統合開発環境(IDE)Eclipse※1で実行する手順を備忘録として記載させていただきます。
特徴であるラムダ式などのJava 8以降の機能を活用して実施したサンプルを記載しました。
※1 Eclipse Oxygen.1a (4.7.1a)から JUnit Platformサポートを提供
junit5
https://junit.org/junit5/
ECLIPSE
https://www.eclipse.org/community/eclipse_newsletter/2017/october/article5.php
検証環境
java Version: "13.0.1" 2019-10-15
Eclipse Version: 2021-09 (4.21.0)
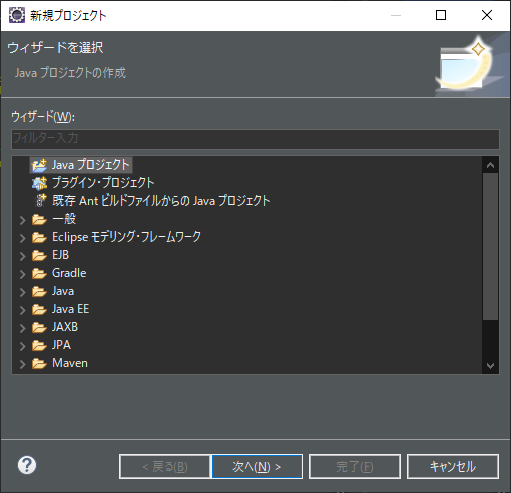
1.Javaプロジェクトの新規作成
ファイル → 新規 → プロジェクト
2.テストメソッド、テストクラス作成
ラムダ式を使用できることを確認して「src」フォルダに配置しました。
import java.util.Arrays;
import java.util.List;

public class Filter {
	public String FilterFunction(String x, String y) throws Exception {
		List<String> stringList = Arrays.asList(x, y);
		stringList.stream().filter(string -> string.contains(x));
		return x;
	}

	public void Exception(String arg) {
		if (arg == null) {
			throw new IllegalArgumentException();
		}
	}
}
import static org.junit.jupiter.api.Assertions.*;

import org.junit.jupiter.api.Test;

class FilterTest {

	@Test
	public void FilterTest_1() throws Exception {
		Filter Filter = new Filter();
		String expected = "Hello";
		String actual = Filter.FilterFunction("Hello", "World");
		assertEquals(expected, actual, () -> "Hello");
	}

	@Test
	void exception1() {
		Filter target = new Filter();
		assertThrows(IllegalArgumentException.class, () -> target.Exception(null));
	}
}
3.JUnit5をビルド・パスに追加
@Testアノテーションで発生しているエラーをクリック

4.テスト実行
テストクラスを右クリックして実行

5.テスト結果確認
