はじめに
今回はReactで簡単なフォームを作って、PHPの方で受け取るプログラムを書いてみました。Laravelではやったことがあるのですが、フレームワーク無しのPHPでやったことがなくて、フレームワーク無しのPHPをだいぶ忘れてしまったのでやってみました。
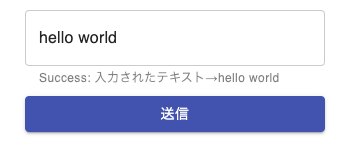
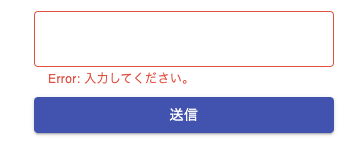
テキストを入力して送信したら、そのテキストが表示されて、何も入力しなければエラーが表示される感じのシンプルなフォームです。
以下を参考にさせていただきました。
参考:Create a Contact Form With PHP and React in 3 Min
React側
{
  "name": "simple-form",
  "version": "1.0.0",
  "private": true,
  "dependencies": {
    "@material-ui/core": "^4.11.2",
    "@types/axios": "^0.14.0",
    "@types/node": "^14.14.12",
    "@types/react": "^17.0.0",
    "@types/react-dom": "^17.0.0",
    "axios": "^0.21.0",
    "react": "^16.11.0",
    "react-dom": "^16.11.0",
    "react-hook-form": "^6.13.0",
    "react-scripts": "^4.0.1",
    "styled-components": "^5.2.1",
    "ts-node": "^9.1.1",
    "typescript": "^4.1.2"
  },
  "scripts": {
    "start": "react-scripts start",
    "build": "react-scripts build",
    "test": "react-scripts test",
    "eject": "react-scripts eject"
  },
  "eslintConfig": {
    "extends": "react-app"
  },
  "browserslist": [
    ">0.2%",
    "not dead",
    "not ie <= 11",
    "not op_mini all"
  ]
}
↑使用したpackageです。react-hook-formとmaterial-uiを使用していますが、これらの説明は割愛します。
↓react-hook-formの記事も書いているので良ければ是非!
react-hook-formの使い方を解説!V6.12.0追加
import React from "react";
import ReactDOM from "react-dom";
import { App } from "./App";

ReactDOM.render(<App />, document.getElementById("root"));
index.tsxでApp.tsxからインポートしています。見慣れた形だと思います。
import React, { useState } from "react";
import axios from "axios";
import { Button, CircularProgress, styled, TextField } from "@material-ui/core";
import { useForm } from "react-hook-form";

type FormData = {
  text: string;
};

export const App: React.FC = () => {
  const [message, setMessage] = useState("");
  const [error, setError] = useState(false);

  const {
    register,
    handleSubmit,
    formState: { isSubmitting },
  } = useForm<FormData>();

  const onSubmit = async (data: FormData) => {
    try {
      const res = await axios.post("http://localhost:8080/index.php", data);
      setError(res.data.error);
      setMessage(res.data.message);
    } catch {
      setError(true);
      setMessage("通信に失敗しました。");
    }
  };

  return (
    <>
      <Form onSubmit={handleSubmit(onSubmit)}>
        <TextField
          defaultValue=""
          margin="normal"
          variant="outlined"
          name="text"
          error={error}
          inputRef={register}
          helperText={message}
        />
        <Button
          type="submit"
          variant="contained"
          color="primary"
          disabled={isSubmitting}>
          {isSubmitting ? <CircularProgress size={24} /> : "送信"}
        </Button>
      </Form>
    </>
  );
};

const Form = styled("form")({
  display: "flex",
  flexDirection: "column",
  width: 300,
  margin: "0 auto",
});
axiosでhttp://localhost:8080/index.phpにフォームの値を送信し、レスポンスとして、errorとmessageが入った連想配列を受け取ります。PHPの方のコードを見ればイメージがしやすいと思います。
PHP側
PHPはDockerでnginxを使い、http://localhost:8080で立ち上げました。MAMPとかを使っても簡単にできると思います。
<?php
header("Access-Control-Allow-Origin: *");
header('Access-Control-Allow-Headers: Content-Type');
$rest_json = file_get_contents("php://input"); // JSONでPOSTされたデータを取り出す
$_POST = json_decode($rest_json, true); // JSON文字列をデコード

if(empty($_POST['text'])) {
    echo json_encode(
        [
           "error" => true,
           "message" => "Error: 入力してください。",
        ]
    );
} else {
    echo json_encode(
        [
           "error" => false,
           "message" => 'Success: 入力されたテキスト→'.$_POST['text'],
        ]
    );
}
- Access-Control-Allow-Originで異なるオリジンからのアクセスを可能に
- Access-Control-Allow-Headersで使用可能なHTTPヘッダーを設定
- file_get_contentsでJSONでPOSTされたデータを取り出す
- POSTされたデータがなければ、errorがtrueでエラーメッセージを返し、POSTされたデータがあれば、errorがfalseでPOSTされたデータを返す感じです
終わりに
ここまで読んでいただきありがとうございます!細かい説明があまりできていませんが、初めてフロントエンドとサーバーサイドで連携する時のサンプルとしてみていただければと思います。次はデータベースを使って簡単なCRUDをできるようにしたいなと思います。文章力あまりないのでわかりにくいかもしれませんが、少しずつ続けながら上げていきたいと思います。