はじめに
ASP.NET Core Identity が重厚で持て余してしまっていたので、
JSON Web Token(通称JWT)で認証処理を行ってみました。
JSON Web Token とは
JSON Web Token とは、ざっくりいって署名の出来る JSON を含んだ URL Safe なトークンです。 署名とは、署名時に使った鍵を用いて、JSON が改ざんされていないかをチェック出来るようにすることです。 ... 発行者だけが、鍵を使ってトークンが正しいことを検証出来る。
JSON Web Token の効用 - Qiita
https://qiita.com/kaiinui/items/21ec7cc8a1130a1a103a
JSON Web Token による認証の実装
記事では色々略して抜粋を載せますので、ソースは以下のリポジトリでご確認ください。
https://github.com/sano-suguru/NetCoreJwtAuth
作ったもの
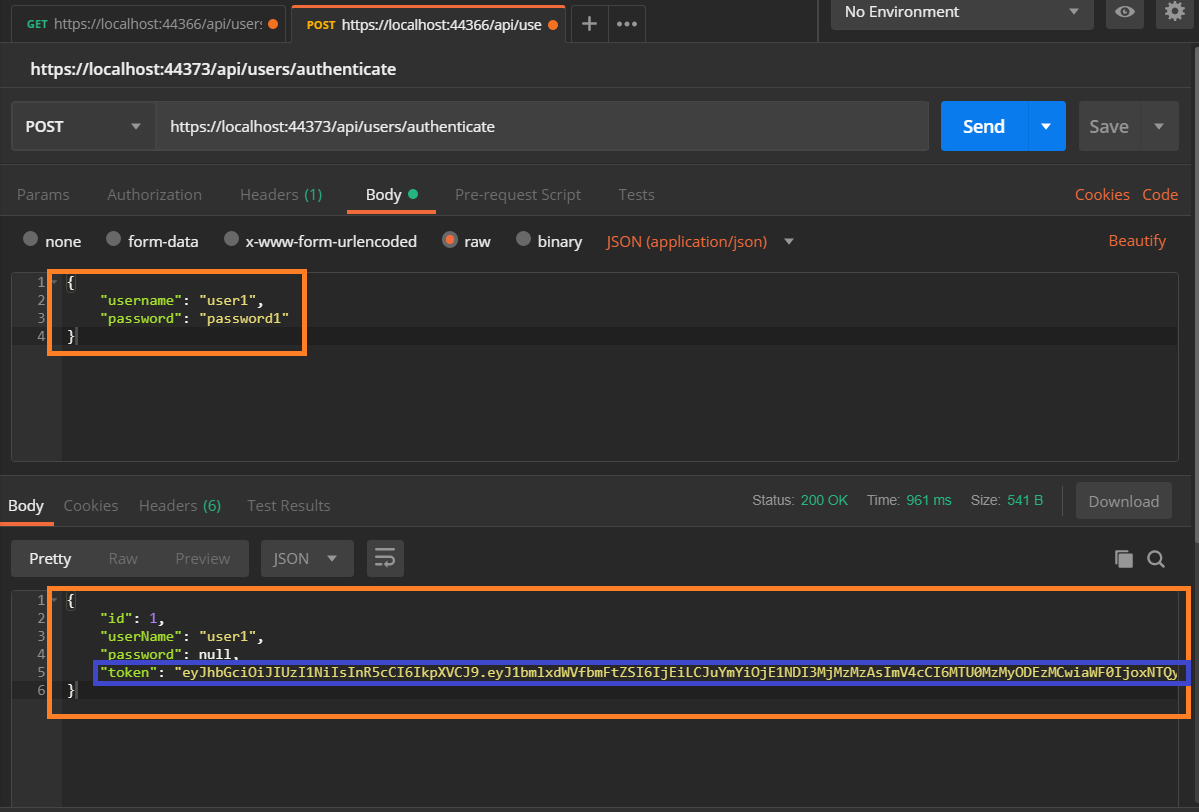
JSON Web Tokenの発行と認証ができる Web API を作りました。
- ユーザー名とパスワードを
POSTすると、トークンを返す- 無効なユーザー名、パスワードである場合、
400 BadRequestを返す
- 無効なユーザー名、パスワードである場合、
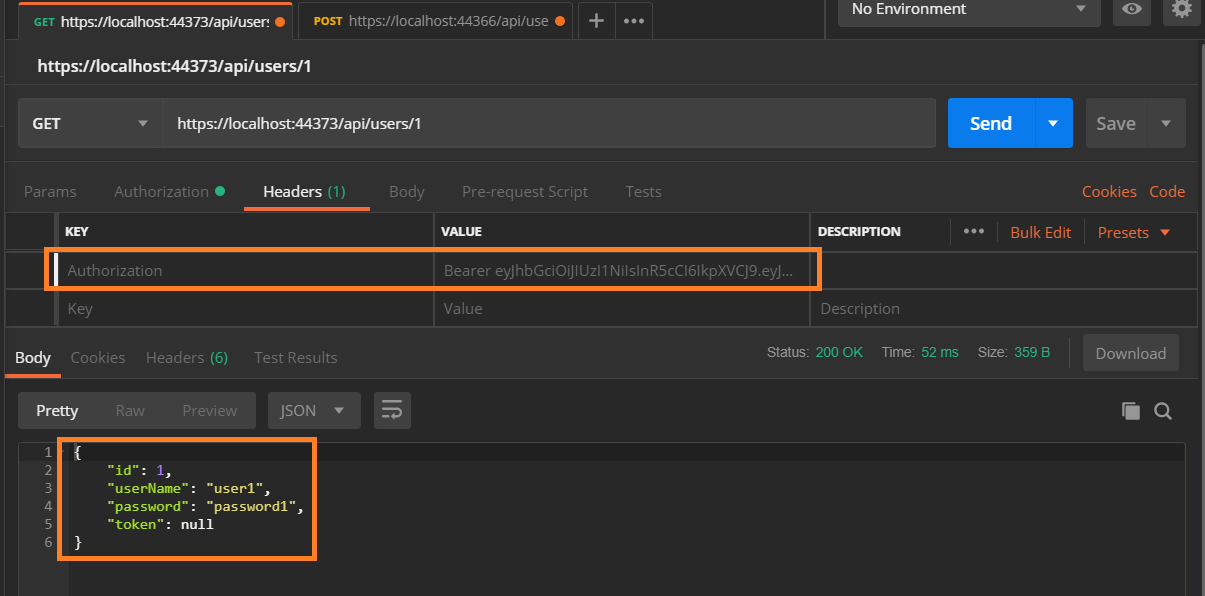
- 発行されたトークンをヘッダーに付けてユーザー情報を
GETするとその情報を返す- トークンが無効の場合、
401 Unauthorizedを返す
- トークンが無効の場合、
プロジェクトの作成
なるべく基礎から理解したかったので空のプロジェクトから作りました。
dotnet new web -o NetCoreJwtAuth
コントローラー
上記のトークンの発行とユーザー情報を返すメソッドが定義されています。
クラスに[Authorize]アノテーションが付いているのでアクセスにはデフォルトで認証が必要です。
認証トークンを発行するAuthenticateは誰でもアクセスできるように[AllowAnonymous]がついています。
[Authorize]
[Route("api/[controller]")]
[ApiController]
public class UsersController : ControllerBase {
  /* 中略 */

  // 認証トークン発行
  [AllowAnonymous]
  [HttpPost("authenticate")]
  public IActionResult Authenticate([FromBody]AppUser user) {
    var foundUser = authService.Authenticate(user.UserName, user.Password);
    if (foundUser is null) {
      return BadRequest(new { message = "ユーザー名もしくはパスワードは不正です" });
    }
    return Ok(foundUser);
  }

  // 認証が必要
  // ID のユーザー情報を返す
  [HttpGet("{id}")]
  public IActionResult GetAll(int id) {
    var user = userService.GetById(id);
    return Ok(user);
  }
}
モデルとデータベースコンテキスト
ユーザー登録の手間を省くためにOnModelCreatingにフックして最初からユーザーを作るようにしておきます。
// ユーザーモデル
public class AppUser {
  public int ID { get; set; }
  public string UserName { get; set; }
  public string Password { get; set; }
  public string Token { get; set; }
}

// データベースコンテキスト
public class MyDbContext : DbContext {
  public MyDbContext(DbContextOptions<MyDbContext> options)
    : base(options) { }

  public DbSet<AppUser> Users { get; set; }

  protected override void OnModelCreating(ModelBuilder modelBuilder) =>
    modelBuilder.Entity<AppUser>().HasData(
      new AppUser { ID = 1, UserName = "user1", Password = "password1" },
      new AppUser { ID = 2, UserName = "user2", Password = "password2" }
    );
}
認証サービス
JSON Web Tokenを発行する認証サービスは以下のように実装しました。
ユーザー名とパスワードでデータベースから検索し一致した場合、JSON Web Tokenを発行します。
public class JwtAuthService : IAuthService {
  /* 中略 */

  public JwtAuthService(MyDbContext myDbContext, IOptions<AppSettings> appSettings, IHostingEnvironment env) {
    this.myDbContext = myDbContext;
    this.appSettings = appSettings.Value;
    // インメモリDB を使うので初回のインスタンス生成時にシードデータを作っておく
    if (env.IsDevelopment() && !this.myDbContext.Users.Any()) {
      this.myDbContext.Database.EnsureCreated();
    }
  }

  // 認証処理
  AppUser IAuthService.Authenticate(string userName, string password) {
    var foundUser = myDbContext.Users.SingleOrDefault(
      x => x.UserName == userName && x.Password == password);
    if (foundUser is null) {
      return null;
    }
    foundUser.Token = GetSerializedToken(foundUser.ID, expiredDay: DateTime.UtcNow.AddDays(7));
    foundUser.Password = null;
    return foundUser;
  }

  // token 発行
  string GetSerializedToken(int id, DateTime expiredDay) {
    var tokenHandler = new JwtSecurityTokenHandler();
    // 秘密鍵
    var key = Encoding.ASCII.GetBytes(appSettings.Secret);
    var tokenDescriptor = new SecurityTokenDescriptor {
      Subject = new ClaimsIdentity(new Claim[] {
        new Claim(ClaimTypes.Name, id.ToString())
      }),
      // 有効期限
      Expires = expiredDay,
      // 署名
      SigningCredentials = new SigningCredentials(
        key: new SymmetricSecurityKey(key),
        algorithm: SecurityAlgorithms.HmacSha256Signature
      )
    };
    var token = tokenHandler.CreateToken(tokenDescriptor);
    var serializedToken = tokenHandler.WriteToken(token);
    return serializedToken;
  }
}
Startup.cs
アプリケーションのサービス構成は以下の通りです。
services.AddAuthentication AuthenticationBuilder.AddJwtBearerで認証オプションの設定を行っています。
オプションの設定は Microsoft Docs の方で検索すると出てくると思うのでそちらをご確認ください。
public class Startup {
  public Startup(IConfiguration configuration) {
    Configuration = configuration;
  }

  public IConfiguration Configuration { get; }

  public void ConfigureServices(IServiceCollection services) {
    services.AddCors();
    services.AddMvc();

    // インメモリ DB を使う設定
    services.AddDbContext<MyDbContext>(options => {
      options.UseInMemoryDatabase(databaseName: "MyDb");
    });

    // appsettings.json の AppSettings に 秘密鍵があるので設定を読み取ります。
    // ※本来は環境変数などから読み取ります。
    var appSettingsSection = Configuration.GetSection("AppSettings");
    services.Configure<AppSettings>(appSettingsSection);

    var appSettings = appSettingsSection.Get<AppSettings>();
    var key = Encoding.ASCII.GetBytes(appSettings.Secret);
    services.AddAuthentication(options => {
      options.DefaultAuthenticateScheme = JwtBearerDefaults.AuthenticationScheme;
      options.DefaultChallengeScheme = JwtBearerDefaults.AuthenticationScheme;
    }).AddJwtBearer(options => {
      options.RequireHttpsMetadata = false;
      options.SaveToken = true;
      options.TokenValidationParameters = new TokenValidationParameters {
        ValidateIssuerSigningKey = true,
        IssuerSigningKey = new SymmetricSecurityKey(key),
        ValidateIssuer = false,
        ValidateAudience = false
      };
    });
    services.AddScoped<IAuthService, JwtAuthService>();
    services.AddTransient<IUserService, UserService>();
  }

  public void Configure(IApplicationBuilder app, IHostingEnvironment env, ILoggerFactory loggerFactory) {
    loggerFactory.AddConsole(Configuration.GetSection("Logging"));
    loggerFactory.AddDebug();

    if (env.IsDevelopment()) {
      app.UseDeveloperExceptionPage();
    }

    // クロスオリジンを想定しているので
    app.UseCors(corsPolicyBuilder => {
      corsPolicyBuilder.AllowAnyOrigin()
        .AllowAnyMethod()
        .AllowAnyHeader()
        .AllowCredentials();
    });

    app.UseAuthentication();
    app.UseMvc();
  }
}
最後に
今回は Web API のみ実装しリクエストは POSTMAN で行いました。
実際のウェブアプリではトークンを発行した場合は、ローカルストレージに保存するのが一般的なようです。