はじめに
Reactivesearchを使ったELasticsearch SPAアプリをささっと作る手順です。Reactivesearchは、Elasticsearchに保管したデータを手軽に扱えるようにするフロントエンドUIコンポーネントです。React.js版とVue.js版がありますが、今回はReact版を使いました。Node.jsやReactについて理解することなく、Macの初期状態からとにかく動くものを作るところまでです。
「Reactivesearch v3でいい感じの検索SPAを30分ぐらいで作る」をかなり参考にさせていただきました。
作成するもの
完成形としてはこのような検索アプリです。都市や人口のデータをElasticsearchに入れておいて、国名を入力すると、その国の都市のリストが出てくるようなアプリです。

事前準備
Elasticsearch環境
「Amazon Elasticsearch Serviceで検索できる状態まで最速で立ち上げる」を参考に、Elasticsearch環境を事前に用意します。リンク先にあるとおり都市のデータも投入しておきます。
手順
Node.jsのインストール
ここでは、Node.jsのインストールとバージョン管理をするためにnodebrewを使います。nodebrewのインストールのためにMacのHomebrewを使います。
開発用ディレクトリに移動
Macでターミナルアプリを開き、開発用ディレクトリに移動。
Homebrewをインストール
まだMacにインストールしていない場合はHomebrewからインストールします。
$ /usr/bin/ruby -e "$(curl -fsSL https://raw.githubusercontent.com/Homebrew/install/master/install)"
もしくは、
$ /bin/bash -c "$(curl -fsSL https://raw.githubusercontent.com/Homebrew/install/master/install.sh)"
nodebrewをインストール
Homebrewを使ってnodebrewをインストールし、セットアップします。
$ brew install nodebrew
$ nodebrew setup
Fetching nodebrew...
Installed nodebrew in $HOME/.nodebrew

========================================
Export a path to nodebrew:

export PATH=$HOME/.nodebrew/current/bin:$PATH
========================================
nodebrewのパスの設定
ホームディレクトリの.bash_profileに以下を追加。
export PATH=$HOME/.nodebrew/current/bin:$PATH
Nodeをインストール
nodebrewでNode.jsの最新バージョン(ここではv13.11.0)をインストールし、このバージョンを使うように指定します。このNodeのバージョンではnpm(Node.jsのパッケージ管理)とnpx(Node.jsの実行環境管理)もいっしょにインストールされます。
$ nodebrew install-binary latest
Fetching: https://nodejs.org/dist/v13.11.0/node-v13.11.0-linux-x64.tar.gz
################################################################################ 100.0%
Installed successfully
$ nodebrew list
v13.11.0

current: none
$ nodebrew use v13.11.0
use v13.11.0
Reactivesearchのインストール
create-react-appモジュールのインストール
npmを使って、React環境を簡単にセットアップしてくれるcreate-react-appモジュールをインストールします。
$ npm install -g create-react-app
Reactプロジェクトの作成
開発用ディレクトリで下コマンドを実行します。ここでは、city-rankという名前で開発します。開発用ディレクトリ下にcity-rankというディレクトリが作られ、その配下にReact開発に必要なモジュールやファイルが自動で作成されます。
$ npx create-react-app city-rank
Reactアプリの起動
Reactプロジェクトディレクトリ(ここではcity-rank)に移動し、試しにReactアプリを起動してみます。
$ cd city-rank
$ npm start

Compiled successfully!
You can now view city-rank in the browser.

  Local:            http://localhost:3000
  On Your Network:  http://xxx.xxx.xxx.xxx:3000

Note that the development build is not optimized.
To create a production build, use npm run build.
上のように表示され自動的にブラウザが起動し、http://localhost:3000 にアクセスしてReactのデフォルト画面が表示されます。
Reactivesarchのインストール
Reactivesearchモジュールをインストールします。
$ npm install @appbaseio/reactivesearch
ReactiveSearchアプリの開発
「Amazon Elasticsearch Serviceで検索できる状態まで最速で立ち上げる」で作ったElasticsearchをバックエンドとします。
create-react-appでは、プロジェクトディレクトリ配下にsrcディレクトリが作られ、そこにindex.jsやApp.js、それらのCSSファイルなどが作成されています。App.jsを修正することでReactivesearchアプリを作っていきます。
App.jsの編集
src配下のApp.jsを編集し、下のとおりに書き換えます。
import React, {Component} from 'react';
import {DataSearch,ReactiveBase,ReactiveList,ResultList,SelectedFilters} from '@appbaseio/reactivesearch';

const {ResultListWrapper} = ReactiveList;

class App extends Component {
    render() {
        return (
            <div>
                <ReactiveBase
                    app = "cityindex"
                    url = "https://[Elasticsearch ServiceのエンドポイントURL]"
                >
                    <DataSearch
                        componentId = "search-component"
                        dataField = {["countryname"]}
                        queryFormat = "and"
                    />
                    <ReactiveList
                        componentId = "list-component"
                        pagination = {true}
                        size = {10}
                        react = {{
                            "and": ["search-component"]
                        }}
                    >
                        {({data, error, loading}) => (
                            <ResultListWrapper>
                                {
                                    data.map(item => (
                                        <ResultList key = {item._id}>
                                            <ResultList.Content>
                                                <ResultList.Title
                                                    dangerouslySetInnerHTML = {{
                                                        __html: item.cityname
                                                    }}
                                                />
                                                <ResultList.Description>
                                                    <div> {item.countryname} </div>
                                                    <div> {item.population}万人 </div>
                                                </ResultList.Description>
                                            </ResultList.Content>
                                        </ResultList>
                                    ))
                                }
                            </ResultListWrapper>
                        )}
                    </ReactiveList>
                </ReactiveBase>
            </div>
        );
    }
}

export default App;
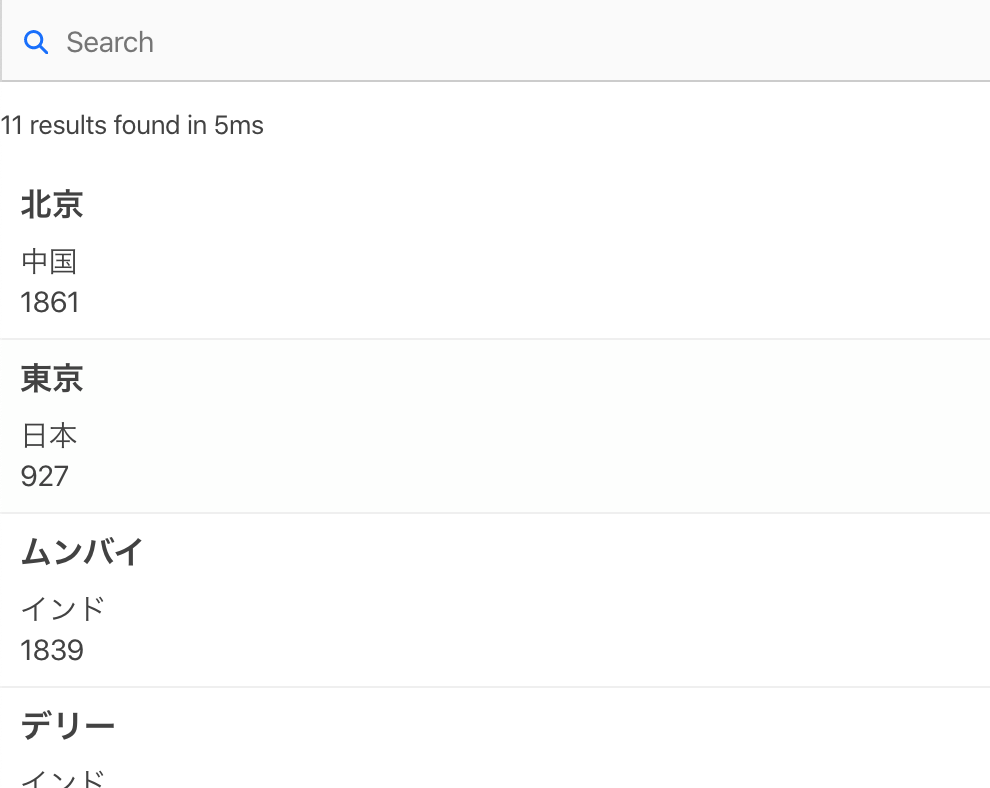
App.jsを保存すると、自動的にブラウザがリフレッシュされ、下の通り表示されます。
Search窓に国名(countryname)を入れると、動的にその国の都市だけにフィルターされます。
ランキング順に修正
都市を人工の多いランク順に並べ替えるため、ReactiveListコンポーネントに、sortOptionsをセットしrankの昇順に並び替えます。
<ReactiveList
    componentId = "list-component"
    pagination = {true}
    size = {10}
    react = {{
        "and": ["search-component"]
    }}
    sortOptions={[
        {label: "ランク", dataField: "rank", sortBy: "asc"}
    ]}
>
CSSで整形
App.jsの修正
CSSで見た目を整形するのに合わせてApp.js本体も以下の通りに書き直します。CityRank.cssという名前のCSSファイルを新たに作りインポートしています。
import React, {Component} from 'react';
import {DataSearch,ReactiveBase,ReactiveList,ResultList,SelectedFilters} from '@appbaseio/reactivesearch';
import './CityRank.css';

const {ResultListWrapper} = ReactiveList;

class App extends Component {
    componentDidMount() {
        document.title = "City Population Rank"
    }
    render() {
        return (
            <div className = "main-class">
                <ReactiveBase
                    app = "cityindex"
                    url = "https://search-bimilist2-elubdsi3x4beh3gb6tcbdxd72u.ap-northeast-1.es.amazonaws.com"
                >
                    <DataSearch
                        componentId = "search-component"
                        dataField = {["countryname"]}
                        title = "国名を入れてください"
                        placeholder = "例:日本"
                        showIcon={false}
                        className="search-class"
                    />
                    <ReactiveList
                        componentId = "list-component"
                        pagination = {true}
                        size = {10}
                        react = {{
                            "and": ["search-component"]
                        }}
                        sortOptions={[
                            {label: "ランク", dataField: "rank", sortBy: "asc"}
                        ]}
                        className = "list-class"
                        innerClass={{
                            button: "button-innerclass",
                        }}
                    >
                        {({data, error, loading}) => (
                            <ResultListWrapper>
                                {
                                    data.map(item => (
                                        <ResultList key = {item._id} className = "item-class">
                                            <ResultList.Content>
                                                <ResultList.Title
                                                    dangerouslySetInnerHTML = {{
                                                        __html: item.cityname
                                                    }}
                                                />
                                                <ResultList.Description>
                                                    <div className="description-class">
                                                        <div className="countryname-class"> {item.countryname} </div>
                                                        <div className="population-class"> {item.population}万人 </div>
                                                    </div>
                                                </ResultList.Description>
                                            </ResultList.Content>
                                        </ResultList>
                                    ))
                                }
                            </ResultListWrapper>
                        )}
                    </ReactiveList>
                </ReactiveBase>
            </div>
        );
    }
}

export default App;
CityRank.cssという名前のCSSファイルを同じフォルダに作成します。
body {
    background-color: #f9f4ef;
    display: flex;
    flex-direction: column;
    align-items: center;
}

.main-class {
    width: 480px;
    margin-top: 10px;
}

.search-class {
    width: 200px;
}

.list-class {
    color: #172c66;
}

.list-class .button-innerclass{
    color: #172c66;
    background-color: #fffffe;
}

.list-class .button-innerclass:hover{
    color: #001858;
    background-color: #eaddcf;
}

.list-class .button-innerclass:focus{
    color: #001858;
    background-color: #eaddcf;
}

.list-class .item-class {
    background-color: #fffffe;
    padding: 8px;
    margin: 2px;
}

.list-class .item-class:hover {
    background-color: #eaddcf;
}

.list-class article {
    color: #172c66;
    display: flex;
    flex-direction: row;
    align-items: center;
    padding: 2px;
}

.list-class h2 {
    color: #001858;
}

.list-class .description-class {
    display: flex;
    flex-direction: row;
    color: #172c66;
}

.list-class .countryname-class {
    width: 120px;
}

.list-class .population-class {
    width: 90px;
    padding-right: 10px;
    text-align: right;
}
保存すると次のような見た目になります。
以上となります。
今回の手順で勘違いしやすいポイント
Node.jsやReact系はググるとたくさん情報が出てきますが古いものや部分的で混乱する情報もいろいろありますので、勘違いしないよう整理しました。
node initは不要
今回はcreate-react-appを使います。create-react-appが同等の準備してくれますので、node initの実行は不要です。
npm installに--saveは不要
npmの現バージョンでは--saveオプションなしでも同等の処理となります。