今回のケース
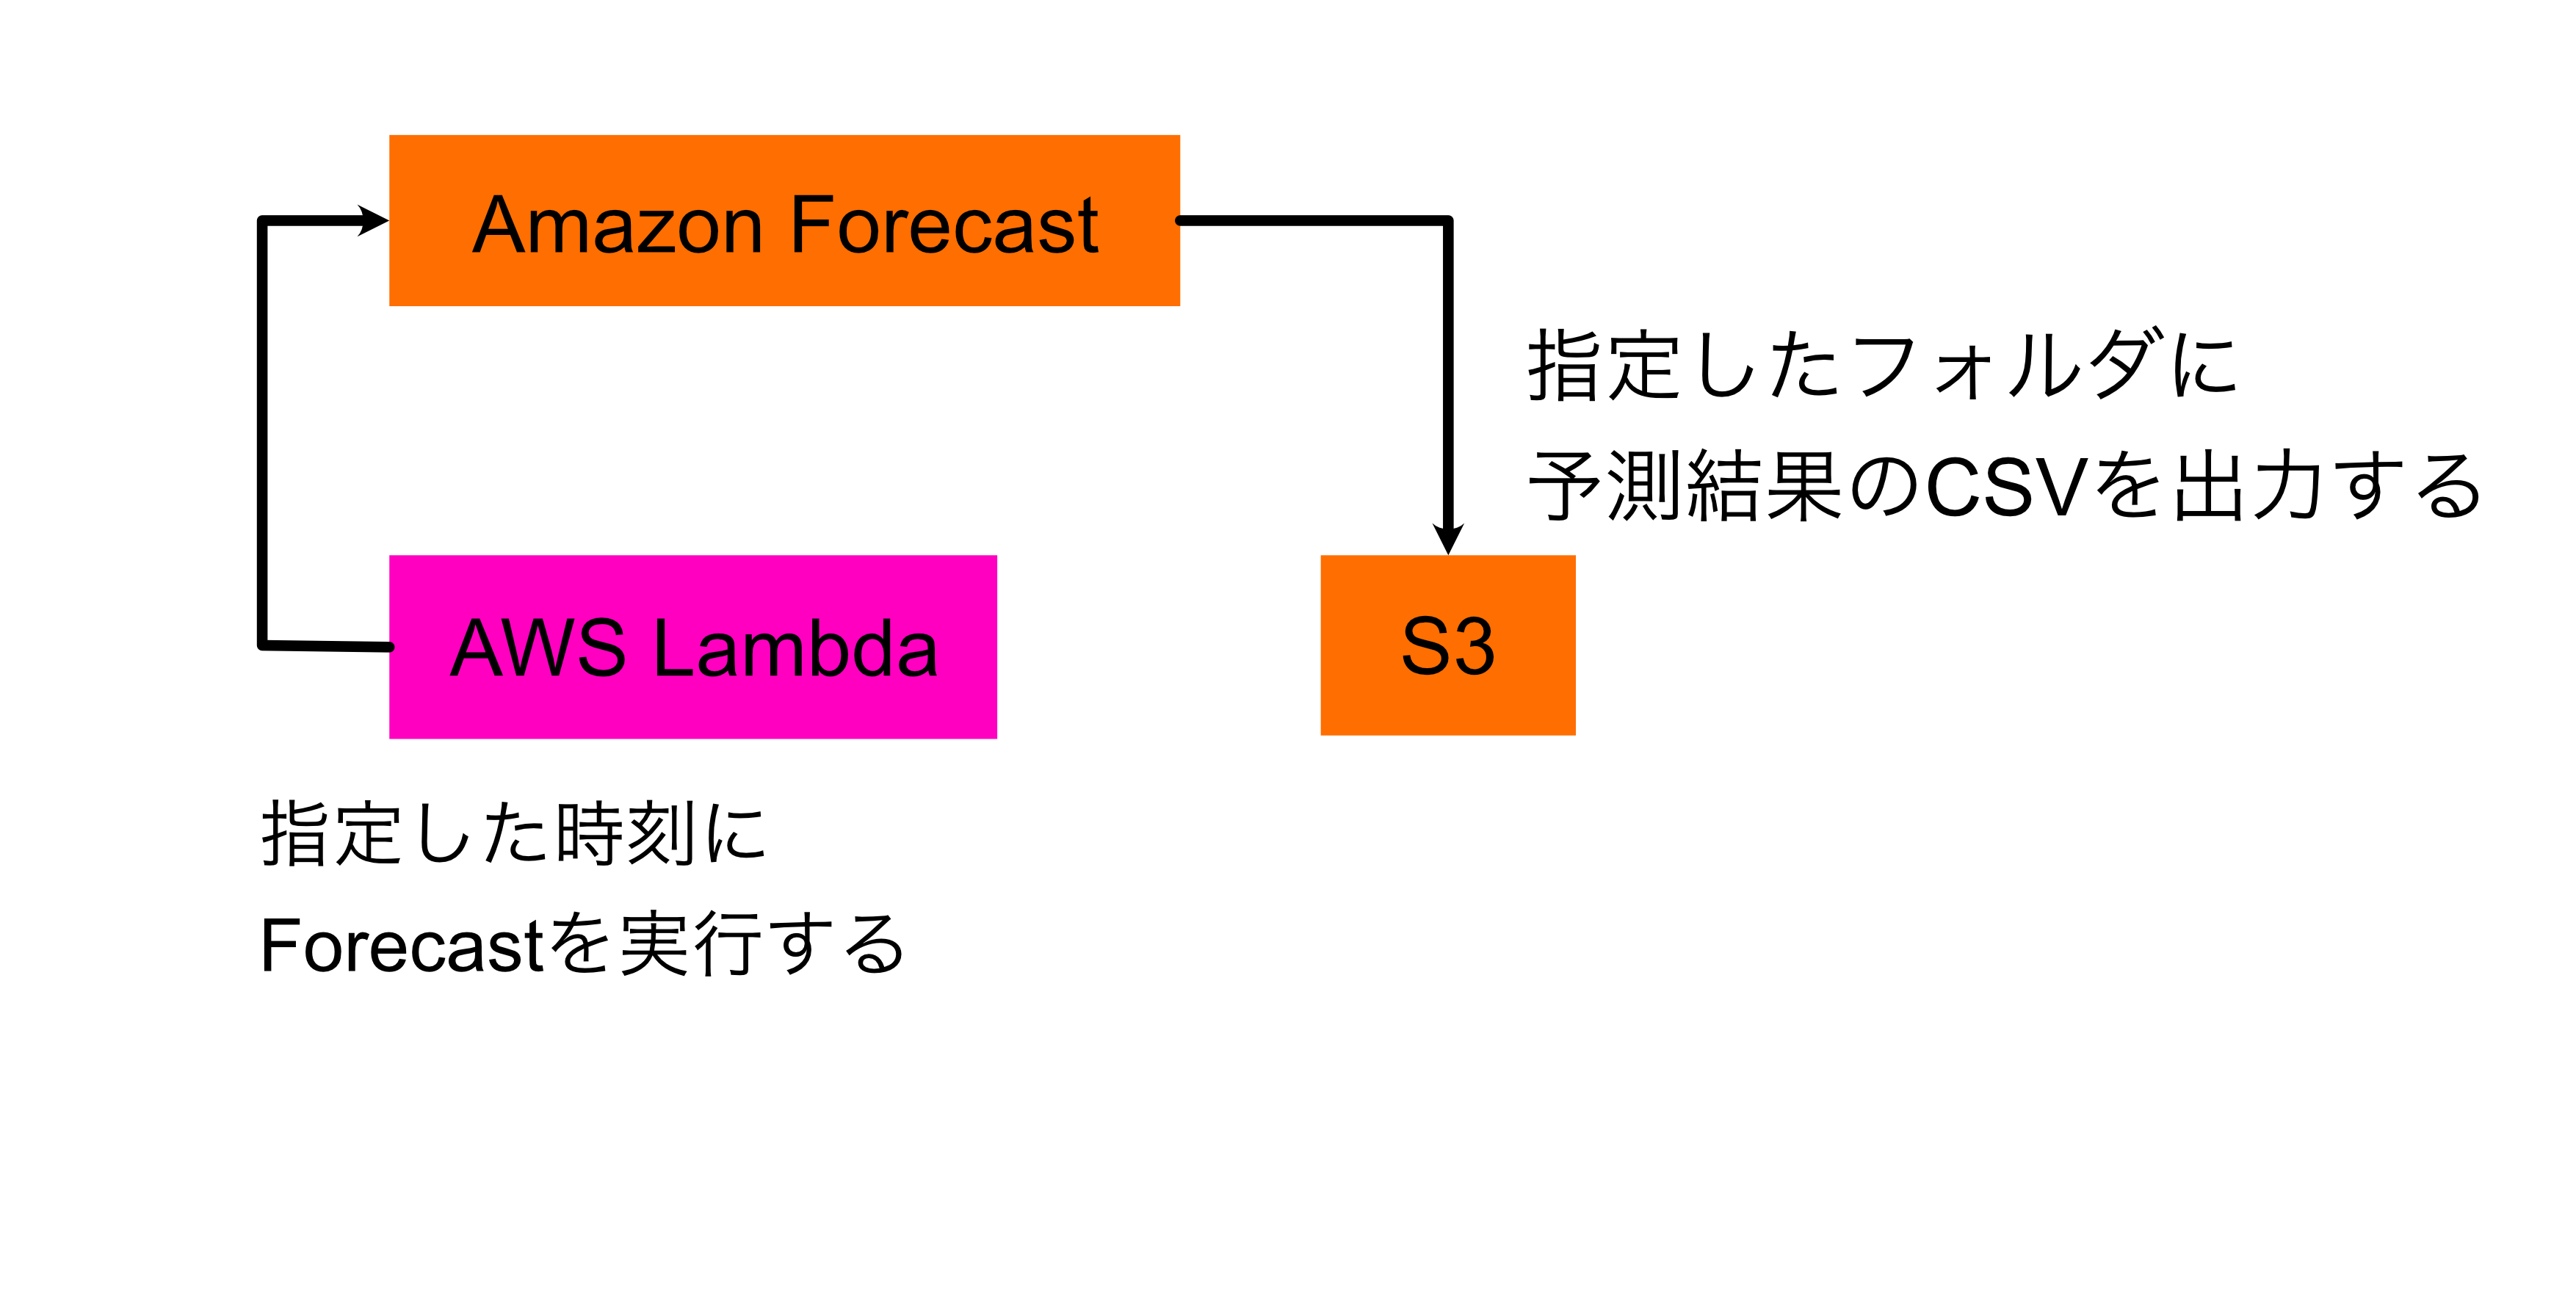
今回のケースは学習したAmazon ForecastをAWS Lambdaで指定時刻になったらS3にCSVファイルを出力することです。
本記事ではそのための方法を説明します。
前提
予測子(Predictorの作成)の作成、モデル(Forecast)の作成が終わっていることとします。
流れ
- Lambdaに権限を与える。
- Lambdaにコードを書く
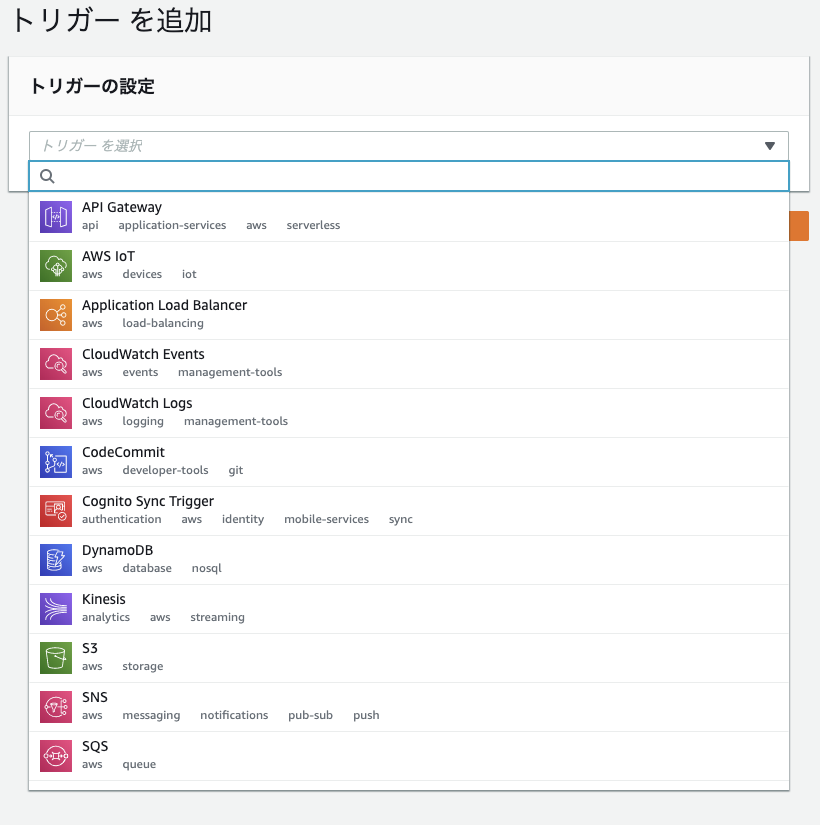
- トリガーを設定する
- 実行されるのを待つ
という流れです。
Lambda Function
execution_forecast
import json
import boto3
# リージョンを指定する
session = boto3.Session(region_name='us-east-2')
forecast = session.client(service_name='forecast')
forecastquery = session.client(service_name='forecastquery')

def lambda_handler(event, context):

    forecastArn = 'モデル(forecast)のArnを記入する'
    forecastResponse = forecastquery.query_forecast(
    ForecastArn=forecastArn,
    # item_idのIDを指定する。
    Filters={"item_id":"0001"}
)
    formatted = json.dumps(forecastResponse, indent=4, sort_keys=True, separators=(',', ': '))
    # バケット名を記入する
    s3_bucket = "forecastbucket"
    # S3のフォルダ構造を記入する
    s3_key_prefix = "projects/0001/models/0001/predictedData/"
    # ファイルの名前を書く
    filename = 'predict0926.json'
    s3_client = boto3.client('s3')
    s3_client.put_object(
        Bucket=s3_bucket,
        Key = s3_key_prefix + filename,
        Body = formatted
    )

    return {
        'statusCode': 200,
        'body': json.dumps('Success')
    }
boto3とjsonは最初からForecast内にあるので、自分でimportする必要はありません。
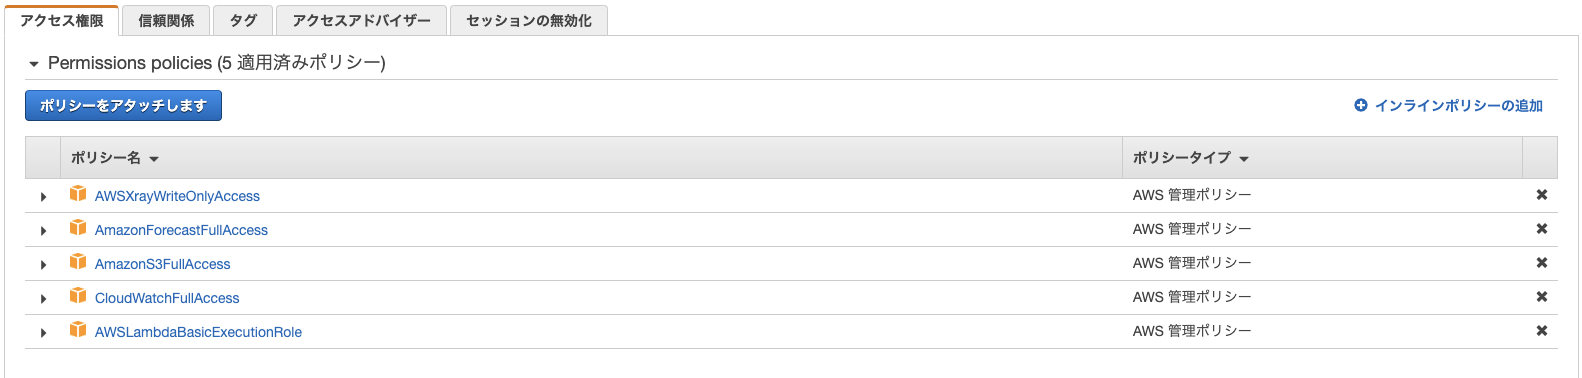
実行するために権限を与える
画像の5つを追加
サービス => IAMと入力 => ロール => ポリシーのアタッチ
lambdaのダッシュボードから、CloudWatch Eventsをクリック。
例えば毎週の17時に実行したい場合は次のように入力します。
※これはUTC(協定世界時)時間で設定する必要があります。
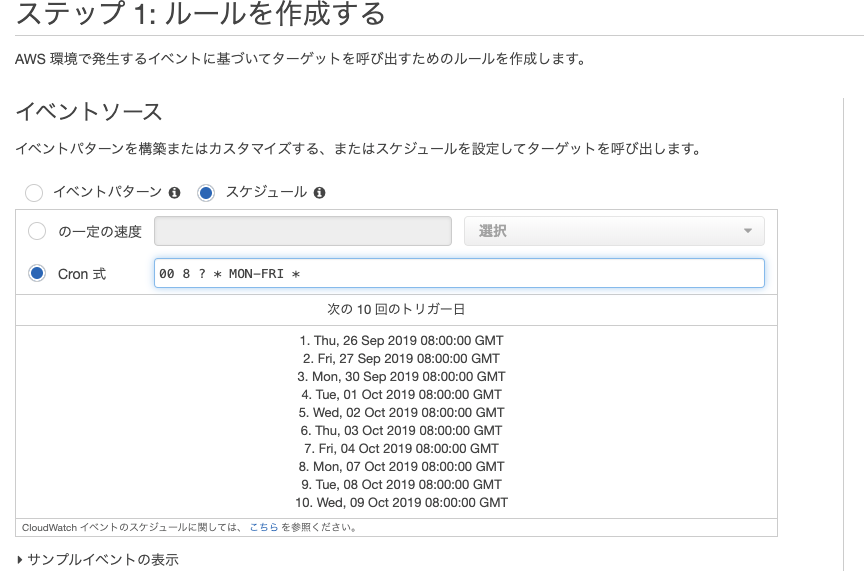
今回のケースのフォーマットは
分(mm) 時刻(yy) * 繰り返したい曜日の範囲 *
になっております。
これらを入力して時刻になると指定したフォルダに予測結果のCSVが出力されます。