activity.xml
<RelativeLayout xmlns:android="http://schemas.android.com/apk/res/android"
    xmlns:tools="http://schemas.android.com/tools"
    android:layout_width="match_parent"
    android:layout_height="match_parent"
    android:paddingLeft="@dimen/activity_horizontal_margin"
    android:paddingRight="@dimen/activity_horizontal_margin"
    android:paddingTop="@dimen/activity_vertical_margin"
    android:paddingBottom="@dimen/activity_vertical_margin"
    tools:context=".MainActivity">

    <TextView
        android:text="@string/hello_world"
        android:layout_width="wrap_content"
        android:layout_height="wrap_content" android:layout_alignParentTop="true"
        android:layout_centerHorizontal="true" android:id="@+id/countText"/>
    <Button
        android:layout_width="wrap_content"
        android:layout_height="wrap_content"
        android:text="+"
        android:id="@+id/countButton" android:layout_below="@+id/countText" android:layout_centerHorizontal="true"
        android:layout_marginTop="150dp"/>

</RelativeLayout>
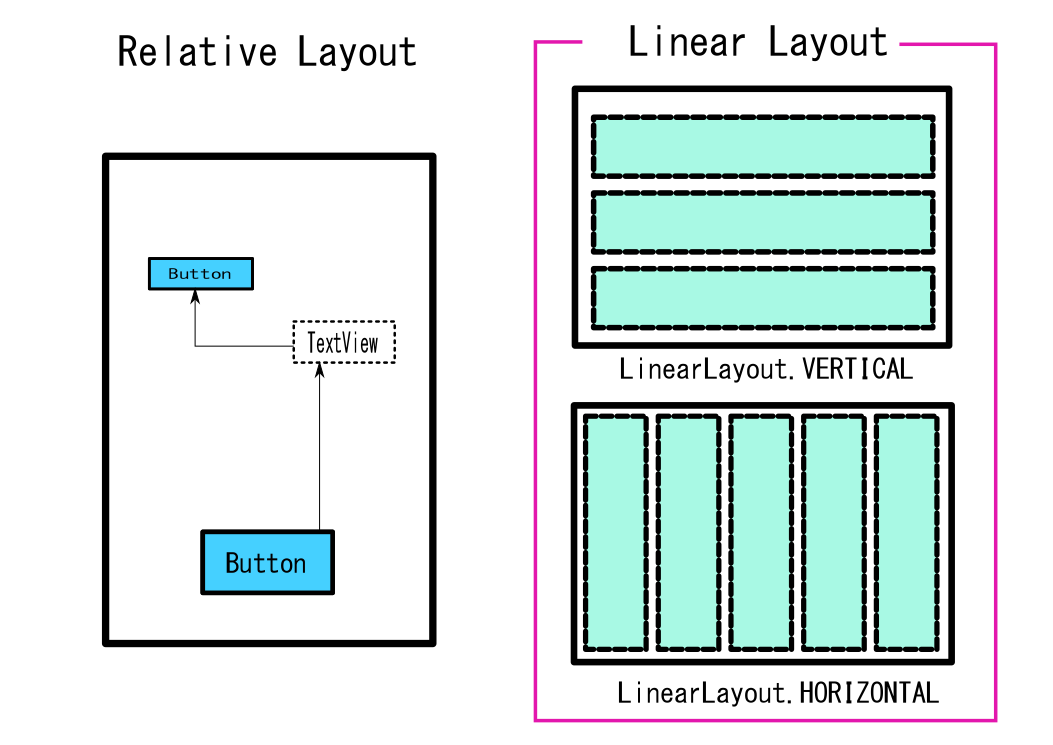
Androidアプリのレイアウトファイルは初期ではReLativeLayoutになっており、マウスでTextViewやButtonを配置することができます。しかし、これではTextViewからどれだけの位置にあるかで判定しています。そのためとても扱いずらいです。
そこでLinearLayoutを使うことになるのですが、LinearLayoutには二種類の属性が指定できます。VERTICALとHORIZONTALがあります。VERTICALは縦にオブジェクトを配置されていきます。そしてHORIZONTALは横にオブジェクトが配置されていきます。
覚え方はバーっと上に並べるバーティカル。ホーっと驚くくらいの横並びのHORIZONTAL。
基本はこの二つを利用してアプリ開発をしていくことになります。