現在のフロントエンド開発のプロジェクトでは、ESLintとPrettierは欠かせない存在となっていると思います。
私が現在携わっている案件(ionicでフレームワークはAngularを使用)でも、ESLintとPrettierを導入してコーディングルールやフォーマットを統一しています。
本記事では、プロジェクトにESLint、Prettierを導入するメリットを簡単に整理し、実際にAngularのプロジェクトに導入してみるところまでまとめていこうと思います。
ESLintとPrettierを導入するメリット
ESLintとPrettierはどちら開発者の補助をしてくれるツールになっています。
それぞれの役割としては、以下のようになるかと思います。
◆ESLint
▶︎ 構文エラーや違反箇所がチェックしてくれる。
◆Prettier
▶︎ コードを見やすいように整形してくれる。
コードの整形についてはESLintだけでもコードの整形を行うことが可能ですが、ESLintでカバーしきれない部分をPrettierが補っていると言うことになります。
◆ESLint
ESLint(読み方:「イーエスリント」)は、JavaScriptやTypeScriptの静的検証ツールになります。
構文エラーやコーディングルールに違反していないかチェックを行い、エラーや違反箇所を指摘して開発を補助してくれるツールになります。
導入のメリットとしては、
- プログラムを動かす前にコードの問題点を指摘してくれるので、効率的に品質の高い開発を行うことができる。
- いろいろなルールをカスタマイズして設定することができるので、プロジェクトに合わせた運用を行うことができる。
- 複数人で開発において、コーディングに一貫性を持たせることができる。
などが挙げられます。
Visual Studio Code (VS Code)では、ESLintのプラグインを合わせて導入することで、リアルタイムで違反箇所を指摘してくれます。
◆Prettier
Prettier(読み方:「プリティア」)は、JavaScriptやTypeScriptはもちろん、HTMLやCSSなど多くのプログラムをサポートしているフォーマッターになります。
コーディングルールを設定しておくと、Prettierがルールに則ってフォーマッターを実行してコードを統一してくれます。
複数人で開発の際では、コメントの書き方やスペースやインデントの使い方など個々の癖を統一できるので、チームのみんなが見やすいソースコードを作成することができます。
ESLintとPrettierを導入してみる
それぞれの役割を整理したところで、実際にAngularのプロジェクトを作成し、この2つを導入してみたいと思います。
今回サンプルで作成するプロジェクトの諸々のバージョンは以下になります。
$ ng version

     _                      _                 ____ _     ___
    / \   _ __   __ _ _   _| | __ _ _ __     / ___| |   |_ _|
   / △ \ | '_ \ / _` | | | | |/ _` | '__|   | |   | |    | |
  / ___ \| | | | (_| | |_| | | (_| | |      | |___| |___ | |
 /_/   \_\_| |_|\__, |\__,_|_|\__,_|_|       \____|_____|___|
                |___/


Angular CLI: 14.2.8
Node: 16.13.1
Package Manager: npm 8.19.2
OS: darwin x64

Angular: 14.2.9
... animations, common, compiler, compiler-cli, core, forms
... platform-browser, platform-browser-dynamic, router

Package                         Version
---------------------------------------------------------
@angular-devkit/architect       0.1402.8
@angular-devkit/build-angular   14.2.8
@angular-devkit/core            14.2.8
@angular-devkit/schematics      14.2.8
@angular/cli                    14.2.8
@schematics/angular             14.2.8
rxjs                            7.5.7
typescript                      4.7.4
ESLintを設定する
ESLintを追加する
それでは実際にAngularのプロジェクトにESLintを導入してみましょう。
まずは適当なAngularのプロジェクトを作成してください。
作成後はプロジェクトフォルダの配下に移動し、下記のコマンドを実行します。
$ ng lint
上記のコマンドはリンターを実行するコマンドになりますが、まだESLintを導入していないためリンターは実行されません。
その代わりに下記のようなメッセージが表示されるかと思います。
「ESLintを追加するか?」と確認されるので、Yを入力して実行します。
$ ng lint
Cannot find "lint" target for the specified project.
You can add a package that implements these capabilities.

For example:
  ESLint: ng add @angular-eslint/schematics

Would you like to add ESLint now? (Y/n) Y
続けてschematicsでインストールするか確認されるので、同じくYを入力して実行します。
Would you like to add ESLint now? Yes
ℹ Using package manager: npm
✔ Found compatible package version: @angular-eslint/schematics@14.1.2.
✔ Package information loaded.

The package @angular-eslint/schematics@14.1.2 will be installed and executed.
Would you like to proceed? (Y/n) Y
下記のようなメッセージが表示されれば、ESLintの追加に成功しています。
✔ Packages successfully installed.

    All @angular-eslint dependencies have been successfully installed 🎉

    Please see https://github.com/angular-eslint/angular-eslint for how to add ESLint configuration to your project.

    We detected that you have a single project in your workspace and no existing linter wired up, so we are configuring ESLint for you automatically.

    Please see https://github.com/angular-eslint/angular-eslint for more information.

CREATE .eslintrc.json (984 bytes)
UPDATE package.json (1422 bytes)
UPDATE angular.json (3443 bytes)
✔ Packages installed successfully.
上記実行後にプロジェクトのルート配下を確認すると、ESLintの設定ファイルである「.eslintrc.json」というファイルが追加されているかと思います。
ESLintチェックを実行してみる
ESLintが追加されたので、一番初めに実行した下記のコマンドを再度実行すると、ESLintのチェックが実行されます。
$ ng lint
All files pass linting.
「All files pass linting.」と表示されているので、チェックが問題なかったようです。
チェックが問題がある時はどのように表示されるのかも合わせて確認したいと思います。
ESLintのルールは設定ファイルである「.eslintrc.json」に記載されており、導入直後は以下の設定になっているかと思います。
{
  "root": true,
  "ignorePatterns": [
    "projects/**/*"
  ],
  "overrides": [
    {
      "files": [
        "*.ts"
      ],
      "parserOptions": {
        "project": [
          "tsconfig.json"
        ],
        "createDefaultProgram": true
      },
      "extends": [
        "plugin:@angular-eslint/recommended",
        "plugin:@angular-eslint/template/process-inline-templates"
      ],
      "rules": {
        "@angular-eslint/directive-selector": [
          "error",
          {
            "type": "attribute",
            "prefix": "app",
            "style": "camelCase"
          }
        ],
        "@angular-eslint/component-selector": [
          "error",
          {
            "type": "element",
            "prefix": "app",
            "style": "kebab-case"
          }
        ]
      }
    },
    {
      "files": [
        "*.html"
      ],
      "extends": [
        "plugin:@angular-eslint/template/recommended"
      ],
      "rules": {}
    }
  ]
}
上記の記載内容のうち、rulesプロパティに記載されている内容がESLintでチェックするルールになります。
例えば、component-selectorのルールに"prefix": "app"と設定されているため、コンポーネントのセレクターのプレフィックスをapp以外の名前に設定するとLintエラーで指摘されます。
$ ng lint

[プロジェクトのパス]/src/app/app.component.ts
  4:13  error  The selector should start with one of these prefixes: "app" (https://angular.io/guide/styleguide#style-02-07)  @angular-eslint/component-selector

✖ 1 problem (1 error, 0 warnings)

Lint errors found in the listed files.
しっかりとチェックされているようですね!
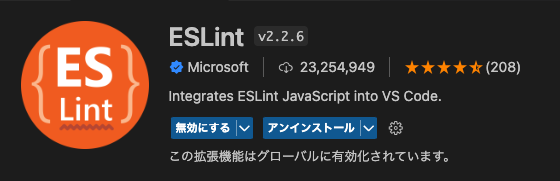
VS CodeにESLintのプラグインを追加して、リアルタイムで違反がないか確認する
VS CodeにESLintのプラグインを追加すると、エディタ上にエラー箇所と内容が表示されるようになります。
いちいちコマンドを実行しなくてもエラーに気づけるので合わせて追加しましょう。
追加するのはこちらのプラグインです。
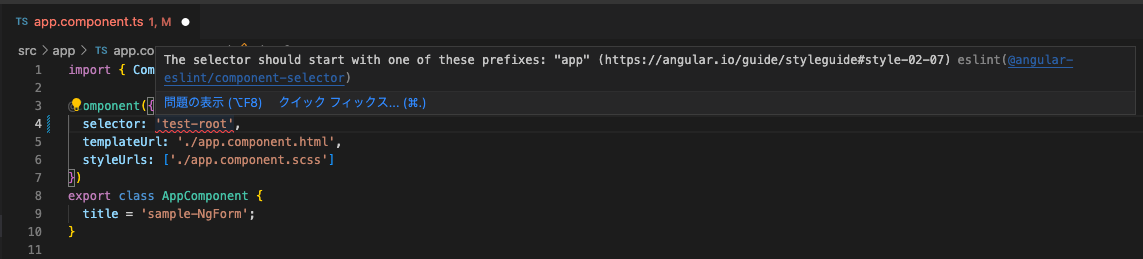
プラグインを導入すると、エラー箇所は下記の画像のように赤い波線で指摘してくれるようになります。めっちゃ便利。。
Prettierを設定する
続いてはPrettierを設定したいと思います。
Prettierを追加する
PrettierとESLintと併用するために、以下のコマンドで複数のパッケージをインストールします。
npm install --save-dev prettier eslint-config-prettier @typescript-eslint/eslint-plugin
- prettier: Prettierの本体。
- eslint-config-prettier:Prettierと競合するESLintのルールを無効化する。
- @typescript-eslint/eslint-plugin:ESLintでTypeScriptのルールを適用するためのプラグイン。
ESLintの設定ファイルにPrettierの情報を追記する
ESLintとPrettierを併用できるように、ESLintの設定ファイル「.eslintrc.json」を下記のように修正します。
{
  "root": true,
  "ignorePatterns": [
    "projects/**/*"
  ],
  "overrides": [
    ・・・ 省略 ・・・
      "extends": [
        "plugin:@angular-eslint/recommended",
        "plugin:@angular-eslint/template/process-inline-templates",
        "prettier" // これを追加
      ],
     ・・・ 省略 ・・・
Prettierの設定ファイルを作成
Prettierの設定ファイル「.prettierrc.json」を作成して、ルール設定を記載します。
{
  "printWidth": 120, // 折り返す行の長さ
  "singleQuote": true, // ダブルクォートの代わりにシングルクォートを使用
}
フォーマッターを実行してみる
今回はESLintをでチェックを行なった後にフォーマッターを実行させたいので、「package.json」ファイルにコマンドを設定していこうと思います。
  "scripts": {
    "ng": "ng",
    "start": "ng serve",
    "build": "ng build",
    "watch": "ng build --watch --configuration development",
    "test": "ng test",
    "lint": "ng lint",
    "lint-fix": "eslint --cache --fix src/ && prettier --write src/"// ここを追加
  },
scriptsを設定した上で、下記のコマンドを実行すると、ESLintをでチェックを行なった後にフォーマッターが実行されるようになります!
npm run lint-fix
まとめ
本記事ではESLintとPrettierについて軽く整理し、Angularのプロジェクトの導入手順についてまとめました。
細かいルールの設定などまだ自分自身でも整理できていないので、どこかでまた整理していきたいと思います。