 あくまで認識させるとこまでのメモ。
やること
M5StampS3 をI2Cスレーブとして設定し、 Aruduino系(今回はESP32DevkitC)からI2Cデバイスとして認識させます。

準備物・実施環境
- M5StampS3
- ESP32DevkitC(ArduinoでももちろんOK)
- Arduino IDE
注意点
- 書き込みモードにするには、本体のボタンを押しながらUSBを挿す必要があります。
- M5StampS3では通常のシリアルモニタ命令は使えず、USBSerialとして指定する必要があります。
スケッチ
メイン(マスター)側(ESP32DevkitC)
#include <Wire.h>
#define PIN_SDA 21
#define PIN_SCL 22

void setup()
{
  Wire.setPins(PIN_SDA, PIN_SCL);
  Wire.begin();
  Serial.begin(115200);
  while (!Serial);
  Serial.println("\nI2C Scanner");
}

void loop()
{
  byte error, address;
  int nDevices;
  Serial.println("Scanning...");
  nDevices = 0;
  for (address = 1; address < 127; address++ )
  {
    Wire.beginTransmission(address);
    error = Wire.endTransmission();

    if (error == 0)
    {
      Serial.print("I2C device found at address 0x");
      if (address < 16)
        Serial.print("0");
      Serial.print(address, HEX);
      Serial.println("  !");

      nDevices++;
    }
    else if (error == 4)
    {
      Serial.print("Unknown error at address 0x");
      if (address < 16)
        Serial.print("0");
      Serial.println(address, HEX);
    }
  }
  if (nDevices == 0)
    Serial.println("No I2C devices found\n");
  else
    Serial.println("done\n");
  delay(3000);
}
サブ(スレーブ)側(M5StampS3)
今回はI2Cデバイスとして認識させる用なので、onRequestやonReceiveの通信の内容についてはまだデタラメです。
#include "Wire.h"
#define PIN_SDA 13
#define PIN_SCL 15
#define I2C_DEV_ADDR 0x58

uint32_t i = 0;

void onRequest() {
  Wire.print(i++);
  Wire.print(" Packets.");
  USBSerial.println("onRequest");
}

void onReceive(int len) {
  USBSerial.printf("onReceive[%d]: ", len);
  while (Wire.available()) {
    USBSerial.write(Wire.read());
  }
  USBSerial.println();
}

void setup() {
  USBSerial.begin(115200);
  USBSerial.setDebugOutput(true);
  USBSerial.print("Start as I2C 0x");
  USBSerial.println(I2C_DEV_ADDR, HEX);

  Wire.setPins(PIN_SDA, PIN_SCL);
  Wire.onReceive(onReceive);
  Wire.onRequest(onRequest);
  Wire.begin((uint8_t)I2C_DEV_ADDR);
}

void loop() {
}
接続
| ESP32DevkitC | M5StampS3 |
|---|---|
| GND | GND |
| 5V | 5V |
| 21番ピン(SDA) | 13番ピン(SDA) |
| 22番ピン(SCL) | 15番ピン(SCL) |
他のI2Cデバイスがある場合も同様に接続します。
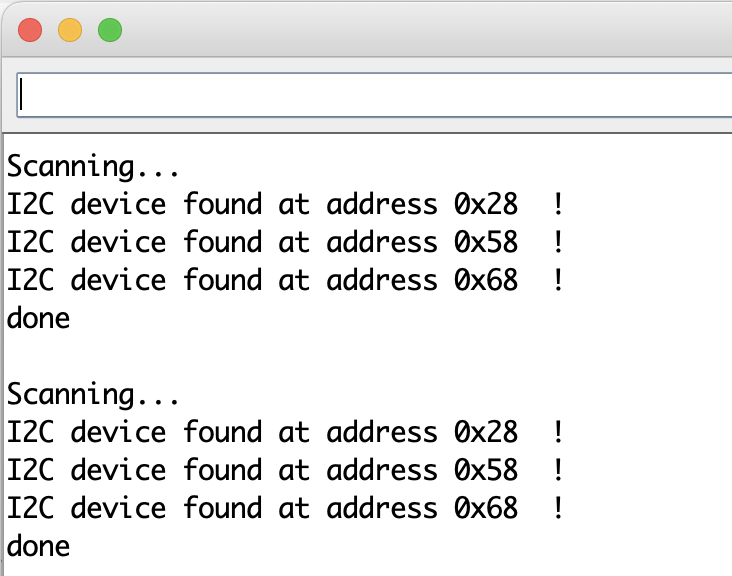
実行結果
下記はESP32DevkitC(I2Cマスター)のシリアルモニタの表示例です。 I2CデバイスとしてのM5StampS3に加え、センサーのMPU6050, BNO055も同時に接続した場合の実行結果です。
オリジナルのI2Cデバイスのアドレスの選び方
下記が参考になりました。ありがとうございます。
続き
配列のような一連のデータをM5StampS3から送信することもできました。
記事は以下になります。
課題感
ただし、S3のI2C通信速度がプルアップ抵抗を入れても100kまでしか対応しません。 下記のライブラリを使うことで400kに対応することができるかもしれません。