はじめに
今風のフロント開発に憧れて React にチャレンジしみる。
トレンドな技術を身につけて今風エンジニアになる!

Home brew のインストール
公式ページのコマンドをコピペしターミナルから実行する。
インストールが完了したら、問題がないか確認する。
$ brew doctor
Your system is ready to brew.
エラーなし。
nodebrew のインストール
以下のコマンドでnodebrewをインストールする。
node.js のバージョン管理とか、楽になるらしい。
$ brew install nodebrew
インストールが完了したら以下のコマンドでバージョンを確認する。
$ nodebrew -v
Node.js のインストール
必要なバージョンを指定してインストールする。
$ nodebrew install-binary {version}
インストールするバージョンを確認するには
$ nodebrew ls-remote
最新版を取得する際は
$ nodebrew install-binary latest
安定版を取得する際は
$ nodebrew install-binary stable
以下のコマンドでインストールされたバージョンを確認んする。
$ nodebrew ls
ここで以下のようなエラーが出たためディレクトリを作成した。
curl: (23) Failed writing body (0 != 941)
download failed: https://nodejs.org/dist/v7.10.0/node-v7.10.0-darwin-x64.tar.gz
>```
$ mkdir -p ~/.nodebrew/src
インストール直後はcurrent: noneとなっているため、必要なバージョンを有効化する。
$ nodebrew use v7.1.0
node が使えるように環境パスを通す。
$ echo 'export PATH=$HOME/.nodebrew/current/bin:$PATH' >> ~/.bash_profile
追記した後、ターミナルを再起動する。
node のバージョンを確認する。
$ node -v
create-react-app のインストール
以下のコマンドで create-react-app をインストールする。
何かと使い勝手がいいらしい。
npm install -g create-react-app
アプリを作成してみる。
アプリ名はなんでも良い。ここでは"new_world"
$ create-react-app new_world
作成したディレクトリに移動してアプリを起動する。
$cd new_world
$npm start
すると、ブラウザが起動する。
React のロゴが表示されれば OK!
やっとでスタート地点に到着した。
コンポーネントの作成
React といえばやはりコンポーネント、コンポーネントを作成してみる。
タイトルと説明を表示するコンポーネントである。
props(引数)としてtitleとdescriptionを受け取り表示させる。
srcディレクトリ下に2つファイルを作成する。
- src/ToDoListItem.js
import React, { Component } from 'react';
import './ListItem.css';

class ListItem extends Component {
  render() {
    const {
      title,
      description
    } = this.props;

    return (
      <div className="ListItem">
        <div className="ListItem-title">{title}</div>
        <div className="ListItem-description">{description}</div>
      </div>
    );
  }
}

export default ListItem;
- src/ToDoListItem.css
.ListItem {
    border: 1px solid aquamarine;
    margin: 12px;
    border-radius: 4px;
    width: 300px;
    background-color: #fafbfd;
    box-shadow: 1px 2px 5px 3px rgba(0,0,0,.1);
    padding: 4px 2px;
  }

  .ListItem-title {
    font-size: 18px;
    margin: 0 8px 4px;
    border-bottom: 1px solid #333;
    text-align: left;
    padding: 4px 8px;
  }

  .ListItem-description {
    word-wrap: break-word;
    padding: 8px;
  }
ListItemコンポーネントは状態を持たず、propsに渡された引数によって表示内容が変わるだけの単純なコンポーネントである。
今回作成したコンポーネントが実際に動くか、 App.js を書き換えて確かめて見る。
import React, { Component } from 'react';
import './App.css';
import ListItem from "./ListItem.js"

class App extends Component {
  render() {
    return (
      <div className="App">
        <div>
          <ListItem
            title="Reactの勉強"
            description="Reactをインストールして一覧を表示する画面を作成する。"
          />
        </div>
      </div>
    );
  }
}

export default App;
コンポーネントが以下のように表示される。

複数コンポーネントを表示する
App.jsに表示する内容を JSON で複数用意し、 JSON 分コンポーネントを表示するようにする。
List を state に定義し、 List 配列分コンポーネントを展開するようにする。
import React, { Component } from 'react';
import './App.css';
import ListItem from "./ListItem.js"

class App extends Component {
  // List を state に定義、初期値は JSON 2つ
  state = {
    list: [
      {title: "コンポーネントを表示",description: "まずはベタ書き" },
      {title: "コンポーネントを複数表示",description: "JSONを使用する" }
    ]
  }

  render() {
    return (
      <div className="App">
        <div>
        {/* list 配列の要素数分 ListItem コンポーネントを展開 */}
          {this.state.list.map(list => (
            <ListItem
              key={list.title}
              title={list.title}
              description={list.description}
            />
          ))}
        </div>
      </div>
    );
  }
}

export default App;
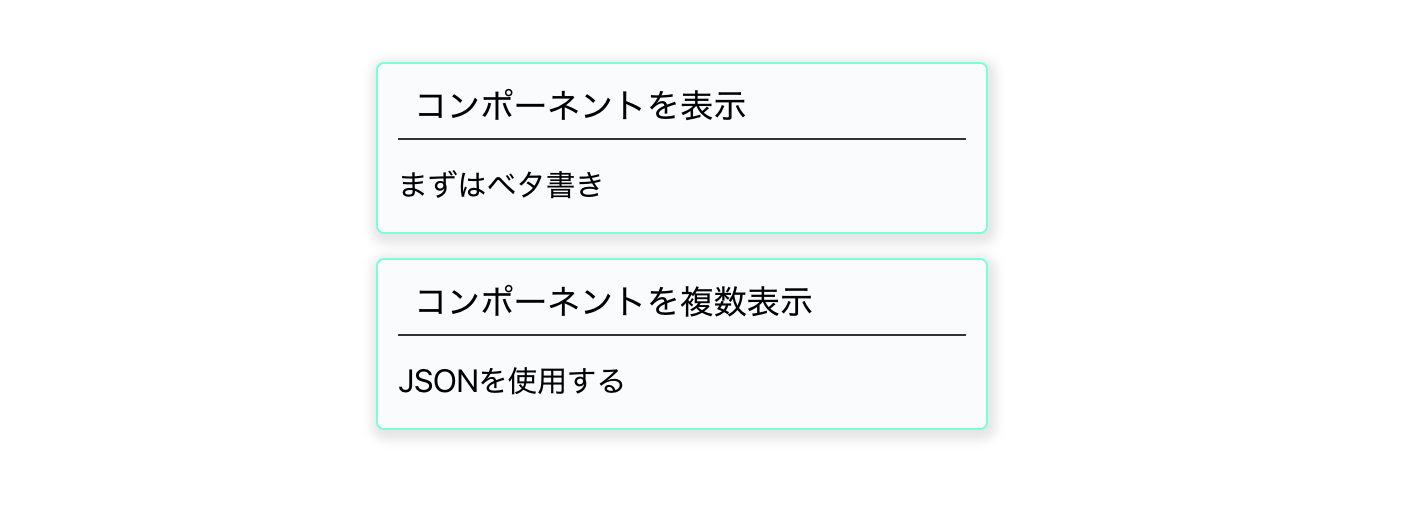 用意した JSON 分コンポーネントが表示された。
登録した内容を表示する
いい感じに一覧ぽくなってきたので、入力フォームを作成し登録した内容を表示できるようにしてみる。
App.jsを変更して form を追加する。
- src/App.js
import React, { Component } from 'react';
import './App.css';
import ListItem from "./ListItem.js"

class App extends Component {
  // List を state に定義、初期値は[]
  state = {
    list: []
  }

  render() {
    return (
      <div className="App">
        <form
          className="App-form"
          onSubmit={e => {
            // form のデフォルトのイベントをキャンセル
            e.preventDefault();

            // id が title の Element を取得
            const titleElement = e.target.elements["title"]
            // id が description の Element を取得
            const descriptionElement = e.target.elements["description"];

            // list state に追加
            this.setState(
              {
                list: this.state.list.concat({
                  title: titleElement.value,
                  description: descriptionElement.value
                })
              },
              // state の変更後に入力した値を空にする
              () => {
                titleElement.value = "";
                descriptionElement.value = "";
              }
            )
          }}
        >
          <div>
            <input
              id="title"
              placeholder="title"
            />
            <textarea
              id="description"
              placeholder="description"
            />
          </div>
          <div>
            <button
              type="submit"
            >
              登録
            </button>
          </div>
        </form>
        <div>
        {/* list 配列の要素数分 ListItem コンポーネントを展開 */}
          {this.state.list.map(list => (
            <ListItem
              key={list.title}
              title={list.title}
              description={list.description}
            />
          ))}
        </div>
      </div>
    );
  }
}

export default App;
ついでにスタイルも変更する。
- src/App.css
.App {
  width: 800px;
  margin: 20px auto;
  display: flex;
  flex-direction: column;
  justify-content: center;
  align-items: center;
}

.App-form {
  display: flex;
  flex-direction: column;
  width: 300px;
  margin: 8px 4px;
  padding-bottom: 16px;
  border-bottom: 1px solid #aaa;
}

.App-form > :nth-child(1) {
  display: flex;
  flex-direction: column;
}

.App-form > :nth-child(1) > * {
  outline: none;
  border: 1px solid #aaa;
  transition: all .3s;
  border-radius: 2px;
}

.App-form > :nth-child(1) > *:focus {
  box-shadow: 0 0 7px #1abc9c;
  border: 1px solid #1abc9c;
}

.App-form > :nth-child(1) > :first-child {
  font-size: 18px;
  height: 24px;
  padding: 2px 8px;
}

.App-form > :nth-child(1) > :last-child {
  margin-top: 4px;
  font-size: 16px;
  height: 40px;
  padding: 2px 8px;
}

.App-form > :nth-child(2) {
  display: flex;
  flex-direction: column;
  justify-content: flex-end;
}

.App-form button {
  border: 1px solid #ccc;
  background: white;
  padding: 4px 8px;
  border-radius: 2px;
  margin-top: 8px;
  cursor: pointer;
  box-shadow: 0px 2px 2px 0px rgba(0,0,0,.1);
}

.App-form button:hover {
  box-shadow: 0px 2px 2px 2px rgba(0,0,0,.1);
}
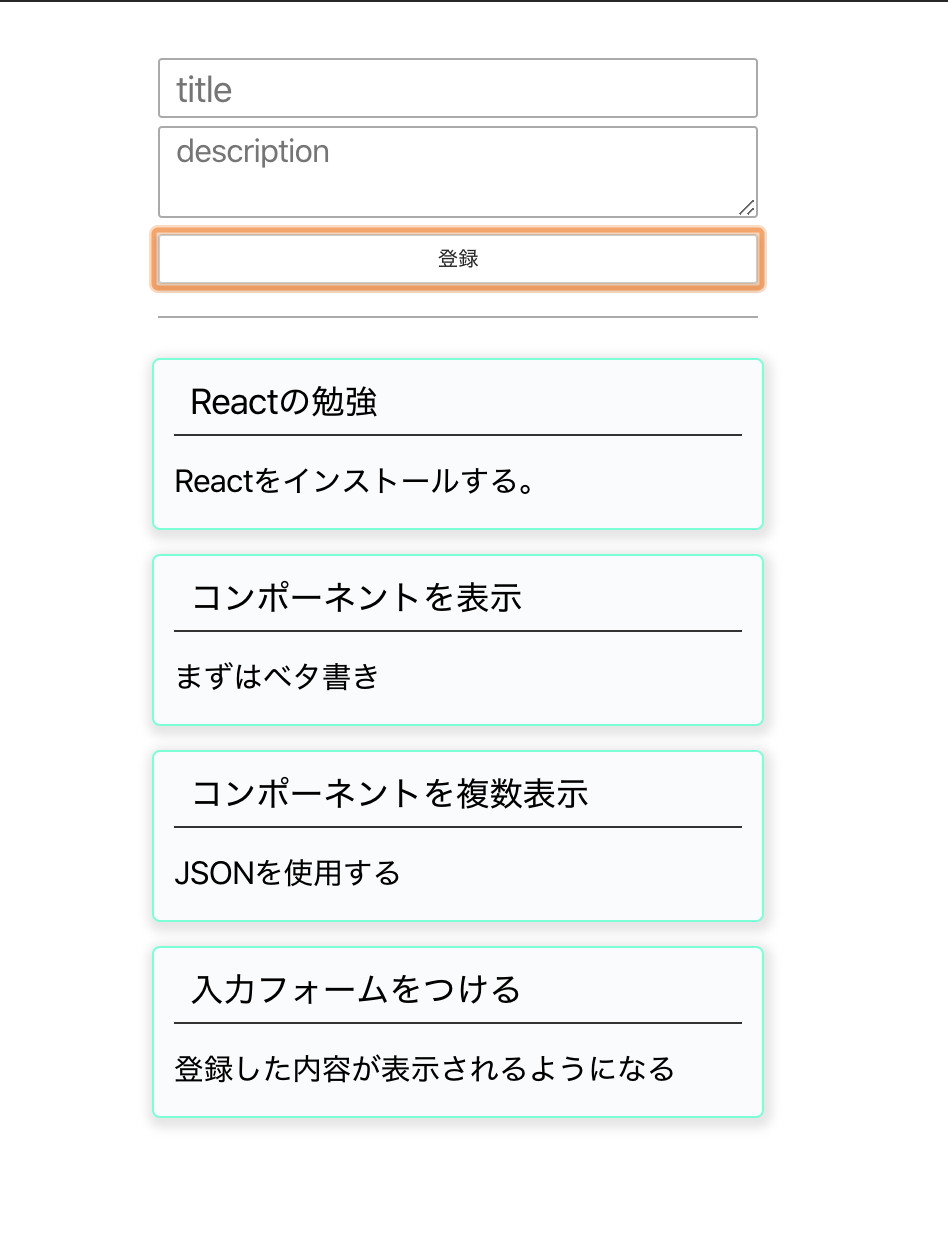
実際にタイトルと説明を入力し、登録ボタンを押すと追加されることが確認できる。
おわりに
React と Node.js の書き方にまだ慣れないが、今風のフロントエンドが作れた事に感動。
この後は build & deploy とバックエンドアプリケーションとの結合を考えていこうと思う。
後、デザイン後をもう少しがんばりたいかな