torchvison 0.17よりtransforms V2が正式版となりました。
transforms V2では、CutmixやMixUpなど新機能がサポートされるとともに高速化されているとのことです。基本的には、今まで(ここではV1と呼びます。)と互換性がありますが一部異なるところがあります。
主な変更点を書きたいと思います。
import
V2への対応は、基本的には、importを以下のように変更すれば互換性をもって対応できます。
- transforms V1
import torchvision.transforms as transforms
- transforms V2
import torchvision.transforms.v2 as transforms
ToTensor非推奨
ToTensorは、データをTensor型に変換するとともに0~1の間に正規化します。両方同時に行うので非常に便利でした。V2より非推奨になりました。Tensor型への変換と正規化を別々に行う必要があります。
PIL Imageを想定した対応方法です。
Tensor型への変換
ToImageを利用します。イメージ用のTensorのサブクラスのImageに変換します。
numpyのデータやPIL Imageを変換することができます。
正規化
ToDtypeでデータを実数化し0~1の間に正規化します。引き数として、データ型のtorch.float32を指定し、正規化用にscale=Trueとします。
例
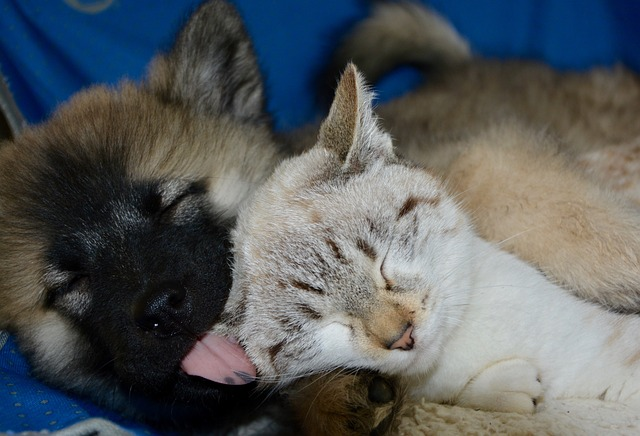
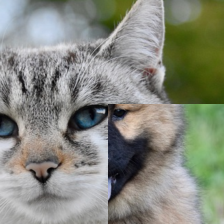
画像を読み込み0~1のTensor型に変換してみます。
- 画像読み込み
PILを利用し画像を読み込みます。
from PIL import Image

# 画像の読み込み
img = Image.open('dog-cat.jpg')
img
- transforms V1
ToTensorでTensor型に変換するとともに0~1に正規化します。
import torchvision.transforms as transforms

img_ts = transforms.ToTensor()(img)
img_ts
tensor([[[0.0000, 0.0000, 0.0000,  ..., 0.0078, 0.0078, 0.0078],
         [0.0000, 0.0000, 0.0039,  ..., 0.0039, 0.0039, 0.0039],
         [0.0000, 0.0000, 0.0039,  ..., 0.0000, 0.0000, 0.0000],
         ...,
         [0.2706, 0.2627, 0.2549,  ..., 0.6784, 0.6745, 0.6706],
         [0.3255, 0.3216, 0.3176,  ..., 0.6824, 0.6745, 0.6706],
         [0.3451, 0.3490, 0.3451,  ..., 0.6784, 0.6706, 0.6667]],

        [[0.1882, 0.1843, 0.1765,  ..., 0.0941, 0.0941, 0.0941],
         [0.1843, 0.1843, 0.1804,  ..., 0.0902, 0.0902, 0.0902],
         [0.1843, 0.1843, 0.1804,  ..., 0.0824, 0.0824, 0.0824],
         ...,
         [0.3412, 0.3333, 0.3255,  ..., 0.6824, 0.6784, 0.6745],
         [0.3804, 0.3765, 0.3725,  ..., 0.6863, 0.6784, 0.6745],
         [0.3882, 0.3922, 0.3882,  ..., 0.6824, 0.6745, 0.6706]],

        [[0.4196, 0.4118, 0.4078,  ..., 0.2902, 0.2902, 0.2902],
         [0.4157, 0.4118, 0.4118,  ..., 0.2863, 0.2863, 0.2863],
         [0.4157, 0.4118, 0.4118,  ..., 0.2902, 0.2902, 0.2902],
         ...,
         [0.4275, 0.4118, 0.4039,  ..., 0.6627, 0.6588, 0.6549],
         [0.4157, 0.4118, 0.4078,  ..., 0.6667, 0.6588, 0.6549],
         [0.4039, 0.4078, 0.3961,  ..., 0.6627, 0.6549, 0.6510]]])
データ拡張例
sample_transforms = transforms.Compose([
    transforms.RandomResizedCrop(size=(224, 224)),
    transforms.ToTensor()
])
データ拡張後の画像を確認してみます。ToPILImageでPILに変換しています。
transforms.ToPILImage()(sample_transforms(img))
- transforms V2
ToImageでTensor型(正式にはTensorのsubclassのImage)に変換します。ただし正規化は行われず0~255の整数型のままです。
import torch
import torchvision.transforms.v2 as transforms

img_ts = transforms.ToImage()(img)
img_ts
Image([[[  0,   0,   0,  ...,   2,   2,   2],
        [  0,   0,   1,  ...,   1,   1,   1],
        [  0,   0,   1,  ...,   0,   0,   0],
        ...,
        [ 69,  67,  65,  ..., 173, 172, 171],
        [ 83,  82,  81,  ..., 174, 172, 171],
        [ 88,  89,  88,  ..., 173, 171, 170]],

       [[ 48,  47,  45,  ...,  24,  24,  24],
        [ 47,  47,  46,  ...,  23,  23,  23],
        [ 47,  47,  46,  ...,  21,  21,  21],
        ...,
        [ 87,  85,  83,  ..., 174, 173, 172],
        [ 97,  96,  95,  ..., 175, 173, 172],
        [ 99, 100,  99,  ..., 174, 172, 171]],

       [[107, 105, 104,  ...,  74,  74,  74],
        [106, 105, 105,  ...,  73,  73,  73],
        [106, 105, 105,  ...,  74,  74,  74],
        ...,
        [109, 105, 103,  ..., 169, 168, 167],
        [106, 105, 104,  ..., 170, 168, 167],
        [103, 104, 101,  ..., 169, 167, 166]]], dtype=torch.uint8, )
ToDtypeを利用し、実数型に変換するとともにscale=Trueで0~1に正規化します。
img_ts = transforms.ToDtype(torch.float32, scale=True)(img_ts)
Image([[[0.0000, 0.0000, 0.0000,  ..., 0.0078, 0.0078, 0.0078],
        [0.0000, 0.0000, 0.0039,  ..., 0.0039, 0.0039, 0.0039],
        [0.0000, 0.0000, 0.0039,  ..., 0.0000, 0.0000, 0.0000],
        ...,
        [0.2706, 0.2627, 0.2549,  ..., 0.6784, 0.6745, 0.6706],
        [0.3255, 0.3216, 0.3176,  ..., 0.6824, 0.6745, 0.6706],
        [0.3451, 0.3490, 0.3451,  ..., 0.6784, 0.6706, 0.6667]],

       [[0.1882, 0.1843, 0.1765,  ..., 0.0941, 0.0941, 0.0941],
        [0.1843, 0.1843, 0.1804,  ..., 0.0902, 0.0902, 0.0902],
        [0.1843, 0.1843, 0.1804,  ..., 0.0824, 0.0824, 0.0824],
        ...,
        [0.3412, 0.3333, 0.3255,  ..., 0.6824, 0.6784, 0.6745],
        [0.3804, 0.3765, 0.3725,  ..., 0.6863, 0.6784, 0.6745],
        [0.3882, 0.3922, 0.3882,  ..., 0.6824, 0.6745, 0.6706]],

       [[0.4196, 0.4118, 0.4078,  ..., 0.2902, 0.2902, 0.2902],
        [0.4157, 0.4118, 0.4118,  ..., 0.2863, 0.2863, 0.2863],
        [0.4157, 0.4118, 0.4118,  ..., 0.2902, 0.2902, 0.2902],
        ...,
        [0.4275, 0.4118, 0.4039,  ..., 0.6627, 0.6588, 0.6549],
        [0.4157, 0.4118, 0.4078,  ..., 0.6667, 0.6588, 0.6549],
        [0.4039, 0.4078, 0.3961,  ..., 0.6627, 0.6549, 0.6510]]], )
データ拡張例
V1では最後にToTensorでTensor型に変換しましたが、V2でははじめにToImageでTensor型に変換することを推奨しています。
また、RandomResizedCropを利用する場合は、antialiasの既定値が変更されたようで明示的に指定します。
sample_transforms = transforms.Compose([
    transforms.ToImage(),
    transforms.RandomResizedCrop(size=(224, 224), antialias=True),
    transforms.ToDtype(torch.float32, scale=True)
])
標準化を行う場合は、V1,V2とも最後にNormalizeで行います。
CutMix,MixUp
せっかくなのでCutMix、MixUpも試してみます。
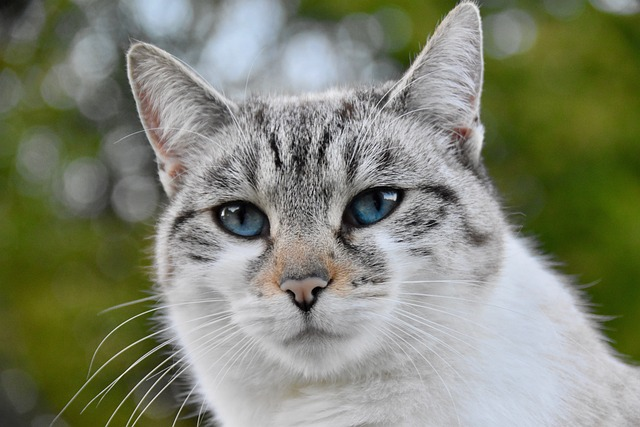
以下の2つの画像を利用します。
# 画像の読み込み
img1 = Image.open('dog.jpg')
img1
# 画像の読み込み
img2 = Image.open('cat.jpg')
img2
先ほど行ったデータ拡張を用いてTensor型にしておきます。
img1_ts = sample_transforms(img1)
img2_ts = sample_transforms(img2)
CutMix
CutMix,MixUpともミニバッチ学習時にデータ拡張することを想定されています。複数枚の画像を同時に変換する必要があります。
CutMixには、たとえば画像分類のクラス数を指定します。ここでは犬と猫の2を指定します。
cutmix = transforms.CutMix(num_classes=2)
CutMixを行うとCutMix後のデータと各クラスの割合が返却されます。
ミニバッチ用に2つのデータをstackで結合しました。クラスは整数型のTensorで指定する必要があります。0を犬、1を猫として指定しています。
cutmix_img_ts, cutmix_label = cutmix(torch.stack([img1_ts, img2_ts]), torch.LongTensor([0, 1]))
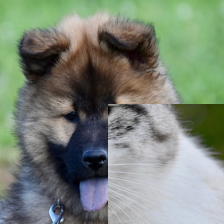
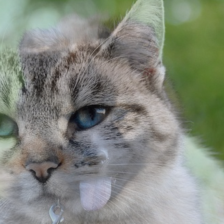
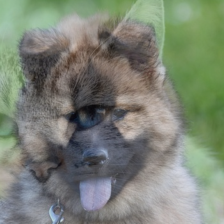
CutMix後の画像を表示してみます。
transforms.ToPILImage()(cutmix_img_ts[0])
transforms.ToPILImage()(cutmix_img_ts[1])
2つの画像がMixされていることがわかります。
クラスを確認してみます。
cutmix_label
tensor([[0.7226, 0.2774],
        [0.2774, 0.7226]])
1枚目の画像は、犬が約0.72、猫が約0.28、2枚目の画像は逆になっています。画像を見るとその程度の割合になっていることがわかります。
MixUp
CutMix同様にMixUpもミニバッチ学習時にデータ拡張することを想定されています。複数枚の画像を同時に変換する必要があります。
MixUpには、たとえば画像分類のクラス数を指定します。ここでは犬と猫の2を指定します。
mixup = transforms.MixUp(num_classes=2)
MixUpを行うとMixUp後のデータと各クラスの割合が返却されます。
ミニバッチ用に2つのデータをstackで結合しました。クラスは整数型のTensorで指定する必要があります。0を犬、1を猫として指定しています。
mixup_img_ts, mixup_label = mixup(torch.stack([img1_ts, img2_ts]), torch.LongTensor([0, 1]))
MixUp後の画像を表示してみます。
transforms.ToPILImage()(mixup_img_ts[0])
transforms.ToPILImage()(mixup_img_ts[1])
2つの画像が合成されていることがわかります。
クラスを確認してみます。
mixup_label
tensor([[0.3732, 0.6268],
        [0.6268, 0.3732]])
1枚目の画像は、犬が約0.37、猫が約0.63、2枚目の画像は逆になっています。画像を見ると1枚目は猫や強く、2枚目は犬が強く合成されていることがわかります。
実際には、ミニバッチ学習で利用されるので、ミニバッチが学習での利用方法は、PyTorchのページで確認してください。
