前置き
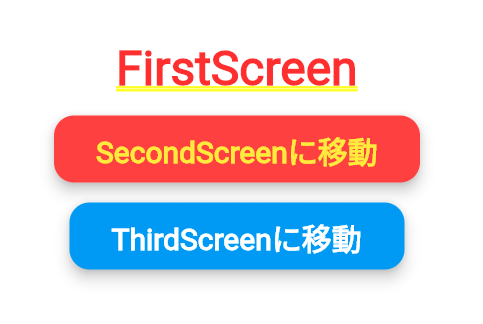
↓みたいなボタンがあったとします
似たようなボタンが2つ並んでいますね。また他のページでも同じデザインのボタンを多数使用する予定です。
そうなると当然、同じ記述を何度も何度も書くのは面倒になってきます。
デザインとしてはほぼ同じですので、背景色やテキスト、またボタンを押した際の挙動などの一部だけを変更できるようにすれば、無駄な記述が減りコードがすっきりしますよね。
Extract Widgetする
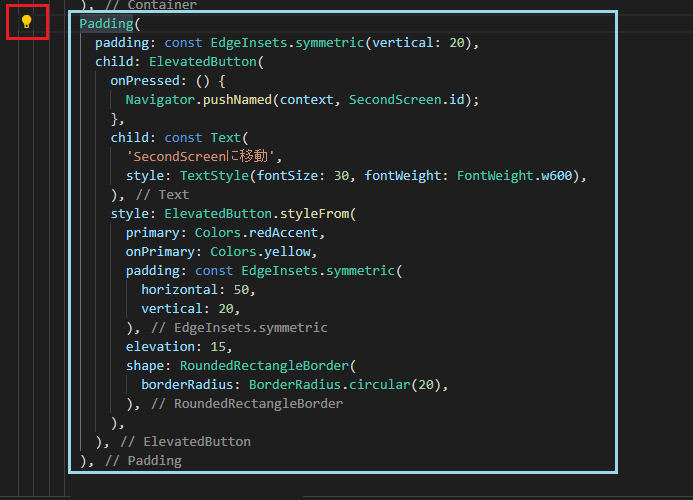
水色で囲った部分が再利用したい部分です。
再利用したいウィジェット(この場合Padding)部分をクリックすると、電球マークが現れます(赤枠で囲った箇所。画像はVSCodeのものですが、android studioでもたぶんほぼ一緒だと思います)
電球マークをクリックすると、メニューが開きます。
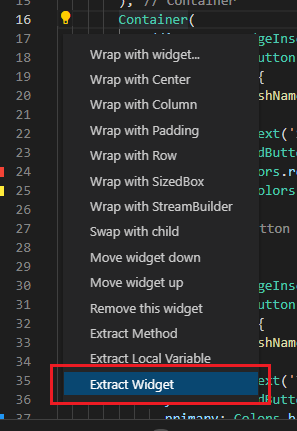
Extract Widgetを押します。
すると何やら入力欄が出ますので、任意の名前をつけます。
ここではMyButtonとしておきます。
すると先ほどまでの水色で囲っていた部分がMyButton()に置き換わり↓
class FirstScreen extends StatelessWidget {
  static const String id = 'first_screen';

  @override
  Widget build(BuildContext context) {
    return Column(
      mainAxisAlignment: MainAxisAlignment.center,
      children: [
        Container(
          child: const Text('FirstScreen'),
        ),
        MyButton(), //先ほどPaddingがあったところ。MyButton()に置き換わっている
        Padding( //ここから↓二つ目のボタン
          padding: const EdgeInsets.symmetric(vertical: 20),
          child: ElevatedButton(
            onPressed: () {
              Navigator.pushNamed(context, ThirdScreen.id);
            },
            child: const Text(
              'ThirdScreenに移動',
              style: TextStyle(fontSize: 30, fontWeight: FontWeight.w600),
            ),
            style: ElevatedButton.styleFrom(
              primary: Colors.teal,
              onPrimary: Colors.white,
              padding: const EdgeInsets.symmetric(
                horizontal: 50,
                vertical: 20,
              ),
              elevation: 15,
              shape: RoundedRectangleBorder(
                borderRadius: BorderRadius.circular(20),
              ),
            ),
          ),
        ),
      ],
    );
  }
}
代わりにMyButtonクラスが作成されます↓
class MyButton extends StatelessWidget {
  const MyButton({
    Key? key,
  }) : super(key: key);

  @override
  Widget build(BuildContext context) {
    return Padding(
      padding: const EdgeInsets.symmetric(vertical: 20),
      child: ElevatedButton(
        onPressed: () {
          Navigator.pushNamed(context, SecondScreen.id);
        },
        child: const Text(
          'SecondScreenに移動',
          style: TextStyle(fontSize: 30, fontWeight: FontWeight.w600),
        ),
        style: ElevatedButton.styleFrom(
          primary: Colors.redAccent,
          onPrimary: Colors.yellow,
          padding: const EdgeInsets.symmetric(
            horizontal: 50,
            vertical: 20,
          ),
          elevation: 15,
          shape: RoundedRectangleBorder(
            borderRadius: BorderRadius.circular(20),
          ),
        ),
      ),
    );
  }
}
このままでは、ウィジェットの記述を別の箇所に書き出しただけになってしまいます。
再利用するためにはボタンの色やテキスト、ボタンを押した際の挙動などを変数に置き換える必要があります。
なので変数を宣言し、コンストラクタを記述します。
class MyButton extends StatelessWidget {
  const MyButton({
    //コンストラクタを記述。必須のパラメータはrequiredをつける。そうでないものにはデフォルトの値を代入しておく
    Key? key,
    required this.onPressed,
    this.backgroundColor = Colors.blueAccent,
    this.textColor = Colors.white,
    required this.text,
  }) : super(key: key);

  final Function onPressed; //変数を宣言
  final Color backgroundColor;
  final Color textColor;
  final String text;

  @override
  Widget build(BuildContext context) {
    return Padding(
      padding: const EdgeInsets.symmetric(vertical: 20),
      child: ElevatedButton(
        onPressed: () => onPressed, //変数に置き換える
        child: Text(
          text, //同じく変数に置き換える
          style: const TextStyle(fontSize: 30, fontWeight: FontWeight.w600),
        ),
        style: ElevatedButton.styleFrom(
          primary: backgroundColor, //同じく
          onPrimary: textColor, //同じく
          padding: const EdgeInsets.symmetric(
            horizontal: 50,
            vertical: 20,
          ),
          elevation: 15,
          shape: RoundedRectangleBorder(
            borderRadius: BorderRadius.circular(20),
          ),
        ),
      ),
    );
  }
}
最後に、置き換わったMyButton()に必要なパラメータを書き加えたら終わりです。
MyButton(
          onPressed: () => Navigator.pushNamed(context, ThirdScreen.id),
          backgroundColor: Colors.redAccent,
          textColor: Colors.yellow,
          text: 'SecondScreenに移動',
        ),
同様のデザインのボタンを他の箇所で使いたいときは、MyButton()と記述して、引数に配色やテキストなどのパラメーターを渡せばOKです。