無料のXserver StaticとMicroCMSでブログを作ってみる
単にSSGしてデプロイだけではなく、MicroCMSのWEBHook機能を使ってGithubActionsを動かし、デプロイするところまで
Nextjs
MicroCMS
XserverStatic
成果物
参考
Xserver Staticでの静的コンテンツ、SSGやSPAのデプロイとGitHub Actionsによる自動化について
Nextjs
npx create-next-app@latest
適当なgithubリポジトリにpushします。
Xserver Staticの設定
サーバー設定>FTPの利用>利用するボタンを押す。
FTPのパスワードを設定する。
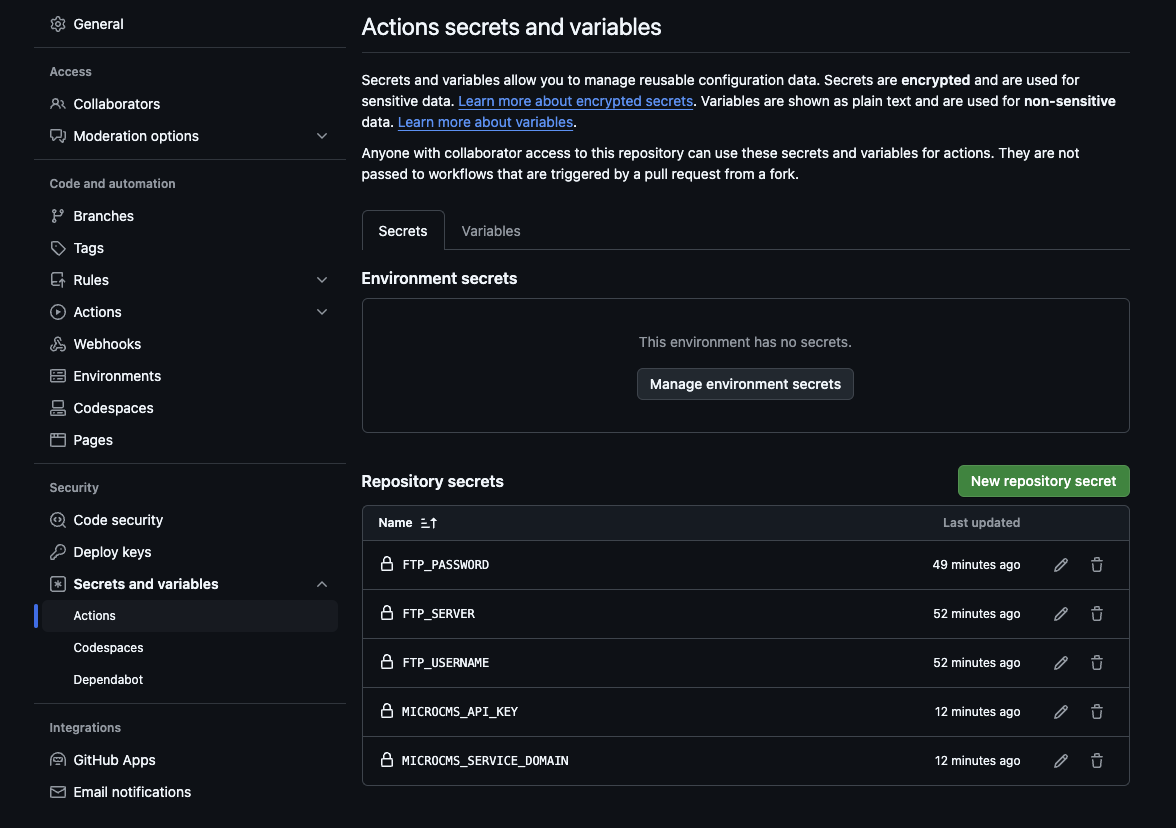
Githubのリポジトリ画面 > Settings > Secrests and variables > Repository secrets の項目で、上記のFTP_SERVER、FTP_USERNAME、FTP_PASSWORDをそれぞれ設定する
Github Actionsを設定
on: push
name: 🚀 Deploy website on push
jobs:
  web-deploy:
    name: 🎉 Deploy
    runs-on: ubuntu-latest
    steps:
    - name: 🚚 Get latest code
      uses: actions/checkout@v4

    - name: 🌱 Set up Node.js
      uses: actions/setup-node@v3
      with:
        node-version: 20

    - name: 💪 Install dependencies
      run: npm install

    - name: 🎁 Output static content
      run: npm run build

    - name: 📂 Sync files
      uses: SamKirkland/FTP-Deploy-Action@v4.3.5
      with:
        server: ${{ secrets.FTP_SERVER }}
        username: ${{ secrets.FTP_USERNAME }}
        password: ${{ secrets.FTP_PASSWORD }}
        local-dir: ./.next/
        exclude: .htaccess
NextJsの設定
SSGを強制するので、next.config.mjsに追記
/** @type {import('next').NextConfig} */
const nextConfig = {
  output: "export",
  trailingSlash: true,
};

export default nextConfig;
これで公開までできているかひとまず確認
MicroCMSで新しいサービスを作成
サービス作成、ブログのAPIをとりあえず読み込み
APIキーとサービスドメインを環境変数へ
MICROCMS_SERVICE_DOMAIN=(サービスドメイン)
MICROCMS_API_KEY=(API_KEY)
githubのsecretsにも同様の設定を行う。
MicroCMSを利用するファイルを作る
必要なモジュールをインストールする
npm i -D microcms-js-sdk html-react-parser
import { createClient } from "microcms-js-sdk";
import type {
  MicroCMSQueries,
  MicroCMSImage,
  MicroCMSDate,
  MicroCMSContentId,
} from "microcms-js-sdk";
import { notFound } from "next/navigation";

// カテゴリーの型定義
export type Category = {
  name: string;
} & MicroCMSContentId &
  MicroCMSDate;

// ニュースの型定義
export type Blog = {
  title: string;
  description: string;
  content: string;
  thumbnail?: MicroCMSImage;
  category: Category;
  publishedAt: string;
};


export type Article = Blog & MicroCMSContentId & MicroCMSDate;

if (!process.env.MICROCMS_SERVICE_DOMAIN) {
  throw new Error("MICROCMS_SERVICE_DOMAIN is required");
}

if (!process.env.MICROCMS_API_KEY) {
  throw new Error("MICROCMS_API_KEY is required");
}

// Initialize Client SDK.
export const client = createClient({
  serviceDomain: process.env.MICROCMS_SERVICE_DOMAIN,
  apiKey: process.env.MICROCMS_API_KEY,
});

// ニュース一覧を取得
export const getBlogsList = async (queries?: MicroCMSQueries) => {
  const listData = await client
    .getList<Blog>({
      endpoint: "blogs",
      queries,
    })
    .catch(notFound);
  return listData;
};

// ニュースの詳細を取得
export const getBlogsDetail = async (
  contentId: string,
  queries?: MicroCMSQueries
) => {
  const detailData = await client
    .getListDetail<Blog>({
      endpoint: "blogs",
      contentId,
      queries,
    })
    .catch(notFound);

  return detailData;
};

export const getBlogsAllIds = async () => {
  const listData = await client.getAllContentIds({
    endpoint: "blogs",
  });
  return listData;
};
とりあえずトップにニュースの一覧、/news/[news_id]で詳細を表示する。
import Image from "next/image";
import { Blog, getBlogsList } from "@/hooks/useMicrocms";
import Link from "next/link";

export default async function Home() {
  const blogsRes = await getBlogsList();
  const blogs = blogsRes.contents;
  return (
    <div className="container mx-auto font-[family-name:var(--font-geist-sans)]">
      <div className="relative pb-24 overflow-hidden">
        <div className="flex flex-col items-center w-full max-w-2xl mx-auto">
          <header className="h-30 pb-12">
            <div className="block w-12 h-12 mx-auto mb-4 rounded-full bg-gradient-conic from-gradient-3 to-gradient-4" />
            <p className="text-2xl text-center">
              <Link href="/">Blog Site</Link>
            </p>
          </header>
          <main className="flex-1 w-full">
            <ul className="w-full">
              {blogs.map((blog) => (
                <li
                  key={blog.id}
                  className="transition bg-white border border-b-0 border-gray-800 md:first:rounded-t-lg md:last:rounded-b-lg backdrop-blur-lg dark:bg-black dark:bg-opacity-30 bg-opacity-10 hover:bg-opacity-20 dark:hover:bg-opacity-50 dark:border-white border-opacity-10 dark:border-opacity-10 last:border-b hover:border-b hovered-sibling:border-t-0"
                >
                  <Link
                    as={`/news/${blog.id}`}
                    href={`/news/[slug]`}
                    className="block px-6 py-6 lg:py-10 lg:px-16 focus:outline-none focus:ring-4"
                  >
                    {blog.publishedAt && (
                      <p className="mb-3 font-bold uppercase opacity-60">
                        {new Date(blog?.publishedAt).toLocaleDateString()}
                      </p>
                    )}
                    <h2 className="text-2xl md:text-3xl">{blog.title}</h2>
                    <svg
                      xmlns="http://www.w3.org/2000/svg"
                      width="24"
                      height="24"
                      fill="none"
                      viewBox="0 0 24 24"
                    >
                      <path
                        className={`stroke-current text-primary`}
                        strokeLinecap="round"
                        strokeLinejoin="round"
                        strokeWidth="2"
                        d="M5 12h14M12 19l7-7-7-7"
                      ></path>
                    </svg>
                  </Link>
                </li>
              ))}
            </ul>
          </main>
        </div>
      </div>
    </div>
  );
}
import Image from "next/image";
import HTMLReactParser from "html-react-parser";
import { Blog, getBlogsDetail, getBlogsAllIds } from "@/hooks/useMicrocms";
import Link from "next/link";

export async function generateStaticParams() {
  const postIds = await getBlogsAllIds();

  return postIds.map((id: string) => ({
    news_id: id,
  }));
}

export default async function NewsDetail({
  params,
}: {
  params: { news_id: string };
}) {
  if (!params?.news_id) {
    return <></>;
  }
  const blog = await getBlogsDetail(params?.news_id);
  return (
    <div className="container mx-auto font-[family-name:var(--font-geist-sans)]">
      <div className="relative pb-24 overflow-hidden">
        <div className="flex flex-col items-center w-full max-w-2xl mx-auto">
          <header className="h-30 pb-12">
            <div className="block w-12 h-12 mx-auto mb-4 rounded-full bg-gradient-conic from-gradient-3 to-gradient-4" />
            <p className="text-2xl text-center">
              <Link href="/">Blog Site</Link>
            </p>
          </header>
          {new Date(blog?.publishedAt).toLocaleDateString()}
          <h1>{blog?.title}</h1>
          <div>{HTMLReactParser(blog?.content)}</div>
        </div>
      </div>
    </div>
  );
}
mainにpushしてデプロイされるのを確認する
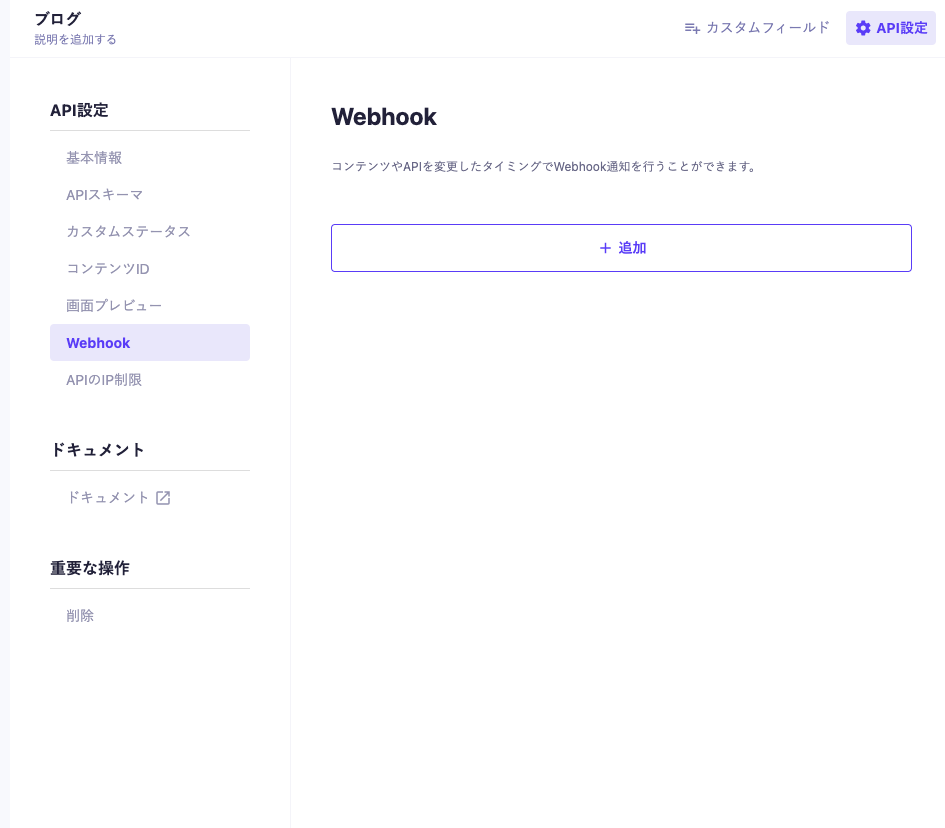
WebHookの設定
このままではMicroCMSの更新と連動できないので、MicroCMSのWEBHookを使ってGithubActionsでデプロイする
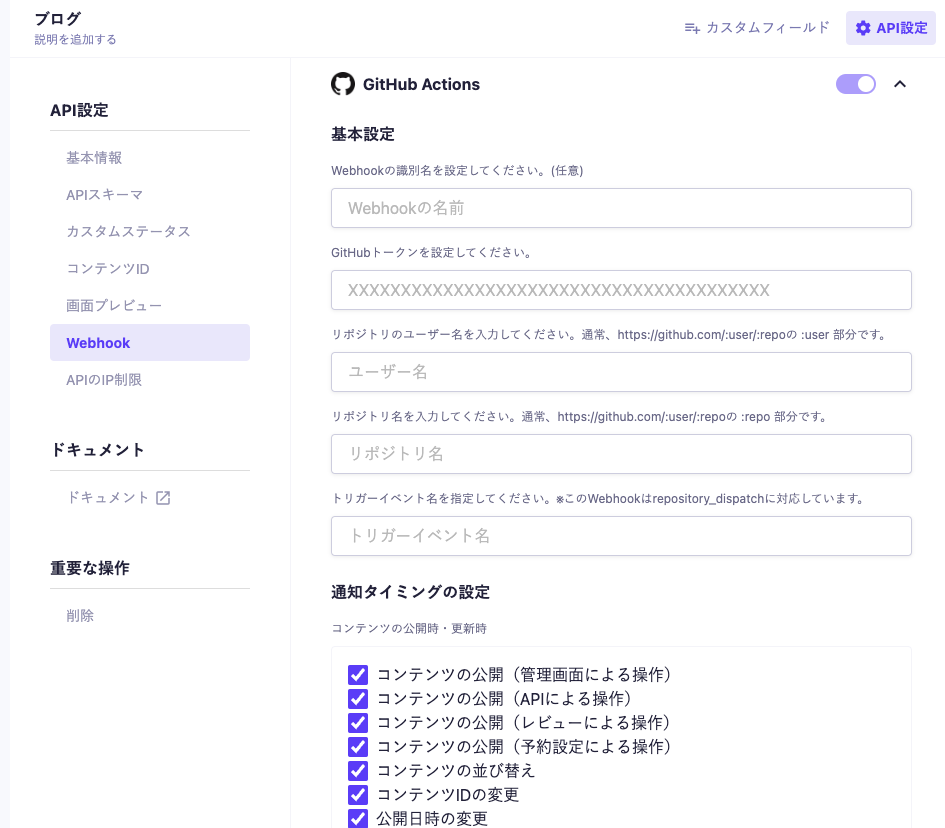
AccessTokenを取得
このページでアクセストークンを取得する
リポジトリー許可でcontentsのreadOnlyを許可のみで良い
トークン・ユーザー名・リポジトリ名を入れ、トリガーイベントはmain.ymlと同じになるように入れる。今回はdeployと設定した。
ymlファイルの修正
onイベントと
name: 🚀 Deploy website on push

on:
  push:
    branches:
      - 'main'
  repository_dispatch:
    types: [deploy]

jobs:
  web-deploy:
    name: 🎉 Deploy
    runs-on: ubuntu-latest
    steps:
    - name: 🚚 Get latest code
      uses: actions/checkout@v4

    - name: 🌱 Set up Node.js
      uses: actions/setup-node@v3
      with:
        node-version: 20

    - name: 💪 Install dependencies
      run: npm install

    - name: 🎁 Output static content
      run: npm run build

    - name: 📂 Sync files
      uses: SamKirkland/FTP-Deploy-Action@v4.3.5
      with:
        server: ${{ secrets.FTP_SERVER }}
        username: ${{ secrets.FTP_USERNAME }}
        password: ${{ secrets.FTP_PASSWORD }}
        MICROCMS_API_KEY: ${{ secrets.MICROCMS_API_KEY }}
        MICROCMS_SERVICE_DOMAIN: ${{ secrets.MICROCMS_SERVICE_DOMAIN }}
        local-dir: ./out/
        exclude: .htaccess
repository_dispatchイベントで駆動できる。詳しくは公式ドキュメント参照
無事MicroCMSの公開に合わせてGithubActionsが動くようになり、公開できるようになりました。
所感
- 無料でできる範囲はMicroCMSのAPIが3つまでなのは厳しい
- コンテンツやモジュールが増えるとビルド時間が増える。GithubActionsのビルド時間が圧迫されるので、悩みどころ
- たまにGithubActionsからのファイル移動に失敗する時がある
- 更新してから1分ほどかかるので、クライアント側での取得を選択するのも有効と思う
はまりどころ
trailingSlashをつけないとリロードで404
遷移はできるが、リロードでエラーになる。
リンクの末尾に.htmlをつけるかnext.config.mjsでtrailingSlashをつけることで回避できる。
ローカルの確認方法
npm run buildの後、npm run startはできない。npx serve@latest outで行う。serveをインストールしてもいいと思う
repository_dispatchはdefaultブランチしか動かない
イベントのテストをしたい時などはいちいちdefaultブランチを更新しないといけない。