Firebaseを知る
とある新しくアサインされた案件で、Firebase触ることになりましたので、調べたことを記述します。
FirebaseはBaasという括り
クラウドサービスではBaaSの括りに入る。クラウドサービスには3種類ほど存在するので、それぞれの違いを明確にします。本当はこれに加えてSaaSもありますが、これはもうソフトウェアなので、言ってしまえば利用するサービスそのもの(例えばGmail とか)までが決まっているので、省きます。今回、以下の3つにフォーカスしたのは、バックエンドをサポートしてくれる範囲を明示したかった意図があります。
IaaS
Infrastructure as a Servicの略。システム稼働に必要な仮想サーバ、ハードディスク、ファイヤーウォールなどのインフラのみを提供するサービス。AWSのEC2などが代表格。クラウドサービスの中では最も自由度が高く、OSやハードのスペックを任意に決めることができる。もちろん、使用言語や、フレームワーク、ミドルウェアも開発側で決めることができる分、そのそれを使う知識、時間コストがあります。
PaaS
Platform as a Serviceの略である。プラットフォームからぽちぽちするだけで、設置が簡単にできます。ハードからOS、ウェア、フレームワークまでが提供済みであり、IaaSよりは自由度が減ります。この上で開発された独自サービスの規模、ユーザーのアクセス頻度などに応じて、動的にサーバーのCPUやメモリ、ネットワークの帯域幅などのリソースを割り当てることができる機能も備えています。AWSのマネジメントコンソールや、GCP、Azureなどが代表格。
BaaS
Backend as a Serviceの略です。サーバーサイドにおけるバックエンドシステムを全て担います。バックエンドシステムは自動生成される。これらのバックエンドはAPIや、組み込みのライブラリの形で提供されており。開発するシステムの中に埋め込む形でバックエンドを機能させて、開発を進めることができる。代表格が今回のFirebaseです。
Firebaseをいじる
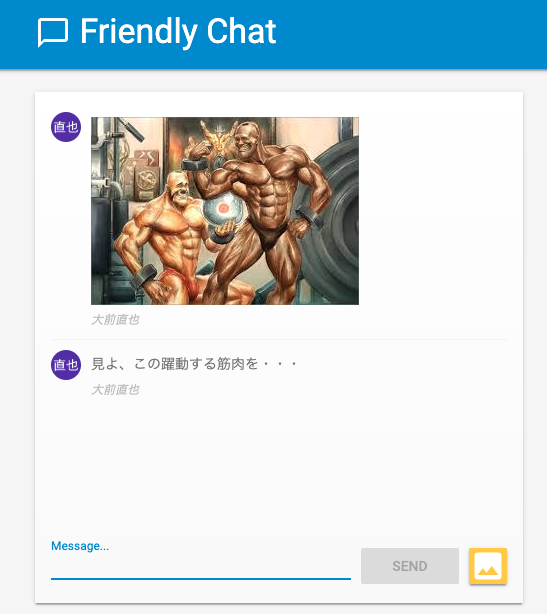
簡単に、Webチャットアプリをデプロイしてみます。チュートリアル用のアプリのリポジトリがGithubで公開されているので、まずはこれをgit cloneしてきます。
公式リファレンスはこちらです。
リファレンス;Firestore
公開されているリポジトリ
firebase/friendlychat-web
$ git colne git@github.com:firebase/friendlychat-web.git
Firebase consoleへ
Cloud FirestoreでDBを作成
Cloud Firestore は、Firebase のモバイルアプリ開発用の新しい主力データベースです。直感的な新しいデータモデルで、Realtime Databaseをさらに効果的にしています。Cloud Firestore は、Realtime Database よりも多彩で高速なクエリと高性能なスケーリングが特長です。
もう1つRealtime Databaseなるものもあります。どちらもNo SQLです。
コンソール上から、Firestoreから作成を選択し、テストモードで作成してください。
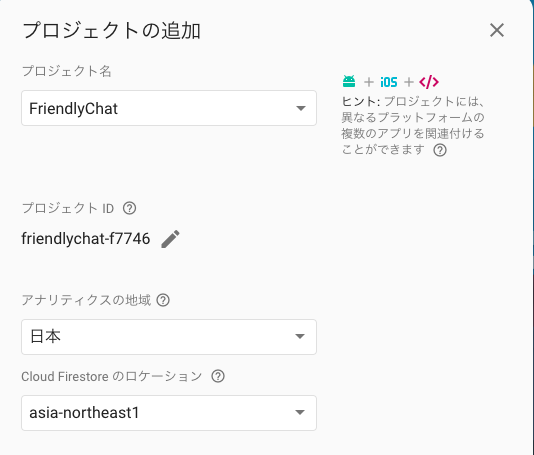
プロジェクト作成とロケーション確定
まずは、Firebaseのコンソールから、新しくプロジェクトを立ち上げます。プロジェクト名を入力して、Firestoreのロケーションを設定します。リファレンスを確認したところ、asia-northeast1が日本ということで、こちらを選択します。
アプリ種類選定とスクリプト埋め込み
その次に、iOS・Andoroid・webの3つのどれかを選択します。今回は、webを選択します。アプリのニックネームとFirebase Hostingをセットする状態で始めます。
Firebase SDKスニペットの追加を行います。CDNのスニペットを貼り付けます。
<!-- The core Firebase JS SDK is always required and must be listed first -->
<script src="https://www.gstatic.com/firebasejs/6.2.0/firebase-app.js"></script>

<!-- TODO: Add SDKs for Firebase products that you want to use
     https://firebase.google.com/docs/web/setup#config-web-app -->

<script>
  // Your web app's Firebase configuration
  var firebaseConfig = {
    apiKey: "AIzaSyCeV8Kz7JfmmA6xi3vlW1irQegzP77cSU0",
    authDomain: "friendlychat-f7746.firebaseapp.com",
    databaseURL: "https://friendlychat-f7746.firebaseio.com",
    projectId: "friendlychat-f7746",
    storageBucket: "friendlychat-f7746.appspot.com",
    messagingSenderId: "1053657019228",
    appId: "1:1053657019228:web:e826e4941f91d633"
  };
  // Initialize Firebase
  firebase.initializeApp(firebaseConfig);
</script>
このスクリプトを、下記のようにに埋め込むこみます。コメントアウトでインポートする部分が書かれているので、ここに埋め込みます。コメントアウトは邪魔っけだったので、スクリプトタグのみを追加しました。
<script src="/__/firebase/6.1.1/firebase-app.js"></script>
<script src="/__/firebase/6.1.1/firebase-auth.js"></script>
<script src="/__/firebase/6.1.1/firebase-storage.js"></script>
<script src="/__/firebase/6.1.1/firebase-messaging.js"></script>
<script src="/__/firebase/6.1.1/firebase-firestore.js"></script>
<script src="/__/firebase/6.1.1/firebase-performance.js"></script>
<script src="/__/firebase/init.js"></script>

<script src="scripts/main.js"></script>

<script>
  // Your web app's Firebase configuration
  var firebaseConfig = {
    apiKey: "AIzaSyCeV8Kz7JfmmA6xi3vlW1irQegzP77cSU0",
    authDomain: "friendlychat-f7746.firebaseapp.com",
    databaseURL: "https://friendlychat-f7746.firebaseio.com",
    projectId: "friendlychat-f7746",
    storageBucket: "friendlychat-f7746.appspot.com",
    messagingSenderId: "1053657019228",
    appId: "1:1053657019228:web:e826e4941f91d633"
  };
  // Initialize Firebase
  firebase.initializeApp(firebaseConfig);
</script>
埋め込みが完了したら、コンソール上から次へを選択してください。
Firebase CLIのインストール
これでローカルで開発しているものをFirebaseのホスティングサービスへアップします。
npm経由でCLIをインストールします。
$ npm install -g firebase-tools
login
firebaseのコマンドでログインを行うと、ブラウザが立ち上がるので、アカウント使用を許可します。
$ firebase login
? Allow Firebase to collect anonymous CLI usage and error reporting information?(Y or n)Y

Waiting for authentication...

✔  Success! Logged in as your email addoress
use --add
プロジェクトを開始します。アプリのルートディレクトリ内に入ってから、initしてください。
$ cd friendlychat-web/web-start
$ firebase use --add
? Which project do you want to add? friendlychat-f7746
? What alias do you want to use for this project? (e.g. staging) test

Created alias test for friendlychat-f7746.
Now using alias test (friendlychat-f7746)
serve --only hosting
$ firebase serve --only hosting
i  hosting: Serving hosting files from: ./public
✔  hosting: Local server: http://localhost:5000
にこれでアクセスしてみてください。アプリの画面が立ち上がると思います。
セットアップ
サインイン
function signIn() {
  var provider = new firebase.auth.GoogleAuthProvider();
  firebase.auth().signInnwithPopup(provider);
}
サインアウト
function signOut() {
  firebase.auth().signOut();
}
Firebase初期化
function initFirebaseAuth() {
  firebase.auth().onAuthStateChanged(authStateObserver);
}
ユーザーネームとトップ画像を返す
// Returns the signed-in user's profile Pic URL.
function getProfilePicUrl() {
  return firebase.auth().currentUser.photoURL || '/images/profile_placeholder.png';
}

// Returns the signed-in user's display name.
function getUserName() {
  return firebase.auth().currentUser.displayName;
}
サインイン時のプロフィールを返す
function isUserSignedIn() {
  return !!firebase.auth().currentUser;
}
google Authenticationを使用する
Firebase consoleから Authenticationをサイドバーから選択し、Authenticationのログイン方法から、Googleを選択し、有効化してください。
ここでもしかしたらエラーがでるかもしれません。
http://localhost:5000
アクセスして、googleアカウントで認証しようとすると、
Error 403: restricted_client This app is not yet configured to make OAuth requests. To do that, set up the app’s OAuth consent screen in the Google Cloud Console.
こんなのが出てきてしまうと思いますが、Google APIsのOAuth認証情報が欠けているので、このエラーから詳細リンクがあるので、そこから認証情報を保存をしてあげると、サーバーキーとブラウザキーと、クライアントIDを自動で生成してくれます。
これで再度、
http://localhost:5000
にアクセスすれば、ちゃんとgoogleアカウントでログインができるようになると思います。
メッセージを保存する
function saveMessage(messageText) {
  return firebase.firestore().collection('messages').add({
    name: getUserName(),
    text: messageText,
    profilePicUrl: getProfilePicUrl(),
    timestamp: firebase.firestore.FieldValue.serverTimestamp()
  }).catch(function(error) {
    console.error('Error writing new message to Firebase Database', error);
  });
}
この時点で先に設定した、Cloud Firesroreに入力したメッセージが保存されます。コンソール上から、サイドバーのデータベースを選択して、入力内容が入っているか確認してみてください。
メッセージがUIで読めるようにする
function loadMessages() {
  // Create the query to load the last 12 messages and listen for new ones.
  var query = firebase.firestore()
                  .collection('messages')
                  .orderBy('timestamp', 'desc')
                  .limit(12);

  // Start listening to the query.
  query.onSnapshot(function(snapshot) {
    snapshot.docChanges().forEach(function(change) {
      if (change.type === 'removed') {
        deleteMessage(change.doc.id);
      } else {
        var message = change.doc.data();
        displayMessage(change.doc.id, message.timestamp, message.name,
                       message.text, message.profilePicUrl, message.imageUrl);
      }
    });
  });
}
Cloud Storage for Firebaseで画像を保存できるようになる
function saveImageMessage(file) {
  // 1 - We add a message with a loading icon that will get updated with the shared image.
  firebase.firestore().collection('messages').add({
    name: getUserName(),
    imageUrl: LOADING_IMAGE_URL,
    profilePicUrl: getProfilePicUrl(),
    timestamp: firebase.firestore.FieldValue.serverTimestamp()
  }).then(function(messageRef) {
    // 2 - Upload the image to Cloud Storage.
    var filePath = firebase.auth().currentUser.uid + '/' + messageRef.id + '/' + file.name;
    return firebase.storage().ref(filePath).put(file).then(function(fileSnapshot) {
      // 3 - Generate a public URL for the file.
      return fileSnapshot.ref.getDownloadURL().then((url) => {
        // 4 - Update the chat message placeholder with the image's URL.
        return messageRef.update({
          imageUrl: url,
          storageUri: fileSnapshot.metadata.fullPath
        });
      });
    });
  }).catch(function(error) {
    console.error('There was an error uploading a file to Cloud Storage:', error);
  });
}
これに加えて、Cloud Storage for Firebaseを使用して、画像や動画のコンテンツをここで格納します。コンソール上からサイドバーのStorageを選択し、こちらを起動してください。
これで画像を送れるようになっているはずです。試してみてください。
Firebase Cloud Messagingでプッシュ通知を送れるようにする
{
  "name": "Friendly Chat",
  "short_name": "Friendly Chat",
  "start_url": "/index.html",
  "display": "standalone",
  "orientation": "portrait"
  "gcm_sender_id": "10536****28"  #ここが追加する部分です。
、
追加するものは、送信者IDなるものなのですが、見つけにくいです。コンソール上のサイドバーから、歯車のマークをクリックし、プロジェクトの設定を選択してください。そして、設定のタブの中にクラウドメッセージングというのがあるので、これを選択してください。そうすると、送信者IDを見ることができます。
今度は、新しくファイルを作り、下記のように記述をします。
importScripts('/__/firebase/6.0.4/firebase-app.js');
importScripts('/__/firebase/6.0.4/firebase-messaging.js');
importScripts('/__/firebase/init.js');

firebase.messaging();
続いてデバイストークンを保存する関数を作ります。
function saveMessagingDeviceToken() {
  firebase.messaging().getToken().then(function(currentToken) {
    if (currentToken) {
      console.log('Got FCM device token:', currentToken);
      // Saving the Device Token to the datastore.
      firebase.firestore().collection('fcmTokens').doc(currentToken)
          .set({uid: firebase.auth().currentUser.uid});
    } else {
      // Need to request permissions to show notifications.
      requestNotificationsPermissions();
    }
  }).catch(function(error){
    console.error('Unable to get messaging token.', error);
  });
}
続いて通知の許可を与える関数を作ります。
function requestNotificationsPermissions() {
  console.log('Requesting notifications permission...');
  firebase.messaging().requestPermission().then(function() {
    // Notification permission granted.
    saveMessagingDeviceToken();
  }).catch(function(error) {
    console.error('Unable to get permission to notify.', error);
  });
}
この時点で、
http://localhost:5000/
こちらにアクセスをしてみて、通知の許可をするためのポップアップが出ると思うので、許可するを選択してください。これで、通知を受け取る準備ができました。
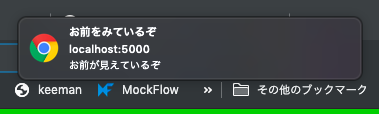
早速、通知を飛ばしてみましょう。
$ curl -X POST -H "Authorization: key=Server_Key" -H "Content-Type: application/json" -d '{
"notification": {
 "title": "お前をみているぞ",
 "body": "お前が見えているぞ",
 "icon": "/images/icon.png",
 "click_action": "http://localhost:5000"
},
"to": "FCM_device_token"
}' "https://fcm.googleapis.com/fcm/send"
このcurlコマンドでメッセージを飛ばしてみます。この引数に必要なのが、サーバーキーと、FCMデバイストークンです。
サーバーキーは先程の送信者IDがある場所にありますので、こちらを、コピペしてください。
FCMデバイストークンは、
http://localhost:5000/
で、検証ツールを開き、consoleのタブを開いてみると、表示されているはずなので、それをコピペしてください。そうして、このコマンドを打つと、通知が表示されます。
Cloud Firebase Security rulesを変更する
サイドバーのDatabaseから、ルールを選択してください。
ここにスクリプトをかけるテキストボックスがあるので、下記のスクリプトを書いてください。
service cloud.firestore {
  match /databases/{database}/documents {
    // Messages:
    //   - Anyone can read.
    //   - Authenticated users can add and edit messages.
    //   - Validation: Check name is same as auth token and text length below 300 char or that imageUrl is a URL.
    //   - Deletes are not allowed.
    match /messages/{messageId} {
      allow read;
      allow create, update: if request.auth != null
                    && request.resource.data.name == request.auth.token.name
                    && (request.resource.data.text is string
                      && request.resource.data.text.size() <= 300
                      || request.resource.data.imageUrl is string
                      && request.resource.data.imageUrl.matches('https?://.*'));
      allow delete: if false;
    }
    // FCM Tokens:
    //   - Anyone can write their token.
    //   - Reading list of tokens is not allowed.
    match /fcmTokens/{token} {
      allow read: if false;
      allow write;
    }
  }
}
このスクリプトを書いたら、公開ボタンを押して、ルールを公開設定してください。
そして、このスクリプトをローカルにファイルとして、作成します。ファイル名は、firestore.rulesです。
次に、作ったファイルを読ませるので、jsonファイルに追記をします。
{
  "firestore": {
    "rules": "firestore.rules" #ここを追加します。
  },
  "hosting": {
    "public": "./public",
    "headers": [{
      "source" : "**/*.@(js|html)",
      "headers" : [ {
        "key" : "Cache-Control",
        "value" : "max-age=0"
      } ]
    }]
  }
}
これで、このセキュリティルールをアプリへデプロイします。
$ firebase deploy --only firestore
⚠  functions: package.json indicates an outdated version of firebase-functions.
 Please upgrade using npm install --save firebase-functions@latest in your functions directory.

=== Deploying to 'friendlychat-f7746'...

i  deploying firestore
i  firestore: checking firestore.rules for compilation errors...
✔  firestore: rules file firestore.rules compiled successfully
i  firestore: uploading rules firestore.rules...
✔  firestore: released rules firestore.rules to cloud.firestore

✔  Deploy complete!
Cloud Storage ruleを変更する。
今度は、コンソール上からStorageを選択し、ルールのタブを開き、
function isImageBelowMaxSize(maxSizeMB) {
  return request.resource.size < maxSizeMB * 1024 * 1024
      && request.resource.contentType.matches('image/.*');
}

service firebase.storage {
  match /b/{bucket}/o {
    match /{userId}/{messageId}/{fileName} {
      allow write: if request.auth != null && request.auth.uid == userId && isImageBelowMaxSize(5);
      allow read;
    }
  }
}
上記のスクリプトを記述し、公開します。そして、ローカルにファイルを作成します。ファイル名は、storage.rulesです。
こちらも読み込ませるために、jsonに追加します。
{
  "firestore": {
    "rules": "firestore.rules"
  },
  "storage": {
    "rules": "storage.rules" #ここを追記してください
  },
  "hosting": {
    "public": "./public",
    "headers": [{
      "source" : "**/*.@(js|html)",
      "headers" : [ {
        "key" : "Cache-Control",
        "value" : "max-age=0"
      } ]
    }]
  }
}
そしてこちらも最後にデプロイします。
$ firebase deploy --only storage
⚠  functions: package.json indicates an outdated version of firebase-functions.
 Please upgrade using npm install --save firebase-functions@latest in your functions directory.

=== Deploying to 'friendlychat-f7746'...

i  deploying storage
i  storage: checking storage.rules for compilation errors...
✔  storage: rules file storage.rules compiled successfully
i  storage: uploading rules storage.rules...
✔  storage: released rules storage.rules to firebase.storage/friendlychat-f7746.appspot.com

✔  Deploy complete!
アプリのレスポンスをFirebase Performance Monitoringを使って監視する。
このようにライブラリを読み込ませて、コンソール上からパフォーマンスをみることができます。デプロイしたら、使えるようになるそうです。
<script type="text/javascript">!function(n,e){var t,o,i,c=[],f={passive:!0,capture:!0},r=new Date,a="pointerup",u="pointercancel";function p(n,c){t||(t=c,o=n,i=new Date,w(e),s())}function s(){o>=0&&o<i-r&&(c.forEach(function(n){n(o,t)}),c=[])}function l(t){if(t.cancelable){var o=(t.timeStamp>1e12?new Date:performance.now())-t.timeStamp;"pointerdown"==t.type?function(t,o){function i(){p(t,o),r()}function c(){r()}function r(){e(a,i,f),e(u,c,f)}n(a,i,f),n(u,c,f)}(o,t):p(o,t)}}function w(n){["click","mousedown","keydown","touchstart","pointerdown"].forEach(function(e){n(e,l,f)})}w(n),self.perfMetrics=self.perfMetrics||{},self.perfMetrics.onFirstInputDelay=function(n){c.push(n),s()}}(addEventListener,removeEventListener);</script>
最後に全てをデプロイします。
$ firebase deploy --except functions
⚠  functions: package.json indicates an outdated version of firebase-functions.
 Please upgrade using npm install --save firebase-functions@latest in your functions directory.

=== Deploying to 'friendlychat-f7746'...

i  deploying storage, firestore, hosting
i  storage: checking storage.rules for compilation errors...
✔  storage: rules file storage.rules compiled successfully
i  firestore: checking firestore.rules for compilation errors...
✔  firestore: rules file firestore.rules compiled successfully
i  storage: uploading rules storage.rules...
i  firestore: uploading rules firestore.rules...
i  hosting[friendlychat-f7746]: beginning deploy...
i  hosting[friendlychat-f7746]: found 8 files in ./public
✔  hosting[friendlychat-f7746]: file upload complete
✔  storage: released rules storage.rules to firebase.storage/friendlychat-f7746.appspot.com
✔  firestore: released rules firestore.rules to cloud.firestore
i  hosting[friendlychat-f7746]: finalizing version...
✔  hosting[friendlychat-f7746]: version finalized
i  hosting[friendlychat-f7746]: releasing new version...
✔  hosting[friendlychat-f7746]: release complete

✔  Deploy complete!

Project Console: https://console.firebase.google.com/project/friendlychat-f7746/overview
Hosting URL: https://friendlychat-f7746.firebaseapp.com
そして、下記コマンドで、web上で公開できるようです。
$ firebase open hosting:site
まとめ
複数のサービスをライブラリを呼び出す形で利用できる。
それらのサービスは、jsonでまとめられている。
NoSQLですが、インデックスが使える。
モニタリングも簡単。
アプリ開発に専念できるbaasの名を冠するのは伊達じゃないということですね。
Dockerなんて・・・
こんな感じで使えるようになります。