IoTLT Advent Calendar 2019の4日目を担当します、ニアムギです。
「M5Stackに天気予報を表示」となんともベタな内容ですが、いい感じに汎用性のある仕組みが出来たので紹介したいと思います。
家族にも好評で、日ごろ使ってくれているのも嬉しいところです。
見た目
直近3日の天気予報を表示します。天気マークは長男に書いてもらいました。
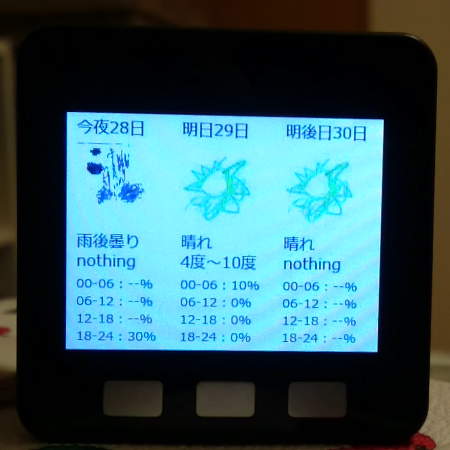
このような感じで表示されます。

※実際は30秒ほどかかります…
仕組み
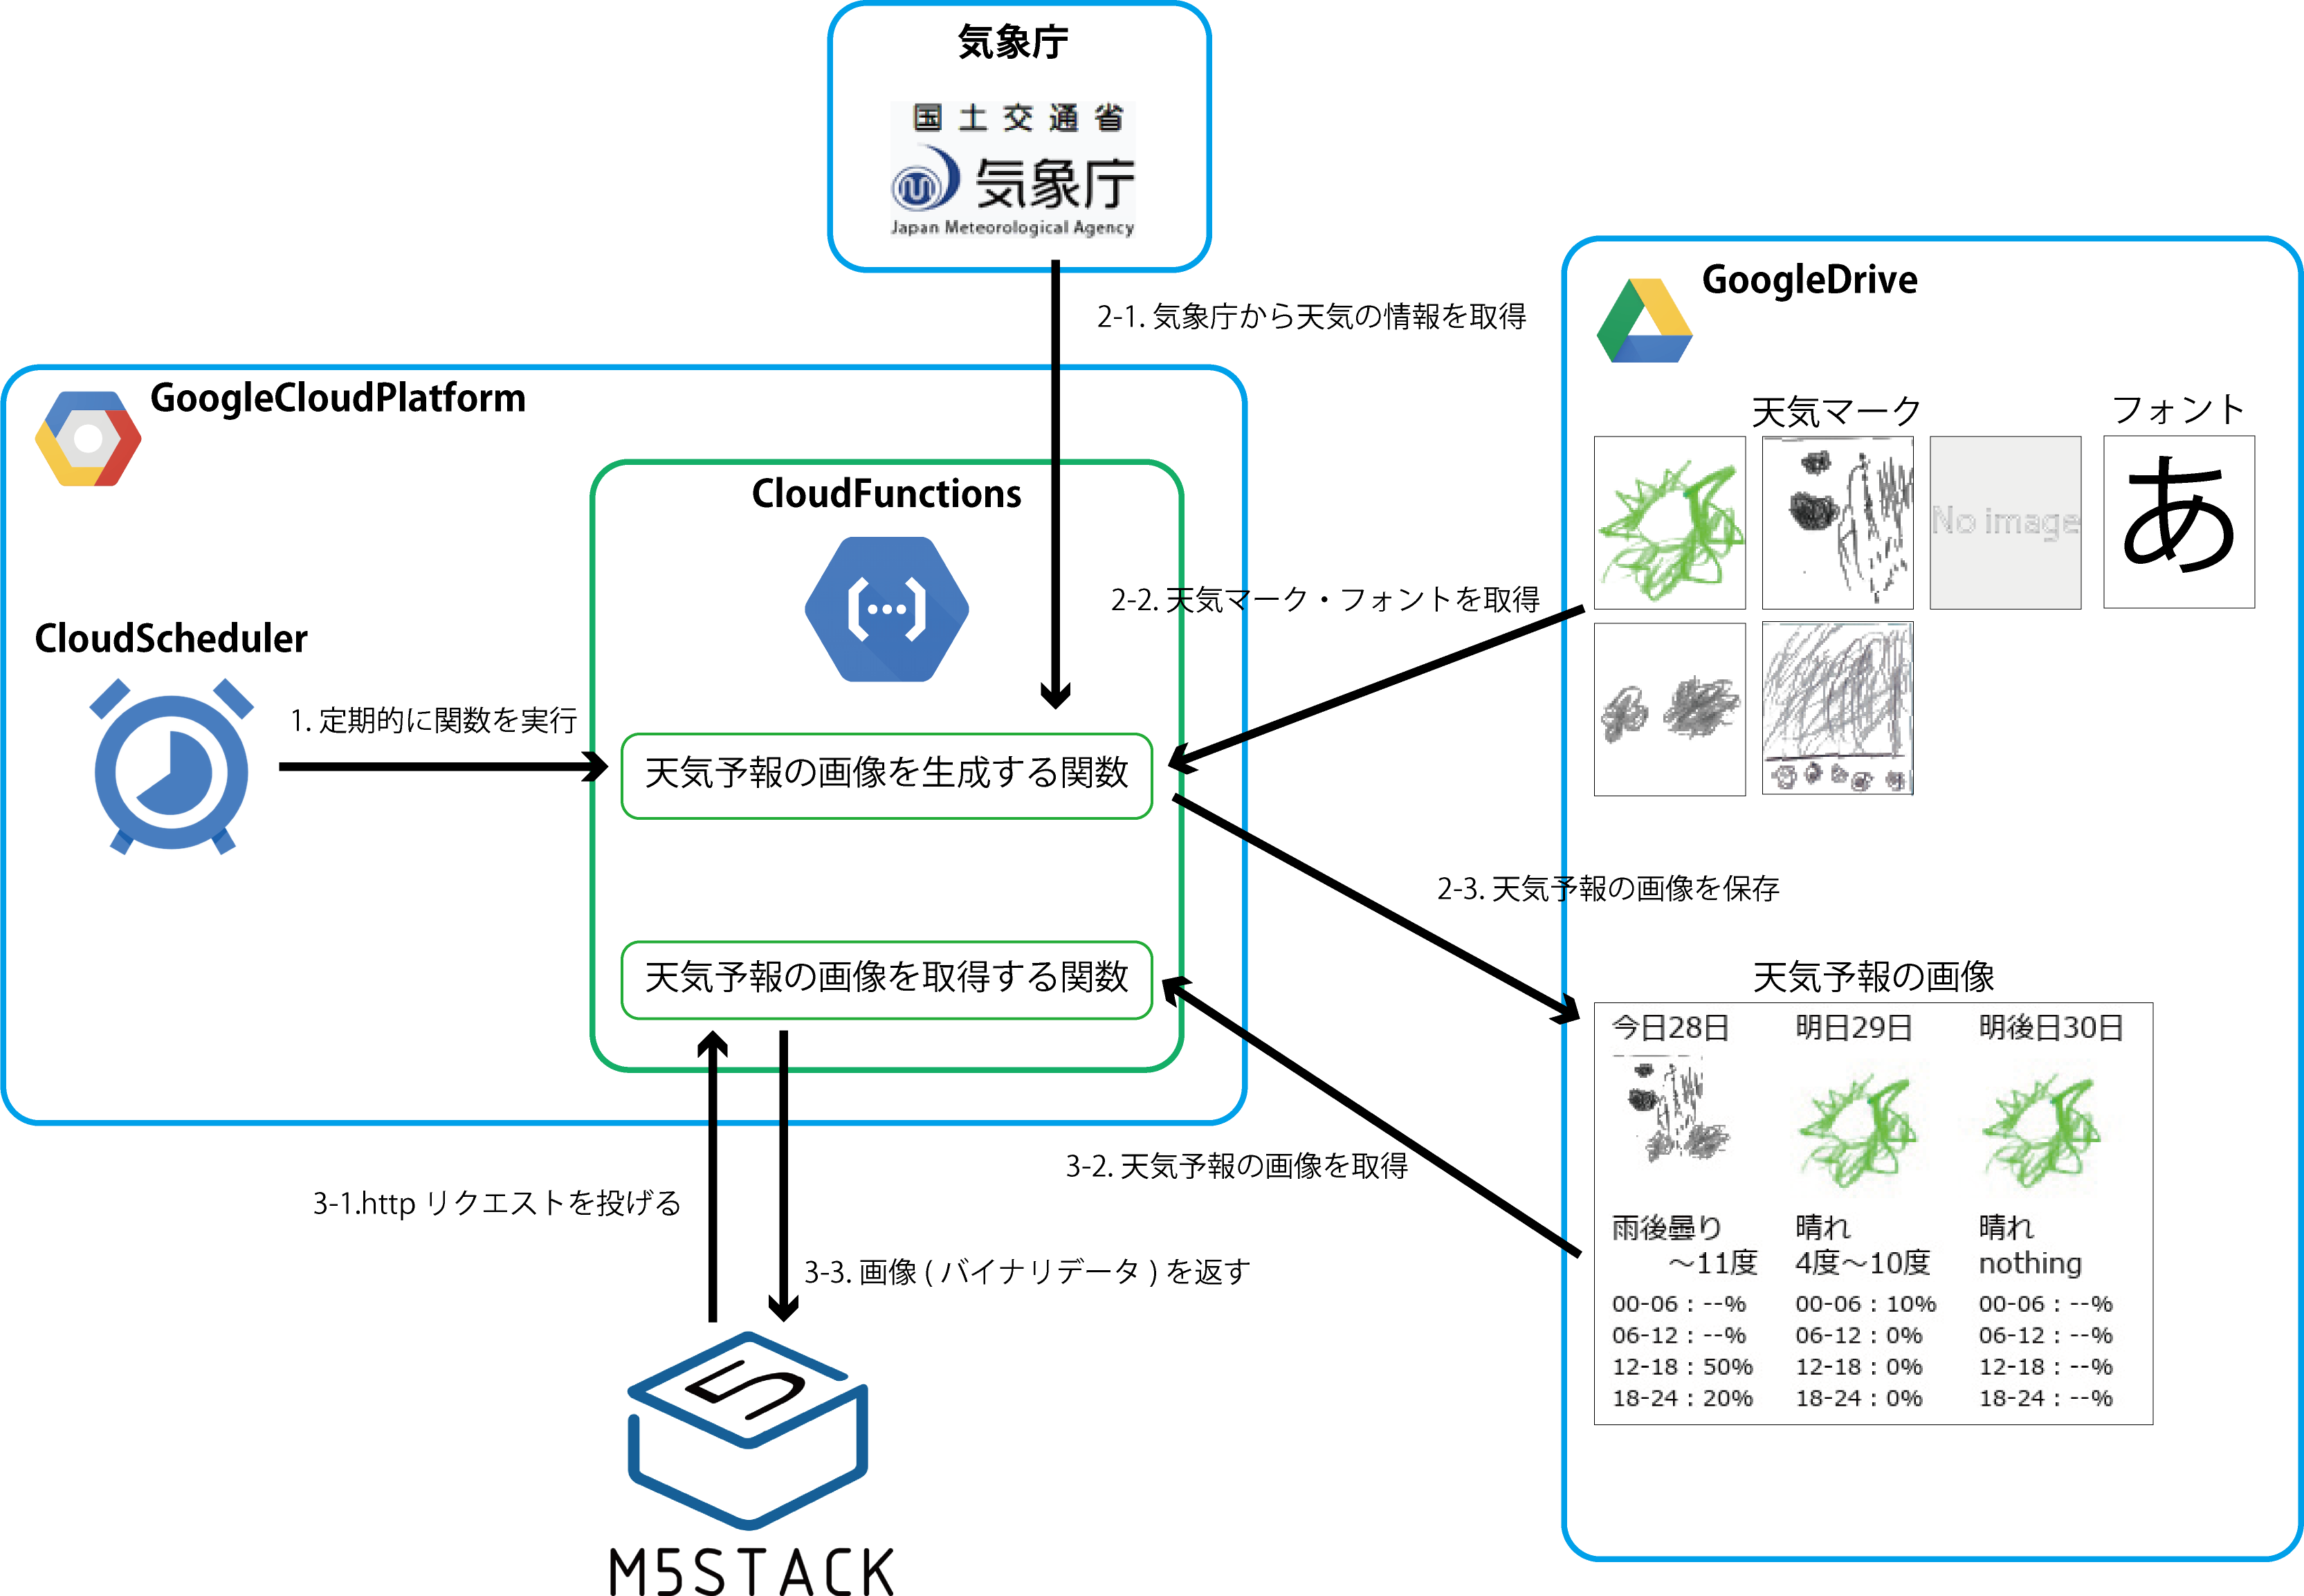
天気予報の画像を「生成する」と「取得する」の2つに分かれます。
- GoogleCloudPlatform(GCP)のCloudSchedulerで定期的に「天気予報の画像を生成する関数」を実行します。
- GCPのCloudFunctionsで天気予報の画像を作成、GoogleDriveに保存します。
- M5Stackからhttpリクエストで「天気予報の画像を取得する関数」を実行し、画像を取得します。
(詳細)画像生成について
ポイントとなるところを列挙していきます。
天気予報を取得する
気象庁の天気予報にアクセスしてデータを取得しています。
CloudFunctionsでファイルを扱う
クラウド上で動くCloudFunctionsでファイルを扱いたい場合、/tmpフォルダに保存できます。
つまり、GoogleDriveで取得したファイルを/tmpフォルダに保存することで、ローカル環境と同じようにファイルを扱えます。
GoogleDriveにアクセスするための準備
あらかじめアクセスに必要なクライアントID・クライアントシークレット・リフレッシュトークンを取得しておきます。
こちらについては以前dotstudioさんのブログに書かせていただきました。NefryBTからGoogleDriveにデータをアップロードする方法をご参照ください。
GoogleDriveを操作する
※ここはかなり細かい内容です。
GoogleDriveにアクセスするためにいくつか機能を用意します。
GoogleDriveにアクセスするサービスを取得する関数
先ほどのクライアントID・クライアントシークレット・リフレッシュトークンを使ってGoogleDriveにアクセスするサービスを取得します。
「python リフレッシュトークン Google API: oauth2client.client を使用して更新トークンから資格情報を取得する」を参考にしました。
def getDriveService():
    CLIENT_ID = os.getenv("drive_client_id")
    CLIENT_SECRET = os.getenv("drive_client_secret")
    REFRESH_TOKEN = os.getenv("drive_refresh_token")

    creds = client.OAuth2Credentials(
        access_token=None,
        client_id=CLIENT_ID,
        client_secret=CLIENT_SECRET,
        refresh_token=REFRESH_TOKEN,
        token_expiry=None,
        token_uri=GOOGLE_TOKEN_URI,
        user_agent=None,
        revoke_uri=None,
    )
    http = creds.authorize(httplib2.Http())

    creds.refresh(http)
    service = build("drive", "v3", credentials=creds, cache_discovery=False)
    return service
ファイル名で検索してIDを取得する関数
GoogleDrive内のデータはそれぞれIDが割り振られています。
IDでデータの取得や更新を行うため、IDの検索が必要となります。
def searchID(service, mimetype, nm):
    """Driveから一致するIDを探す
    """
    query = ""
    if mimetype:
        query = "mimeType='" + mimetype + "'"

    page_token = None
    while True:
        response = (
            service.files()
            .list(
                q=query,
                spaces="drive",
                fields="nextPageToken, files(id, name)",
                pageToken=page_token,
            )
            .execute()
        )

        for file in response.get("files", []):
            if file.get("name") == nm:
                return True, file.get("id")

        page_token = response.get("nextPageToken", None)
        if page_token is None:
            break
フォントデータを取得する関数
CloudFunctionsはクラウド上で動くため、日本語のフォントはおそらく使えないと思います。(試してないです)
そのためフォントをGoogleDriveから取得します。
mimetypeは"application/octet-stream"です。
def getFontFromDrive(service, fontName):
    """フォントをDriveから取得、tmpフォルダに保存する
    """
    ret, id = searchID(service, "application/octet-stream", fontName)
    if not ret:
        return None

    request = service.files().get_media(fileId=id)
    fh = io.FileIO("/tmp/" + fontName, "wb")  # ファイル

    downloader = MediaIoBaseDownload(fh, request)
    done = False
    while done is False:
        status, done = downloader.next_chunk()

    return "/tmp/" + fontName
画像データを取得する関数
天気マークを取得します。
mimetypeは"image/png"です。
def getImageFromDrive(service, imageName):
    """画像をDriveから取得、tmpフォルダに保存する
    """
    ret, id = searchID(service, "image/png", imageName)
    if not ret:
        return False

    request = service.files().get_media(fileId=id)
    fh = io.FileIO("/tmp/" + imageName, "wb")  # ファイル

    downloader = MediaIoBaseDownload(fh, request)
    done = False
    while done is False:
        status, done = downloader.next_chunk()

    return True
画像データをアップロードする関数
生成した天気予報の画像をGoogleDriveにアップロードします。
def uploadData(service, mimetype, fromData, toData, parentsID="root"):
    """ Driveにアップロードする
    """
    try:
        media = MediaFileUpload(fromData, mimetype=mimetype, resumable=True)
    except FileNotFoundError:
        return False

    # IDを検索、該当するデータがある場合は上書きする。
    ret, id = searchID(service, mimetype, toData)
    if ret:
        file_metadata = {"name": toData}

        file = (
            service.files()
            .update(fileId=id, body=file_metadata, media_body=media, fields="id")
            .execute()
        )
    else:
        file_metadata = {"name": toData, "parents": [parentsID]}

        file = (
            service.files()
            .create(body=file_metadata, media_body=media, fields="id")
            .execute()
        )

    return True
一連の流れ
上記で用意した関数を使って、天気予報の画像をGoogleDriveにアップロードします。
def CreateImgWeather(event, context):
    """ get weatherImage and upload to drive for M5stack
    """

    # 1. GoogleDriveにアクセスするサービスを取得
    driveService = getDriveService()

    # 2. フォントを取得
    fontPath = getFontFromDrive(driveService, "meiryo.ttc")
    if not fontPath:
        return False

    # 3. 天気マークを取得
    if not getImageFromDrive(driveService, "noImage.png"):
        return False
    if not getImageFromDrive(driveService, "fine.png"):
        return False
    if not getImageFromDrive(driveService, "cloud.png"):
        return False
    if not getImageFromDrive(driveService, "rain.png"):
        return False
    if not getImageFromDrive(driveService, "snow.png"):
        return False

    # 4. 天気予報の画像を生成
    weatherList = getWeekWeather()
    ret = createImg(fontPath, "/tmp/imgWeather.jpeg", weatherList)
    if not ret:
        return False

    # 5. GoogleDriveにアップロード
    ret = uploadData(
        driveService, "image/jpeg", "/tmp/imgWeather.jpeg", "imgWeather.jpeg"
    )
    if not ret:
        return False

    return True
(詳細)画像取得について
M5Stack側
詳細はソースを参照ください。
httpのPOSTリクエストでCloudFunctionsの関数にアクセスします。
こちらもまた、dotstudioさんの「HTTP通信でリクエストを投げる」を参考にしました。
[ホスト名] = "[プロジェクト名].cloudfunctions.net"
[関数名] = "getDriveImage_M5stack";
[ポート番号] = 443;

POST /[関数名] HTTP/1.1
Host: [ホスト名]:[ポート番号]
Connection: close
Content-Type: application/json;charset=utf-8
Content-Length:  + [ポストするjsonデータのサイズ]

[ポストするjsonデータ]
jsonデータ形式で以下のようなリクエストを投げます。
{
  "drive" : {
    "img" : "[ファイル名]",
    "trim" : "[分割の番号]"
  }
}
一度に取得できるデータ量の都合で8分割にしています。そのため8回POSTリクエストを投げます。
CloudFunctions側
M5StackからのPOSTリクエストに合わせて、天気予報の画像を取得します。
そして8分割にしたバイナリーデータを返します。
ソースを載せておきます。
import sys
import os
import io
from io import BytesIO
import numpy as np
from PIL import Image

import httplib2
from googleapiclient.discovery import build
from oauth2client import client, GOOGLE_TOKEN_URI
from apiclient.http import MediaIoBaseDownload


def getDriveService():
    ~画像生成と同じ~

def searchID(service, mimetype, nm):
    ~画像生成と同じ~


def downloadData(mimetype, data):
    # GoogleDriveにアクセスするサービスを取得
    drive_service = getDriveService()

    # IDを検索
    ret, id = searchID(drive_service, mimetype, data)
    if not ret:
        return False, None

    # 天気予報の画像を検索
    request = drive_service.files().get_media(fileId=id)
    fh = io.BytesIO()
    downloader = MediaIoBaseDownload(fh, request)
    done = False
    while done is False:
        status, done = downloader.next_chunk()

    return True, fh.getvalue()


def devideImage_M5stack(imgBinary, _trim):
    """M5Stack用に画像を分割する。返値はイメージデータ
    """
    imgNumpy = 0x00

    # 入力データの確認
    if _trim.isnumeric():
        trimPos = int(_trim)
        if trimPos <= 0 or trimPos > 8:
            return False
    else:
        return False

    # 画像の分割
    # 1 2 3 4
    # 5 6 7 8
    Trim = [
        (0, 0, 80, 120),
        (80, 0, 160, 120),
        (160, 0, 240, 120),
        (240, 0, 320, 120),
        (0, 120, 80, 240),
        (80, 120, 160, 240),
        (160, 120, 240, 240),
        (240, 120, 320, 240),
    ]

    # PILイメージ <- バイナリーデータ
    img_pil = Image.open(BytesIO(imgBinary))

    # トリミング
    im_crop = img_pil.crop(Trim[trimPos - 1])

    # numpy配列(RGBA) <- PILイメージ
    imgNumpy = np.asarray(im_crop)

    return True, imgNumpy


def getBinary(img):
    """画像をバイナリデータへ変換
    """
    ret = ""
    pilImg = Image.fromarray(np.uint8(img))
    output = io.BytesIO()
    pilImg.save(output, format="JPEG")
    ret = output.getvalue()

    return ret


def getDriveImg_Binary(imgName, trim):
    """googleDriveに保存してある画像を取得する。返値はバイナリーデータ。
    """

    img = 0x00

    # Driveから画像(バイナリーデータ)を取得
    ret, imgBinary = downloadData("image/jpeg", imgName)
    if not ret:
        print("...error")
        return ""

    print(ret, len(imgBinary))

    # 画像を分割する
    # ※M5Stack専用
    if trim is not None:
        isGet, img = devideImage_M5stack(imgBinary, trim)
        if not isGet:
            return ""

        # バイナリデータに変換する
        imgBinary = getBinary(img)

    return imgBinary


def getDriveImage_M5stack(request):
    imgName = ""
    trim = "0"

    # リクエストデータ(JSON)を変換
    request_json = request.get_json()

    # GoogleDriveへのアクセス情報を取得
    if request_json and "drive" in request_json:
        imgName = request_json["drive"]["img"]
        trim = request_json["drive"]["trim"]
    else:
        return ""

    # トリムした天気予報の画像を取得する
    ret = getDriveImg_Binary(imgName, trim)

    return ret
応用
この仕組みの良いところは、「画像さえ用意すればM5Stackに表示できる」ことです。
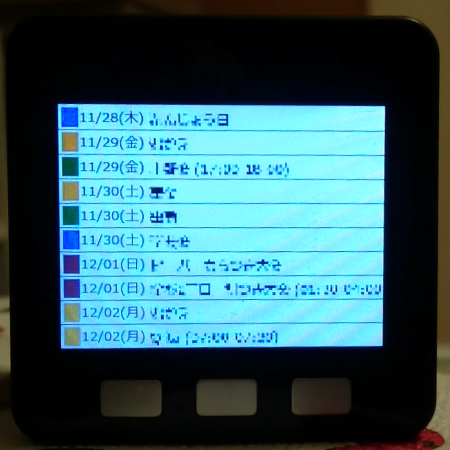
つまり天気予報に限らず、スケジュールやタスクなど何にでも対応できます。M5Stack側は取得する画像名を設定するだけです。
また画像をM5Stackの外で生成しているので、画像を修正したいときにM5Stackのプログラムを触る必要はありません。
以下はGoogleカレンダーを表示させたパターンです。(予定はモザイクかけています)
まとめ
今回M5Stackに合わせた画像表示システムを作れたことで、応用パターンをいくつか考えるようになりました。M5Stackのディスプレイは食卓にちょうど良い大きさなので色々と活用したいと思います。
何かの参考になれば幸いです。ではでは。
参考
NefryBTからGoogleDriveにデータをアップロードする方法
python リフレッシュトークン Google API: oauth2client.client を使用して更新トークンから資格情報を取得する
HTTP通信でリクエストを投げる