A-Frameを使用してWebVRを自分のサイトに組み込んでみました。短いコードでWebVRが作成できるのがすごいです。
実際の画面がこちらです。
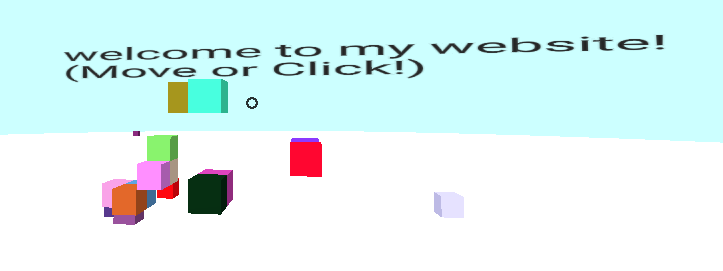
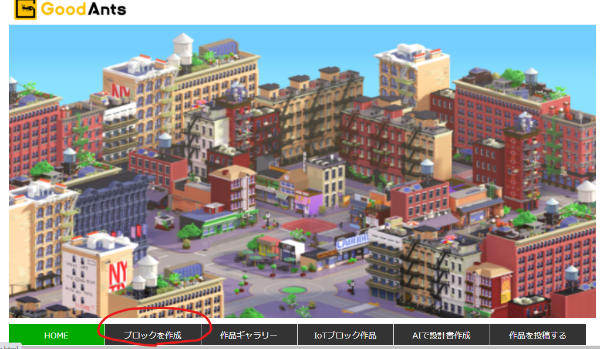
公開サイト
以下の「ブロックを作成」メニューから飛べます。
今回追加した機能
- 視点を合わせてクリックをするとブロックを配置
- 置いたブロックをクリックするとランダムで色変更
- 十字キーで左右上下の移動
- テキスト表示(英語)
今回追加しなかった機能
- 今後は置いたブロックをクリックしたら色を指定できるようにしたい
- テキスト表示(日本語) ここで出来そうです
- 空間(sky)と地面(ground)は最初はテクスチャを張っていたが、雰囲気に合わず一旦削除
コード
<!DOCTYPE html>
<html>
<head>
<script src="https://aframe.io/releases/0.5.0/aframe.min.js"></script>
<script src="https://unpkg.com/aframe-teleport-controls@0.2.x/dist/aframe-teleport-controls.min.js"></script>
<script src="https://unpkg.com/aframe-controller-cursor-component@0.2.x/dist/aframe-controller-cursor-component.min.js"></script>
<script src="https://rawgit.com/ngokevin/kframe/csstricks/scenes/aincraft/components/random-color.js"></script>
<script src="https://rawgit.com/ngokevin/kframe/csstricks/scenes/aincraft/components/snap.js"></script>
<script src="https://rawgit.com/ngokevin/kframe/csstricks/scenes/aincraft/components/intersection-spawn.js"></script>
<body>
<a-scene>
<a-assets>
<a-mixin id="voxel" geometry="primitive: box; height: 0.3; width: 0.3; depth: 0.3" material="shader: standard" random-color snap="offset: 0.25 0.25 0.25; snap: 0.3 0.3 0.3 " img id="boxTexture" src="https://i.imgur.com/mYmmbrp.jpg"></a-mixin>
</a-assets>
<a-cylinder id="ground" collar="white" radius="30" height="0.1"></a-cylinder>
<a-sky color="#CCFFFF" radius="900"></a-sky>
<!-- Hands. -->
<a-entity id="teleHand" hand-controls="left" teleport-controls="type: parabolic; collisionEntities: [mixin='voxel'], #ground"></a-entity>
<a-entity id="blockHand" hand-controls="right" controller-cursor intersection-spawn="event: click; mixin: voxel"></a-entity>
<!-- Camera. -->
<a-camera>
<a-cursor intersection-spawn="event: click; mixin: voxel"></a-cursor>
</a-camera>
<a-text position="-3.5 1.25 -3" value="welcome to my website! (Move or Click!)" color="#222222" scale="3"></a-text>
</a-scene>
</body>
</html>
本当に短いです。。笑
解説
以下の部分でクリックしたらブロックが表示されるようにしています。
ブロックの大きさは、height・width・depthで定義しています。
<a-assets>
<a-mixin id="voxel" geometry="primitive: box; height: 0.3; width: 0.3; depth: 0.3" material="shader: standard" random-color snap="offset: 0.25 0.25 0.25; snap: 0.3 0.3 0.3 ></a-mixin>
</a-assets>
<a-scene>
<a-text position="-3 2.25 -3" value="welcome to my website! (Move or Click!)" color="#222222" scale="3"></a-text>
</a-scene>
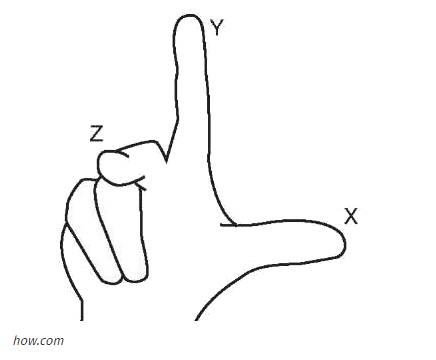
positionでx軸、y軸、z軸の順で座標を定義しており、半角スペースで区切ります。忘れた時には以下のイラストが役立ちます。
参考にしたサイト
公式ページ
今後の改善点
- この状態でデザインがしやすいとは決して言えないため、改良していきたい
- objファイルの取込も活用して、もう少し世界観を表現したい
- 他の技術ももう少し組み合わせたかった