はじめに
UE4ではコンソールコマンドを追加する場合、UFUNCTIONのマクロ指定子のExecを特定のクラスの関数で使用することが多いと思います。
UFUNCTION(Exec)
static void ConsoleCommand();
しかし、この方法ではプレイ中は使えるのですが、
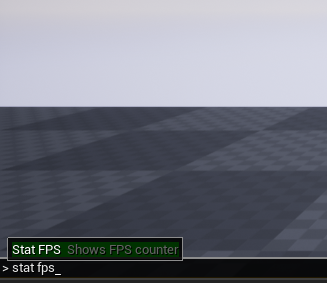
アウトプットログからコンソールコマンドを使う際には使えません。
今回はこのアウトプットログから使えるコントロールコマンドの追加方法をご紹介します。
今回ご紹介する方法はC++を使います。
つくりかた
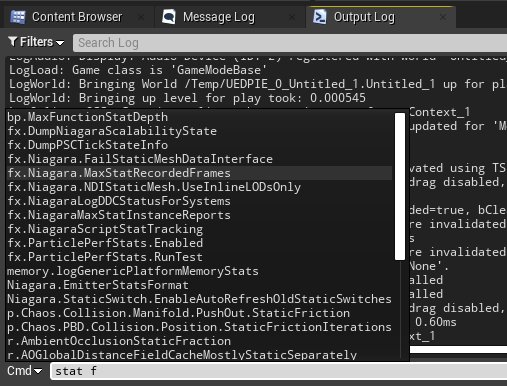
やり方はかなり簡単で、以下のいずれかのクラスをどこでも良いのでstaticで定義するだけです。
| クラス | 説明 | 関数例 |
|---|---|---|
| FAutoConsoleCommand | 引数無しのvoid関数がバインドできる | void() |
| FAutoConsoleCommandWithWorld | 引数から現在開いているレベルを受け取れる | void(UWorld*) |
| FAutoConsoleCommandWithWorldAndArgs | 引数からコンソールコマンドの引数と現在開いているレベルを受け取れる | void (const TArray&, UWorld*) |
| FAutoConsoleCommandWithOutputDevice | 引数から出力デバイスを受け取れる | void(FOutputDevice&) |
| FAutoConsoleCommandWithWorldArgsAndOutputDevice | 引数からコンソールコマンドの引数と現在開いているレベル、出力デバイスを受け取れる | void(const TArray&, UWorld*, FOutputDevice&) |
まずは、使用例を見てみましょう。
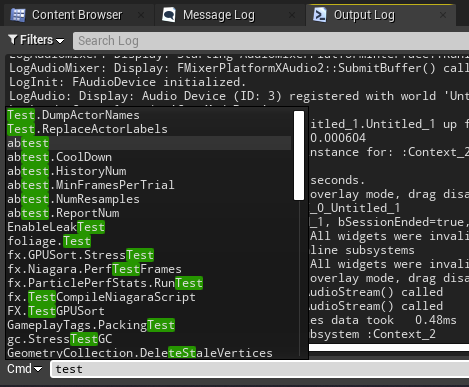
現在開いているレベルのアクターの名前をログ出力する
static FAutoConsoleCommandWithWorld DumpActorNames
(
	TEXT("Test.DumpActorNames"),
	TEXT("Logs the names of actors located in the currently open world."),
	FConsoleCommandWithWorldDelegate::CreateLambda([](UWorld* World)
	{
		check(IsValid(World));

		for (TActorIterator<AActor> Itr(World); Itr; ++Itr)
		{
			const AActor* Actor = *Itr;
			UE_LOG(LogConsoleCommandTest, Log, TEXT("%s"), *GetNameSafe(Actor));
		}
	})
);
現在開いているレベルのアクターラベルの特定の文字列を置換する
static FAutoConsoleCommandWithWorldAndArgs ReplaceActorLabels
(
	TEXT("Test.ReplaceActorLabels"),
	TEXT("Replaces the specified string on the actor's label with the specified string."),
	FConsoleCommandWithWorldAndArgsDelegate::CreateLambda([](const TArray<FString>& Args, UWorld* World)
	{
		check(IsValid(World));

		if (Args.Num() < 2)
		{
			UE_LOG(LogConsoleCommandTest, Error, TEXT("Specify the character string before the change and the character string after the change in the argument."));
			return;
		}

		const FString& From = Args[0];
		const FString& To = Args[1];

		for (TActorIterator<AActor> Itr(World); Itr; ++Itr)
		{
			AActor* Actor = *Itr;
			if (!IsValid(Actor))
			{
				continue;
			}

			const FString OriginalLabel = Actor->GetActorLabel();
			const FString ReplacedLabel = OriginalLabel.Replace(*From, *To);
			Actor->SetActorLabel(ReplacedLabel);

			if (OriginalLabel != ReplacedLabel)
			{
				UE_LOG(LogConsoleCommandTest, Log, TEXT("Renamed \"%s\" to \"%s\"."), *OriginalLabel, *ReplacedLabel);
			}
		}
	})
);
今回用意した使用例はどちらもレベル上での操作だったため、FAutoConsoleCommandWithWorld系を使用しました。
引数はどのクラスを使っても同じで、第一引数でコマンド名(コンソールコマンドとして入力する文字列)、第二引数でコマンドの説明(コマンド名の横に表示される)、第三引数がそれぞれの型に応じたデリゲート、第四引数はコンソール変数のフラグになっています。
第二引数のコマンドの説明文ですが、コンソールコマンドをプレイ中に使用する場合は表示されますが、アウトプットログで使用する場合は表示されません。

第四引数のフラグですが、こちらはコンソールコマンドを登録する場合は使用されないと思いますのでデフォルトのままで良いでしょう。
今回は詳しく紹介していませんが、コンソール変数というものがあり、こちらを定義する際に使うものだと思われます。
コンソール変数を定義する場合は、FAutoConsoleVariableやFAutoConsoleVariableRefを使うと良いと思います。
コンソール変数の機能は以前からありましたが、UE5からData Driven CVarsという便利な機能が追加されていましたので合わせてご紹介しておきます。
UE5 Data Driven CVars(コンソール変数)について
おわりに
エディタから何かしらの機能を実行する場合、こちらの記事でご紹介した用にレベルエディタのメニューに専用の項目を追加するのも良いですが、テストなどサクッと作ってみたい時などはコンソールコマンドも重宝しそうです。
今回の方法で追加できるコンソールコマンドは主にエディタ拡張などをする際に役に立つのではないでしょうか。
この記事で紹介したプロジェクトは以下でダウンロードできます。
https://github.com/Naotsun19B/ConsoleCommandTest