Raspberry PiにOpenCV(2.4)をインストールし、RasPi-CAMで画像処理を行うまでを手順をまとめていきます。
必要なライブラリのインストール
まずは、必要なツールやライブラリをインストールします。
sudo apt-get -y install build-essential cmake cmake-qt-gui pkg-config libpng12-0 libpng12-dev libpng++-dev libpng3 libpnglite-dev zlib1g-dbg zlib1g zlib1g-dev pngtools libtiff5-dev libtiff4 libtiffxx0c2 libtiff-tools
sudo apt-get -y install libjpeg8 libjpeg8-dev libjpeg8-dbg libjpeg-progs libavcodec-dev libavcodec56 libavformat56 libavformat-dev libgstreamer0.10-0-dbg libgstreamer0.10-0 libgstreamer0.10-dev libxine2-ffmpeg libxine2-dev libxine2-bin libunicap2 libunicap2-dev libdc1394-22-dev libdc1394-22 libdc1394-utils swig libv4l-0 libv4l-dev libgtk2.0-dev pkg-config
sudo apt-get install libswscale-dev
OpenCVのダウンロードとインストール
続いてOpenCV(2.4)のソースコードをダウンロードして、buildします。
"make -j 4"はCPUコアを4つ使ってbuildするということなのですが、若干不安定です。時間がかかりますが、"make -j 2"や"make"の方がよいかもしれません。
git clone -b 2.4 git://github.com/opencv/opencv
cd opencv
mkdir build
cd build
cmake -D CMAKE_BUILD_TYPE=RELEASE -D CMAKE_INSTALL_PREFIX=/usr/local -D BUILD_NEW_PYTHON_SUPPORT=ON -D BUILD_EXAMPLES=ON ..
make -j 4
sudo  make install
sudo  ldconfig
cmakeの途中でたくさんlogが流れます。以下のように自分が使用する言語が対応されていることを確認しましょう。
--   C/C++:
--     Built as dynamic libs?:      YES
--     C++ Compiler:                /usr/bin/c++  (ver 4.9.2)
RasPi-CAM用ライブラリのインストール
続いてRaspPiCamをOpenCVから使用するためのライブラリをインストールします。この通りのフォルダ名にしないと後で動かなくなるので注意してください。元はこちらにすべて記載されています。
Raspberry Pi userland libraryのインストール
sudo apt-get install gcc g++ libx11-dev libxt-dev libxext-dev libgraphicsmagick1-dev libcv-dev libhighgui-dev
mkdir -p ~/git/raspberrypi
cd ~/git/raspberrypi
git clone https://github.com/raspberrypi/userland.git
cd userland
./buildme
raspicam libraryのインストール
ビルドした後に、中身の確認をしています。libraspicamcv.a ができて入ればOKです。
cd ~/git
git clone https://github.com/robidouille/robidouille.git
cd robidouille/raspicam_cv
mkdir objs
make
ls
Makefile   RaspiCamCV.c  RaspiCamTest.c   libraspicamcv.so  raspicamtest
README.md  RaspiCamCV.h  libraspicamcv.a  objs
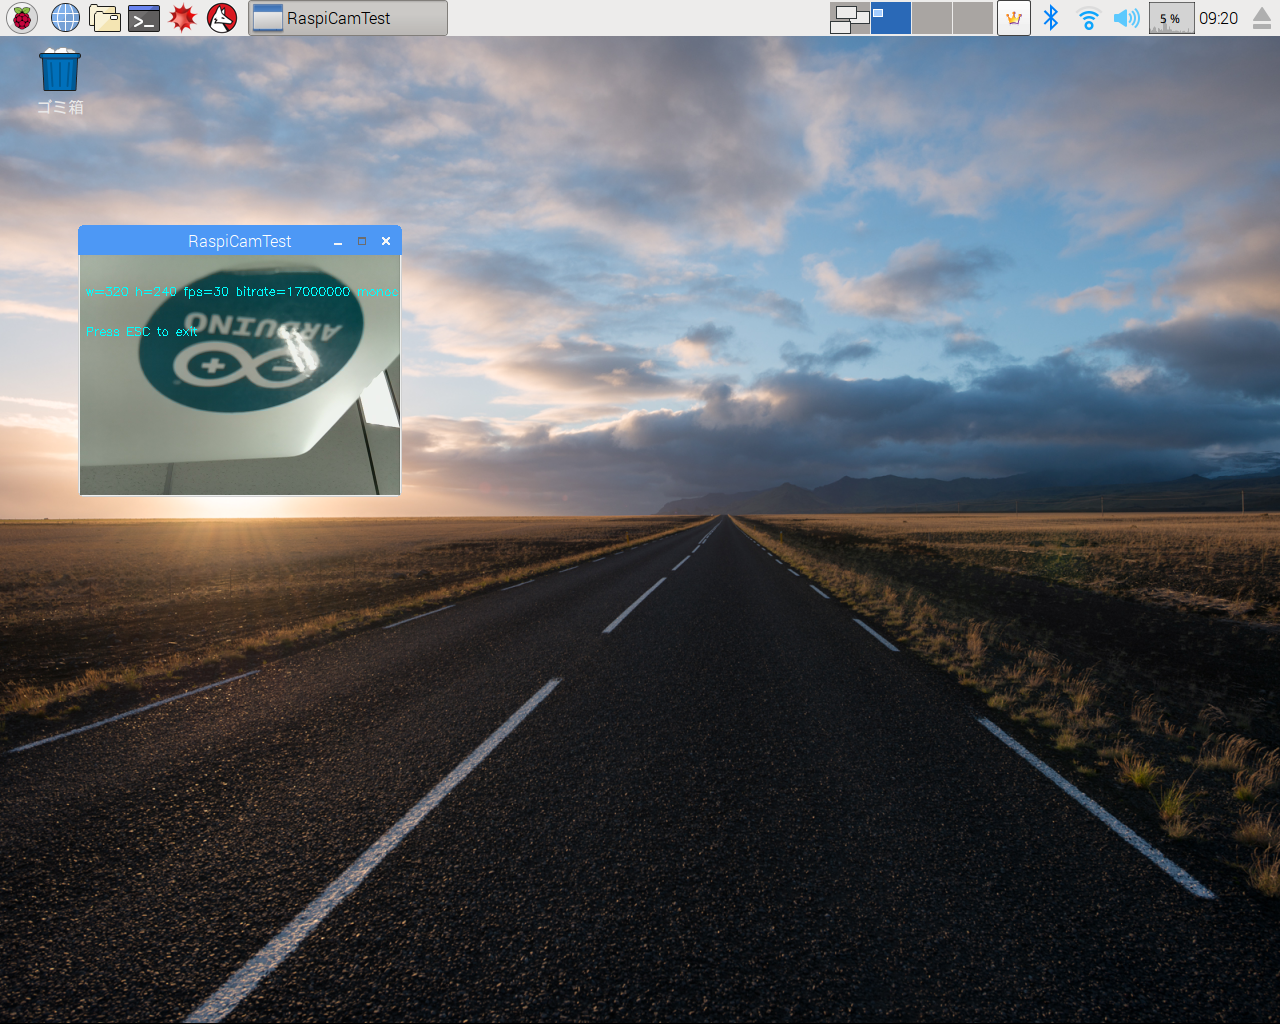
動作確認
"raspicamtest"を実行して動作確認をしてみましょう。
./rasoucantest
カメラの画像が表示されました!!
OpenCVでから使用する。
OpenCVに含まれている顔認識のテーブルを使用してリアルタイム顔認識をするプログラムを作りました。認識した人の数もコンソール画面に表示します。
facedetectを作成するためのフォルダを作り、必要なライブラリをコピーします。
mkdir ~/facedetect
cd facedetect
# copy library
cp ~/git/robidouille/raspicam_cv/libraspicamcv.a  ~/git/robidouille/raspicam_cv/RaspiCamCV.h .
続いて、本ページの最後に書いてあるコードをfacedetect.cppと言うファイル名で作成してください。
作成したfacedetect.cppをビルドし、実行します。
# build
g++ facedetect.cpp `pkg-config opencv --cflags` `pkg-config opencv --libs` -o facedetect -L . libraspicamcv.a -L ~/git/raspberrypi/userland/build/lib -lmmal_core -lmmal -lmmal_util -lvcos -lbcm_host
# execute
./facedetect
facedetect.cpp
# include "opencv2/objdetect/objdetect.hpp"
# include "opencv2/highgui/highgui.hpp"
# include "opencv2/imgproc/imgproc.hpp"
# include "opencv2/opencv.hpp"

# include <fcntl.h>
# include <sys/ioctl.h>
# include <sys/types.h>
# include <linux/kernel.h>
# include <unistd.h>
# include <cctype>
# include <fstream>
# include <iostream>
# include <iterator>
# include <stdio.h>
# include <vector>
# include <string.h>
# include <typeinfo>

# include "RaspiCamCV.h"

using namespace std;
using namespace cv;

Mat detectFaceInImage(Mat &image,string &cascade_file,int *num){
	CascadeClassifier cascade;
	cascade.load(cascade_file);

	vector<Rect> faces;
	cascade.detectMultiScale(image, faces, 1.1,3,0,Size(20,20));

	*num = faces.size();

	for (int i = 0; i < faces.size(); i++){
		rectangle(image, Point(faces[i].x,faces[i].y),Point(faces[i].x + faces[i].width,faces[i].y + faces[i].height),Scalar(0,200,0),3,CV_AA);
	}

	return image;
}

int main( int argc, const char** argv )
{

	//CvCapture* capture = 0;
	RaspiCamCvCapture* capture = 0;

	RASPIVID_CONFIG * config = (RASPIVID_CONFIG*)malloc(sizeof(RASPIVID_CONFIG));
	config->width=320;
	config->height=240;
	config->bitrate=0;  // zero: leave as default
	config->framerate=0;
	config->monochrome=0;

	// save
	//VideoWriter writer("result.avi",CV_FOURCC_DEFAULT,10,Size(640,480),true);

	// --------------------------------------------------------------
	cv::Mat frame1,grayImage;

	// catch raspi-cam
	capture = (RaspiCamCvCapture *) raspiCamCvCreateCameraCapture2(0, config);

	cvNamedWindow( "origin", 1 );

	//cvSetMouseCallback("origin",on_mouse,0);
	if( capture )
	{
		cout << "In capture ..." << endl;
		for(;;)
		{

			//IplImage* iplImg = cvQueryFrame( capture );
			IplImage* iplImg1;
			iplImg1 = raspiCamCvQueryFrame( capture );
			frame1 = iplImg1;
			char msg[64];
			int numFace;

			// optimize frame
			cv::flip(frame1,frame1,0);

			// face detect
			string filename = "/home/pi/opencv-2.4/data/haarcascades/haarcascade_frontalface_default.xml";
			frame1=detectFaceInImage(frame1,filename,&numFace);

			// print number of face
			if(numFace){
				sprintf(msg,"%d",numFace);
				cout << msg << endl;
			}

			// display Image
			cv::imshow("origin", frame1);

			if( waitKey( 10 ) >= 0 )
				goto _cleanup_;
		}

		waitKey(0);

_cleanup_:

		//cvReleaseCapture( &capture );
		// change for raspicam
		raspiCamCvReleaseCapture(&capture);
	}
	cvDestroyWindow("origin");

	return 0;
}