
はじめに
Cloud9のHTML5テンプレートを利用して、WEBサイトをHerokuで公開する手順について解説します。
HerokuへのデプロイにはHeroku Gitを利用します。

参考サイト
How to deploy a static website to Heroku
準備
- Herokuのアカウントを作成しておく
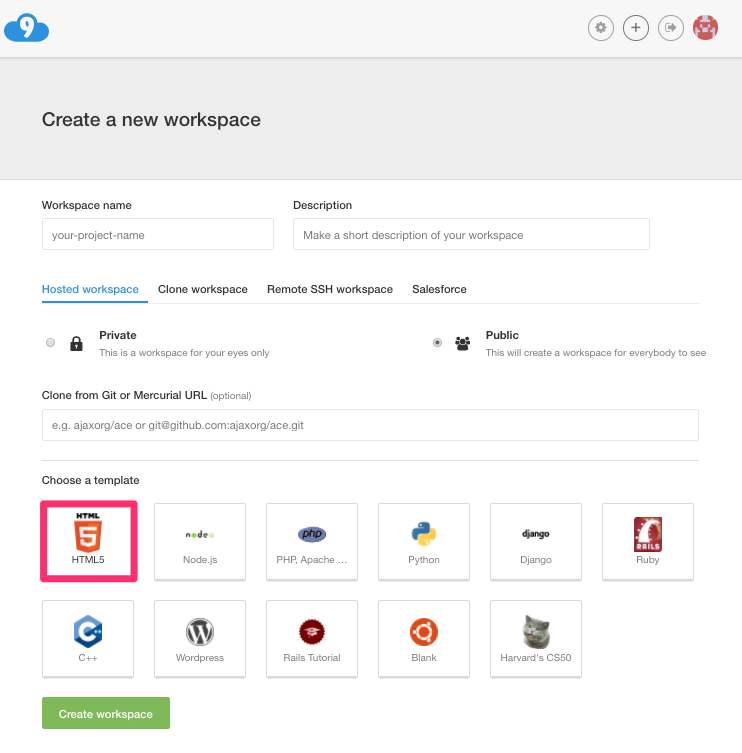
- Cloud9でHTMLテンプレートを選択してワークスペースを作成しておく
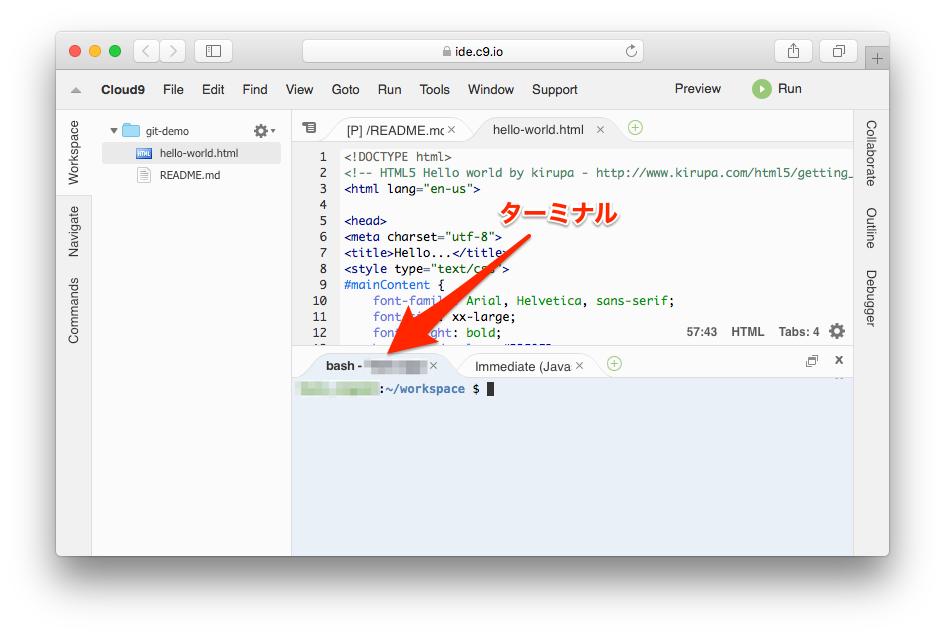
- Cloud9のターミナルを表示しておく
補足:
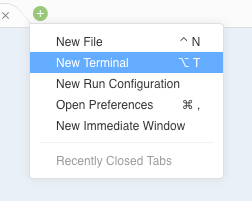
操作できるターミナルがない場合は+ > New Terminalで新しいターミナルタブを用意できます。
ローカルリポジトリの準備
Heroku Gitを利用したデプロイが実行できるようにGitコマンドでローカルリポジトリ を作成して、デプロイするファイル一式をコミットしておきます。
# 初期化
$ git init

# ディレクトリ配下のファイルをコミット対象にする
$ git add *

# コミット
$ git commit -m "Herokuにリリースするファイル一式をコミット"
Heroku
ログイン
heroku loginコマンドを実行して、事前に用意しておいたherokuアカウントを利用した操作が実施できるようにします。
$ heroku login

Enter your Heroku credentials:
Email: xxxxx@gmail.com
Password: ********
Logged in as xxxxx@gmail.com
アプリ作成
heroku create <アプリ名>コマンドを実行して、Herokuアプリを作成します。
<アプリ名>は省略可能です。省略するとアプリ名が自動で割り当てられます。
アプリが作成されるとHerokuアプリのWeb URL,Git URLが出力されます。
$ heroku create <アプリ名>
Creating ⬢ xxxxx-xxxxx-xxxxx... done
https://xxxxx-xxxxx-xxxxx.herokuapp.com/ | https://git.heroku.com/xxxxx-xxxxx-xxxxx.git
補足:
https://xxxxx-xxxxx-xxxxx.herokuapp.com/はWeb URLです。
ブラウザなどでこのURLにアクセスすることでデプロイしたアプリを表示することができるようになります。
https://git.heroku.com/xxxxx-xxxxx-xxxxx.gitはGIt URLです。
Gitコマンドを利用してこのURLへソースコードをPushすることでデプロイを実行することができるようになります。
作成したHerokuアプリの情報はheroku infoコマンドでも参照可能です。
$ heroku info
=== cloud9-heroku
Auto Cert Mgmt: false
Dynos:
Git URL:        https://git.heroku.com/xxxxx-xxxxx-xxxxx.git
Owner:          xxxxx@gmail.com
Region:         us
Repo Size:      0 B
Slug Size:      0 B
Stack:          heroku-xx
Web URL:        https://xxxxx-xxxxx-xxxxx.herokuapp.com/
リモートリポジトリの確認
Git初期化(git init)済みのローカルリポジトリでheroku createコマンドを実行すると、リモートリポジトリherokuとしてGit URLが自動で登録されます。
$ git remote -v
heroku  https://git.heroku.com/xxxxx-xxxxx-xxxxx.git (fetch)
heroku  https://git.heroku.com/xxxxx-xxxxx-xxxxx.git (push)
Git初期化(git init)が未実施だった場合はgit remote addコマンドを実行してGit URLをリモートリポジトリherokuとして登録する必要があります。
# Git初期化
$ git init

# ディレクトリ配下のファイルをすべてコミット
$ git add *
$ git commit -m "first commit"

# Git URLをリモートリポジトリherokuとして登録
$ git remote add heroku https://git.heroku.com/xxxxx-xxxxx-xxxxx.git
デプロイ
Git URLにPush(git push heroku masterコマンド)を実行することでデプロイを実行することができます。
失敗するケース
Cloud9のHTMLテンプレートにはデフォルトでhtmlファイルとmdファイルが含まれてます。
この状態でGit URLにPushを実施しても「このアプリで使われてるデフォルトの言語が検出できなかったよ」と言われてデプロイに失敗します。
$ git push heroku master
Counting objects: 4, done.
Delta compression using up to 8 threads.
Compressing objects: 100% (4/4), done.
Writing objects: 100% (4/4), 1.34 KiB | 1.34 MiB/s, done.
Total 4 (delta 0), reused 0 (delta 0)
remote: Compressing source files... done.
remote: Building source:
remote:
remote:  !     No default language could be detected for this app.
remote:                         HINT: This occurs when Heroku cannot detect the buildpack to use for this application automatically.
remote:                         See https://devcenter.heroku.com/articles/buildpacks
remote:
remote:  !     Push failed
remote: Verifying deploy...
remote:
remote: !       Push rejected to cloud9-heroku.
remote:
To https://git.heroku.com/xxxxx-xxxxx-xxxxx.git
 ! [remote rejected] master -> master (pre-receive hook declined)
error: failed to push some refs to 'https://git.heroku.com/xxxxx-xxxxx-xxxxx.git'
index.phpを追加してデプロイ
htmlファイルとmdファイルだけではHerokuが言語を検出できないため、index.phpを追加します。
こうすることでHerokuがPHP環境として検出してくれるようになります。
$ touch index.php

$ git add index.php
$ git commit -m 'index.phpを追加'
[master 18af38e] Add index.php
 1 file changed, 0 insertions(+), 0 deletions(-)
 create mode 100644 index.php
この状態でGit URLにPushを実施するとPHPの環境が構築されてデプロイに成功します。
$ git push heroku master
Counting objects: 7, done.
Delta compression using up to 8 threads.
Compressing objects: 100% (6/6), done.
Writing objects: 100% (7/7), 1.56 KiB | 1.56 MiB/s, done.
Total 7 (delta 1), reused 0 (delta 0)
remote: Compressing source files... done.
remote: Building source:
remote:
remote: -----> PHP app detected
remote:
remote:  !     WARNING: No 'composer.json' found.
remote:        Using 'index.php' to declare app type as PHP is considered legacy
remote:        functionality and may lead to unexpected behavior.
remote:
remote: -----> Bootstrapping...
remote: -----> Installing platform packages...
remote:        NOTICE: No runtime required in composer.lock; using PHP ^5.5.17
remote:        - nginx (1.8.1)
remote:        - php (5.6.32)
remote:        - apache (2.4.29)
remote: -----> Installing dependencies...
remote:        Composer version 1.5.2 2017-09-11 16:59:25
remote: -----> Preparing runtime environment...
remote:        NOTICE: No Procfile, using 'web: heroku-php-apache2'.
remote: -----> Checking for additional extensions to install...
remote: -----> Discovering process types
remote:        Procfile declares types -> web
remote:
remote: -----> Compressing...
remote:        Done: 13.8M
remote: -----> Launching...
remote:        Released v3
remote:        https://xxxxx-xxxxx-xxxxx.herokuapp.com/ deployed to Heroku
remote:
remote: Verifying deploy... done.
To https://git.heroku.com/xxxxx-xxxxx-xxxxx.git
 * [new branch]      master -> master
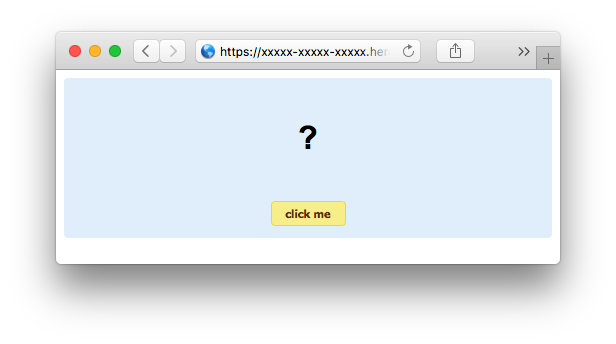
デプロイ成功後にブラウザでWeb URL/hello-world.html
例:https://xxxxx-xxxxx-xxxxx.herokuapp.com/hello-world.html
にアクセスすることでHTMLが表示されるようになります。
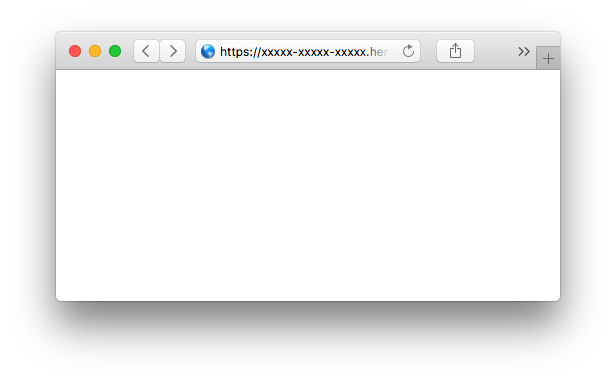
この時点でWeb URL
例:https://xxxxx-xxxxx-xxxxx.herokuapp.com/
にアクセスしてもHTMLは表示されず、白い画面が表示されます。
補足:
ローカル環境などブラウザが利用できる環境ではheroku openコマンドを実行することで自動でブラウザが起動してWeb URLにアクセスしてくれます。
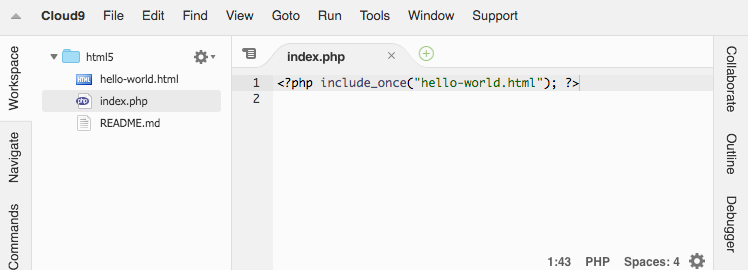
index.phpを修正してデプロイ
Web URLへアクセスした時にhello-world.htmlが表示されるようにするためにはindex.phpを以下のように修正します。
<?php include_once("hello-world.html"); ?>
index.phpを修正した後にGit URLへPushするとWeb URLへアクセスした時にhello-world.htmlが表示されるようになります。
$ git commit -am 'index.phpを修正'
$ git push heroku master
例:https://xxxxx-xxxxx-xxxxx.herokuapp.com/