プロトタイプあるある
ぼく『ラズパイとセンサ繋いでIoT機器のプロトタイプ出来た!ケースもぴったり!』
??『じゃあ今から、うちの会社の会議室でデモしてくれない?』
ぼく『…デモ前にケース開けてモニタとマウスとキーボード繋いで、現場のWifiに再設定が必要です。』
ぼく&??『とほほ・・・』
なんとか設置を簡便に出来ないものか?
(誰でも/特別な機器やケーブル、アプリ等を用いずに!)
私的解決法:ESP8266+スマホで設定を行い、その情報をラズパイに送る
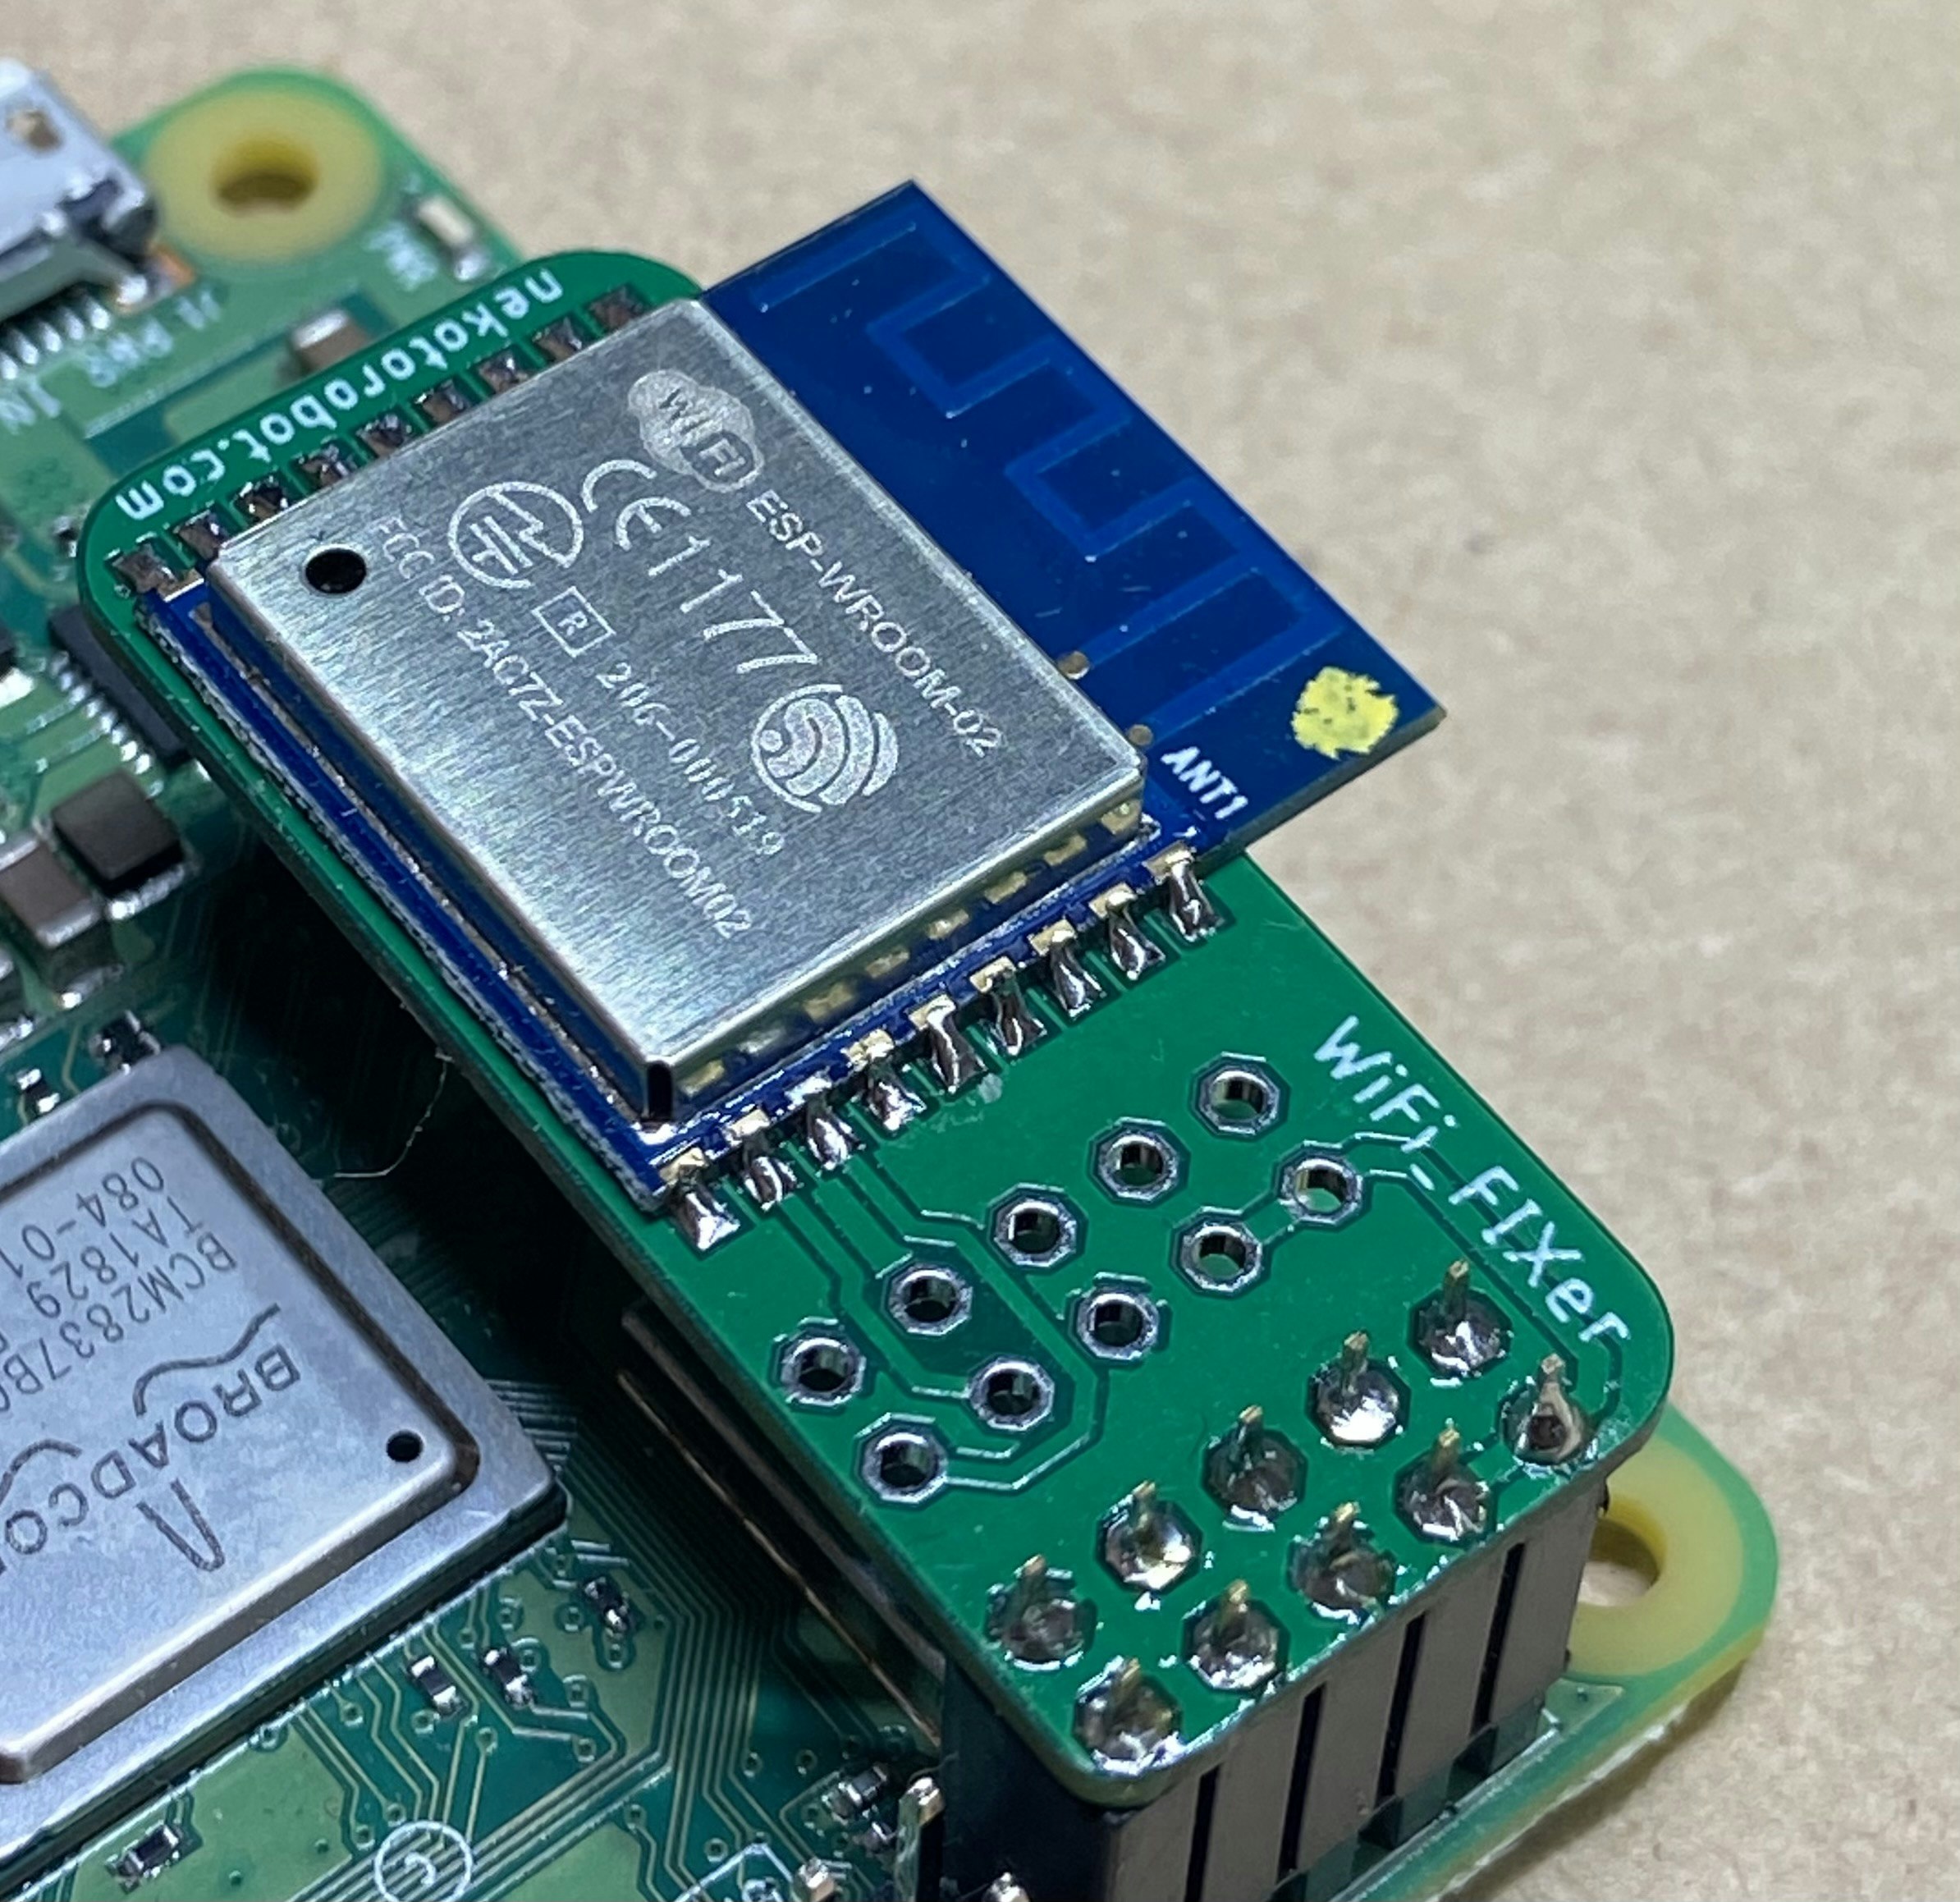
ESP8266(ESP-WROOM-02モジュール)を搭載した基板を製作して、ラズパイとシリアル通信が出来るようにしました。
https://github.com/NaohiroIIDA/wifi_fixer
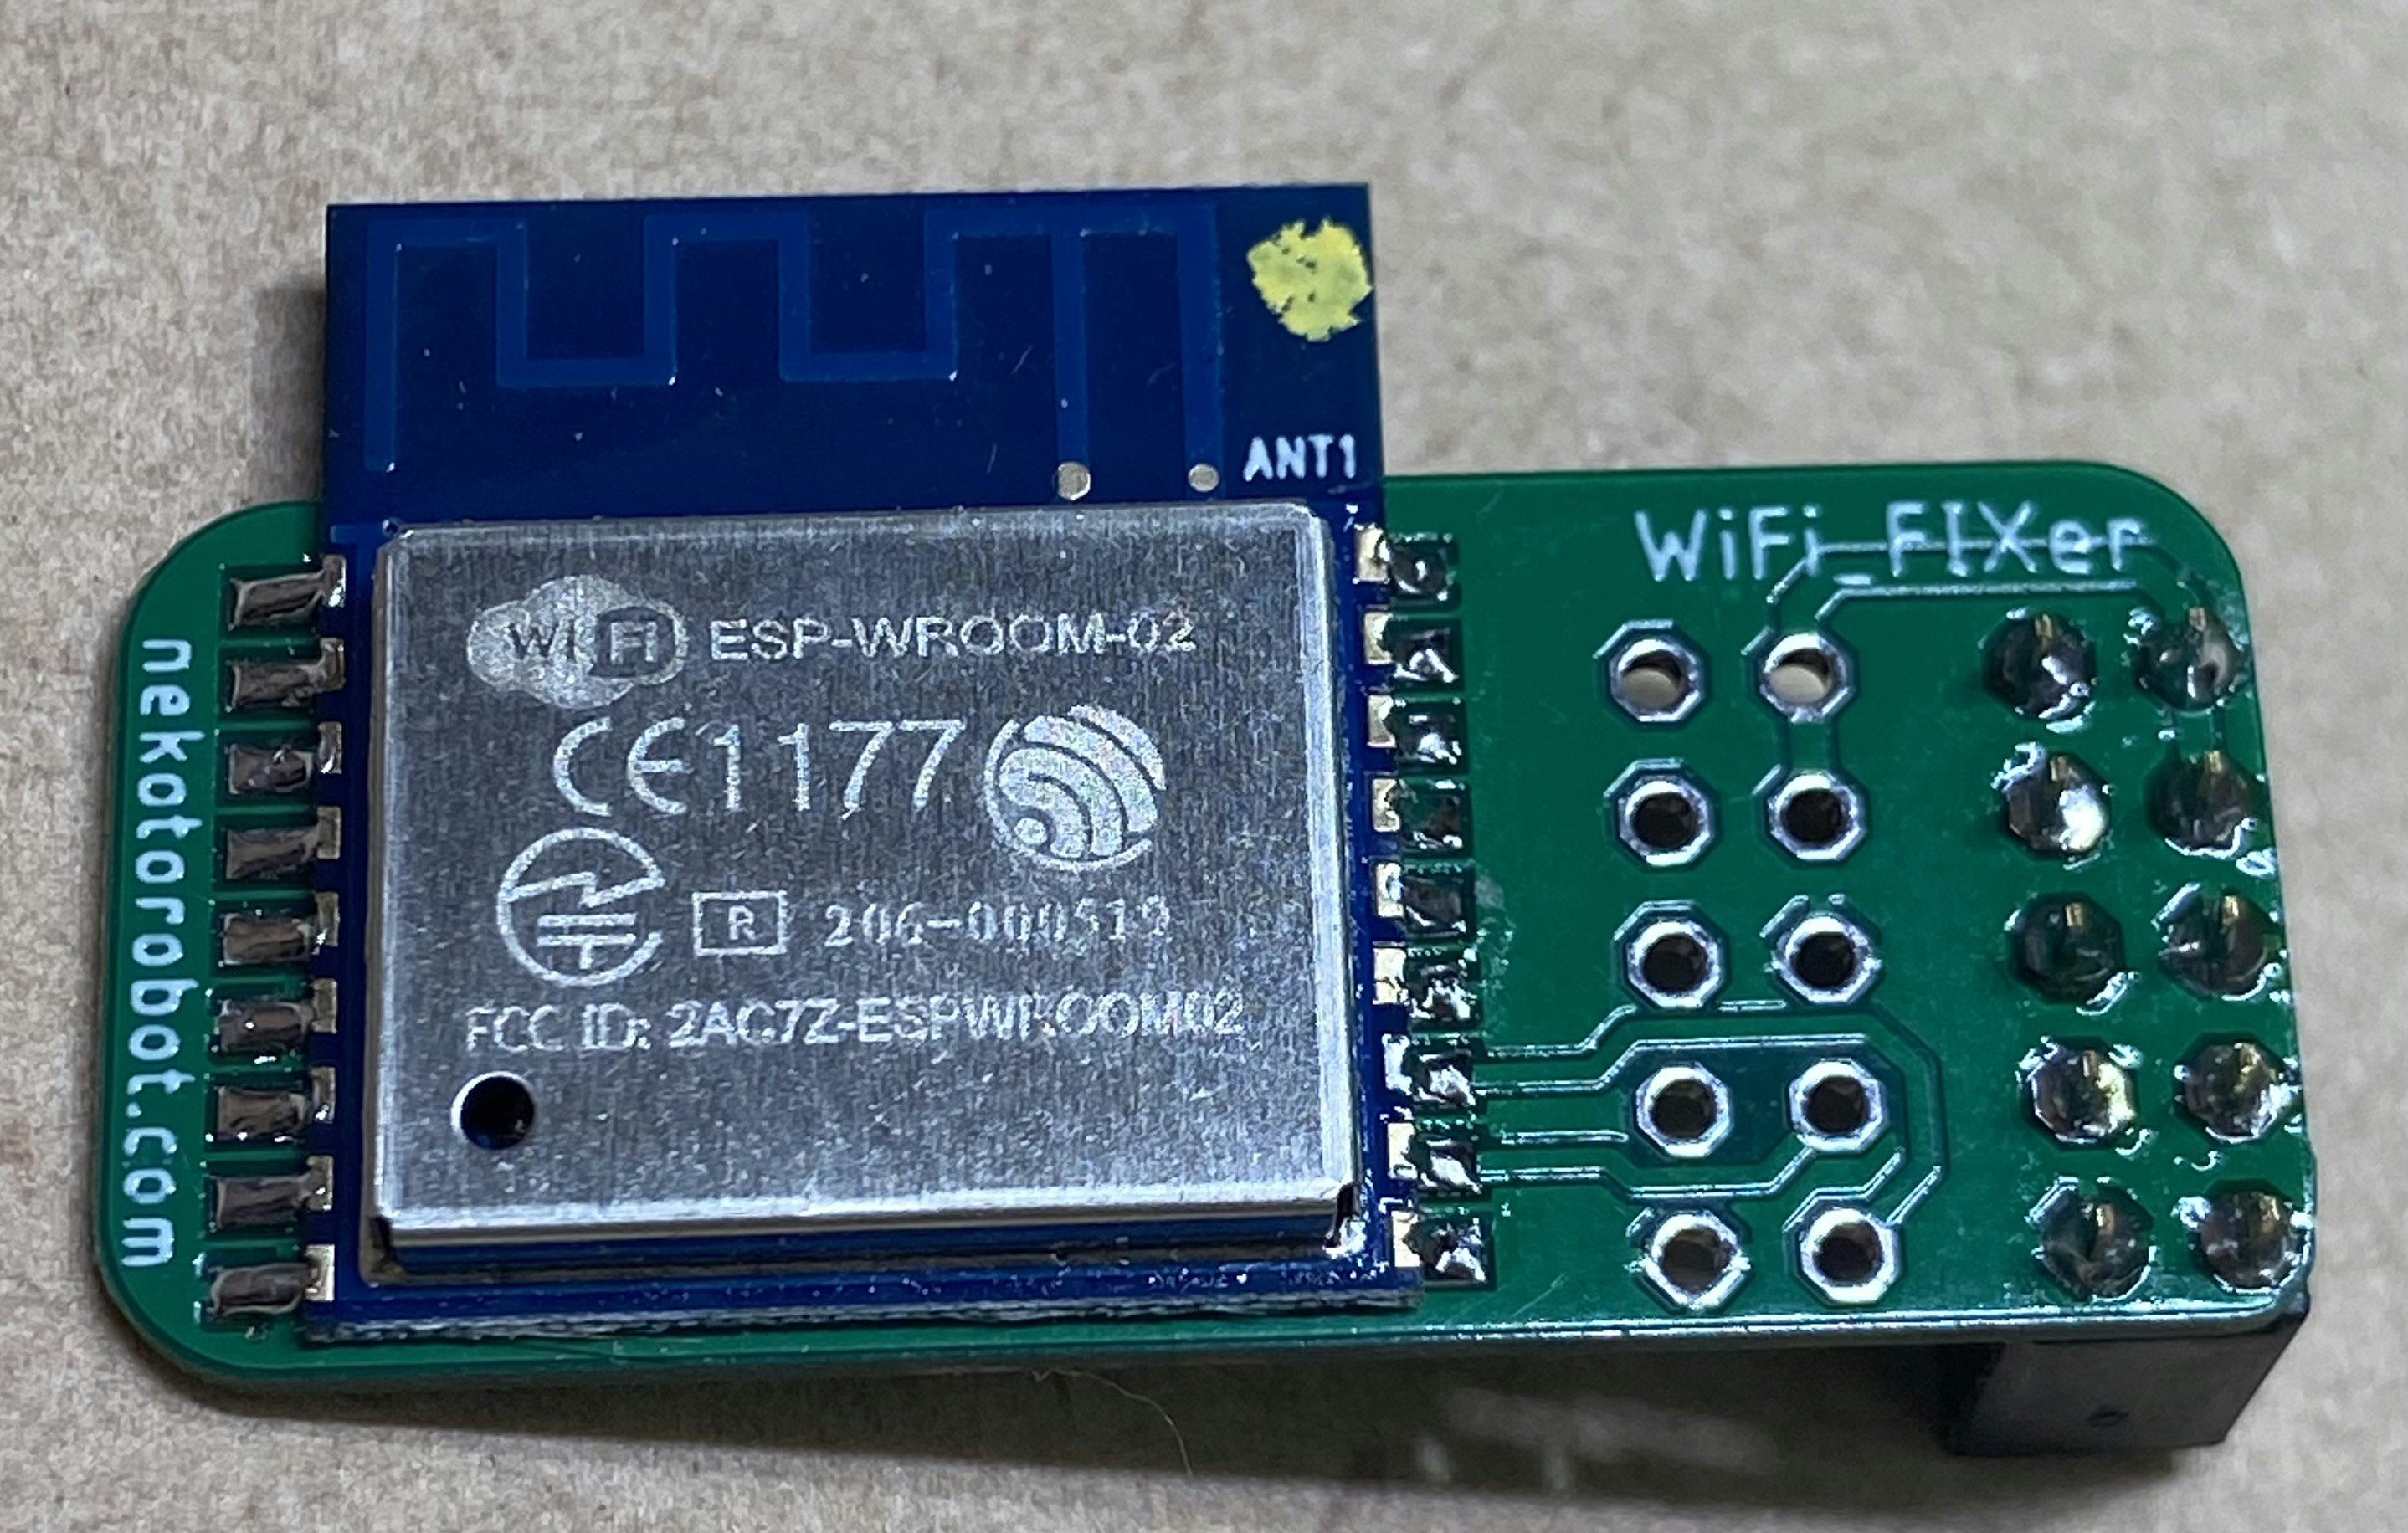
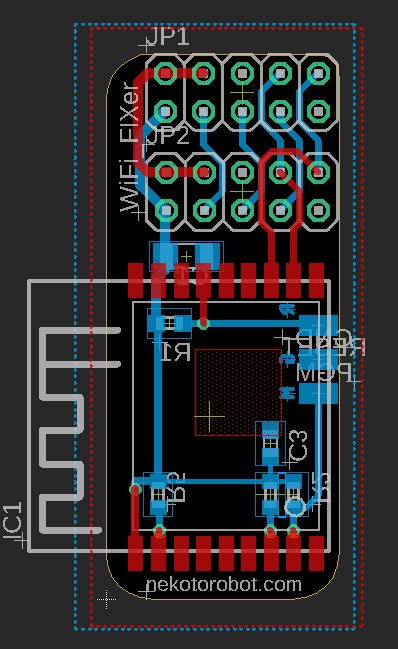
回路
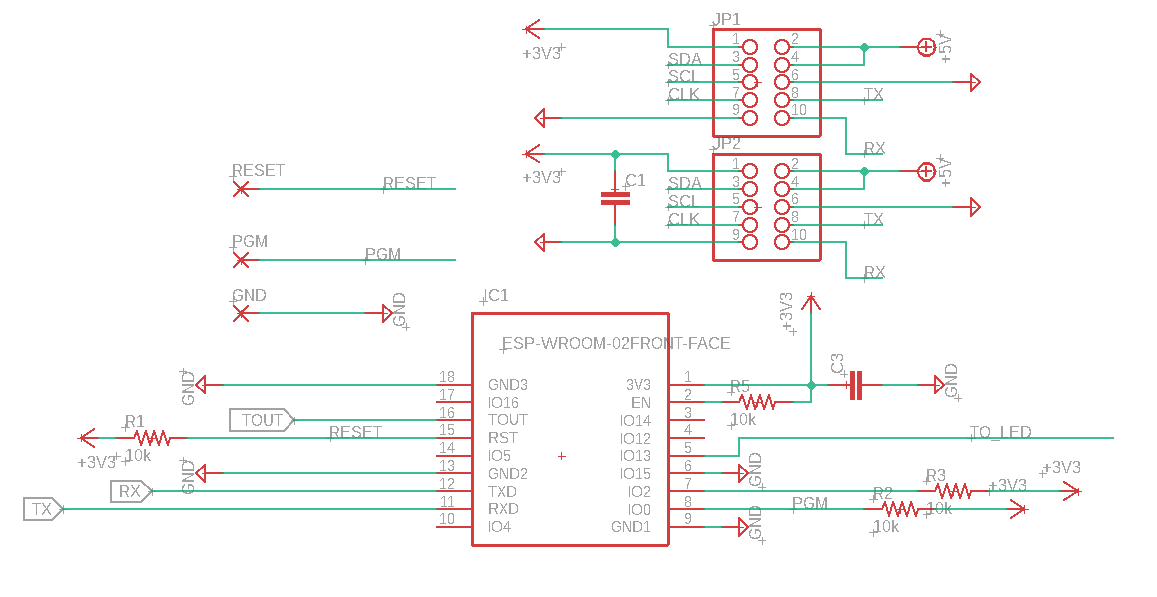
使用したピンは3.3v、GND、Tx、Rxの4本です。5VやI2Cを使用する場合も多そうなので、
ピン配置そのままで10ピン分岐してあります。
スケッチ
# include <ESP8266WiFi.h>          //https://github.com/esp8266/Arduino

//needed for library
# include <DNSServer.h>
# include <ESP8266WebServer.h>
# include <WiFiManager.h>         //https://github.com/tzapu/WiFiManager

String ssid;
String pass;

int incomingByte = 0;  // 受信データ用

void setup() {
  // put your setup code here, to run once:
  IPAddress ip;
  Serial.begin(115200);

  //Serial.println("Start");
  delay(3000);

  //WiFiManager
  //Local intialization. Once its business is done, there is no need to keep it around

  WiFiManager wifiManager;
  wifiManager.setDebugOutput(false);

  //Serial.println("RESET");
  wifiManager.resetSettings();

  //set custom ip for portal
  //wifiManager.setAPStaticIPConfig(IPAddress(10,0,1,1), IPAddress(10,0,1,1), IPAddress(255,255,255,0));

  //fetches ssid and pass from eeprom and tries to connect
  //if it does not connect it starts an access point with the specified name
  //here  "AutoConnectAP"
  //and goes into a blocking loop awaiting configuration

  wifiManager.autoConnect("WifiFix_SETUP");

  //or use this for auto generated name ESP + ChipID
  //wifiManager.autoConnect();


  //if you get here you have connected to the WiFi
  // Serial.println("connected!!");

  ssid = wifiManager.getSSID();
  pass = wifiManager.getPassword();

}

void loop() {
  // put your main code here, to run repeatedly:

  if (Serial.available() > 0) {
    incomingByte = Serial.read();

    Serial.print(ssid);
    Serial.print(",");
    Serial.println(pass);

  }
}
WiFiManager
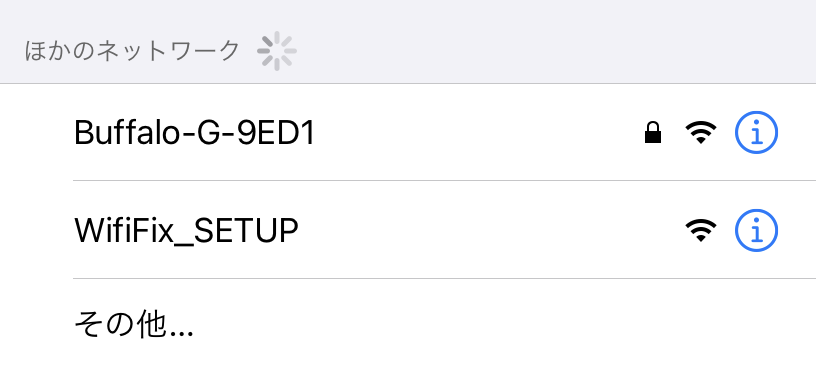
ESP8266/ESP32向けのArduinoライブラリで、WiFiManagerがあります。(Qiitaで探してみよう)作成したスケッチを書き込むとアクセスポイントとして動作するのでスマートフォン等でアクセスポイントを探すと [WifiFix_SETUP]が現れます。
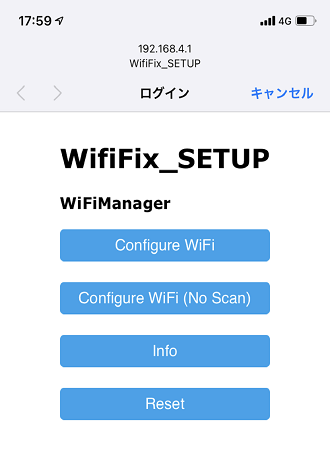
接続すると自動的に192.168.4.1にアクセスし、この様な画面が出ます。
"Configure Wifi"をタップするとアクセスポイントのスキャンを行い、SSID一覧から選んでパスワード入力が可能です。
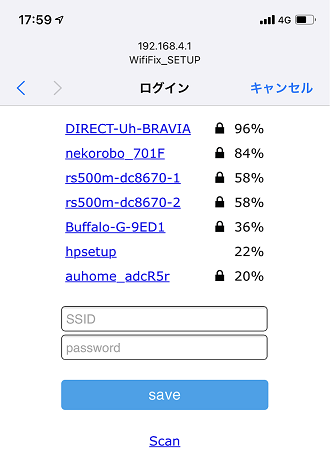
正しく設定されるとESP8266は指定したアクセスポイントに接続します。
接続に成功すると電源投入中はSSIDとパスワードを保持するので、この情報をRaspberryPiに反映させる事が出来れば目的達成です。(電源投入時にSSID/PASSは初期化します)
RaspberryPiとの接続
pythonスクリプトを作成しました。
import os
import time
import serial

def ESP_check():

    ser = serial.Serial('/dev/serial0', 115200, timeout=3)

    time.sleep(1)
    ser.write(11)

    dummy = ser.readline().decode()
    rim = dummy.split(',')

    if len(rim) > 1:
        #        print("SSID:", rim[0], "  PASS:", rim[1])
        return rim
    else:
        #        print("No data")
        rim = []
        return rim


def CreateWifiConfig(SSID, password):
    config = (
        '\nnetwork={{\n' +
        '\tssid="{}"\n' +
        '\tpsk="{}"\n' + '}}').format(SSID, password)

    print(config)
    with open("wpa_supplicant.conf.edit", "a+") as wifi:
        wifi.write(config)
    wifi.close()
    print("Wifi config added")


def CheckWPAfile(SSID, PASS):

    check = 0
    ssid_txt = ""
    pass_txt = ""

    with open("/home/pi/wpa_supplicant.conf.edit") as wifi:

        while True:
            line = wifi.readline()
            if not line:
                break

            if 'ssid' in line:
                ul = line.split('"')
                ssid_txt = ul[1]

            if 'psk' in line:
                ul = line.split('"')
                pass_txt = ul[1]

            if ssid_txt == SSID and pass_txt == PASS:
                check = 1

        return check


response = os.system("sudo ping -c 1 google.com")

if response != 0:
    print 'system is not connected!'
    response = os.system("sudo ifconfig wlan0 down")
    response = os.system("sudo cp /etc/wpa_supplicant/wpa_supplicant.conf /home/pi/wpa_supplicant.conf.edit")

    esp = ESP_check()
    if len(esp) != 0:
        print(esp[0].strip(), esp[1].strip())

        if CheckWPAfile(esp[0].strip(), esp[1].strip()):
        	print("find")

        else:
        	print("diff!")

        	CreateWifiConfig(esp[0].strip(), esp[1].strip())
    		response = os.system("sudo cp /home/pi/wpa_supplicant.conf.edit /etc/wpa_supplicant/wpa_supplicant.conf")
    		response = os.system("sudo reboot")

    response = os.system("sudo ifconfig wlan0 up")

    while True:
        res2 = os.system("sudo ping -c 1 google.com")
        time.sleep(1)
        if res2 == 0:
            print 'Connected'
            break
動作
- ラズパイのWifiが外部に繋がっているかpingで確認
- ESP8266にシリアルで問い合わせ、もしSSID/PASSが登録されていたら/etc/wpa_supplicant/wpa_supplicant.confに追記してリブート
- wifiが正常に設定されている、またはESP8266が何も返さない(設定されていない)ならスクリプトを終了
上記のようなスクリプトをcronに設定し一定周期で走らせます。ラズパイは知らない場所で起動してもWifiが繋がらず手も足も出ませんが、スマホから設定されればスクリプトが動作した際にWifiの設定が更新され、再起動が行われます。
本来の目的アプリを自動起動にしておけば、次回からは再設定されたWifiに自動接続されて無事動作するという目論見です。
問題点&検討中の課題
- IEEE 802.11 b/g/n (2.4GHz帯)しか対応していない
- 電波強度が強いアクセスポイントが複数ある場所では目的のアクセスポイントが見つけにくい(直接入力は可能)
- ラズパイのシリアルピンを占有してしまう
- セキュリティ上の懸念(ESP内部にデータを保持している)
現在改良中です!
あと、この基板を某所に置いてもらえないか画策中