#0.ConstraintLayoutとは?
##0-1.概要
Viewの要素を配置する際に各要素の相関関係により配置場所を決定する。
これにより、画面の解像度や縦横比率の違いによりレイアウト崩れが発生することを抑制できる
##0-2.主な各要素の説明
###①右側の指定
####app:layout_constraintRight_toRightOf
→要素の右側の位置を関連する要素の右側に対して指定する
####app:layout_constraintRight_toLeftOf
→要素の右側の位置を関連する要素の左側に対して指定する
###②左側の指定
####app:layout_constraintLeft_toLeftOf
→要素の左側の位置を関連する要素の左側に対して指定する
####app:layout_constraintLeft_toRightOf
→要素の左側の位置を関連する要素の左側に対して指定する
###③上側の指定
####app:layout_constraintTop_toTopOf
→要素の上側の位置を関連する要素の上側に対して指定する
####app:layout_constraintTop_toBottomOf
→要素の上側の位置を関連する要素の下側に対して指定する
###④下側の指定
####app:layout_constraintBottom_toBottomOf
→要素の下側の位置を関連する要素の下側に対して指定する
####app:layout_constraintBottom_toTopOf
→要素の下側の位置を関連する要素の上側に対して指定する
##0-3.注意点
###①上下の内1つ以上かつ左右の内1つ以上の要素を指定しなければエラーになる。
つまり、下記のようなイメージ
・constraintTopとconstraintBottomだけだとエラーになる(左右のどちらかがないから)
・constraintRightとconstraintLeftだけだとエラーになる(上下のどちらかがないから)
・constraintTopとconstraintRightだけだとエラーにならない(上下の内どちらか、左右のうちどちらかが両方あるから)
###②特定のタグで囲まれている必要がある
<androidx.constraintlayout.widget.ConstraintLayout>
上記のタグで囲まれた要素についてConstraintLayoutのルールが適用される。
下記の内容は画面のレイアウトの最上位から最下部までをこのコードで囲んでいる状態である。
#1.中央配置
【ポイント】
両端の要素を指定することで指定した要素の中央にViewを配置できる
##1-1.上下左右中央
###①コード
    <TextView
        android:id="@+id/tx01"
        android:layout_width="wrap_content"
        android:layout_height="wrap_content"
        android:text="Hello World!"
        android:textSize="30sp"
        android:background="@color/design_default_color_secondary"
        app:layout_constraintBottom_toBottomOf="parent"
        app:layout_constraintLeft_toLeftOf="parent"
        app:layout_constraintRight_toRightOf="parent"
        app:layout_constraintTop_toTopOf="parent" />
###②結果

##1-2.上下中央
###①コード
    <TextView
        android:id="@+id/tx01"
        android:layout_width="wrap_content"
        android:layout_height="wrap_content"
        android:text="Hello World!"
        android:textSize="30sp"
        android:background="@color/design_default_color_secondary"
        app:layout_constraintLeft_toLeftOf="parent"
        app:layout_constraintBottom_toBottomOf="parent"
        app:layout_constraintTop_toTopOf="parent" />
###②結果

##1-3.左右中央
###①コード
    <TextView
        android:id="@+id/tx01"
        android:layout_width="wrap_content"
        android:layout_height="wrap_content"
        android:text="Hello World!"
        android:textSize="30sp"
        android:background="@color/design_default_color_secondary"
        app:layout_constraintLeft_toLeftOf="parent"
        app:layout_constraintRight_toRightOf="parent"
        app:layout_constraintTop_toTopOf="parent" />
###②結果
#2.隣配置
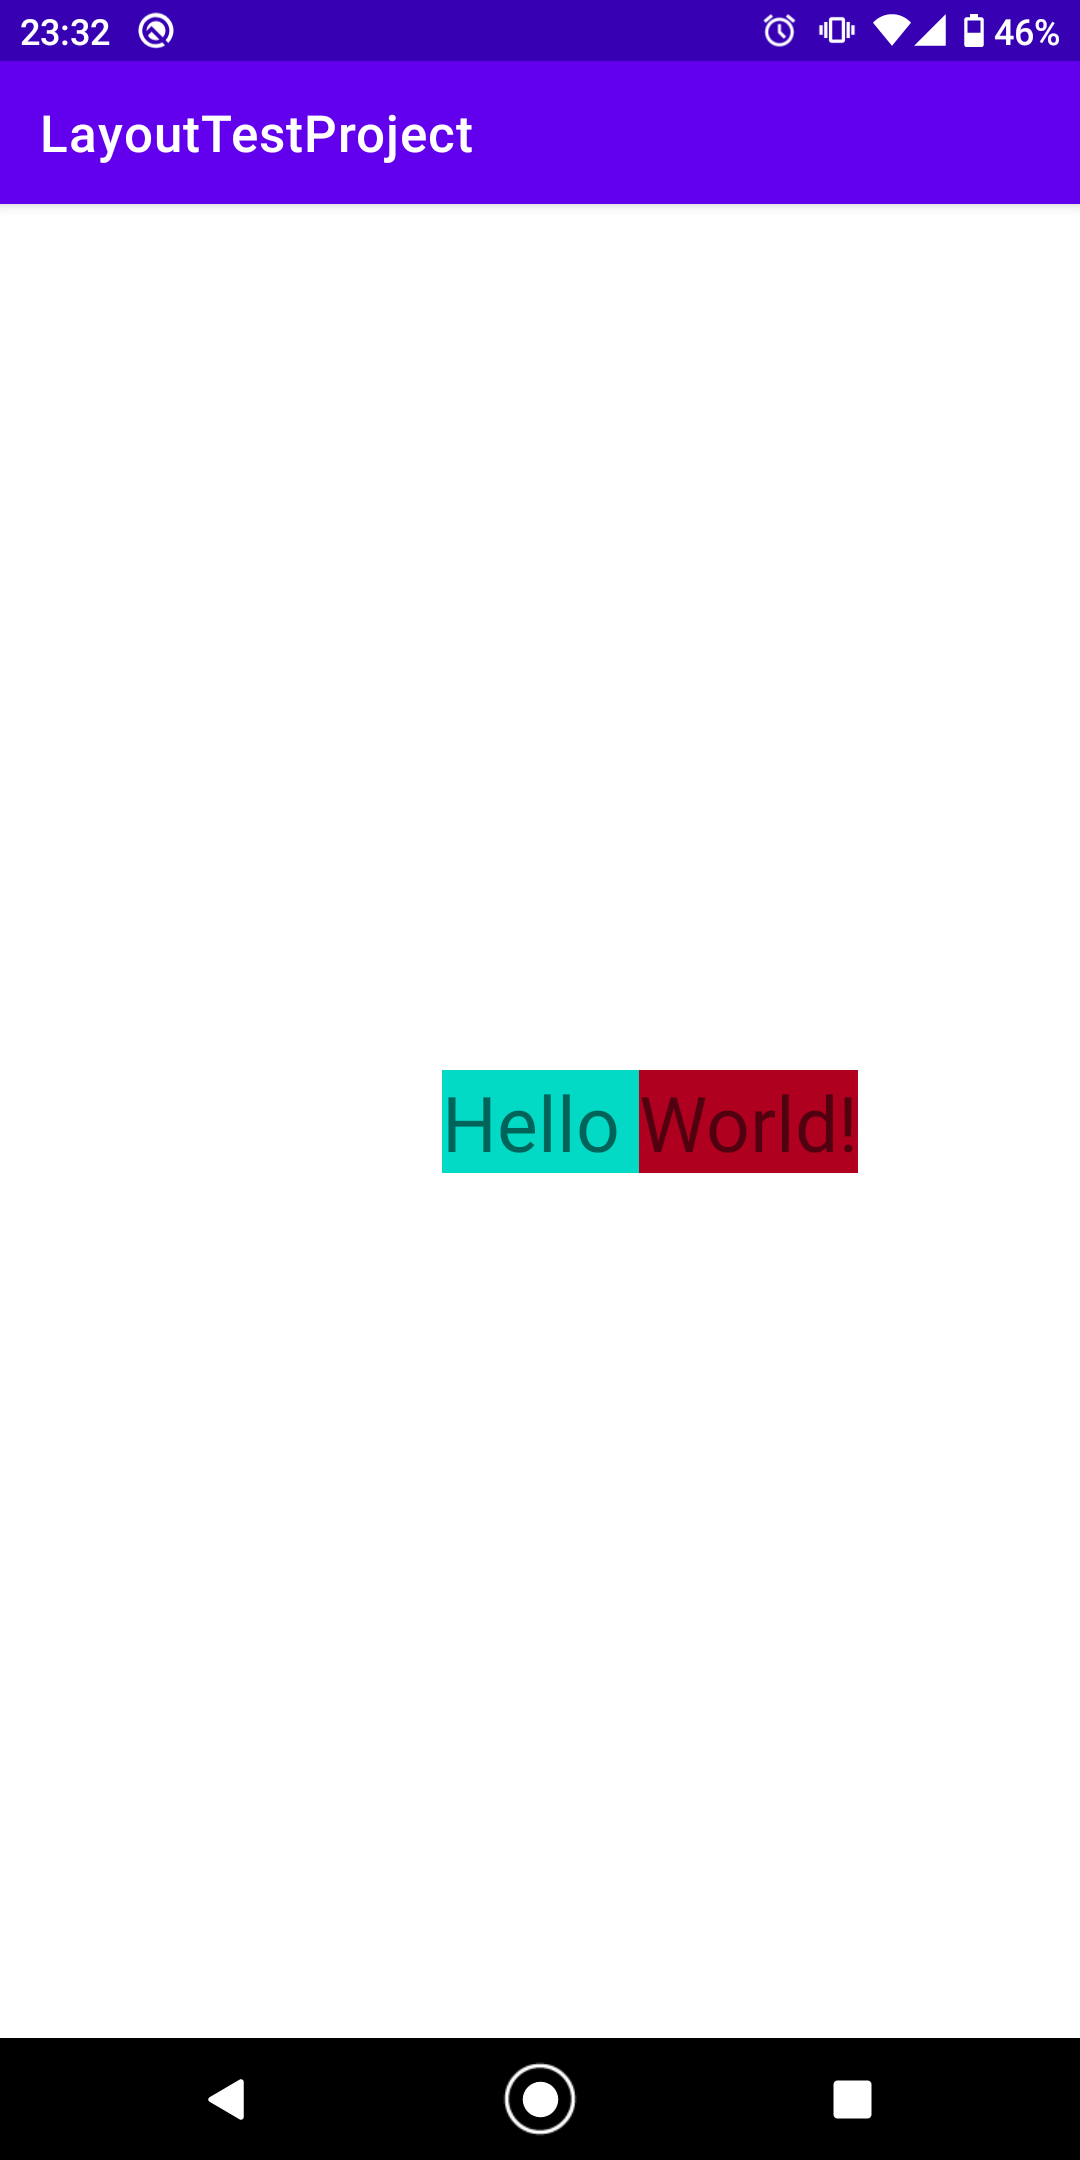
【ポイント】
接する面に隣に配置したいViewを指定することでその隣にViewを配置する
ここではtextview「tx01(青色)」に対して「tx02(赤色)」をどのように指定すればどのように表示されるかを記載している
##2-1.右隣
①コード
    <TextView
        android:id="@+id/tx02"
        android:layout_width="wrap_content"
        android:layout_height="wrap_content"
        android:text="World!"
        android:textSize="30sp"
        android:background="@color/design_default_color_error"
        app:layout_constraintLeft_toRightOf="@+id/tx01"
        app:layout_constraintTop_toTopOf="@+id/tx01" />
###②結果
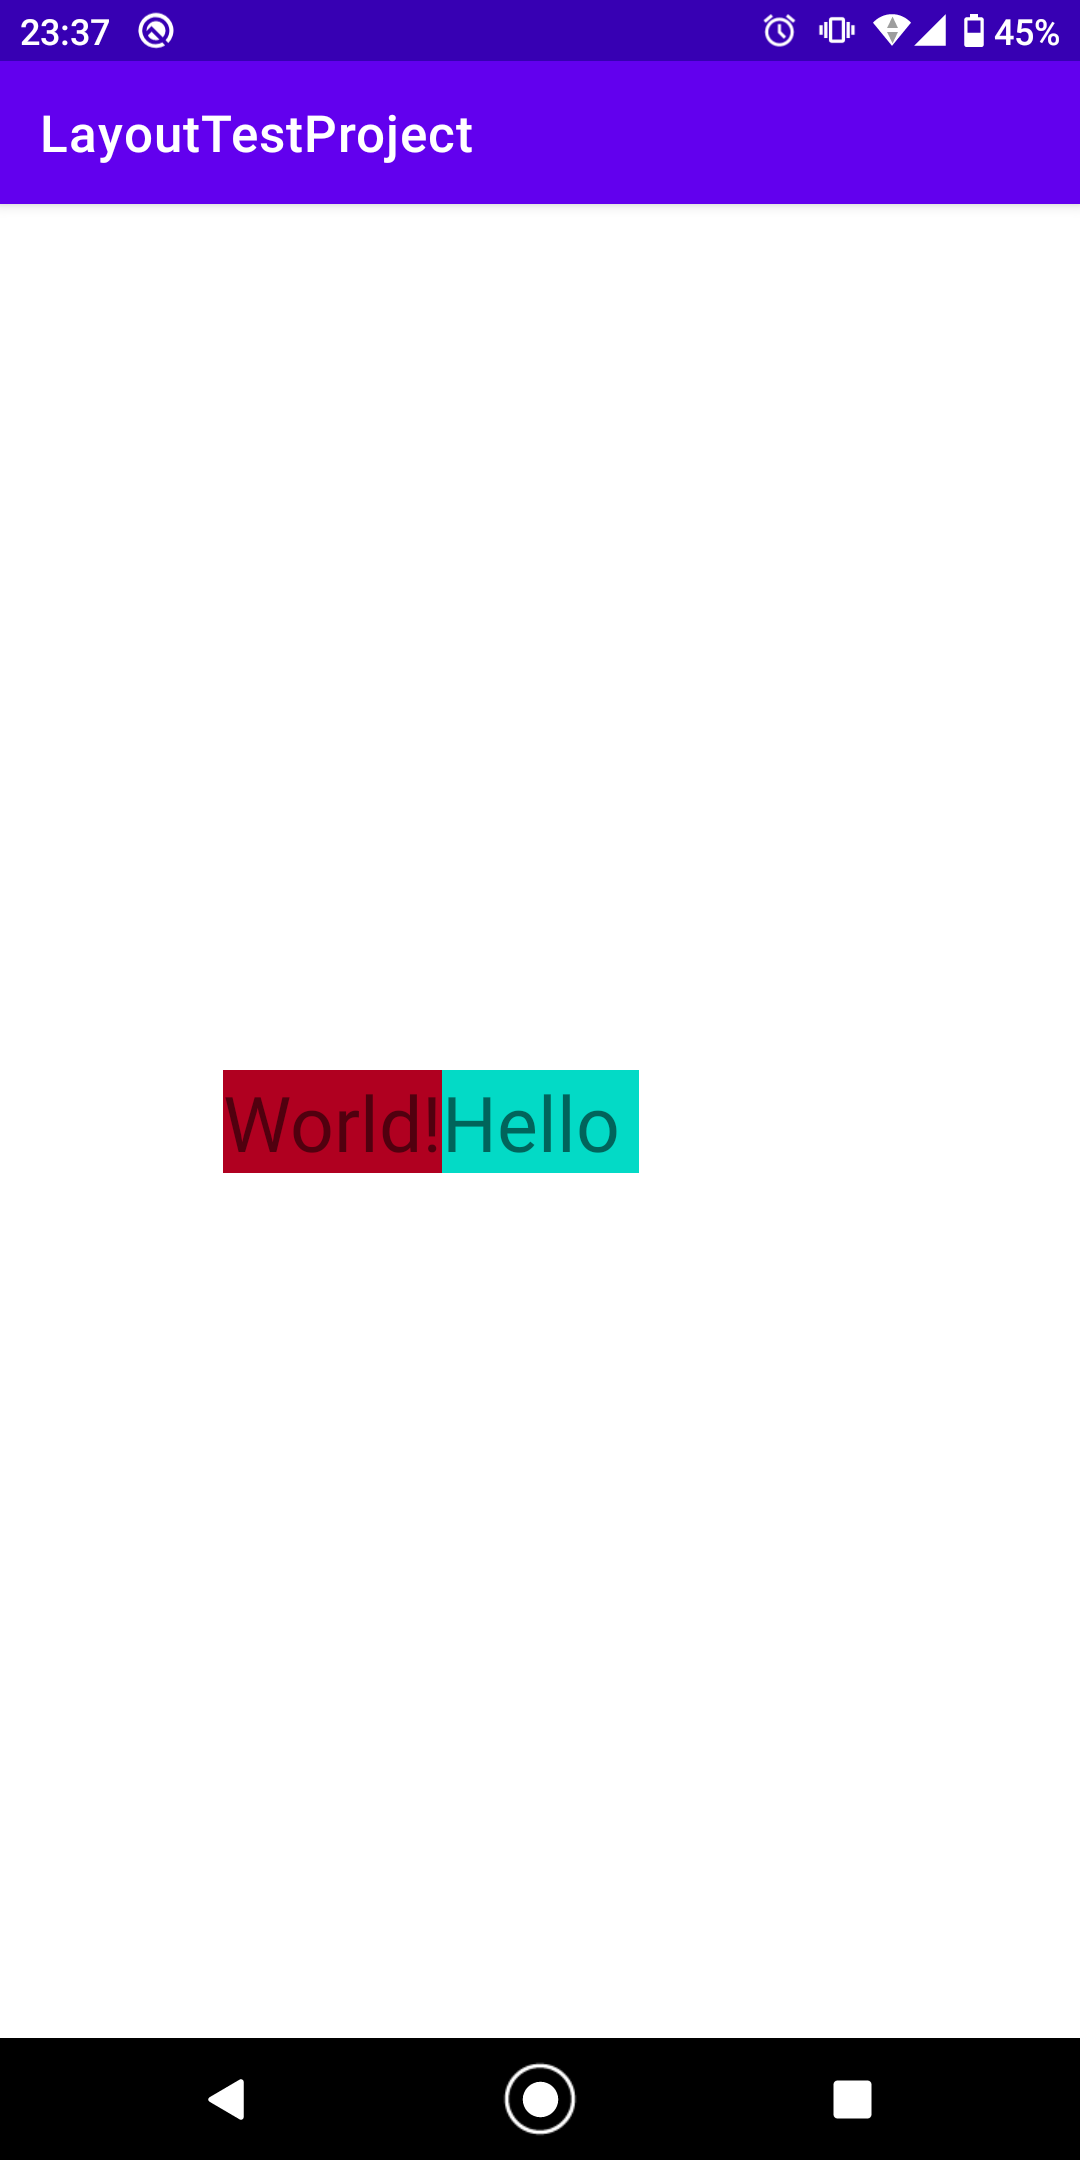
##2-2.左隣
###①コード
   <TextView
        android:id="@+id/tx02"
        android:layout_width="wrap_content"
        android:layout_height="wrap_content"
        android:text="World!"
        android:textSize="30sp"
        android:background="@color/design_default_color_error"
        app:layout_constraintRight_toLeftOf="@+id/tx01"
        app:layout_constraintTop_toTopOf="@+id/tx01" />
###②結果
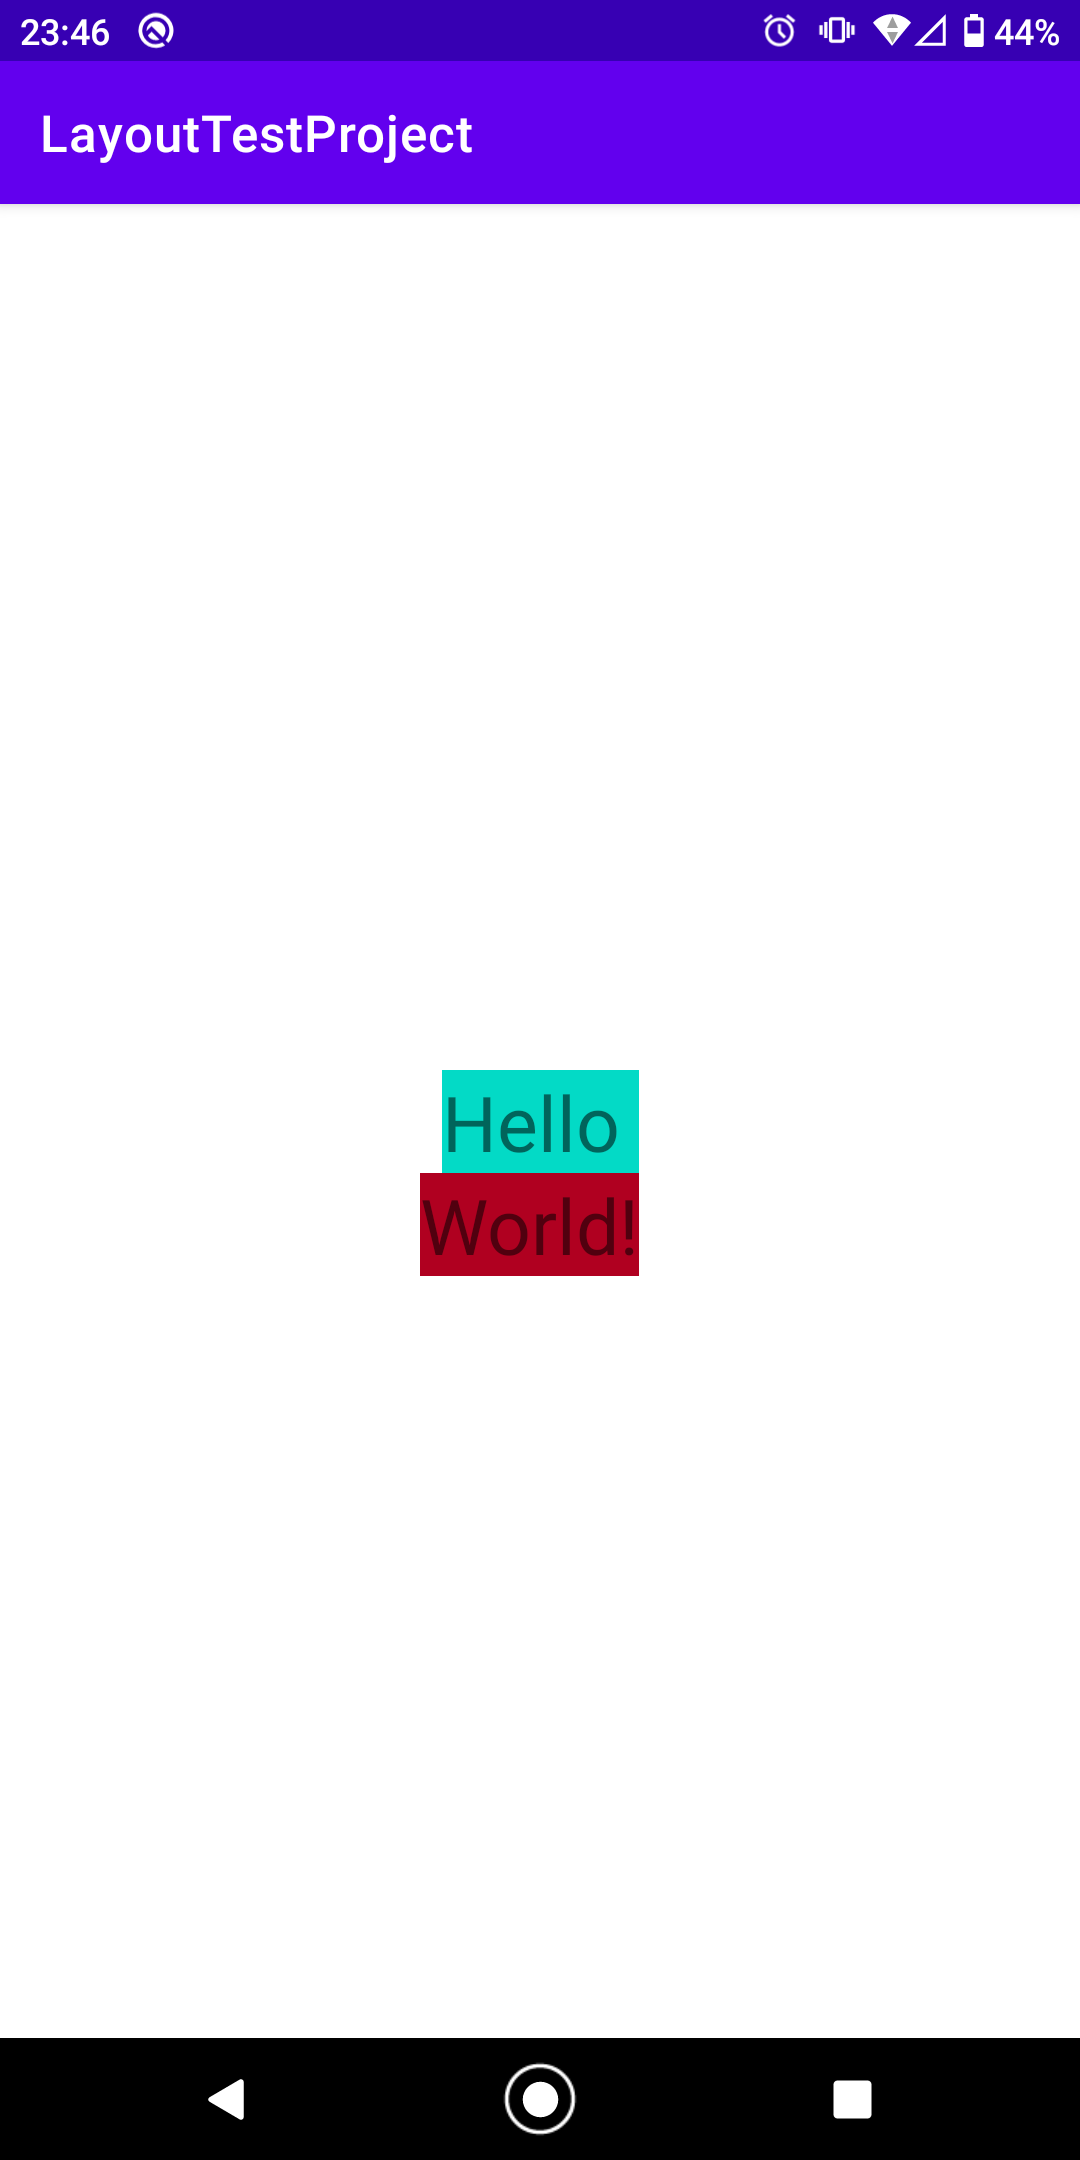
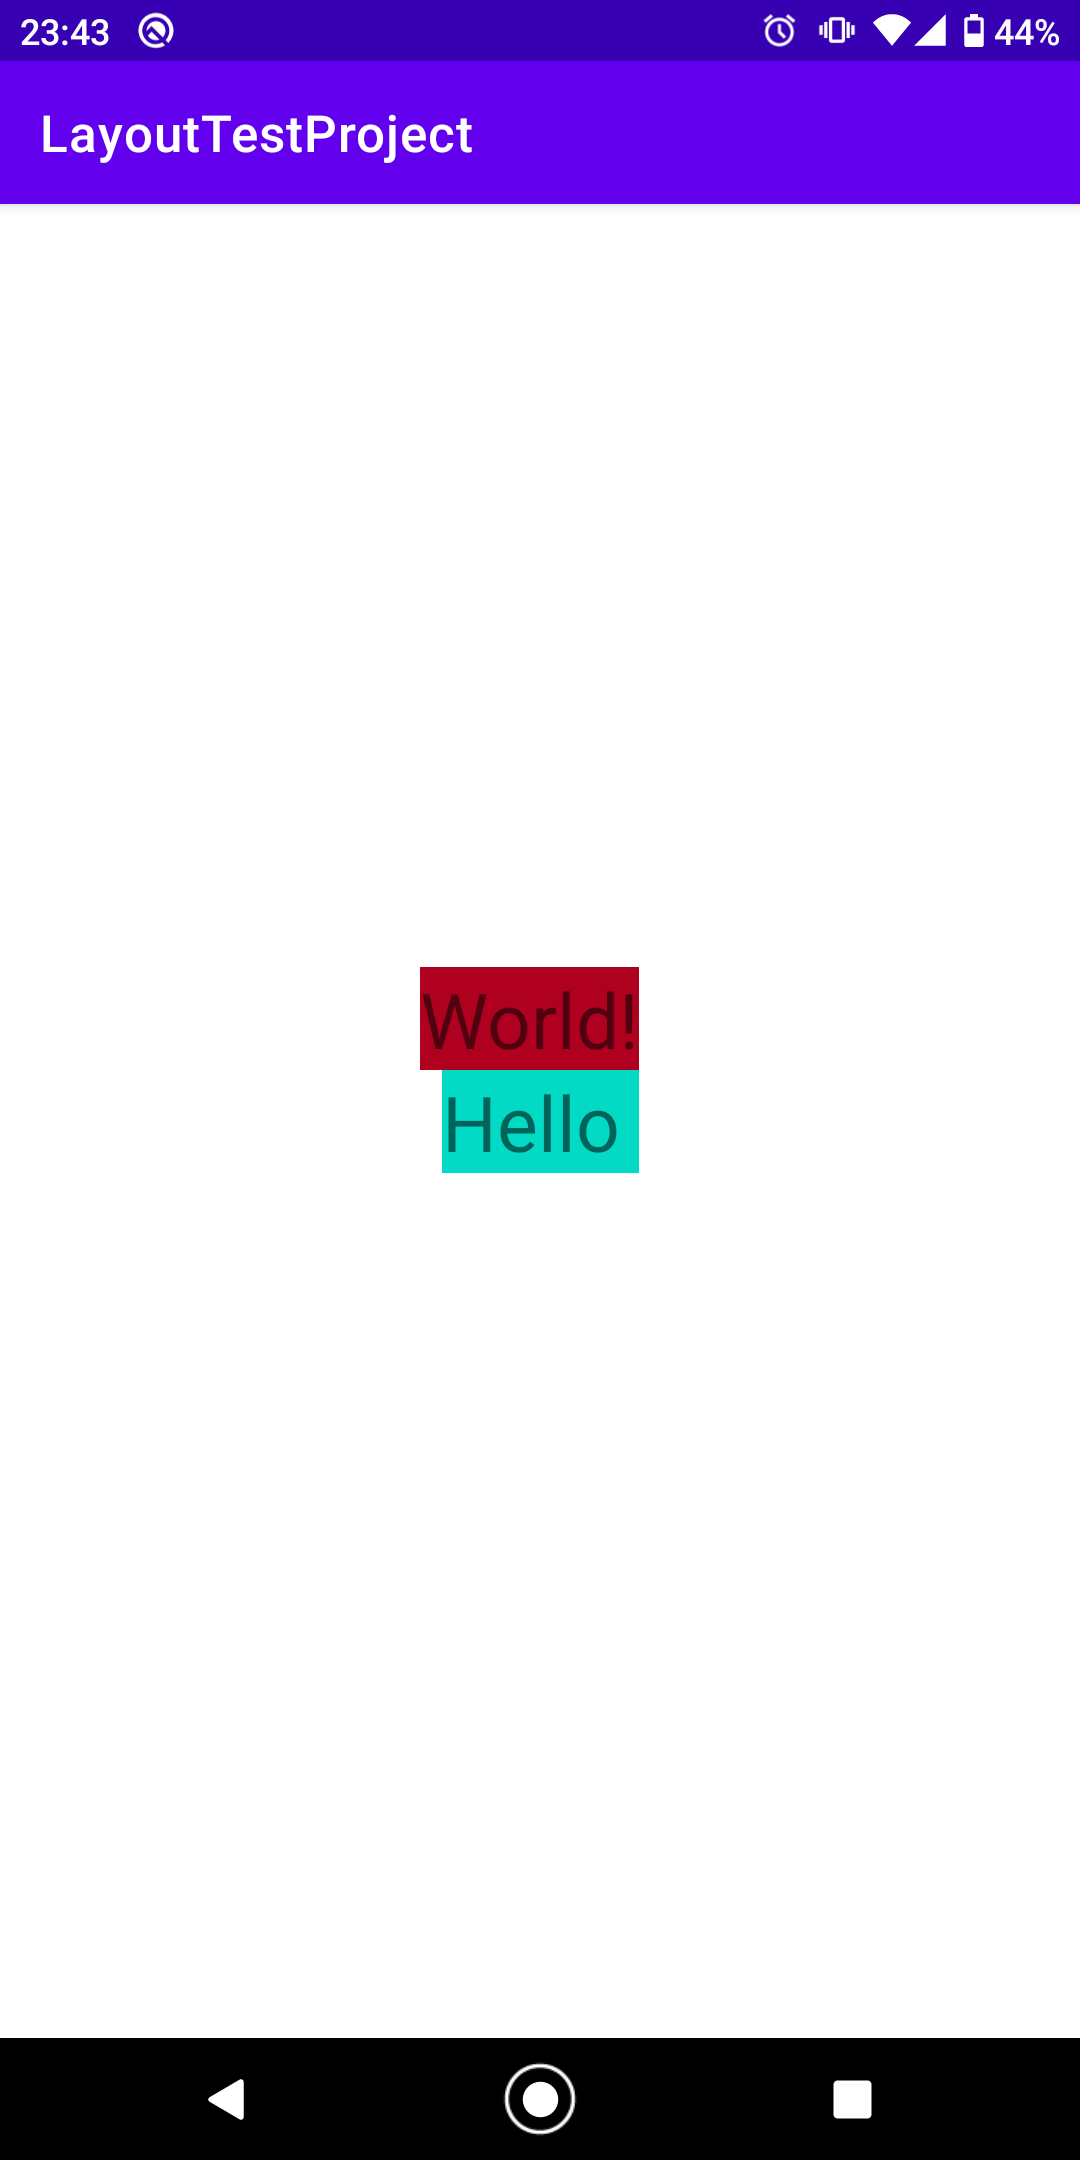
##2-3.上隣
###①コード
    <TextView
        android:id="@+id/tx02"
        android:layout_width="wrap_content"
        android:layout_height="wrap_content"
        android:text="World!"
        android:textSize="30sp"
        android:background="@color/design_default_color_error"
        app:layout_constraintRight_toRightOf="@+id/tx01"
        app:layout_constraintBottom_toTopOf="@+id/tx01" />
###②結果
##2-4.下隣
    <TextView
        android:id="@+id/tx02"
        android:layout_width="wrap_content"
        android:layout_height="wrap_content"
        android:text="World!"
        android:textSize="30sp"
        android:background="@color/design_default_color_error"
        app:layout_constraintRight_toRightOf="@+id/tx01"
        app:layout_constraintTop_toBottomOf="@+id/tx01" />
###②結果