目的
DRF上で django-rest-auth を使用して,バク速でユーザ認証を実装する.
実装環境
・ Linux Mint (Ubuntu/Debianベース)
・ Python ==> 3.7.0
・ virtualenv ==> 20.0.15 (なくてもいい)
・ Django ==> 3.0.5
事前パッケージインストール
※ Django REST Frameworkの環境を設定の上 django-rest-auth の設定を行ってください.
https://www.django-rest-framework.org/
$ pip install djangorestframework django-rest-authtoken
インストール
パッケージのインストール
$ pip install django-rest-auth

Successfully installed django-rest-auth-0.9.5
$ pip install django-allauth

Successfully installed defusedxml-0.6.0 django-allauth-0.41.0 oauthlib-3.1.0 python3-openid-3.1.0 requests-oauthlib-1.3.0
セッティング
-
rest_auth や django-allauth など必要なものを,
settings.pyのINSTALLED_APPSに追加します.
https://github.com/Tivix/django-rest-auth/blob/master/docs/installation.rst
INSTALLED_APPS = [
    'django.contrib.admin',
    'django.contrib.auth',
    'django.contrib.contenttypes',
    'django.contrib.sessions',
    'django.contrib.messages',
    'django.contrib.staticfiles',
    'mysite.apps.MysiteConfig',
    'mysite.templatetags.vendor',
    'rest_framework.authtoken',
    'rest_framework',
    'django_filters'

    # -- ↓↓ ----- 以下を追加 ----- ↓↓ -- #
    'django.contrib.sites',
    'allauth',
    'allauth.account',
    'rest_auth'
    'rest_auth.registration',
    # -------------------------------- #
]

SITE_ID = 1  #ついでにこれも追加します.
2. 次にurl.pyにログイン認証のパスを追加します.
urlpatterns = [
    ...,
    url(r'^rest-auth/', include('rest_auth.urls')), # -- 追加
    url(r'^rest-auth/registration/', include('rest_auth.registration.urls')), # -- 追加
]
3. 最後にデータベースのmigrate
$ python manage.py migrate
ログイン認証画面
Django上で設定しているホストにアクセス
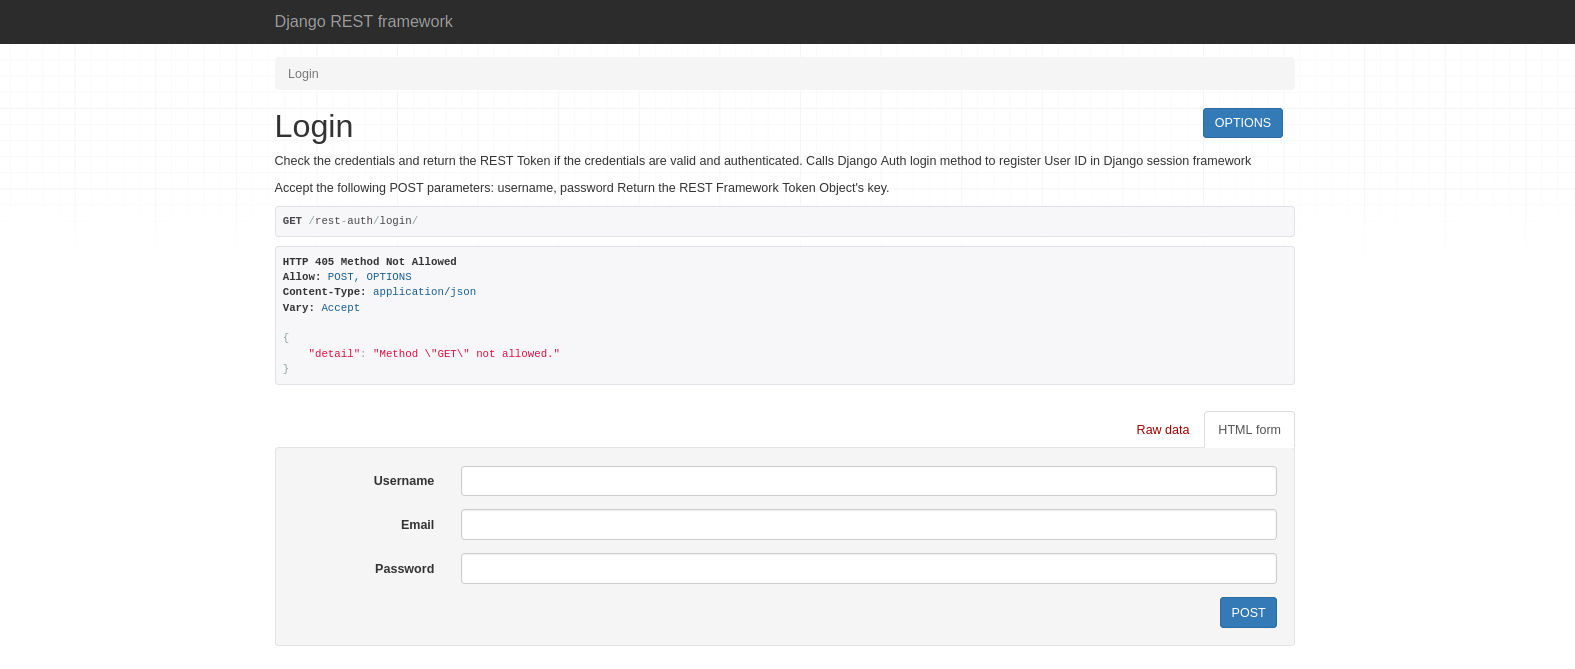
ひと通り実装完了です.
カスタムシリアライザの設定
1. ログイン認証画面のユーザネームを無くしたいなど,設定を変えたい場合
setting.pyに以下を追記していきます.
# REST_AUTHのシリアライザ設定
REST_AUTH_SERIALIZERS = {
        'LOGIN_SERIALIZER'      : ' Serializerクラスがあるパス.LoginSerializer',
}

# 認証にユーザネームの要求を無くす
ACCOUNT_AUTHENTICATION_METHOD = 'email'
ACCOUNT_EMAIL_REQUIRED = True
ACCOUNT_USERNAME_REQUIRED = False
2. 自作ログインシリアライザを作ります.
本家のサイトを参考にシリアライザを作ってください.
https://github.com/Tivix/django-rest-auth/blob/master/docs/configuration.rst
https://github.com/Tivix/django-rest-auth/blob/master/rest_auth/serializers.py
今回はログイン認証にユーザネームをなくすだけの簡単なオーバライドをします.
from rest_auth.serializers import LoginSerializer as RestAuthLoginSerializer

class LoginSerializer(serializers.Serializer):
    username = None
変更結果

ユーザネーム入力フォームが消えました.
後はログインするだけで,認証成功です.
補足
^rest-auth/ ^password/reset/$ [name='rest_password_reset']
^rest-auth/ ^password/reset/confirm/$ [name='rest_password_reset_confirm']
^rest-auth/ ^login/$ [name='rest_login']
^rest-auth/ ^logout/$ [name='rest_logout']
^rest-auth/ ^user/$ [name='rest_user_details']
^rest-auth/ ^password/change/$ [name='rest_password_change']
^rest-auth/registration/