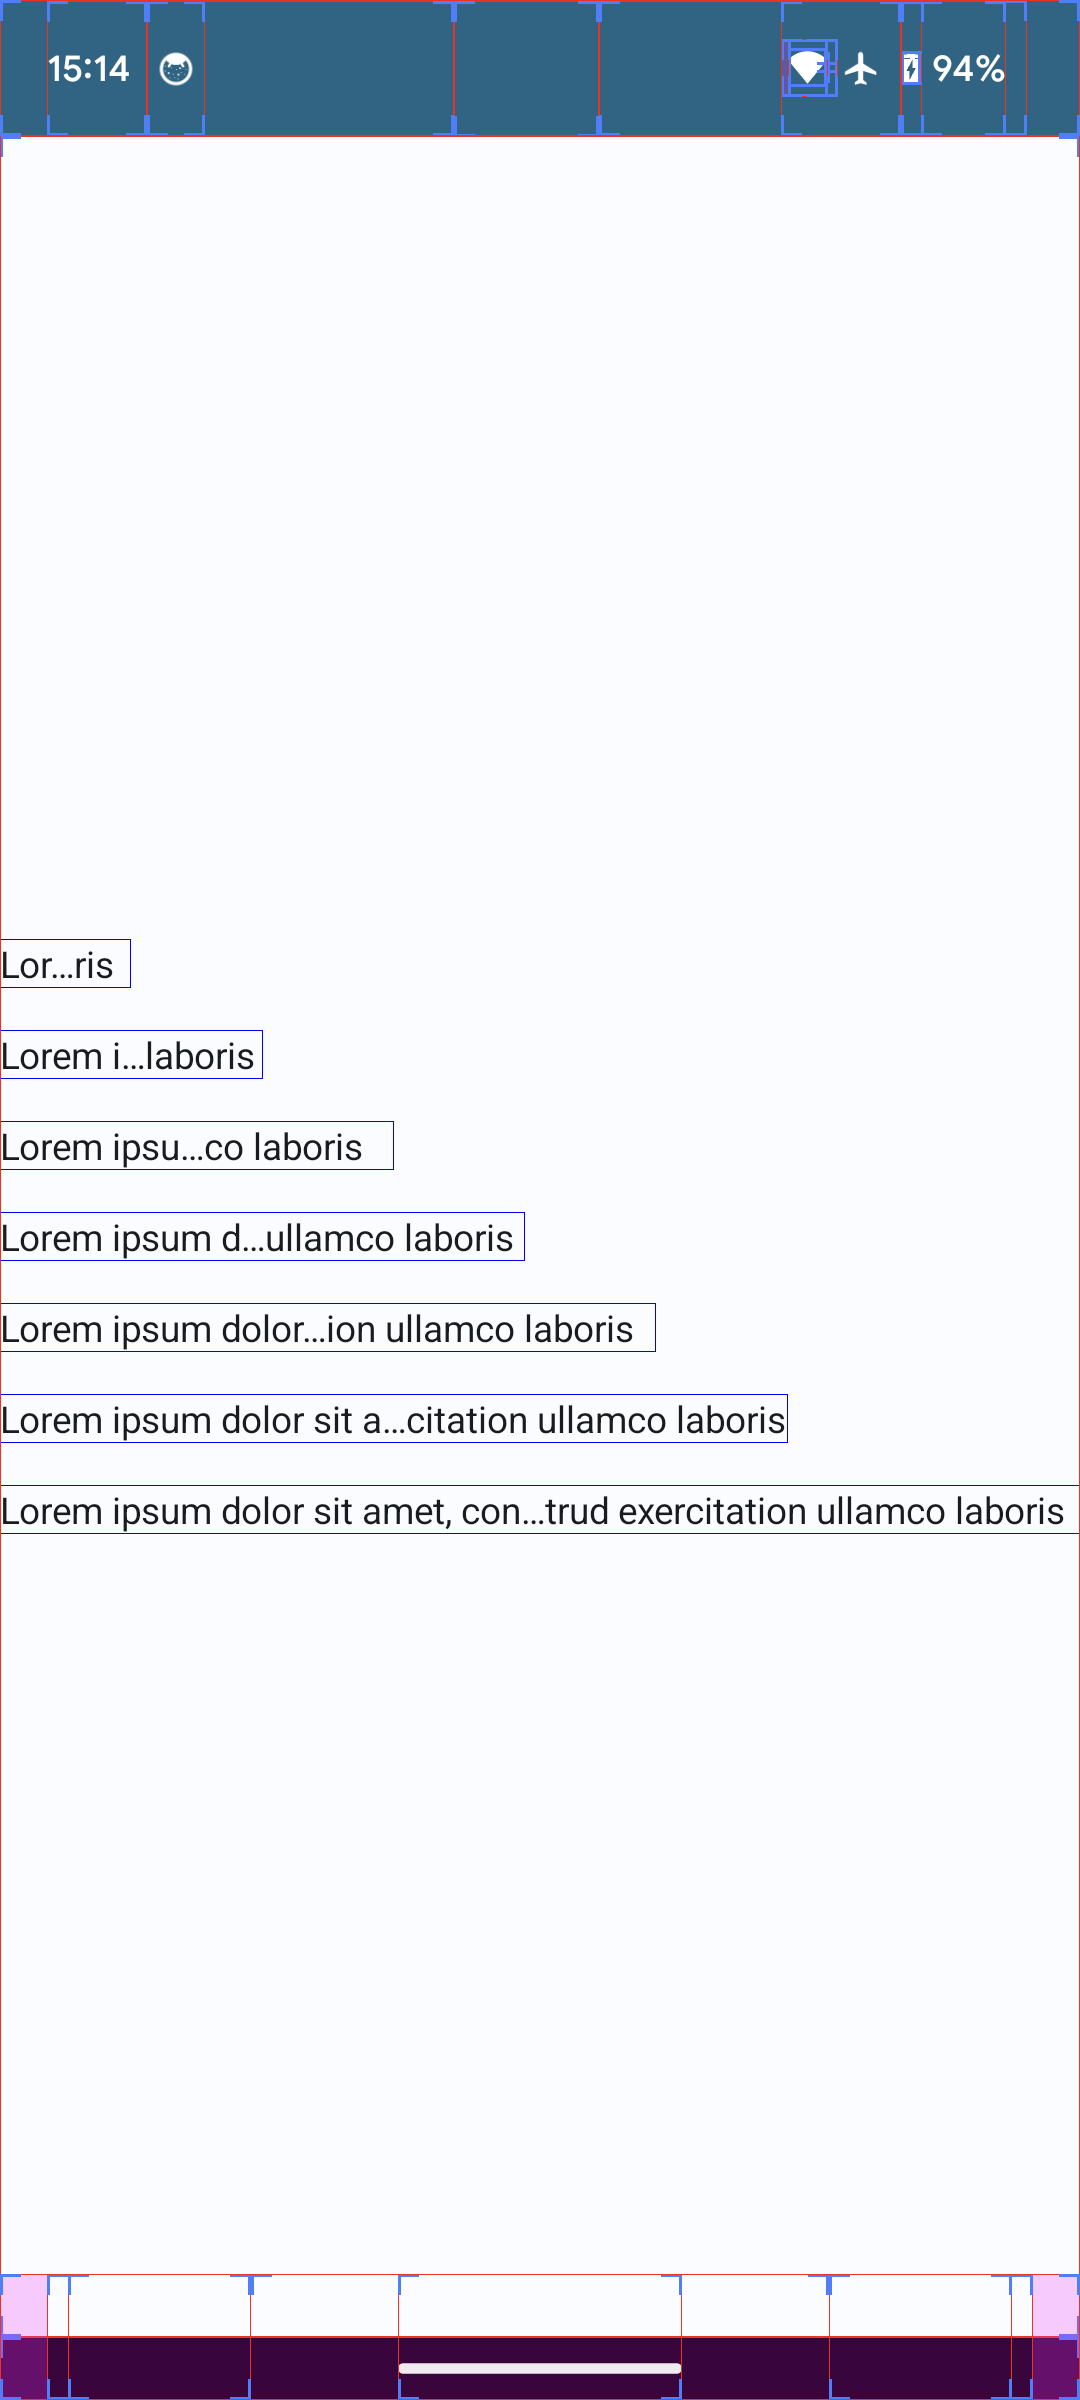
Jetpack Compose の Text の API では overflow = TextOverflow.Ellipsis で末尾省略は可能ですが、真ん中省略の API はありません。
TextView では maxLines = 1 のとき限定で真ん中省略が可能でした。
Jetpack Compose を使いつつテキストの真ん中省略はどうしたら実現できそうかいくつか試してみたのでそのメモです。
実装
A. TextUtils#ellipsize を使う
TextUtils#ellipsize という Android の API を使用することで、領域に入る文字数の文字列を省略記号付きで返してくれるメソッドがあります。
これと Jetpack Compose の Text を組み合わせて表示させる方法です。
@Composable
fun MiddleTruncatedText(
    text: String,
    modifier: Modifier = Modifier,
    style: TextStyle = LocalTextStyle.current,
    color: Color = LocalContentColor.current,
) {
    val density = LocalDensity.current
    val noLetterSpacingStyle = style.copy(letterSpacing = 0.sp)

    BoxWithConstraints(modifier = modifier) {
        val paint = remember(density, style) {
            TextPaint().apply {
                textSize = with(density) { noLetterSpacingStyle.fontSize.toPx() }
                letterSpacing = 0f
            }
        }
        val truncatedText = TextUtils.ellipsize(text, paint, constraints.maxWidth.toFloat(), TruncateAt.MIDDLE)
        Text(
            text = truncatedText,
            maxLines = 1,
            style = noLetterSpacingStyle,
        )
    }
}

Good
- Jetpack Compose の Text を使っての実装が可能
- 実装コストが低い
Bad
- 実際に表示する時に使う
TextStyleと計算に使用するTextPaintの調整が必要-
TextPaintを使ってどのくらい文字が入るかを計算しているので、調整がズレると領域以上にテキストが長くなったりすることがあり得る
-
-
BoxWithConstraintsを使っているので使い方次第ではパフォーマンスが落ちる
B. TextView を使う
AndroidView を使って TextView を埋め込み、真ん中省略を実現する方法です。
TextView であれば真ん中省略は用意されている API で実現可能です。
@Composable
fun MiddleTruncatedText(
    text: String,
    modifier: Modifier = Modifier,
    style: TextStyle = LocalTextStyle.current,
    color: Color = LocalContentColor.current,
) {
    AndroidView(
        factory = {
            TextView(it).also { textView ->
                textView.textSize = style.fontSize.value
                textView.maxLines = 1
                textView.ellipsize = TruncateAt.MIDDLE
                textView.setTextColor(color.toArgb())
            }
        },
        update = {
            it.text = text
        },
        modifier = modifier
    )
}

Good
-
TextViewの API で真ん中省略は可能なので実装は簡単 - 実装コストが低い
Bad
-
TextViewの style と Jetpack Compose のテキストの装飾に使用するTextStyleの変換が必要で、Jetpack Compose のTextと同じような見た目にするための調整が必要- Jetpack Compose の
Textと並べるレイアウトでなけれ無視はできる
- Jetpack Compose の
- 純粋な Jetpack Compose の Text を使うよりもパフォーマンスが落ちる
- 詳細までは調べていないがおそらく
TextViewのインスタンス生成や measure 周り
- 詳細までは調べていないがおそらく
C. 表示領域とフォントサイズから文字列の操作処理を自前で実装する
フォントサイズとレイアウトのサイズを使って領域可能な文字数を計算して、表示したい文字列を変えることで実現できるとは思いますが、一番大変そうなので試していません…
Good
- 自前実装にすると真ん中省略だけでなくどんなパターンでも実装次第で実現可能
- 本来はできない複数行での真ん中省略(2行目だけ真ん中省略させたい)とか
Bad
- 実装コストが高い
【おまけ】パフォーマンス計測
A と B の実装ではどちらがパフォーマンスいいのか Macrobenchmark で計測してみます。
@Composable
fun TextList() = trace("TextList") {
    LazyColumn(
        modifier = Modifier.testTag("list")
    ) {
        items(100) {
            ListItem(headlineContent = {
                MiddleTruncatedText(longText)
            })
        }
    }
}
このような 100 件のリストをスクロールした時の計測をしてみます。
@OptIn(ExperimentalMetricApi::class)
private fun benchmark(compilationMode: CompilationMode) {
    rule.measureRepeated(
        packageName = "com.example.myapplication",
        metrics = listOf(
            FrameTimingMetric(),
            TraceSectionMetric("TextList")
        ),
        compilationMode = compilationMode,
        startupMode = StartupMode.WARM,
        iterations = 5,
        setupBlock = {
            pressHome()
        },
        measureBlock = {
            startActivityAndWait()
            device.wait(Until.hasObject(By.res("list")), 3_000)
            repeat(3) {
                textListScrollDownUp()
            }
        }
    )
}

private fun MacrobenchmarkScope.textListScrollDownUp() {
    val list = device.findObject(By.res("list"))
    device.flingElementDownUp(list)
}

private fun UiDevice.flingElementDownUp(element: UiObject2) {
    element.setGestureMargin(displayWidth / 5)

    element.fling(Direction.DOWN)
    waitForIdle()
    element.fling(Direction.UP)
}
このような処理で実行してみると
このような結果で、A の方がパフォーマンスがほんの少しいいということになります。
ちなみに、overflow = TextOverflow.Ellipsis の標準の API を使った場合も添えていますが、その場合はやはり標準の API だけの方が一番パフォーマンスがいいという結果になります。
とはいえ体感するほど顕著な差があるかと言われるとそうでもないので要件や実装しやすさで選んでも良さそうには思います。
そのほかに実現できる方法があれば教えてください ![]()


