SupportLibrary 23.2からDesignSupportLibraryにBottomSheetが追加されたので、
BottomSheetBehaviorではなくてBottomSheetDialogFragmentを使ってBottomSheetを実装してみます。
事前にライブラリのパスは通しておきましょう。
build.gradle
compile 'com.android.support:design:23.3.0'
実装
layout_bottom_sheet.xml
<?xml version="1.0" encoding="utf-8"?>
<LinearLayout
    xmlns:android="http://schemas.android.com/apk/res/android"
    android:layout_width="match_parent"
    android:layout_height="wrap_content"
    android:padding="24dp"
    android:orientation="horizontal"
    android:background="#ffffff">

    <LinearLayout
        android:layout_width="match_parent"
        android:layout_height="wrap_content"
        android:layout_weight="1"
        android:gravity="center"
        android:orientation="vertical">
        <ImageButton
            android:layout_width="48dp"
            android:layout_height="48dp"
            android:background="@mipmap/ic_launcher"/>
        <TextView
            android:layout_width="match_parent"
            android:layout_height="wrap_content"
            android:gravity="center"
            android:text="Android"/>
    </LinearLayout>

    <LinearLayout
        android:layout_width="match_parent"
        android:layout_height="wrap_content"
        android:layout_weight="1"
        android:gravity="center"
        android:orientation="vertical">
        <ImageButton
            android:layout_width="48dp"
            android:layout_height="48dp"
            android:background="@mipmap/ic_launcher" />
        <TextView
            android:layout_width="match_parent"
            android:layout_height="wrap_content"
            android:gravity="center"
            android:text="Android"/>
    </LinearLayout>

 </LinearLayout>
CustomBottomSheetDialog.java
import android.app.Dialog;
import android.support.design.widget.BottomSheetDialogFragment;
import android.view.View;

public class CustomBottomSheetDialog extends BottomSheetDialogFragment{

    public CustomBottomSheetDialog(){
    }

    public static CustomBottomSheetDialog newInstance() {
        return new CustomBottomSheetDialog();
    }

    @Override
    public void setupDialog(Dialog dialog, int style) {
        super.setupDialog(dialog, style);
        View view = View.inflate(getContext(), R.layout.layout_bottom_sheet, null);
        dialog.setContentView(view);

        //ここにButtonの処理など
    }
}
ダイアログは作成できたので次に表示します。
MainActivity.java
CustomBottomSheetDialog bottomSheetDialog = CustomBottomSheetDialog.newInstance();
bottomSheetDialog.show(getSupportFragmentManager(), bottomSheetDialog.getTag());
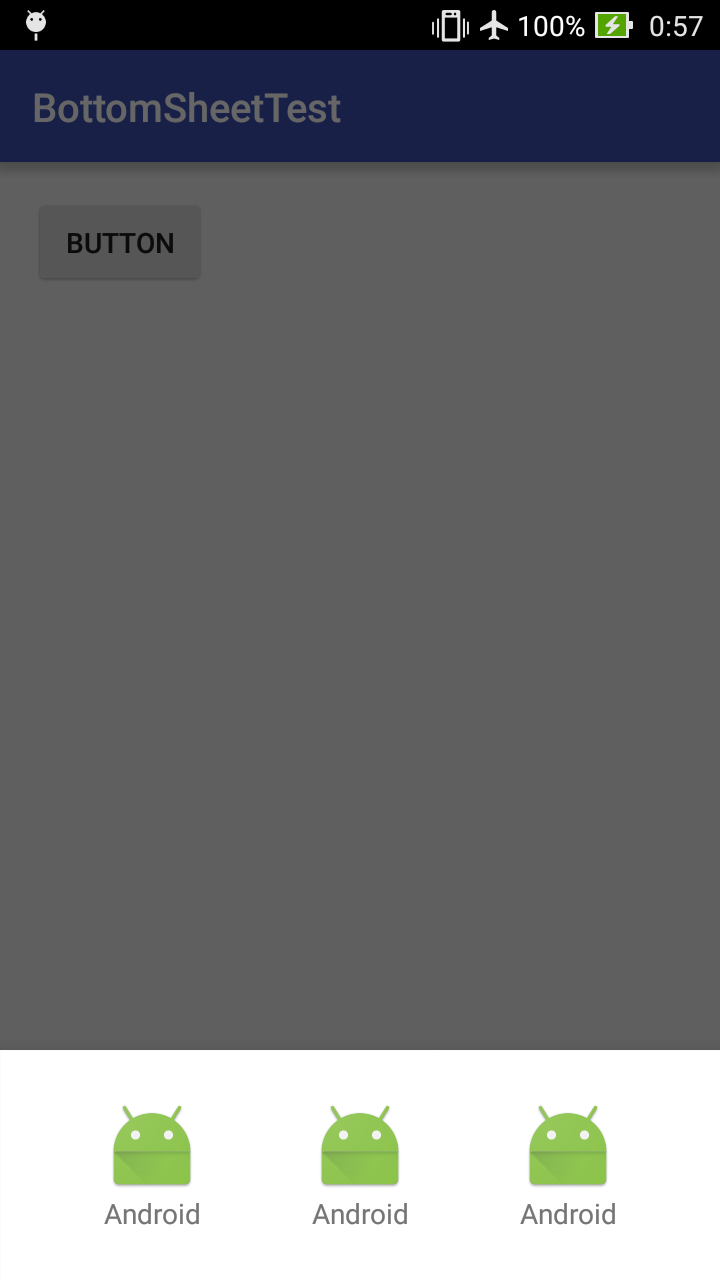
こんな感じで表示できました。
補足
BottomSheetDialogFragmentは見てのとおりFragmentなので、今回作成したCustomBottomSheetDialogにはabstractを使うことができません。
なので、DialogからActivityのメソッドを呼びたいときには(もしかするとあまりいい実装ではないかもしれませんが…)次のように
CustomBottomSheetDialog.java
    private MainActivity activity;

    @Override
    public void onAttach (Activity activity){
        super.onAttach (activity);
        this.activity = (MainActivity)activity;
    }
追加し、Activity内のメソッドを無理やり呼びます。
Fragmentなので少しばかり癖がありますが、こんな感じにライブラリのおかげで簡単に実装できます。