概要
筆者はよく忘れがちなので備忘録として書き残すことにしました
今回も初めて書く方に向けて書いていきたいと思います
以前に取得したワイルドカード証明書を使用していきます
検証環境
- CentOS Linux release 7.6.1810 (Core)
- Apache/2.4.6 (CentOS)
DNSの設定
まず初めにお名前ドットコムのようなサイトにサブドメインの設定をする必要があります
筆者は前回同様にお名前ドットコムを使用しておりますのでここのサイトにグローバルIPを登録する必要があります
このサイトに飛び
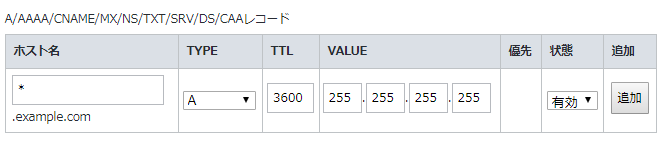
この画像のようにホスト名の箇所に*VALUEの箇所に[Global_IP]を入力し追加、設定してください
これでDNS側の設定は終わりです
記述箇所
まず初めにサイトを置きたいフォルダ任意の名前で作成します
今回はhogeというフォルダを作成します
# mkdir /var/www/html/hoge
/etc/httpd/conf.d/の下のディレクトリに任意の名前でファイルを作成します
今回はhoge.confにしていきます
/etc/httpd/conf.d/hoge.conf
<VirtualHost *:80>
  DocumentRoot /var/www/html/hoge
  ServerName hoge.example.com
  RewriteEngine On
  RewriteCond %{HTTPS} off
  RewriteRule ^(.*)$ https://%{HTTP_HOST}%{REQUEST_URI} [R=301,L]
</VirtualHost>

<Virtualhost *:443>
  DocumentRoot /var/www/html/hoge
  ServerName hoge.example.com

  SSLEngine On
  SSLProtocol all -SSLv2

  SSLCertificateFile /etc/letsencrypt/live/example.com-0001/cert.pem
  SSLCertificateKeyFile /etc/letsencrypt/live/example.com-0001/privkey.pem
  SSLCertificateChainFile /etc/letsencrypt/live/example.com-0001/chain.pem

</VirtualHost>
保存が終わったらプロセスを再起動してください
# systemctl restart httpd
以上でSSL化されると思われます
もし、エラーが返される場合は*.confの権限の設定かと思われます
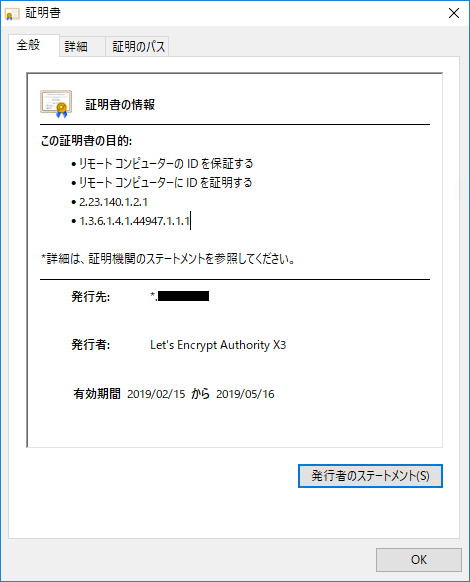
成功した場合このように表示されていると思います。
今回は終わりです