PythonでDiscord Botを気まぐれで作ったので手順でも紹介してみようと思います。
環境作り
- Python3.7.6 (Anaconda)
- エディタはVScodeを使います(Pycharm?知らんねぇ..)
discord.pyをダウンロードする
Pythonの開発環境にpipでdiscord.pyをインストールします。
python3 -m pip install -U discord.py
DEVELOPER PORTALでBotを登録
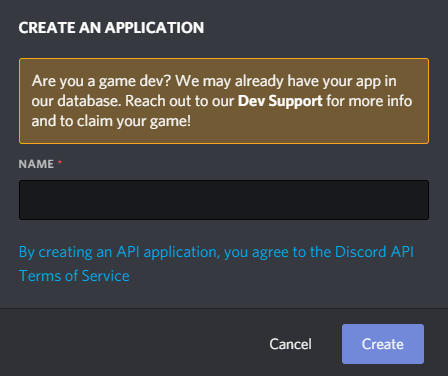
DEVELOPER PORTALにアクセスしてBotを登録します。NewApplicationをクリックし、Botの名前を決めましょう。
メニューからBotを選択し、Build-A-BotのAdd Botをクリックします。
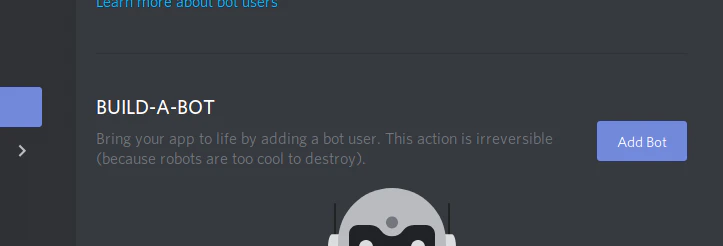
この画面になったらBotの名前やアイコンを好きなものに変えておきましょう。

Tokenを取得する
Click to Reveal TokenをクリックしTokenをコピーしておきます。(Tokenは他の人に教えないようにしましょう(乗っ取られます))
Botをサーバーに参加させる。
Botをサーバーに入れないと話になりません。
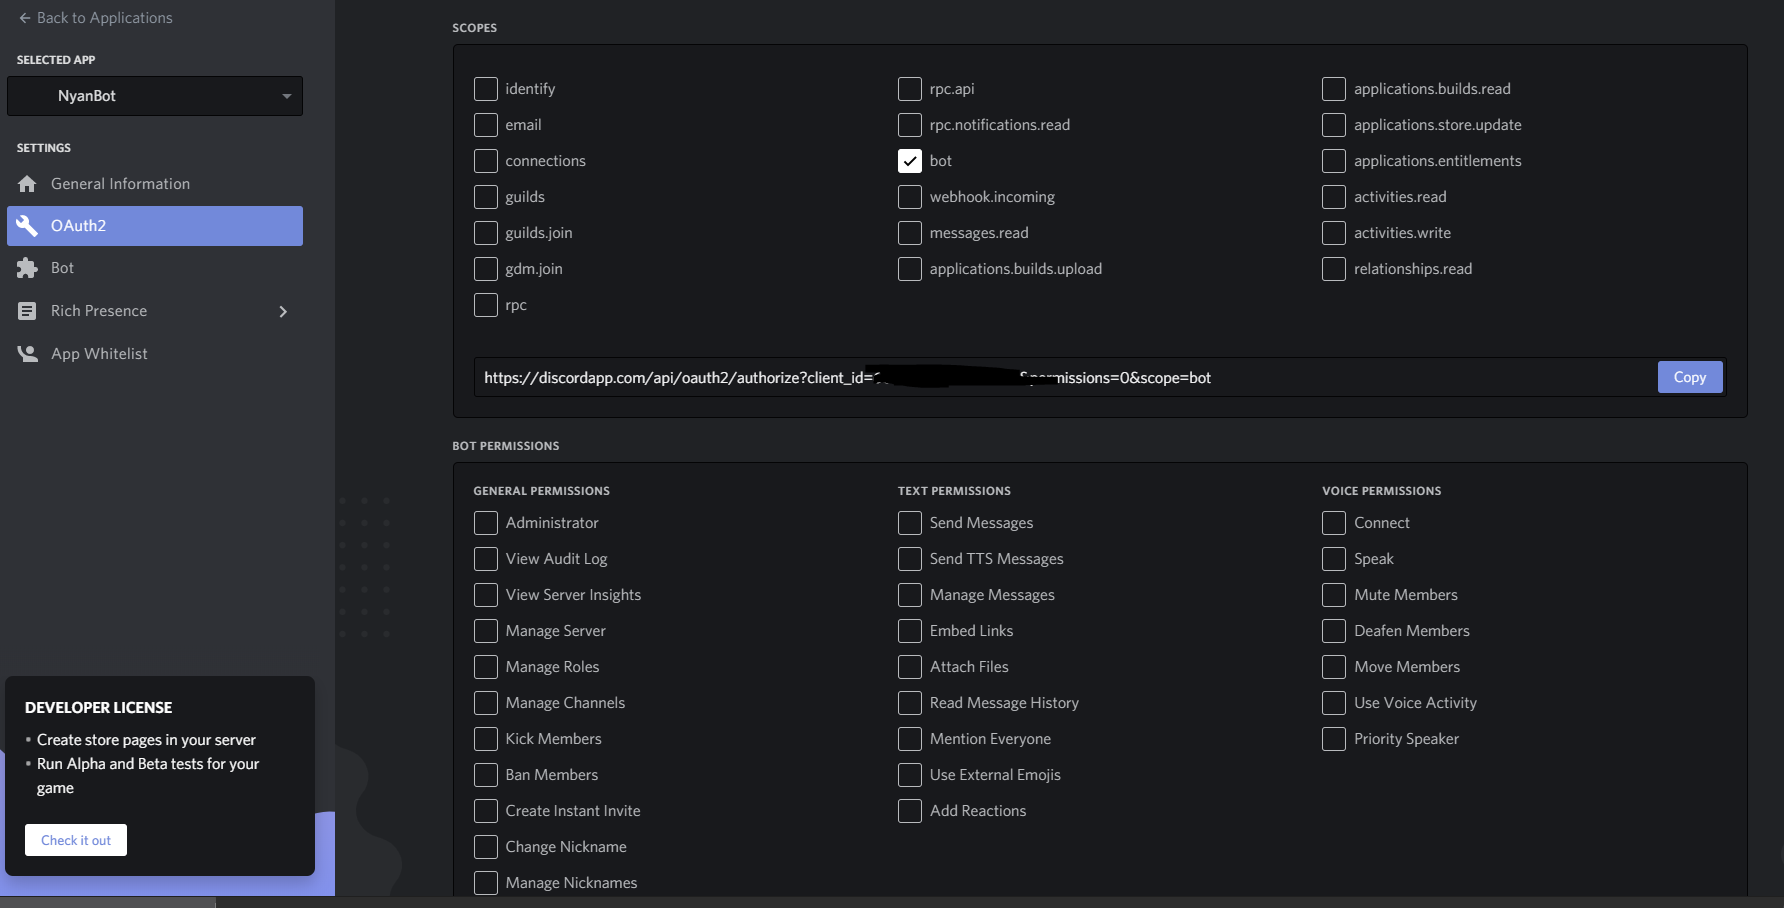
Botをサーバーに入れるにはメニューのOAuth2からチェックボックスのBotを選択、下に現れるリンクにアクセスしてBotを参加させます。
(Botの使用用途に応じてパーミッションの設定をしておくといいと思います。)
Botのプログラムを書く
適当にPythonファイルを作り開きます。
pipでインストールしたDiscord.pyをインポートします。
import discord #Discord.pyをインポート

TOKEN = "YOUR TOKEN" #Tokenはここに書きます。
client = discord.Client()
Botがオンラインになり準備ができた場合にメッセージを送信する処理を書きます。
@client.event
async def on_ready(): #Botが準備完了した場合
   print("Botがログインしました")
   ChannelID = int(0000000000000) #送信するチャンネルIDを書く
   channel = client.get_channel(ChannelID)
   await channel.send("私が参ったぞ!")
特定の文字列で返事をするコードを書きます。
@client.event
async def on_message(message)
   if message.author.bot: #Botだった場合は反応しない
        return
   if message.content == "/hello": #/helloが送られた場合
        print("/helloが実行されました。")
        await message.channel.send("こんにちは!")
Botを開始させるコードを書きます。
client.run(TOKEN)
on_ready()やon_message()以外にも..
on_ready()やon_message()以外にも以下のイベントハンドラがあります。
※必ず@client.event、async defを書いてください。
@client.event
async def on_member_join(member): #新規ユーザー参加時
  #処理
@client.event
async def discord.on_voice_state_update(member, before, after): #メンーのボイスチャンネル出入り時
  #処理
@client.event
async def on_reaction_add(reaction, user): #リアクションが追加された時
  #処理
コード記述例
import discord #Discord.pyをインポート

TOKEN = "YOUR TOKEN" #Tokenはここに書きます。
client = discord.Client()

@client.event
async def on_ready(): #Botが準備完了した場合
   print("Botがログインしました")
   print("----------")
   ChannelID = int(0000000000000) #送信するチャンネルIDを書く
   channel = client.get_channel(ChannelID)
   await channel.send("私が参ったぞ!")

@client.event
async def on_message(message)
   if message.author.bot: #Botだった場合は反応しない
        return
   if message.content == "/hello": #/helloが送られた場合
        print("/helloが実行されました。")
        await message.channel.send("こんにちは!")
@client.event
async def on_member_join(member): #新規ユーザー参加時
        print("新規ユーザー参加")
        await message.channel.send("ようこそ!")
@client.event
async def discord.on_voice_state_update(member, before, after): #メンーのボイスチャンネル出入り時
        print("ボイスチャンネル更新")
        await message.channel.send("ボイスチャンネルに動きが...")
@client.event
async def on_reaction_add(reaction, user): #リアクションが追加された時
        print("リアクション")
        await message.channel.send("リアクションしてくれた!")

client.run(TOKEN)
Botを動かしてみる
Ctrl+Sで保存し、実行してみましょう。
$ python Discord_Bot.py
Botがログインしました
----------
こんな表示が出れば成功です。
あとは自分の好きな機能を加えてみるといいと思います。
まとめ
Discord Botはdiscord.pyという便利なライブラリがあるので簡単に作ることができます。皆さんも是非挑戦してみてください(^▽^)/