はじめに
Rails7になっていろいろ動かなくて苦労したのでメモ。Rails 7.0.3で作った時は動いてたのが7.0.5で別のアプリを作ったら同じようには動かなかったので。
Rails 7.0.5
Ruby 3.1.2
Bootstrap 5.2.3
MySQL Ver 8.0.31 for macos13.0 on arm64 (Homebrew)
Mac OS Ventura 13.4
この記事が参考になってVPSにデプロイしたいと思った方はぜひ以下のリンクからVultr VPSを申し込んでみて下さい。
激安VPSのVultrで紹介者からのリンク経由でアカウント登録すると$100のクレジットをもらえるので、CentOS7, 8, MySQL 5.7, 8などの組み合わせをいろいろ試しました。このキャンペーンはいつ終わるか分からないので、興味のある方は以下のリンクからアカウント登録してください。あなたはクレジットをもらえるし、私にも多少のクレジットが入るらしいので、Win-Winです。
このリンクで$100もらえます
私もリファラー経由でアカウントを作ったので$100もらえました。これで最初にあれやこれや試すのは無料でできます。

- Rails 7.0.5でBootstrap 5.2を動かす(今回の記事)
- Rails 7.0.5、Bootstrap 5.2でDevise 4.9を動かす
- Rails7.0+Devise4.9をBootstrap5でカッコよくする
1. RubyMineでプロジェクト作成
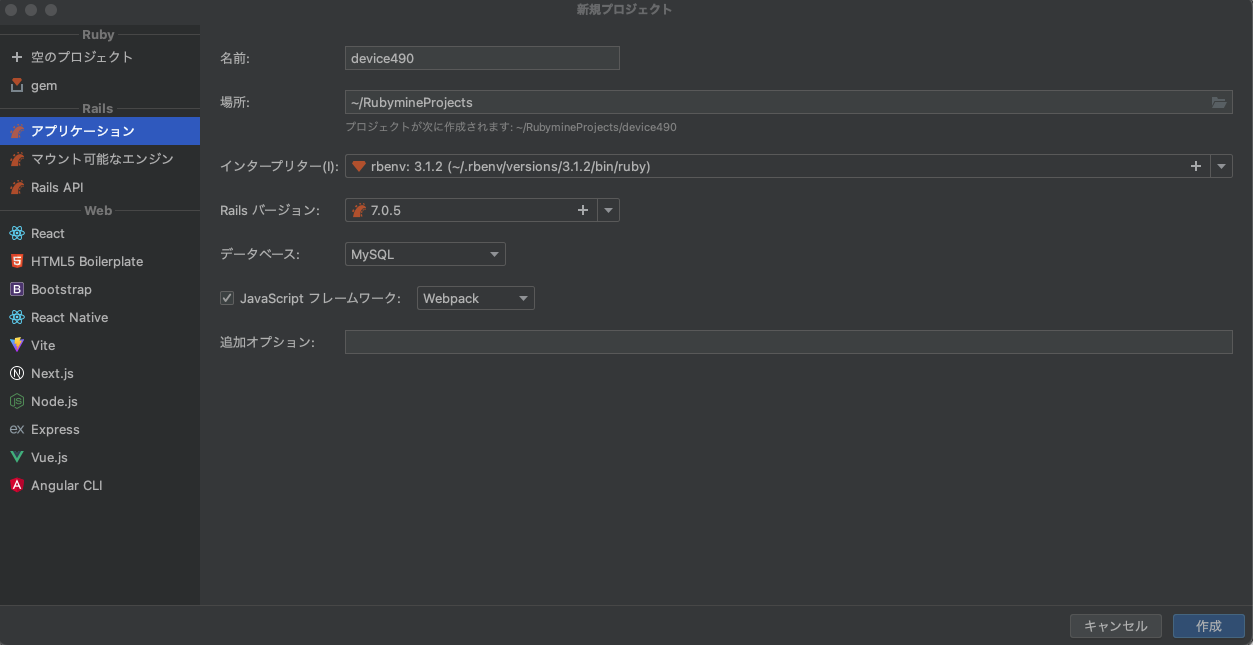
Rails 7ではrails newする時に--css=bootstrapを付けるとBootstrap5が入るという記事をよく見かけるが自分が試した限り上手く動かなかった。また、Rails 7ではjavascriptのパッケージャーの代わりにImportmapがDefaultになったが、これもconfig/importmap.rbが作られなかったし、手で作成してpinを書いても動かなかったのでWebpackを使うことにした。
スクリーンショットの内容でプロジェクトを作成する。
Tips(1) mysql2で以下のエラーが出た時の対応策
Gem::Ext::BuildError: ERROR: Failed to build gem native extension.

    current directory: /Users/nakagawa/RubymineProjects/device490/vendor/bundle/ruby/3.1.0/gems/mysql2-0.5.5/ext/mysql2
/Users/nakagawa/.rbenv/versions/3.1.2/bin/ruby extconf.rb --with-mysql-lib\=/opt/homebrew/Cellar/mysql/8.0.30/lib --with-mysql-dir\=/opt/homebrew/Cellar/mysql/8.0.30 --with-mysql-config\=/opt/homebrew/Cellar/mysql/8.0.30/bin/mysql_config--with-mysql-include\=/opt/homebrew/Cellar/mysql/8.0.30/include
checking for rb_absint_size()... yes
checking for rb_absint_singlebit_p()... yes
checking for rb_gc_mark_movable()... yes
checking for rb_wait_for_single_fd()... yes
checking for rb_enc_interned_str() in ruby.h... yes
-----
Using --with-openssl-dir=/Users/nakagawa/.rbenv/versions/3.1.2/openssl
-----
-----
Cannot find include dir(s) /opt/homebrew/Cellar/mysql/8.0.30/include
-----
*** extconf.rb failed ***
Could not create Makefile due to some reason, probably lack of necessary
libraries and/or headers.  Check the mkmf.log file for more details.  You may
need configuration options.

Provided configuration options:
	--with-opt-dir
	--without-opt-dir
	--with-opt-include
	--without-opt-include=${opt-dir}/include
	--with-opt-lib
	--without-opt-lib=${opt-dir}/lib
	--with-make-prog
	--without-make-prog
	--srcdir=.
	--curdir
	--ruby=/Users/nakagawa/.rbenv/versions/3.1.2/bin/$(RUBY_BASE_NAME)
	--with-openssl-dir
	--with-openssl-dir
	--with-openssl-include
	--without-openssl-include=${openssl-dir}/include
	--with-openssl-lib
	--without-openssl-lib=${openssl-dir}/lib
	--with-mysql-dir
	--with-mysql-include
	--without-mysql-include=${mysql-dir}/include
	--with-mysql-lib=${mysql-dir}/lib

To see why this extension failed to compile, please check the mkmf.log which can be found here:

長いので途中省略

In Gemfile:
  mysql2
         run  bundle binstubs bundler
Could not find gem 'mysql2 (~> 0.5)' in locally installed gems.
       rails  javascript:install:webpack
Could not find gem 'mysql2 (~> 0.5)' in locally installed gems.
Run `bundle install` to install missing gems.
       rails  turbo:install stimulus:install
Could not find gem 'mysql2 (~> 0.5)' in locally installed gems.
Run `bundle install` to install missing gems.
以前の記事でも書いたが以下をRails rootディレクトリで実行してから再度bundle installする。
bundle config --local build.mysql2 "--with-ldflags=-L/usr/local/opt/openssl/lib --with-cppflags=-I/usr/local/opt/openssl/include"
エラーは解消して成功。
Installing mysql2 0.5.5 with native extensions
Bundle complete! 15 Gemfile dependencies, 72 gems now installed.
Bundled gems are installed into `./vendor/bundle`
この時点でのGemfileは次のようになっていた。
source "https://rubygems.org"
git_source(:github) { |repo| "https://github.com/#{repo}.git" }

ruby "3.1.2"

# Bundle edge Rails instead: gem "rails", github: "rails/rails", branch: "main"
gem "rails", "~> 7.0.5"

# The original asset pipeline for Rails [https://github.com/rails/sprockets-rails]
gem "sprockets-rails"

# Use mysql as the database for Active Record
gem "mysql2", "~> 0.5"

# Use the Puma web server [https://github.com/puma/puma]
gem "puma", "~> 5.0"

# Bundle and transpile JavaScript [https://github.com/rails/jsbundling-rails]
gem "jsbundling-rails"

# Hotwire's SPA-like page accelerator [https://turbo.hotwired.dev]
gem "turbo-rails"

# Hotwire's modest JavaScript framework [https://stimulus.hotwired.dev]
gem "stimulus-rails"

# Build JSON APIs with ease [https://github.com/rails/jbuilder]
gem "jbuilder"

# Use Redis adapter to run Action Cable in production
# gem "redis", "~> 4.0"

# Use Kredis to get higher-level data types in Redis [https://github.com/rails/kredis]
# gem "kredis"

# Use Active Model has_secure_password [https://guides.rubyonrails.org/active_model_basics.html#securepassword]
# gem "bcrypt", "~> 3.1.7"

# Windows does not include zoneinfo files, so bundle the tzinfo-data gem
gem "tzinfo-data", platforms: %i[ mingw mswin x64_mingw jruby ]

# Reduces boot times through caching; required in config/boot.rb
gem "bootsnap", require: false

# Use Sass to process CSS
# gem "sassc-rails"

# Use Active Storage variants [https://guides.rubyonrails.org/active_storage_overview.html#transforming-images]
# gem "image_processing", "~> 1.2"

group :development, :test do
  # See https://guides.rubyonrails.org/debugging_rails_applications.html#debugging-with-the-debug-gem
  gem "debug", platforms: %i[ mri mingw x64_mingw ]
end

group :development do
  # Use console on exceptions pages [https://github.com/rails/web-console]
  gem "web-console"

  # Add speed badges [https://github.com/MiniProfiler/rack-mini-profiler]
  # gem "rack-mini-profiler"

  # Speed up commands on slow machines / big apps [https://github.com/rails/spring]
  # gem "spring"
end

group :test do
  # Use system testing [https://guides.rubyonrails.org/testing.html#system-testing]
  gem "capybara"
  gem "selenium-webdriver"
  gem "webdrivers"
end
2. Databaseの構成
config/database.ymlに自分の環境のMySQLサーバーへの接続設定を入れる。
default: &default
  adapter: mysql2
  encoding: utf8mb4
  pool: <%= ENV.fetch("RAILS_MAX_THREADS") { 5 } %>
  username: <%= ENV.fetch('DATABASE_USER', '') %>
  password: <%= ENV.fetch('DATABASE_PASSWORD', '') %>
  host: <%= ENV.fetch('DATABASE_HOST', '') %>
ここでDBを作成してマイグレートしてテーブルを作成し、DB構成が正しいことを確認する。
rails db:create
rails db:migrate
3. Rails動作確認
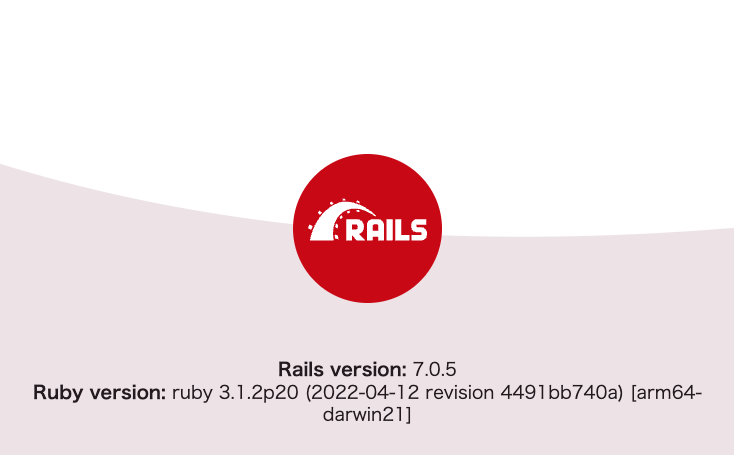
この時点でRailsは動くはずなのでrails sしてブラウザでアクセスし、以下の画面が出ることを確認する。
4. javascriptアプローチ
Rails 7のDefaultはImportmapだが前述の通り自分の環境では動かなかったのでWebpackerを使った。この時点でのview/layout/application.html.erbは次のようになっていた。stylesheet_link_tagはapp/assets/stylesheets/application.cssを参照する
<!DOCTYPE html>
<html>
  <head>
    <title>Device490</title>
    <meta name="viewport" content="width=device-width,initial-scale=1">
    <%= csrf_meta_tags %>
    <%= csp_meta_tag %>

    <%= stylesheet_link_tag "application", "data-turbo-track": "reload" %>
  </head>

  <body>
    <%= yield %>
  </body>
</html>
5. Bootstrap確認用index.html.erb作成
ここからBootstrapを入れるが、その前に確認用のページを作っておく。
$ rails g controller pages index
<h1>Pages#index</h1>
<p>Find me in app/views/pages/index.html.erb</p>

<!-- Example single danger button -->
<div class="btn-group">
  <button type="button" class="btn btn-danger dropdown-toggle" data-bs-toggle="dropdown" aria-expanded="false">
    Action
  </button>
  <ul class="dropdown-menu">
    <li><a class="dropdown-item" href="#">Action</a></li>
    <li><a class="dropdown-item" href="#">Another action</a></li>
    <li><a class="dropdown-item" href="#">Something else here</a></li>
    <li><hr class="dropdown-divider"></li>
    <li><a class="dropdown-item" href="#">Separated link</a></li>
  </ul>
</div>
Rails.application.routes.draw do
  # Define your application routes per the DSL in https://guides.rubyonrails.org/routing.html

  # Defines the root path route ("/")
  # root "articles#index"
  root 'pages#index'
end
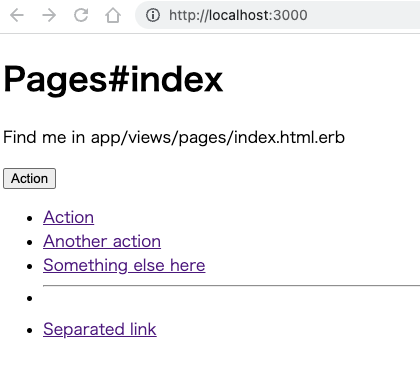
Bootstrapを入れてないので当然だがドロップダウンメニューは動いていない。
6. Bootstrap5
Bootstrap5の公式ページではGemを使わずにCDNから引っ張るやり方が書かれているが、今回はGemを使ってインストールした。
(1) インストール
#bootstrap
gem 'bootstrap'
bundle installしたら自動的にいろいろ入った。現時点でのBootstrap5の最新バージョンは5.3.0だが、Gemではalpha版の5.3.0しかないのでインストールされたのは5.2.3だった。
Installing popper_js 2.11.7
Installing execjs 2.8.1
Fetching autoprefixer-rails 10.4.13.0
Installing tilt 2.2.0
Installing ffi 1.15.5 with native extensions
Installing autoprefixer-rails 10.4.13.0
Fetching sassc 2.4.0
Installing sassc 2.4.0 with native extensions
Fetching sassc-rails 2.1.2
Installing sassc-rails 2.1.2
Fetching bootstrap 5.2.3
Installing bootstrap 5.2.3
Bundle complete! 16 Gemfile dependencies, 80 gems now installed.
Bundled gems are installed into `./vendor/bundle`
(2) application.scssからbootstrapを呼び出す
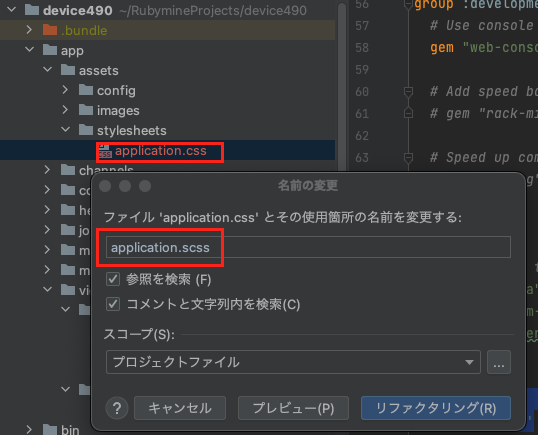
次に
app/assets/stylesheets/application.cssの拡張子を
app/assets/stylesheets/application.scssに変更
そしてapplication.scssからbootstrapを呼び出すようにする。このSassファイル(元のapplication.css)にある*= requireステートメントと*= require_treeをすべてコメントアウト(あるいは削除)し、@import "bootstrap";を追加する。
- *= require_tree .
- *= require_self

+ * require_tree .
+ * require_self
+ @import "bootstrap";
現時点でのapp/assets/stylesheets/application.scssは次のとおり。
/*
 * This is a manifest file that'll be compiled into application.css, which will include all the files
 * listed below.
 *
 * Any CSS (and SCSS, if configured) file within this directory, lib/assets/stylesheets, or any plugin's
 * vendor/assets/stylesheets directory can be referenced here using a relative path.
 *
 * You're free to add application-wide styles to this file and they'll appear at the bottom of the
 * compiled file so the styles you add here take precedence over styles defined in any other CSS
 * files in this directory. Styles in this file should be added after the last require_* statement.
 * It is generally better to create a new file per style scope.
 *
 * require_tree .
 * require_self
 */
// Custom bootstrap variables must be set or imported *before* bootstrap.
@import "bootstrap";
(3) スタイルシートがBootstrapに適用されたか確認
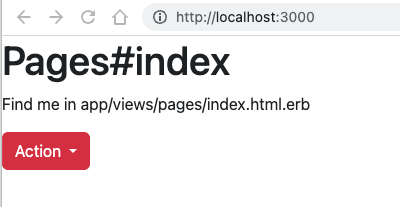
ここでRailsを再起動してSCSSがBootstrapに読み込まれたか確認する。ブラウザではボタンが以下のように見えるはず。しかし、BootstrapのJavascriptが読み込まれていないのでボタンをクリックしてもドロップダウンは動かない。
(4) JavascriptをBootstrapが使えるように設定
JQueryをインストールする。
#jquery
gem 'jquery-rails'
bundle install

Installing jquery-rails 4.5.1
Bundle complete! 17 Gemfile dependencies, 81 gems now installed.
Bundled gems are installed into `./vendor/bundle`
assets/javascripts/application.jsを作る。このファイルは以前のRailsでは自動的に作られていたのだが、存在しなかったので手で作った。
//= require jquery3
//= require popper
//= require bootstrap-sprockets
application.jsを認識させるためにmanifest.jsに//= link application.jsを追記する。
//= link_tree ../images
//= link_directory ../stylesheets .css
//= link application.js
application.jsを読み込ませるためにapplication.html.erbにjavascript_include_tagを追加する。
<!DOCTYPE html>
<html>
  <head>
    <title>Device490</title>
    <meta name="viewport" content="width=device-width,initial-scale=1">
    <%= csrf_meta_tags %>
    <%= csp_meta_tag %>

    <%= stylesheet_link_tag "application", "data-turbo-track": "reload" %>
    <%= javascript_include_tag 'application', 'data-turbolinks-track' => 'reload' %>
  </head>

  <body>
    <%= yield %>
  </body>
</html>
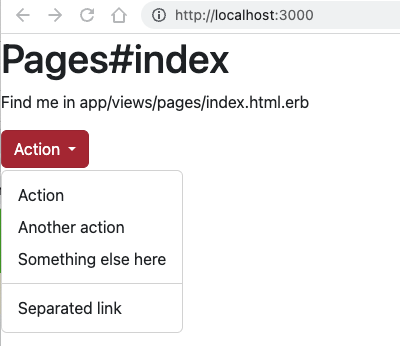
これでJavascriptが動いてドロップダウンが出るようになりました。
ここまででBootstrap5は動くようになりました。
この後、Deviseを入れてBootstrapでカッコいい画面にしていきますが、長くなるので別記事を投稿します。
Rails 7.0.5、Bootstrap 5.2でDevise 4.9を動かす
参考記事
Rails 6.1.4.1 + Ruby 3.0.0 で新規プロジェクト作成手順
Rails7構築 -その2- importmapでbootstrap5の導入
Bootstrap5設置ガイド

