参考
["RPI4 Direct USB Boot Ubuntu 20.04"]
(https://www.raspberrypi.org/forums/viewtopic.php?t=278791)
["raspberry-pi-4でusb接続hddから64ビットubuntu-20-04-1を起動してみました"]
(https://denor.jp/raspberry-pi-4%E3%81%A7usb%E6%8E%A5%E7%B6%9Ahdd%E3%81%8B%E3%82%8964%E3%83%93%E3%83%83%E3%83%88ubuntu-20-04-1%E3%82%92%E8%B5%B7%E5%8B%95%E3%81%97%E3%81%A6%E3%81%BF%E3%81%BE%E3%81%97%E3%81%9F)
["Raspberry Pi 4 bootloader configuration <ラズパイ公式サイト>"]
(https://www.raspberrypi.org/documentation/hardware/raspberrypi/bcm2711_bootloader_config.md)
はじめに
**追記-2021-0611************************************************************************************** この記事はRaspi4が正式にUSB起動に対応していなかったとき(2020-10)の記事です。今現在(2021-05-28)最新版のEEPROMで対応しているのでraspi4のrpi-eepromをupdateすれば下記の作業は一切不要でSSD(USB)Bootが出来ます。 ********************************************************************************************************今回RasPi4 SSD(USB) Bootを試してみましたがいらぬところでつまずきかなり時間がかかったのでこれから挑戦しようとしている方、またもう一度挑戦する自分への備忘録として軌跡を残しておきたいと思います。
["RPI4 Direct USB Boot Ubuntu 20.04"]
(https://www.raspberrypi.org/forums/viewtopic.php?t=278791)ここにすべて載っていました。
ですがやはり端折ってあるところもあるのでより詳しく手順の書かれているUPDATE 05Jul2020の箇所を参考に画像も付けながら手順を辿って行きたいと思います。
=========== UPDATE 05Jul2020==============
Just so everyone can get this working without an issue, once you do the initial setup on the boot partition of the USB drive, there is another step so that you do not have to manually decompress the image after each updated. This was particularly annoying with background updates, and your system would not boot after restart for no apparent reason.
So Here are the steps:
- Download the Ubuntu image for raspberry pi 4 form the Ubuntu official website.
- Flash the image to a USB drive (USB 3.0 SSD or UBS flash drive).
- Download the updated firmware files from the raspberry pi github site (https://github.com/raspberrypi/firmware ... aster/boot). Copy all *.dat and *.elf files to the Ubuntu boot partition. (Overwrite the files that were previously there).
NOTE: You must have MSD Booting EEPROM flashed onto your RPI4, or else this will not work!!! See: https://www.raspberrypi.org/documentati ... torageboot
Note: As of August 2020, you may not need to perform step 3. It has been reported that the current Ubuntu image contains the correct firmware files. I will leave this step here in case it does help someone. Be aware that it may not be necessary, > but does not hurt to do anyway.
- Decompress vmlinuz on the boot partition...
準備するもの
・RaspberryPi4
・MicroSD 16GB以上推奨
・[raspios_arm64(日本のミラーからダウンロード)]
(http://ftp.jaist.ac.jp/pub/raspberrypi/raspios_arm64/images/)(2020-08-24版を使用)
・RasPiをsshで操作するパソコン(今回はMacを使用)
・USB Bootに使用する SSD
今回はWindowsで使用していたSSDを使うのでWin10標準のdiskpart.exeを使いcleanとだけしてある。
・[ubuntu 20.04.1[LTS]]
(https://ubuntu.com/download/raspberry-pi)のラズパイ4専用イメージ(後程ラズパイの方でダウンロードするので最初は不要)
ラズパイでの事前準備
起動後
lsblkコマンドを使いraspiの現状を確認,microSDとWin10で初期化したssdのみを使用している環境なら以下と同じ様になっているはず。

SSDの初期化
Linux標準ファイルシステムのext4を指定しmkfsコマンドで初期化する。
sudo mkfs -t ext4 /dev/sda
Linuxでのファイルシステムの詳細は
["Linux パーティションにmkfsでファイルシステムを作る"]
(https://kazmax.zpp.jp/linux_beginner/mkfs.html)
を参考にしてほしい。
ext4への初期化はこのようなコマンドでもできるみたい。
# mkfs.ext4 /dev/sda ← パーティションのデバイス名を指定するだけ
SSDへUbuntuの書き込み
まずはcurlコマンドで[ubuntu 20.04.1[LTS]をダウンロード]
(https://ubuntu.com/download/raspberry-pi )
curl https://cdimage.ubuntu.com/releases/20.04.1/release/ubuntu-20.04.1-preinstalled-server-arm64+raspi.img.xz -O ubuntu-20.04.1-preinstalled-server-arm64+raspi.img.xz
ダウンロードが終わったら下記コマンドのようにddコマンドを使いSSDへ書き込む。
sudo xzcat ubuntu-20.04.1-preinstalled-server-arm64+raspi.img.xz | sudo dd bs=4M of=/dev/sda
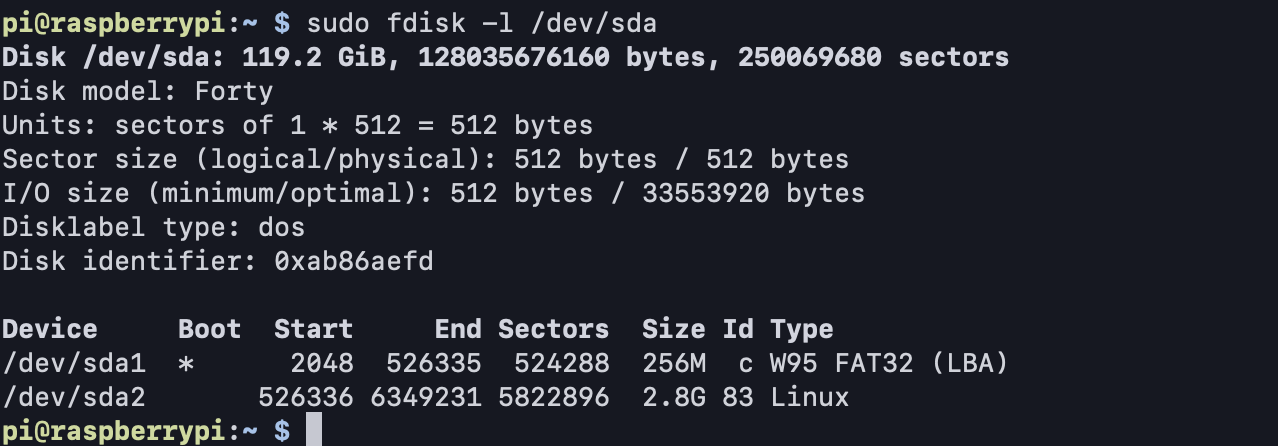
完了したらfdiskコマンドを使用しパーティションを確認
sudo fdisk -l /dev/sda
Ubuntuカーネルイメージの展開
RasPi4 SSD Bootでヒットするサイトを参考にしていく中で行き詰まったポイントはここです。
mount /dev/sda1 /media/boots
このコマンドmount [マウントしたい場所(SSD)] [マウント先]でマウントできてる人がおおい。
+--ps追記2021/01/12---+
後に作成したssd-bootのubuntuでは上記コマンドのみでマウントできました。
何故かraspiではerrが出ます。
+---------------------+
私はmount: /media/boots: mount point does not exist.のようなerrが出ました。
色々調べるとマウントするときは[マウントしたい場所]のファイルタイプが必要と分かりました。
今回UbuntuのBoot領域はfdiskコマンドを見る限りFAT32なので
["mountコマンドについてまとめました【Linuxコマンド集】"]
(https://eng-entrance.com/linux-command-mount)
を参考にファイルタイプはFATで使用するvfatを指定する。
早速覚えたて知識でやっていきましょう。今回はBoot領域での作業なので
sudo su -
を実行してから進めます。
suコマンド詳細については["sudo -i と sudo su- のどちらを使うべきか?"]
(https://win2012r2.com/2020/05/04/%E3%80%8Csudo-i%E3%80%8D-%E3%81%A8-%E3%80%8Csudo-su-%E3%80%8D%E3%81%AE%E3%81%A9%E3%81%A1%E3%82%89%E3%82%92%E4%BD%BF%E3%81%86%E3%81%B9%E3%81%8D%E3%81%8B%EF%BC%9F/)を参考にしてください。
UbuntuのBoot領域をmkdirコマンド+-pオプション
mkdir -p ~/media/boots
で作成した~/media/bootsへマウントしました。lsコマンドでマウントされたBoot領域が確認できればOKです
mount -t vfat /dev/sda1 ~/media/boots
ls ~/media/boots

ここまでできたら圧縮されたカーネルイメージvmlinuzが見えてくるのでzcatコマンドを使い通常のカーネルイメージvmlinuxへ展開
dd if=vmlinuz bs=1 | zcat > vmlinux
config.txtの編集
Boot領域にあるconfig.txtに記載されている[pi4]の箇所を下記のように書き換える
先頭のkernel=uboot_rpi_4.binをコメントアウトし、下から4つを書き足す形
bootオプションについて詳しくは
["Raspberry Pi 4 bootloader configuration <ラズパイ公式サイト>"]
(https://www.raspberrypi.org/documentation/configuration/config-txt/boot.md)
に記載があるが今回は["RPI4 Direct USB Boot Ubuntu 20.04 <ラズパイ公式フォーラム>"]
(https://www.raspberrypi.org/forums/viewtopic.php?t=278791)のものを使用した。
[pi4]
# kernel=uboot_rpi_4.bin
max_framebuffers=2
dtoverlay=vc4-fkms-v3d
boot_delay
kernel=vmlinux
initramfs initrd.img followkernel
新しいファームウェアのコピー
cp ~pi/boot/*.dat ~pi/boot/*.elf ~/media/boots
ls ~/media/boots/*.dat ~/media/boots/*.elf
私の場合は~/media/boots/のようにその都度~(チルダ)つまりホームディレクトリから指定しなければ作業できませんでした。

以上でUSBストレージから起動する準備が整いました。
lsコマンドでコピーが確認できたらマウントを解除
umount ~/media/boots
exit
rootを抜けRaspberry Piの電源を落としましょう。
sudo shutdown -h now
SSDで起動
microSDを外しSSDのみで電源を入れる
macユーザの方はarp-scanコマンドでraspiのアドレスを検索できます。
sudo arp-scan -l --interface en0
初回は、user:ubuntu, password:ubuntu でログインできます。

初回ログイン時はパスワード変更をし再ログインしてください。
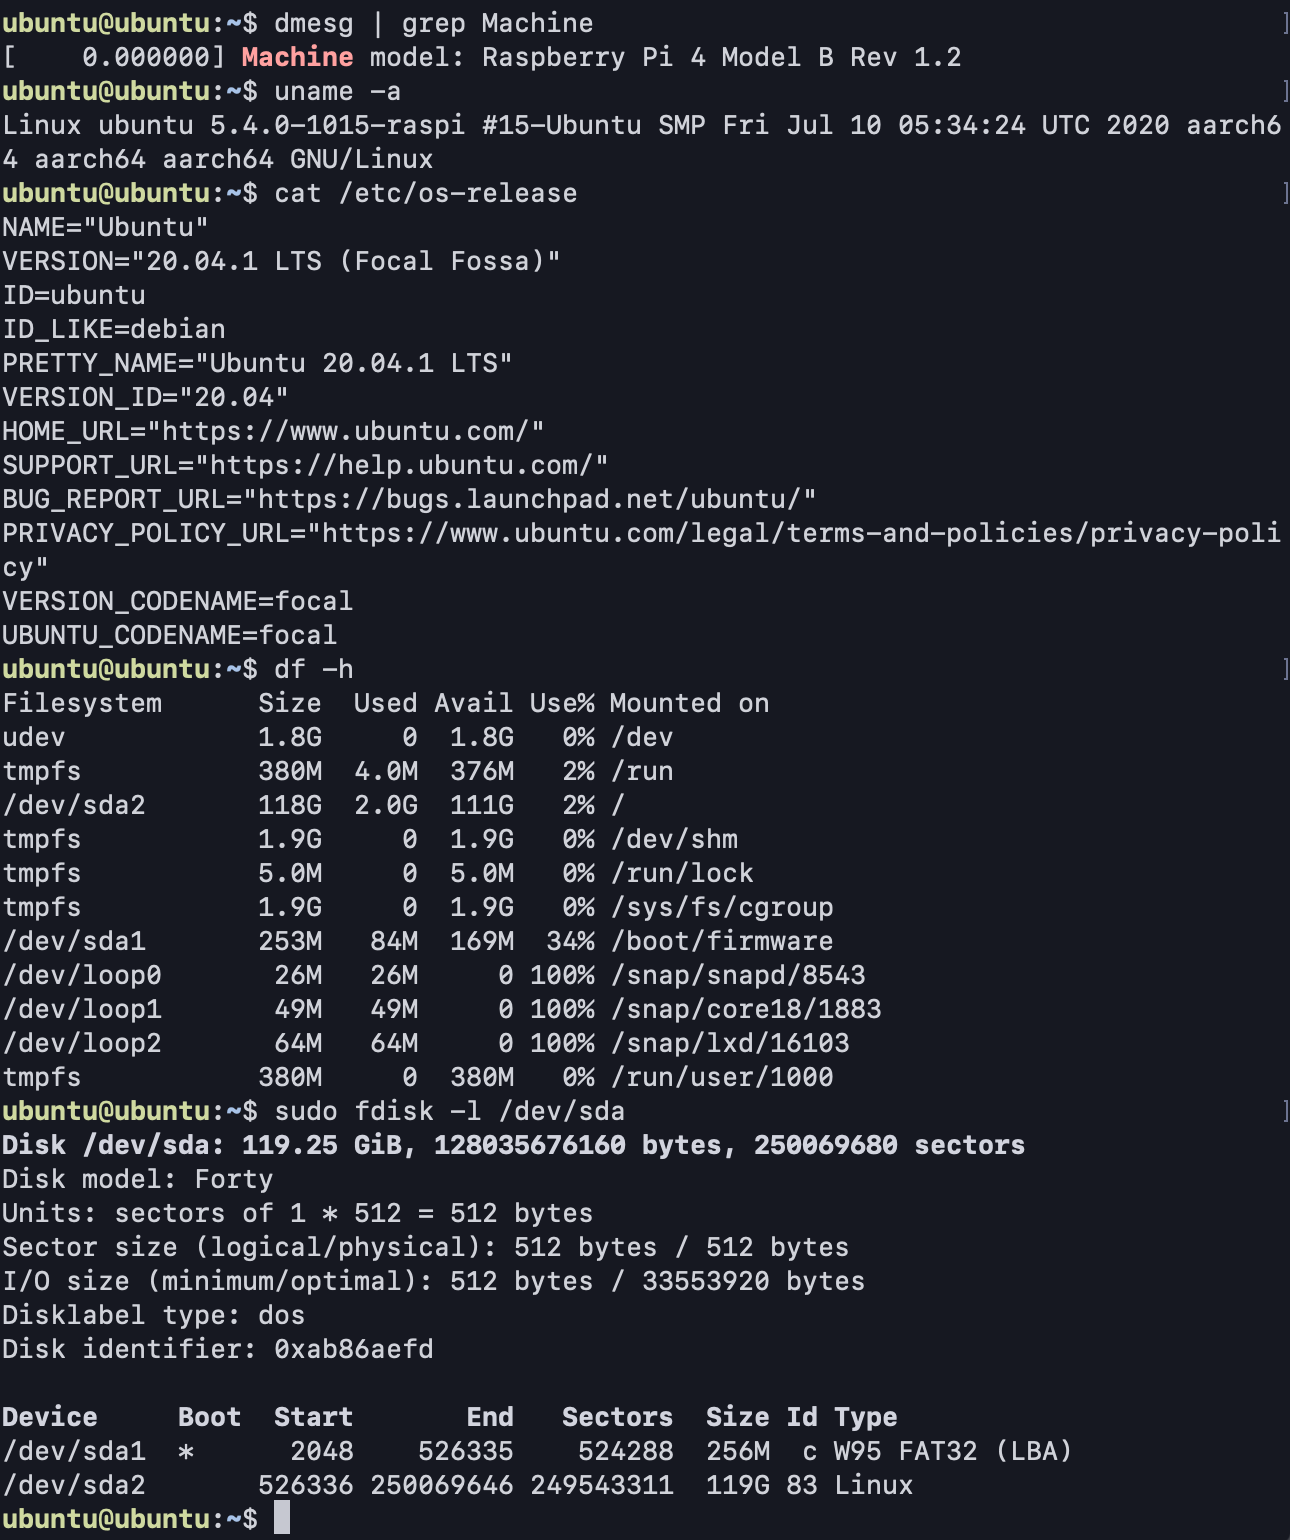
新しく設定したパスワードでログインできたらdf -hなどのコマンドで現状の確認してみましょう。
きちんと動作していますね。

終わりに
と、こんな感じに無事RasPi4でのUbuntu20.04.1[LTS]をSSD onlyで起動するができましたが正直完全には理解できていません。
今回の作業からは学ぶことが多くありました。例えばboots領域をマウントする要領で予めラズパイの初期設定(IPの固定化、ホスト名の設定、Wi-Fi設定、SSH設定など)を設定しておき使用する際に電源を入れるだけで簡単な初期設定が完了している状態に出来ます。ですがUbuntuなどのLTS版ならまだしも年に4〜5回更新されるラズパイイメージには不向きかなとも思います。
最近思うことがapt updateやapt upgradeでUbuntuのリポジトリを最新に更新させた状態のまっさらなインストールディスクが作りたいです。User設定を消せばいいんですかね。。誰かおしえてください。(´・ω・`)


