Terraform公式チュートリアルの日本語訳です。
実際に動作を確認しながら学習できるチュートリアルです。
【AWS編】では、実際にAWS上でインフラの構築・変更・削除をします。
翻訳の掲載をご快諾くださったHashiCorpのEducation Teamのみなさんありがとうございました。
原文はこちらです。1
- Infrastructure | Terraform | HashiCorp Developerl
- Change Infrastructure | Terraform | HashiCorp Developer
また、HashiCorp Learnに登録するとチュートリアルの進捗などがダッシュボードで確認できるようになります。
登録はこちら。Sign in - HashiCorp Learn
※なお、HashiCorpでは当面の間ドキュメントのローカライゼーションの予定はないとのことです。
前回のチュートリアル「準備・導入編」はこちら。
インフラの構築
Terraformをインストールしたので、インフラ2を作成する準備ができました。
このチュートリアルでは、AWS(Amazon Web Services)上にEC2インスタンスをセットアップします。EC2とは、AWS上で起動するバーチャル・マシンです。インフラ・プロジェクトでよく採用されているコンポーネントです。
前提条件
このチュートリアルを進めるには次の事を満たしている必要があります。
- Terraform CLI(1.2.0+)をインストールしていること
- AWS CLIをインストールしていること
- AWS accountと関連する認証情報でリソースが作成できる状態にあること
IAMの認証情報を使ってTerraformのAWSプロバイダーを認証するには、環境変数AWS_ACCESS_KEY_IDを設定する必要があります。
$ export AWS_ACCESS_KEY_ID=
次に、シークレット・キーを設定します。
$ export AWS_SECRET_ACCESS_KEY=
IAMの認証情報にアクセスできない場合には、他の認証方法をお試しください。詳しくはAWSプロバイダードキュメントに記載があります。
このチュートリアルでは、AWS無料利用枠で使用できるリソースをセットアップします。無料利用枠が利用できない場合に生じたいかなる請求に対して我々は責任を負いかねます。
設定の作成
Terraformでインフラを記述するのに使われるファイル群をTerraformの設定と呼びます。まず、設定を作成しAWS EC2のインスタンスを1つ定義してみましょう。
Terraformの設定は必ずワーキング・ディレクトリ内に作成されなければなりません。設定のためのディレクトリを作りましょう。
$ mkdir learn-terraform-aws-instance
作成したディレクトリに移動します。
$ cd learn-terraform-aws-instance
ファイルを作成しインフラを定義します。
$ touch main.tf
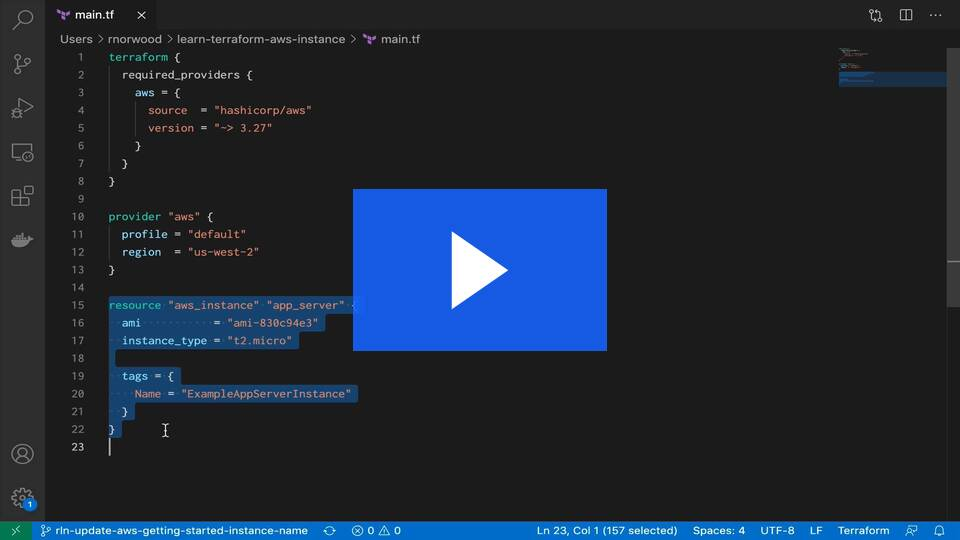
main.tfをテキスト・エディタで開き、次の設定を貼り付けて保存しましょう。
この設定で使うAMI IDはリージョンをus-west-2に指定しています。他のリージョンを使いたい場合はトラブルシューティングに従ってください。
terraform {
  required_providers {
    aws = {
      source  = "hashicorp/aws"
      version = "~> 4.16"
    }
  }

  required_version = ">= 1.2.0"
}

provider "aws" {
  region  = "us-west-2"
}

resource "aws_instance" "app_server" {
  ami           = "ami-830c94e3"
  instance_type = "t2.micro"

  tags = {
    Name = "ExampleAppServerInstance"
  }
}
この設定をすると、Terraformでデプロイすることができます。それぞれのブロックについて詳しく見ていきましょう。
Terraformブロック
terraform {}ブロックにはTerraformの設定が入ります。Terraformでインフラをセットアップするのに必要なプロバイダーについて記述しましょう。プロバイダーにはそれぞれsource属性があり、任意のホスト・ネームやネーム・スペース、プロバイダーのタイプを定義します。デフォルトではTerraformはTerraformリポジトリからプロバイダーをインストールします。このチュートリアルの例では、awsプロバイダーのソースはhashicorp/awsと定義されています。これは、registry.terraform.io/hashicorp/awsの省略した書き方です。
required_providersブロックで定義されたプロバイダーに対してバージョンを制限することもできます。version属性は指定しなくても構いませんが、version属性を指定してプロバイダーのバージョンを制限することをお勧めします。そうすることで、作成された設定の元で正常に動作しないようなバージョンのプロバイダーをTerraformがインストールしてしまうのを防ぐことができます。プロバイダーのバージョンを指定しない場合は、Terraformは初期化中に自動で最新のバージョンをダウンロードします。
詳しくは、プロバイダー・ソースのドキュメントをご参照ください。
プロバイダー
providerブロックは特定のプロバイダーを設定します。このチュートリアルではawsを設定します。プロバイダーとは、Terraformがリソースを作成し管理するために使用するプラグインのことです。
Terraformの設定に複数のプロバイダー・ブロックを書き、異なるプロバイダーからリソースを管理することができます。更に、異なるプロバイダーを一緒に使うこともできます。例えば、AWS EC2インスタンスのIPアドレスをDataDogのモニタリング・リソースに渡すことができます。
リソース
resourceブロックを使ってインフラの構成要素を定義しましょう。リソースは物理的なものであったり、EC2インスタンスの様に仮想のものであったり、Herokuアプリのように論理リソースであったりするかもしれません。
リソース・ブロックにはブロックの前に2つの文字列があります。それぞれ、リソース・タイプとリソース・ネームといいます。このチュートリアルでは、リソース・タイプはaws_instanceで、リソース・ネームはapp_serverとしています。リソース・タイプの接頭辞はプロバイダーのリソース・ネームに対応しています。設定例では、Terraformはawsプロバイダーでaws_instanceを管理します。同時に、リソース・タイプとリソース・ネームはリソースに対してユニークなIDを発行します。例えば、EC2インスタンスのIDはaws_instance.app_serverです。
リソース・ブロックには引数を渡すことができ、引数によってリソースを設定することができます。引数には、マシンのサイズやディスク・イメージの名前、VPCのIDなどがあります。プロバイダー・リファレンスには、各リソースに対して必須の引数やオプションの引数のリストが掲載されています。このチュートリアルでは、EC2インスタンスに対して、AMI IDをUbuntuイメージに、インスタンス・タイプをt2.microに設定しています。これはAWSの無料枠で利用できるものです。タグを設定してインスタンスに名前を付けることもできます。
ディレクトリの初期化
新しく設定を作成したり、バージョン・コントロール・システムから既存の設定にチェックアウトした時には、terraform initを実行してディレクトリを初期化する必要があります。
作業ディレクトリを初期化すると、設定ファイル内で定義されたプロバイダーがダウンロードされインストールされます。このチュートリアルではawsプロバイダーをインストールします。
早速、作業ディレクトリを初期化してみましょう。
$ terraform init

Initializing the backend...

Initializing provider plugins...
- Finding hashicorp/aws versions matching "~> 4.16"...
- Installing hashicorp/aws v4.17.0...
- Installed hashicorp/aws v4.17.0 (signed by HashiCorp)

Terraform has created a lock file .terraform.lock.hcl to record the provider
selections it made above. Include this file in your version control repository
so that Terraform can guarantee to make the same selections by default when
you run "terraform init" in the future.

Terraform has been successfully initialized!

You may now begin working with Terraform. Try running "terraform plan" to see
any changes that are required for your infrastructure. All Terraform commands
should now work.

If you ever set or change modules or backend configuration for Terraform,
rerun this command to reinitialize your working directory. If you forget, other
commands will detect it and remind you to do so if necessary.
Terraformはawsプロバイダーをダウンロードし、作業中のディレクトリに.terraformという名前の隠しディレクトリを作成し、そこにawsプロバイダーをインストールします。terraform initを実行すると、インストールされたプロバイダーのバージョンが出力されます。Terraformは.terraform.lock.hclという名前のロック・ファイルも作ります。このロック・ファイルは使用するプロバイダーの正確なバージョンを指定するので、プロジェクトに使用しているプロバイダーをアップデートしたい時にコントロールすることができます。
設定のフォーマットと検証
設定ファイルには一貫性のあるフォーマットを使用することをお勧めします。terraform fmtを実行すると自動で作業中のディレクトリの設定ファイルがアップデートされて、可読性が高く一貫性のあるフォーマットにフォーマットされます。
設定をフォーマットしてみましょう。少しでも修正されたファイルはそのファイル名が出力されます。以下の場合では、設定ファイルが既に正しくフォーマットされているのでTerraformは何も出力しません。
$ terraform fmt
また、terraform validateを実行することで、設定の構文が有効であり整合性が取れていることを確認することもできます。
設定が有効であることを確認しましょう。上に掲載した設定例は有効なものなので、Terraformは成功メッセージを返します。
$ terraform validate
Success! The configuration is valid.
インフラの作成
terraform applyを実行して設定を適用させましょう。Terraformは以下のような出力をするでしょう。なお、スペースの都合上一部は省略してあります。
$ terraform apply

Terraform used the selected providers to generate the following execution plan.
Resource actions are indicated with the following symbols:
  + create

Terraform will perform the following actions:

   aws_instance.app_server will be created
  + resource "aws_instance" "app_server" {
      + ami                          = "ami-830c94e3"
      + arn                          = (known after apply)
##...

Plan: 1 to add, 0 to change, 0 to destroy.

Do you want to perform these actions?
  Terraform will perform the actions described above.
  Only 'yes' will be accepted to approve.

  Enter a value:
設定の適用に失敗する場合は、リージョンを変更してしまったか、デフォルトのVPCを削除してしまった可能性があります。このチュートリアルのトラブルシューティングの章をご覧いただくと役に立つかもしれません。
変更を加えてしまう前に、Terraformは 実行計画(execution plan) を出力します。実行計画とは、設定ファイルに合致するようにインフラを変更する上でTerraformが実行する内容を書いたものです。
実行計画のフォーマットはGitなどのdiffフォーマットに似ています。上の例では+の横に
aws_instance.app_serverとあります。これは、Terraformがこれからこのリソースを作ることを意味しています。その下の行には、これから設定される属性が書かれています。(known after apply)と書かれている箇所は、リソースを作成するまで分からない値であるという意味です。例えば、AWSは作成時にARN(Amazon Resource Name)をインスタンスに付与します。従って、arn属性の値が分かるのは、設定の変更を適用してAWSプロバイダーがAWS APIから値を返却してからになるのです。
Terraformは今、変更を中断しおり、変更の同意がなされるまで動作の続行を待機しています。実行計画の中に間違いや危険性があった場合は、Terraformがインフラに変更を加える前にここで中断するのが安全です。
今回の例では、実行計画は受け入れられるので、確認のメッセージに対してyesとタイプし、動作を続行します。実行計画が完了するまで数分掛かるかもしれません。というのも、TerraformはEC2インスタンスが利用可能になるまで待機するからです。
  Enter a value: yes

aws_instance.app_server: Creating...
aws_instance.app_server: Still creating... [10s elapsed]
aws_instance.app_server: Still creating... [20s elapsed]
aws_instance.app_server: Still creating... [30s elapsed]
aws_instance.app_server: Creation complete after 36s [id=i-01e03375ba238b384]

Apply complete! Resources: 1 added, 0 changed, 0 destroyed.
Terraformを使ってインフラを作成することができました! EC2コンソールで、新しいEC2インスタンスを探してみましょう。
awsのプロバイダー・ブロックによって、インスタンスのリージョンはus-west-2になっています。AWSコンソールがこのリージョンに設定されていることを確認してください。
状態のチェック
設定を適用させた時に、Terraformはterraform.tfstateというファイルにデータを書き出します。Terraformはこのファイルに管理対象となるリソースのIDとプロパティーを保管します。そのため、この先これらのリソースをアップデートしたり削除したりすることが可能になります。
Terraformの状態ファイルは管理対象となるリソースを追跡する唯一の手段です。また、状態ファイルには機密情報が含まれることもよくあります。従って、状態ファイルは安全に保管し、インフラを管理する必要がある、信頼のできるチームのメンバーのみがアクセスできるように制限してください。プロダクション段階では、Terraform CloudやTerraform Enterpriseを使って状態ファイルはリモートに保管することをお勧めします。Terraformは他にもいくつかのリモート・バックエンドをサポートしているので、それらを使って状態ファイルの保管・管理を行うことができます。
terraform showを実行して現在の状態をチェックしてみましょう。
$ terraform show
# aws_instance.app_server:
resource "aws_instance" "app_server" {
    ami                          = "ami-830c94e3"
    arn                          = "arn:aws:ec2:us-west-2:561656980159:instance/i-01e03375ba238b384"
    associate_public_ip_address  = true
    availability_zone            = "us-west-2c"
    cpu_core_count               = 1
    cpu_threads_per_core         = 1
    disable_api_termination      = false
    ebs_optimized                = false
    get_password_data            = false
    hibernation                  = false
    id                           = "i-01e03375ba238b384"
    instance_state               = "running"
    instance_type                = "t2.micro"
    ipv6_address_count           = 0
    ipv6_addresses               = []
    monitoring                   = false
    primary_network_interface_id = "eni-068d850de6a4321b7"
    private_dns                  = "ip-172-31-0-139.us-west-2.compute.internal"
    private_ip                   = "172.31.0.139"
    public_dns                   = "ec2-18-237-201-188.us-west-2.compute.amazonaws.com"
    public_ip                    = "18.237.201.188"
    secondary_private_ips        = []
    security_groups              = [
        "default",
    ]
    source_dest_check            = true
    subnet_id                    = "subnet-31855d6c"
    tags                         = {
        "Name" = "ExampleAppServerInstance"
    }
    tenancy                      = "default"
    vpc_security_group_ids       = [
        "sg-0edc8a5a",
    ]

    credit_specification {
        cpu_credits = "standard"
    }

    enclave_options {
        enabled = false
    }

    metadata_options {
        http_endpoint               = "enabled"
        http_put_response_hop_limit = 1
        http_tokens                 = "optional"
    }

    root_block_device {
        delete_on_termination = true
        device_name           = "/dev/sda1"
        encrypted             = false
        iops                  = 0
        tags                  = {}
        throughput            = 0
        volume_id             = "vol-031d56cc45ea4a245"
        volume_size           = 8
        volume_type           = "standard"
    }
}
TerraformがこのEC2インスタンスを作成するとき、AWSプロバイダーからリソースのメタデータを収集して、それを状態ファイルに書き出すこともします。この後のチュートリアルでは、これらの値を参照して設定に変更を加え、他のリソースやOutput値の設定を行います。
手動での状態管理
Terraformには、詳細な状態管理のためのterraform stateというビルトインのコマンドがあります。サブコマンドのlistを実行して、プロジェクトの今の状態におけるリソースの一覧を表示してみましょう。
$ terraform state list
aws_instance.app_server
トラブルシューティング
terraform validateでは成功メッセージが表示されるのに変更の適用が失敗する場合は、次に挙げるよくあるエラーが発生しているのかもしれません。
-
リージョンを
us-west-2以外に設定している場合、amiも変更する必要があります。AMI IDはリージョンに固有のものだからです。Amazonのドキュメントに従って自身のリージョンに固有のAMI IDを選択し、main.tfにそのIDを記述しましょう。そしてterraform applyを再度実行してみてください。 -
正しいリージョンのAWSアカウントにデフォルトVPCがない場合、まずWeb UIでAWS VPCダッシュボードに移動し自身のリージョンにVPCを新しく作成し、サブネットとセキュリティ・グループをそのVPCに関連付けます。次に、セキュリティ・グループのID(vpc_security_group_ids)とサブネットのID(subnet_id)の引数を
aws_instanceに加え、その値を新しいセキュリティ・グループとサブネットのものに書き換えます。
 resource "aws_instance" "app_server" {
   ami                    = "ami-830c94e3"
   instance_type          = "t2.micro"
+  vpc_security_group_ids = ["sg-0077..."]
+  subnet_id              = "subnet-923a..."
 }
main.tfを修正し保存したら、terraform applyを再度実行してみましょう。
この後のチュートリアルを読むにあたって、今加えた変更を忘れないようにしてください。詳しくはVPCが稼働しているAWSからこのAmazonのドキュメントをお読みになってください。
次のステップ
Terraformを使って最初のインフラを作ることができたので、次のチュートリアルに進んでインフラに修正を加えてみましょう。
このチュートリアルに出てくる概念について詳しくは以下のHashiCorpのドキュメントをご参照ください。
- Terraformの設定言語についてはこちら。
- プロバイダーについて詳しくはこちら
- Terraformの他の使用例についてはこちら
- AWSの認証について詳しくはこちら
-
terraform stateコマンドやそのサブコマンドを用いた、状態ファイルからのリソースの変更などについてはこちら
インフラの変更
前回のチュートリアルではTerraformを使用してAWSでEC2インスタンスからなるインフラを作成しました。このチュートリアルでは、そのリソースに変更を加え、Terraformプロジェクトに変更を適用する方法を学びます。
インフラとは絶え間なく変化し続けるものです。Terraformはそんな変化を管理するのに役立ちます。Terraformの設定を変更した時に、Terraformは実行計画を構築します。この実行計画は、インフラを希望の状態にするために必要な箇所のみに変更を加えます。
プロジェクトでTerraformを使っているなら、バージョン・コントロール・システムを使用して設定ファイルを管理し、Terraform CloudやTerraform Enterpriseといったリモート・バックエンドに状態を保管しておくことをお勧めします。
前提条件
このチュートリアルは、前回のチュートリアルを終えていることを前提としています。そうでない場合は、このチュートリアルを続ける前に以下の手順に従ってください。
- Terraform CLI(1.2.0+)とデフォルトのプロファイルに設定されたAWS CLIをインストールします。詳しい手順については前回のチュートリアルをご参照ください。
-
learn-terraform-aws-instanceという名前のディレクトリを作成し、以下の設定をmain.tfという名前で保存してください。
terraform {
  required_providers {
    aws = {
      source  = "hashicorp/aws"
      version = "~> 4.16"
    }
  }

  required_version = ">= 1.2.0"
}

provider "aws" {
  region  = "us-west-2"
}

resource "aws_instance" "app_server" {
  ami           = "ami-830c94e3"
  instance_type = "t2.micro"

  tags = {
    Name = "ExampleAppServerInstance"
  }
}
- 作成した設定で初期化します。
$ terraform init
- 設定を適用させます。確認メッセージには
yesと答えましょう。
$ terraform apply
設定の適用に成功すれば、チュートリアルを続けることができます。
設定
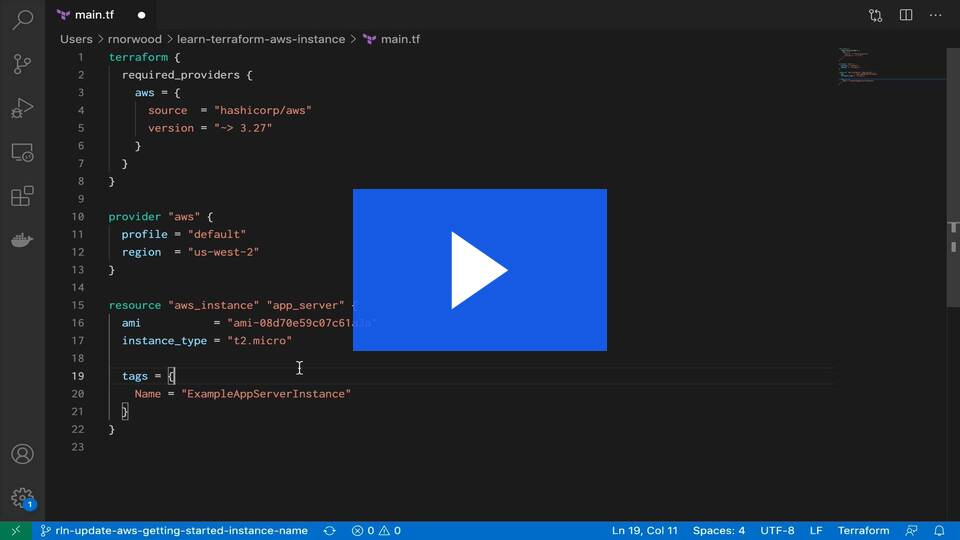
では、インスタンスのamiをアップデートしてみましょう。現在のAMI IDを新しいものに書き換えることでmain.tf内のプロバイダー・ブロックにあるaws_instance.app_serverリソースを変更します。
以下のスニペットはdiffのフォーマットに倣っています。このフォーマットでは、設定ファイル内の変更が必要な個所が分かるようになっています。赤い行の内容を緑の行で置き換えます。その際に行頭の+と-は取り除かれます。3
この設定ファイルで使用する新しいAMI IDはus-west-2リージョンに固有のものです。違うリージョンで作業をしている場合は、このAmazonのドキュメントに従ってそのリージョンに対して適切なAMIを選択できていることを確認してください。
 resource "aws_instance" "app_server" {
-  ami           = "ami-830c94e3"
+  ami           = "ami-08d70e59c07c61a3a"
   instance_type = "t2.micro"
 }
これにより、AMIはUbuntu 16.04 AMIに変更されます。AWSプロバイダーでは、インスタンスが作成された後にそのインスタンスのAMIを変更することができません。従って、Terraformは古いインスタンスを削除してから、新たにインスタンスを作成しています。
変更の適用
設定を変更した後にterraform applyを改めて実行し、Terraformがこの変更をどのように既存のリソースに適用するのか見てみましょう。
$ terraform apply
aws_instance.app_server: Refreshing state... [id=i-01e03375ba238b384]

Terraform used the selected providers to generate the following execution plan.
Resource actions are indicated with the following symbols:
-/+ destroy and then create replacement

Terraform will perform the following actions:

   aws_instance.app_server must be replaced
-/+ resource "aws_instance" "app_server" {
      ~ ami                          = "ami-830c94e3" -> "ami-08d70e59c07c61a3a" # forces replacement
      ~ arn                          = "arn:aws:ec2:us-west-2:561656980159:instance/i-01e03375ba238b384" -> (known after apply)
##...

Plan: 1 to add, 0 to change, 1 to destroy.

Do you want to perform these actions?
  Terraform will perform the actions described above.
  Only 'yes' will be accepted to approve.

  Enter a value:
-/+で始まる行は、Terraformがリソースを直接上書きしてアップデートするというよりは、より正確に言えば、リソースを削除してから再び作成しなおすという意味です。Terraformではいくつかの属性については直接上書きしてアップデートすることができます。そのような変更がある行は~から始まります。一方で、EC2インスタンスのAMIを変更するには直接上書きすることができないので、インスタンスを作成しなおす必要があります。Terraformによってこれらの処理がなされます。実行計画はTerraformが実行する内容を表示しているのです。
更に、実行計画にはAMIの変更がインスタンスを強制的に置き換えるものであることが書かれています。この情報を見て、変更内容を調整し、必要に応じて破壊的なアップデートを回避しましょう。
実行計画を続行するかどうか改めて確認メッセージが出ます。実行するにはyesと入力してください。
  Enter a value: yes

aws_instance.app_server: Destroying... [id=i-01e03375ba238b384]
aws_instance.app_server: Still destroying... [id=i-01e03375ba238b384, 10s elapsed]
aws_instance.app_server: Still destroying... [id=i-01e03375ba238b384, 20s elapsed]
aws_instance.app_server: Still destroying... [id=i-01e03375ba238b384, 30s elapsed]
aws_instance.app_server: Still destroying... [id=i-01e03375ba238b384, 40s elapsed]
aws_instance.app_server: Destruction complete after 42s
aws_instance.app_server: Creating...
aws_instance.app_server: Still creating... [10s elapsed]
aws_instance.app_server: Still creating... [20s elapsed]
aws_instance.app_server: Still creating... [30s elapsed]
aws_instance.app_server: Still creating... [40s elapsed]
aws_instance.app_server: Creation complete after 50s [id=i-0fd4a35969bd21710]

Apply complete! Resources: 1 added, 0 changed, 1 destroyed.
実行計画にあったように、既存のインスタンスを削除してからインスタンスを新しく作成しなおします。terraform showを再び実行すると、このインスタンスに関連けられた新しい値を出力することができます。
インフラの削除

ここまでは、Terraformを使用してAWSにEC2インスタンスを作成し、作成したインスタンスをアップデートしてきました。このチュートリアルでは、Terraformを使用してこのインフラを削除します。
インフラが不要になると、セキュリティのリスクやセキュリティ・コストを減らすためにインフラを削除したくなることがあるかもしれません。例えば、サービスからプロダクション環境を取り除いたり、ビルド用やテスト用のシステムのような作業用環境を管理したりすることがあるかもしれません。インフラの構築や変更に加え、Terraformでは管理しているインフラを削除し、作成し直すことができます。
削除
terraform destroyを実行すると、Terraformプロジェクトで管理しているリソースを終了することができます。このコマンドはterraform applyとちょうど正反対の機能で、Terraformの状態ファイルで指定しているすべてのリソースを終了します。このコマンドでは、他の環境で実行中であり、現在のTerraformプロジェクトで管理されていないリソースは削除されません。
作成したリソースを削除してみましょう。
$ terraform destroy
Terraform used the selected providers to generate the following execution plan.
Resource actions are indicated with the following symbols:
  - destroy

Terraform will perform the following actions:

   aws_instance.app_server will be destroyed
  - resource "aws_instance" "app_server" {
      - ami                          = "ami-08d70e59c07c61a3a" -> null
      - arn                          = "arn:aws:ec2:us-west-2:561656980159:instance/i-0fd4a35969bd21710" -> null
##...

Plan: 0 to add, 0 to change, 1 to destroy.

Do you really want to destroy all resources?
  Terraform will destroy all your managed infrastructure, as shown above.
  There is no undo. Only 'yes' will be accepted to confirm.

  Enter a value:
行頭の-は、そのインスタンスが削除されることを意味します。applyと同様に、Terraformは実行計画を表示し、確認メッセージが出た後に変更が加えます。
yesと入力しこの実行計画を続行し、インフラを削除してみましょう。
  Enter a value: yes

aws_instance.app_server: Destroying... [id=i-0fd4a35969bd21710]
aws_instance.app_server: Still destroying... [id=i-0fd4a35969bd21710, 10s elapsed]
aws_instance.app_server: Still destroying... [id=i-0fd4a35969bd21710, 20s elapsed]
aws_instance.app_server: Still destroying... [id=i-0fd4a35969bd21710, 30s elapsed]
aws_instance.app_server: Destruction complete after 31s

Destroy complete! Resources: 1 destroyed.
applyを実行した時のように、Terraformはリソースを削除する順序を決定します。今回の例では、Terraformは単一のインスタンスに対して依存関係がないことを確認し、そのインスタンスを削除しました。複数のリソースが絡む複雑なケースでは、Terraformは依存関係に基づいて適切な順序でリソースを削除していきます。
Input変数を定義
Terraformを活用し設定を作成できるようになりました。一方で、チュートリアルの例では値がハードコードで記述されていました。Terraformの設定では、変数を用いて設定ファイルを動的かつ柔軟なものにすることができます。
前提条件
ここまでチュートリアルを進めると、learn-terraform-aws-instanceという名前のディレクトリがあり、そこに次のようなmain.tfというファイルがあるでしょう。
terraform {
  required_providers {
    aws = {
      source  = "hashicorp/aws"
      version = "~> 4.16"
    }
  }

  required_version = ">= 1.2.0"
}

provider "aws" {
  region  = "us-west-2"
}

resource "aws_instance" "app_server" {
  ami           = "ami-08d70e59c07c61a3a"
  instance_type = "t2.micro"

  tags = {
    Name = "ExampleAppServerInstance"
  }
}
設定ファイルが上の内容と一致した状態で、learn-terraform-aws-instanceディレクトリでterraform initを実行してあることを確認してください。
変数に依るインスタンス名の設定
現在の設定にはハードコードされた値が散見されます。Terraform変数を使用することで、柔軟で再利用しやすい設定を書くことができます。
変数を追加して、インスタンス名を定義しましょう。
variables.tfというファイルを作成し、instance_name変数を新しく定義するブロックを追加しましょう。
variable "instance_name" {
  description = "Value of the Name tag for the EC2 instance"
  type        = string
  default     = "ExampleAppServerInstance"
}
Terraformでは、カレント・ディレクトリにある.tfで終わるファイルを全て読み込むので、設定ファイルには好きな名前を付けることができます。
main.tfでaws_instanceリソースのブロックをアップデートして新しい変数を使ってみましょう。instance_name変数のブロックを追加したことにより、instance_nameは値が宣言されない限りデフォルト値の"ExampleAppServerInstance"になります。
 resource "aws_instance" "app_server" {
   ami           = "ami-08d70e59c07c61a3a"
   instance_type = "t2.micro"

   tags = {
-    Name = "ExampleAppServerInstance"
+    Name = var.instance_name
   }
 }
設定の適用
設定を適用させます。確認メッセージにはyesと答えましょう。
$ terraform apply

Terraform used the selected providers to generate the following execution plan.
Resource actions are indicated with the following symbols:
  + create

Terraform will perform the following actions:

   aws_instance.app_server will be created
  + resource "aws_instance" "app_server" {
      + ami                          = "ami-08d70e59c07c61a3a"
      + arn                          = (known after apply)
##...

Plan: 1 to add, 0 to change, 0 to destroy.

Do you want to perform these actions?
  Terraform will perform the actions described above.
  Only 'yes' will be accepted to approve.

  Enter a value: yes

aws_instance.app_server: Creating...
aws_instance.app_server: Still creating... [10s elapsed]
aws_instance.app_server: Still creating... [20s elapsed]
aws_instance.app_server: Still creating... [30s elapsed]
aws_instance.app_server: Still creating... [40s elapsed]
aws_instance.app_server: Creation complete after 50s [id=i-0bf954919ed765de1]

Apply complete! Resources: 1 added, 0 changed, 0 destroyed.
では、もう一度設定を適用させてみましょう。今回は-varフラグを使って変数に値を渡してデフォルトのインスタンス名を上書きします。TerraformはインスタンスのNameタグを新しい値に上書きします。確認メッセージにはyesと答えましょう。
$ terraform apply -var "instance_name=YetAnotherName"
aws_instance.app_server: Refreshing state... [id=i-0bf954919ed765de1]

Terraform used the selected providers to generate the following execution plan.
Resource actions are indicated with the following symbols:
  ~ update in-place

Terraform will perform the following actions:

   aws_instance.app_server will be updated in-place
  ~ resource "aws_instance" "app_server" {
        id                           = "i-0bf954919ed765de1"
      ~ tags                         = {
          ~ "Name" = "ExampleAppServerInstance" -> "YetAnotherName"
        }
         (26 unchanged attributes hidden)


         (4 unchanged blocks hidden)
    }

Plan: 0 to add, 1 to change, 0 to destroy.

Do you want to perform these actions?
  Terraform will perform the actions described above.
  Only 'yes' will be accepted to approve.

  Enter a value: yes

aws_instance.app_server: Modifying... [id=i-0bf954919ed765de1]
aws_instance.app_server: Modifications complete after 7s [id=i-0bf954919ed765de1]

Apply complete! Resources: 0 added, 1 changed, 0 destroyed.
コマンドラインから変数を設定した場合、値は保存されません。Terraformは変数の使用や設定について様々な方法をサポートしており、コマンドを実行する際に繰り返し同じ値を入力する手間を省くことができます。詳しくは、より踏み込んだチュートリアル「変数を使用した設定のカスタマイズ」をご覧ください。
Outputでデータを照会

前回のチュートリアルでは、Input変数を用いてTerraformの設定をパラメータ化しました。今回は、Output値を使用してTerraformのユーザーに有益な情報を表示させてみましょう。
前回のInput変数を定義をまだ終えていない方は、先に済ませておいてください。
初期設定
前回のチュートリアルを実践し終えたので、learn-terraform-aws-instanceというディレクトリがあり、その中には次の内容の設定ファイルがあるはずです。
terraform {
  required_providers {
    aws = {
      source  = "hashicorp/aws"
      version = "~> 4.16"
    }
  }

  required_version = ">= 1.2.0"
}

provider "aws" {
  region  = "us-west-2"
}

resource "aws_instance" "app_server" {
  ami           = "ami-08d70e59c07c61a3a"
  instance_type = "t2.micro"

  tags = {
    Name = var.instance_name
  }
}
variable "instance_name" {
  description = "Value of the Name tag for the EC2 instance"
  type        = string
  default     = "ExampleAppServerInstance"
}
お手元の設定が上のものと一致し、learn-terraform-aws-instanceディレクトリで既に初期化を済ませてしまっていることを確認してください。
$ terraform init
この先に進む前に設定を適用させましょう。確認メッセージにはyesと答えます。
$ terraform apply
EC2インスタンスの設定を出力
learn-terraform-aws-instanceディレクトリにoutputs.tfという名前のファイルを作りましょう。
そして以下の設定を書き込み、EC2インスタンスのIDとIPのOutputを定義しましょう。
output "instance_id" {
  description = "ID of the EC2 instance"
  value       = aws_instance.app_server.id
}

output "instance_public_ip" {
  description = "Public IP address of the EC2 instance"
  value       = aws_instance.app_server.public_ip
}
Outputの値の検証
この設定を適用してください。そうすると、このOutput値を利用することができます。設定を適用させてみましょう。確認メッセージにはyesと答えてください。
$ terraform apply
aws_instance.app_server: Refreshing state... [id=i-0bf954919ed765de1]

Changes to Outputs:
  + instance_id        = "i-0bf954919ed765de1"
  + instance_public_ip = "54.186.202.254"

You can apply this plan to save these new output values to the Terraform state,
without changing any real infrastructure.

Do you want to perform these actions?
  Terraform will perform the actions described above.
  Only 'yes' will be accepted to approve.

  Enter a value: yes


Apply complete! Resources: 0 added, 0 changed, 0 destroyed.

Outputs:

instance_id = "i-0bf954919ed765de1"
instance_public_ip = "54.186.202.254"
設定を適用すると、Output値が表示されます。terraform outputを実行してこのOutputを照会してみましょう。
$ terraform output
instance_id = "i-0bf954919ed765de1"
instance_public_ip = "54.186.202.254"
TerraformのOutputを使用して、インフラの他の箇所や他のTerraformプロジェクトと現在のTerraformプロジェクトを結び付けることができます。詳しくは、より踏み込んだチュートリアル「Terraformからデータを出力」をご覧ください。
インフラの削除
この先のチュートリアルも実践するつもりであれば、以下の削除パートは飛ばしましょう。
インフラを削除しましょう。確認メッセージにはyesと答えます。
$ terraform destroy

Terraform used the selected providers to generate the following execution plan.
Resource actions are indicated with the following symbols:
  - destroy

Terraform will perform the following actions:

   aws_instance.app_server will be destroyed
  - resource "aws_instance" "app_server" {
      - ami                          = "ami-08d70e59c07c61a3a" -> null
      - arn                          = "arn:aws:ec2:us-west-2:561656980159:instance/i-0bf954919ed765de1" -> null
##...

Plan: 0 to add, 0 to change, 1 to destroy.

Changes to Outputs:
  - instance_id        = "i-0bf954919ed765de1" -> null
  - instance_public_ip = "54.186.202.254" -> null

Do you really want to destroy all resources?
  Terraform will destroy all your managed infrastructure, as shown above.
  There is no undo. Only 'yes' will be accepted to confirm.

  Enter a value: yes

aws_instance.app_server: Destroying... [id=i-0bf954919ed765de1]
aws_instance.app_server: Still destroying... [id=i-0bf954919ed765de1, 10s elapsed]
aws_instance.app_server: Still destroying... [id=i-0bf954919ed765de1, 20s elapsed]
aws_instance.app_server: Still destroying... [id=i-0bf954919ed765de1, 30s elapsed]
aws_instance.app_server: Destruction complete after 31s

Destroy complete! Resources: 1 destroyed.
リモートに状態を保管
ここまではローカル・マシンでインフラの構築・変更・削除を行ってきました。ローカルでの作業はテストや開発を行う上では大変便利ですが、本番環境では状態をセキュアで暗号化された状態にしておくのが良いでしょう。本番環境では、チームメートはTerraformの状態にアクセスしてインフラ上で共同作業をするでしょう。その場合、状態への共有アクセスが可能なリモート環境でTerraformを稼動するのがベストでしょう。
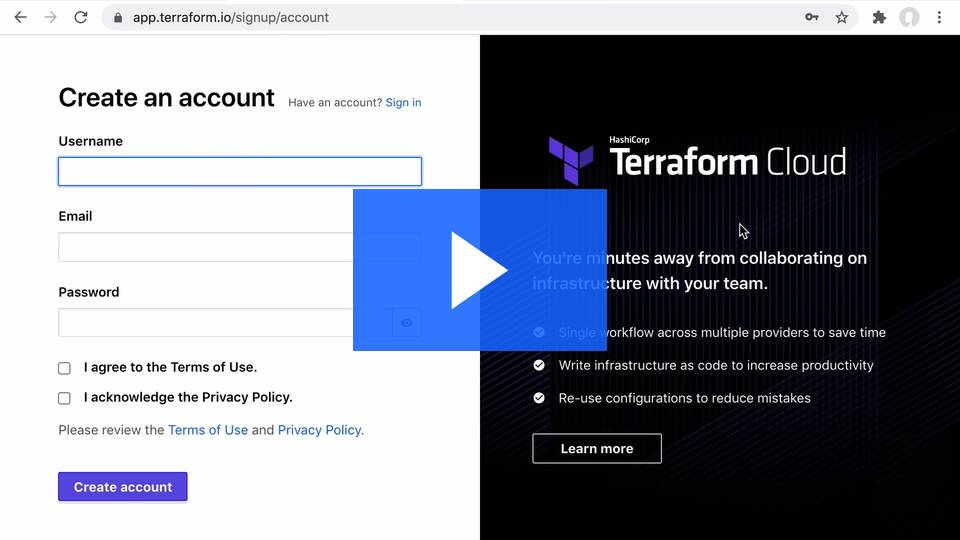
Terraform Cloudを使うと、チーム内でバージョン管理やインフラの監視、インフラ上での共同作業が容易に行えるようになります。他にも、APIトークンやアクセス・キーといった変数をセキュアに保管し、Terraformプロセスを長期間稼動するための安全で安定した環境を手に入れることができます。
このチュートリアルでは、Terraformの状態をTerraform Cloudに移行してみます。
前提条件
このチューリアルは前回のチュートリアルを終えていることを想定して書かれています。まだ前回のチュートリアルを終えていない場合はlearn-terraform-aws-instanceというディレクトリを作成し、main.tfという名前で次のコードを保存してください。
terraform {
  required_providers {
    aws = {
      source  = "hashicorp/aws"
      version = "~> 4.16"
    }
  }

  required_version = ">= 1.2.0"
}

provider "aws" {
  region  = "us-west-2"
}

resource "aws_instance" "app_server" {
  ami           = "ami-08d70e59c07c61a3a"
  instance_type = "t2.micro"
}
terraform initを実行して作業ディレクトリを初期化し必要なプロバイダーをダウンロードします。なお、既にこのディレクトリが初期化済みでありterraform initを再度実行してしまっても問題はありません。
$ terraform init
Initializing the backend...

Initializing provider plugins...
- Finding hashicorp/aws versions matching "~> 4.16"...
- Installing hashicorp/aws v4.27.0...
- Installed hashicorp/aws v4.27.0 (signed by HashiCorp)

Terraform has created a lock file .terraform.lock.hcl to record the provider
selections it made above. Include this file in your version control repository
so that Terraform can guarantee to make the same selections by default when
you run "terraform init" in the future.

Terraform has been successfully initialized!

You may now begin working with Terraform. Try running "terraform plan" to see
any changes that are required for your infrastructure. All Terraform commands
should now work.

If you ever set or change modules or backend configuration for Terraform,
rerun this command to reinitialize your working directory. If you forget, other
commands will detect it and remind you to do so if necessary.
次に設定を適用させます。変更を受け入れるにはyesとタイプしましょう。
$ terraform apply
Terraform used the selected providers to generate the following execution plan. Resource actions are indicated with the
following symbols:
  + create

Terraform will perform the following actions:
##...
Plan: 1 to add, 0 to change, 0 to destroy.

Do you want to perform these actions?
  Terraform will perform the actions described above.
  Only 'yes' will be accepted to approve.

  Enter a value: yes
##...
Apply complete! Resources: 1 added, 0 changed, 0 destroyed.
TerraformはAWS EC2インスタンスをセットアップし、リソースに関するデータをローカルの状態ファイルに保管します。
Terraform Cloudのセットアップ
HashiCorp Cloud PlatformやTerraform Cloudのアカウントを既にお持ちなら、その認証情報を用いてログインしてみましょう。サイン・アップ、および、Organizationの作成法について詳しくはチュートリアルTerraform Cloudにサイン・アップをご覧ください。
次にmain.tfに変更を加えます。Terraformの設定にcloudブロックを追加し、organization-nameを自身のOrganizationの名前に書き換えましょう。
terraform {
+   cloud {
+     organization = "organization-name"
+     workspaces {
+       name = "learn-tfc-aws"
+     }
+   }
+
  required_providers {
    aws = {
      source  = "hashicorp/aws"
      version = "~> 4.16"
    }
  }
}
古いバージョンのTerraformではcloudブロックをサポートしていません。そのため、このチュートリアルを進めるにはTerraformのバージョンが1.1.0以上でなければなりません。1.1.0より前のバージョンではremote backendブロックを使ってCLIのワークフローを設定し状態を移行することができます。
Terraform Cloudにログイン
次にターミナルからTerraform CLIを使いTerraform Cloudにログインしてみましょう。
$ terraform login
Terraform will request an API token for app.terraform.io using your browser.

If login is successful, Terraform will store the token in plain text in
the following file for use by subsequent commands:
    /Users/<USER>/.terraform.d/credentials.tfrc.json

Do you want to proceed?
  Only 'yes' will be accepted to confirm.

  Enter a value:
確認メッセージにyesと答えると、自動的にブラウザが開くので指示通りに進めましょう。入力が求められたらターミナルに生成したAPIキーを貼り付ける必要があります。ログインについて詳しくはTerraform CloudでのCLIの認証をご覧ください。
Terraformの初期化
Terraform Cloudと統合するように設定できたので、terraform initを実行し、設定を再び初期化して状態ファイルをTerraform Cloud上に移行しましょう。移行についての確認メッセージが表示されたらyesと入力します。
$ terraform init

Initializing Terraform Cloud...
Do you wish to proceed?
  As part of migrating to Terraform Cloud, Terraform can optionally copy your
  current workspace state to the configured Terraform Cloud workspace.

  Answer "yes" to copy the latest state snapshot to the configured
  Terraform Cloud workspace.

  Answer "no" to ignore the existing state and just activate the configured
  Terraform Cloud workspace with its existing state, if any.

  Should Terraform migrate your existing state?

  Enter a value: yes


Initializing provider plugins...
- Reusing previous version of hashicorp/aws from the dependency lock file
- Using previously-installed hashicorp/aws v4.17.0

Terraform Cloud has been successfully initialized!

You may now begin working with Terraform Cloud. Try running "terraform plan" to
see any changes that are required for your infrastructure.

If you ever set or change modules or Terraform Settings, run "terraform init"
again to reinitialize your working directory.
これで状態ファイルはTerraform Cloud上に移行されました。ローカルにある状態ファイルは削除しましょう。
$ rm terraform.tfstate
Terraform CloudをCLIから使用する場合は、Terraformをリモートで稼動させるかローカルで稼動させるか選ぶことができます。ローカルで実行すると、Terraform Cloudはローカル・マシン上のTerraformを実行し、Terraform Cloudでリモートに状態ファイルを保管します。このチュートリアルではリモート実行モードで進めていきます。
ワークスペースの変数の設定
terraform initを実行するとTerraform CloudのOrganization内にlearn-tfc-awsというワークスペースが作成されます。AWSプロバイダーを認証するには自身の認証情報でワークスペースの設定をしてください。
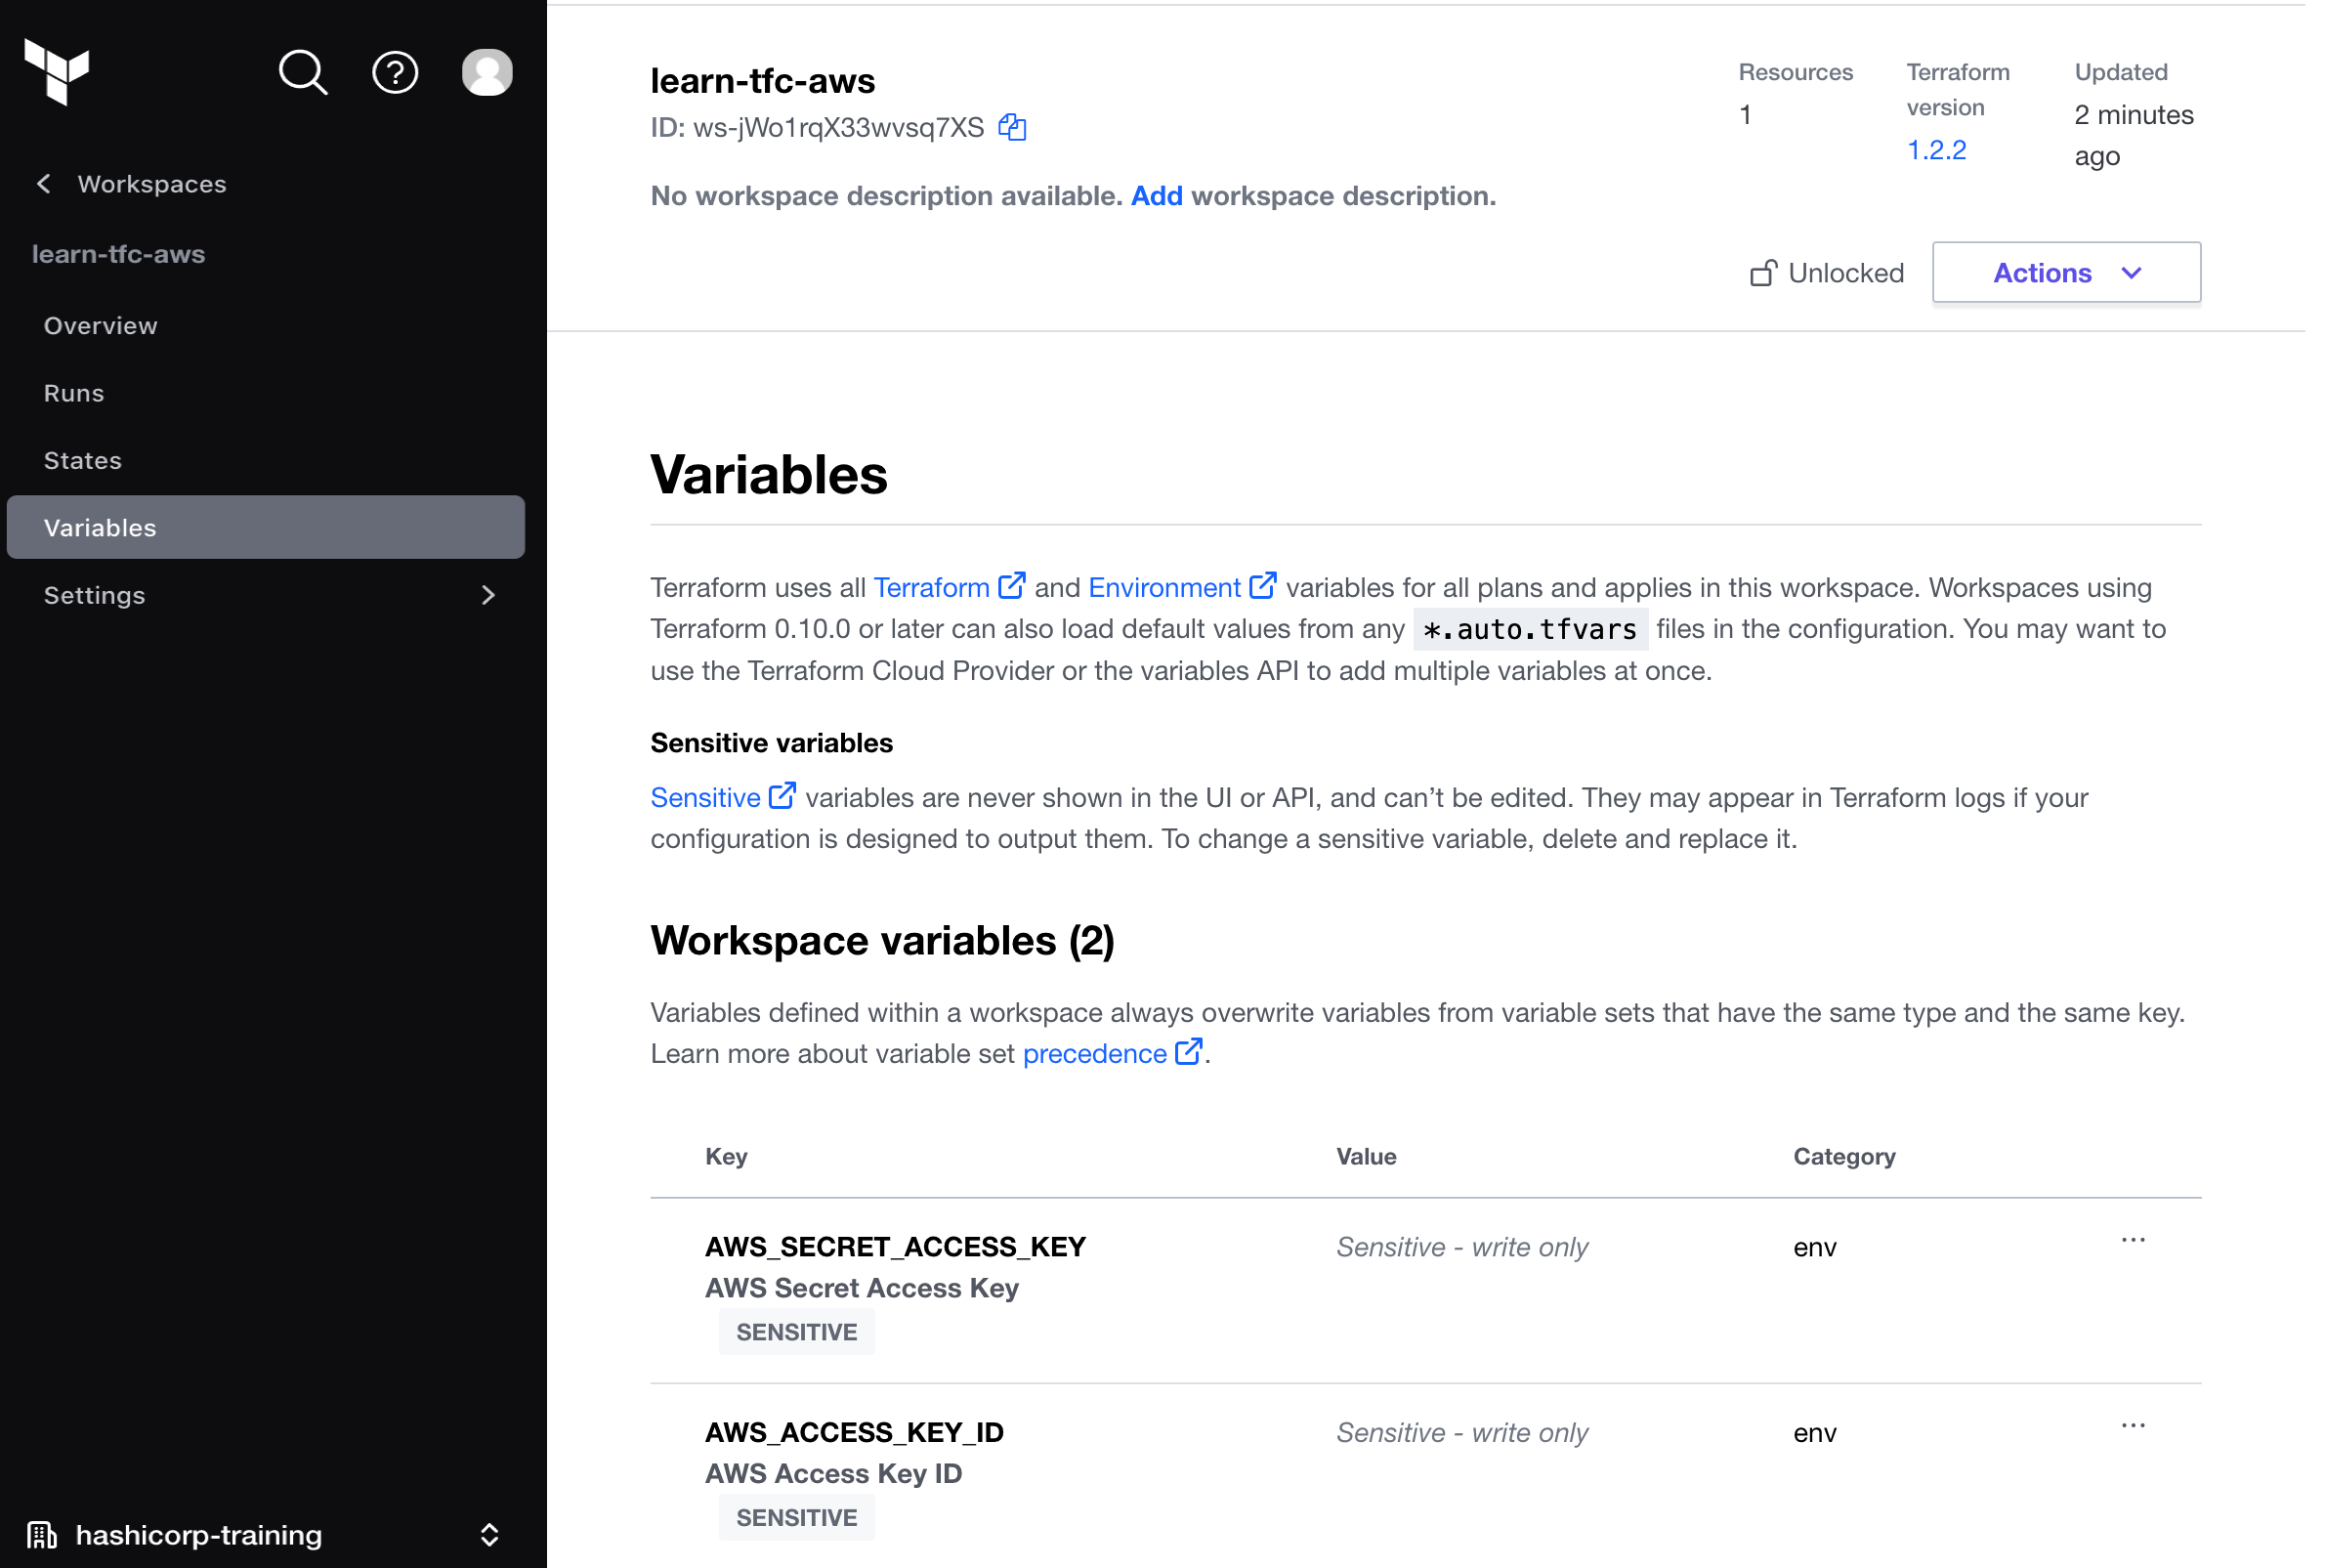
Terraform Cloudでlearn-tfc-awsに進みワークスペースのVariablesを開きます。Workspace Variablesの箇所でEnvironment VariableにAWS_ACCESS_KEY_IDとAWS_SECRET_ACCESS_KEYを追加します。この時、"Sensitive"にチェックを入れるのを忘れないようにしてください。
設定の適用
terraform applyを実行してTerraform Cloudを稼動させてみましょう。何も変更が加えられない旨が表示されるはずです。
$ terraform apply

## ...
No changes. Your infrastructure matches the configuration.

Terraform has compared your real infrastructure against your configuration
and found no differences, so no changes are needed.

------------------------------------------------------------------------
これは、現在の設定と実際に存在する物理的なリソースとの間に差異が全く見られなかったということです。その結果、何も実行される必要がありませんでした。
こうして、状態はTerraform Cloudでリモートに保管されます。リモートに状態を保管しておくことで共同作業は容易になり、ローカル・ディスクから状態ファイルや機密情報を切り離しておくことができます。リモートにある状態は使用時にメモリにのみ読み込まれます。
インフラの削除
terraform destroyを実行しこのチュートリアルで作成したリソースを忘れずに除去しましょう。terraform destroyはTerraform Cloud上で実行され、その結果はターミナルに出力されます。確認メッセージが表示されたらyesと入力しましょう。Terraform CloudのWeb UIから自身のワークスペースにアクセスし実行内容を確認することで動作を確かめることもできます。
$ terraform destroy
Running apply in Terraform Cloud. Output will stream here. Pressing Ctrl-C
will cancel the remote apply if it's still pending. If the apply started it
will stop streaming the logs, but will not stop the apply running remotely.

Preparing the remote apply...

To view this run in a browser, visit:
https://app.terraform.io/app/hashicorp-training/learn-tfc-aws/runs/run-kovFzCiUSrbMP3sD

Waiting for the plan to start...

Terraform v1.2.0
on linux_amd64
Initializing Terraform configuration...
aws_instance.app_server: Refreshing state... [id=i-0e756c00e19ec8f6b]

Terraform used the selected providers to generate the following execution
plan. Resource actions are indicated with the following symbols:
  - destroy

Terraform will perform the following actions:

  # aws_instance.app_server will be destroyed
##...
Apply complete! Resources: 0 added, 0 changed, 1 destroyed.
次のステップ
これでTerraformのスタート・ガイドは終りです。Terraformを使ってインフラを作成し管理することができるようになりました。
Terraformの設定言語やリソースのセットアップ、既存のインフラのインポートなどのより実践的なノウハウについては以下のチュートリアルをご覧ください。
- 設定言語 - 変数やOutput、依存関係、メタ引数など設定言語の他の特徴に慣れてより洗練されたTerraformの設定を書きましょう。
- モジュール - モジュールでTerraformの設定を整理して再利用してみましょう。
- セットアップ - PackerやCloud-initを使ってみましょう。自動でSSHキーとウェブ・サーバをTerraformでAWSに作成したLinux VM上にセットアップできるようになります。
- インポート - 既存のインフラをTerraformにインポートしてみましょう。
利用可能な設定オプションについては、Terraformのドキュメントをご覧ください。
Terraform Cloudについてより詳しく学ぶには
Terraformは状態を保管しておいてローカルでのTerraformの実行をサポートすることもできますが、リモートにある実行環境として使った場合にその真価を発揮します。
- VCS方式。VCSに変更がコミットされる度に自動で計画がキューに入れられます。
- API方式。CIなどの自動化されたツールが設定を直接アップロードします。
VCS方式の実践的なノウハウについては、Terraform Cloudのスタート・ガイドをご覧ください。Terraform Cloudでは、他にも、チーム内での権限の管理や、ポリシーの施行、業務の代行などが含まれた商用ソリューションも提供しています。
