本記事の概要
“POMU.ME”というサービスをSwiftで擬似的に実装したことのフィードバックです。
プログラミング歴4ヶ月の小僧ががむしゃらに作ったので中身や出来に期待しないでください。
SwiftでFirebaseやNiftyCloudを利用したアプリを作る際に参考にしてください。
POMU.MEとは?
僕が参考にしたPOMU.MEとは、複数のSNSリンクを集約できるプロフィール作成サービスです。(使用歴ゼロ。)
↓
https://pomu.me/
完成形
//GitHub
https://github.com/CatLuck2/samplePOMU.ME
開発に至ったきっかけ
データベースの経験を積むためです。
2018年の8月からSwiftを学び始め、これまでいくつかのサンプルアプリをTwitterで発信してきました。
おかげで、数々のリアクションをいただき、時には70いいね!をいただくこともありました。
しかし、どれだけ簡単なサンプルを作っても習得できることなんてたかが知れています。
ライブラリやバックエンドを一切使わずともアプリは作れますが、作れるアプリの範囲が大きく限定されてしまいます。
Evernoteのようなアプリを作ったり、即戦力として評価されるには
- ライブラリ
- バックエンド
などのレベルの高い技術の習得が必要だと確信しました。
そこでFirebaseを使ったチャットアプリを自力で作りましたが、Firebaseの扱いは難しく、マニュアルが理解できず使いこなせません。
現在通ってるスクールのメンターがFirebaseではなくNiftyCloudを勧めてきて、実際にNiftyCloudはFirebaseよりも使いやすいので、データベースの経験を積むためにも、とりあえずNiftyCloudでPOMU.MEのサンプルを作ることにしました。
環境
Swift4.2
Xcode10
解説
画面構成
実装した画面は、
- ホーム
- マイページ
- お問い合わせ
- ログイン/新規登録

それぞれの画面は、
- ホーム:他ユーザーのマイページをタイムライン表示
- マイページ:ユーザーご自身のマイページを表示/編集
- お問い合わせ:メールでご意見や質問を送る
- ログイン/新規登録:ログイン/新規登録
という役割。
AdobeXDで画面をデザイン
今回のサンプルを作るまでは、事前にUIをデザインせずに勢いで作っていました。
しかし、今後のアプリ開発のために今の内からUI設計に触れておこうと。
普通ならSketchを使うべきなんですが、まだUIデザインを学ぶと決めたわけでもなく、いきなり2万円を使うのはまだ早いと思い、無料版のAdobeXDでデザインしました。
作ったデザインはこちら
→https://xd.adobe.com/spec/ec0a25dd-6f85-42e9-77ac-5d7fbe2a90b8-9a3b/
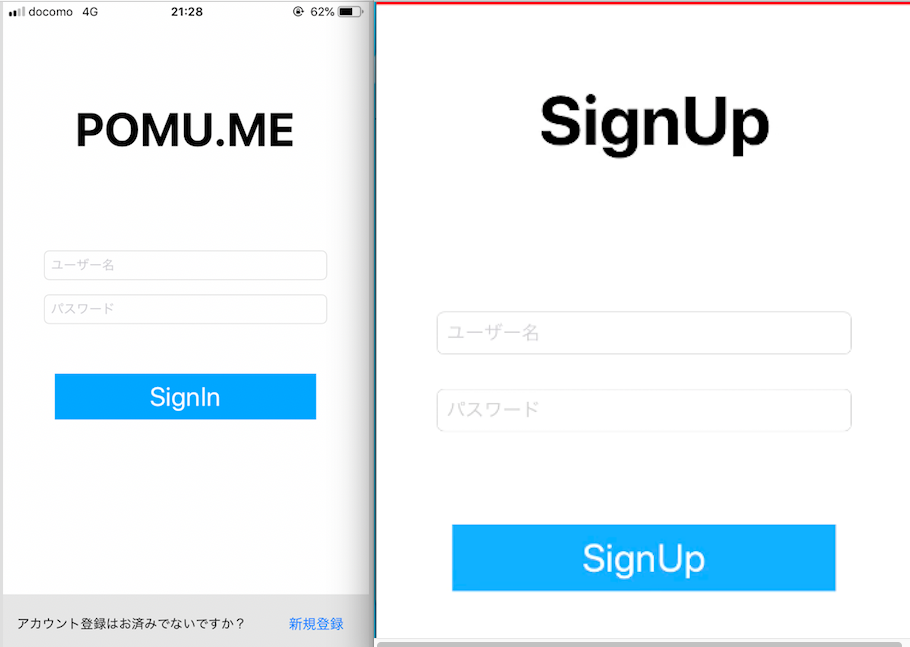
新規登録/ログイン
UserDefaultのbool値によって、起動時の画面を
- ホーム
- ログイン
のどちらに分岐するかが決まる。
例えば、初期値はfalse(未ログイン)なのでログイン画面を表示。
逆に、既にtrue(ログイン中)ならホーム画面を表示
        //ログイン中ならMain.storyBoardに遷移
        if isLogin == true {
            //windowを宣言
            self.window = UIWindow(frame: UIScreen.main.bounds)
            //storyboardを宣言
            let storyboard = UIStoryboard(name: "Main", bundle: Bundle.main)
            //rootViewControllerを宣言
            let rootViewController = storyboard.instantiateViewController(withIdentifier: "tabbar")
            //windowのrootviewcontrollerを設定
            self.window?.rootViewController = rootViewController
            //windowの背景を白にする
            self.window?.backgroundColor = UIColor.white
            //遷移
            self.window?.makeKeyAndVisible()
        //ログイン中ならSignIN.storyBoardに遷移
        } else {
            //windowを宣言
            self.window = UIWindow(frame: UIScreen.main.bounds)
            //storyboardを宣言
            let storyboard = UIStoryboard(name: "SignIN", bundle: Bundle.main)
            //rootViewControllerを宣言
            let rootViewController = storyboard.instantiateViewController(withIdentifier: "signin")
            //windowのrootviewcontrollerを設定
            self.window?.rootViewController = rootViewController
            //windowの背景を白にする
            self.window?.backgroundColor = UIColor.white
            //遷移
            self.window?.makeKeyAndVisible()
        }
メニュー
右上のBarButtonでメニューが表示される。
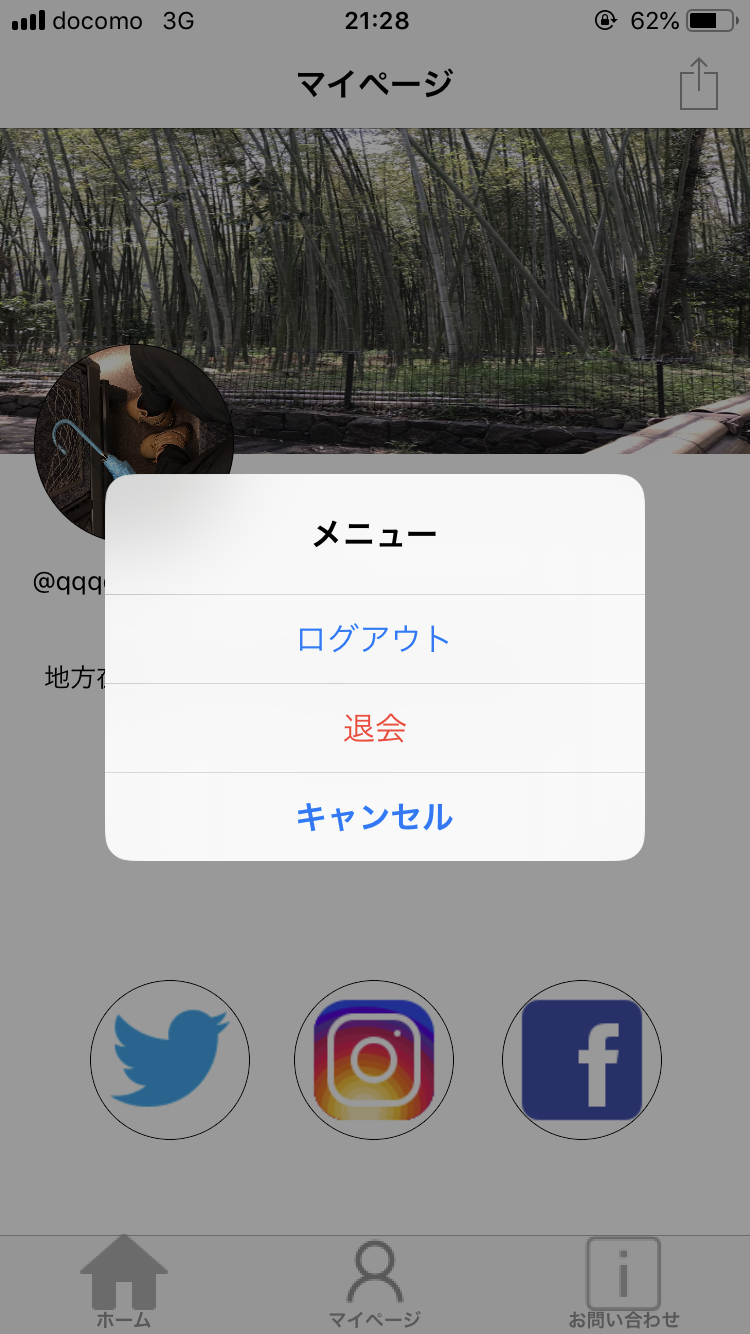
ログアウト。
            //ユーザーをログアウト状態に
            NCMBUser.logOutInBackground({ (error) in
                if error != nil {
                    print("logout error")
                } else {
                    //ログアウト
                    self.syncronize()
                }
            })

    //ログアウトする際の処理
    func syncronize() {
        //storyboardを宣言
        let storyboard = UIStoryboard(name: "SignIN", bundle: Bundle.main)
        let next = storyboard.instantiateViewController(withIdentifier: "signin")
        next.modalTransitionStyle = .crossDissolve
        self.present(next, animated: true, completion: nil)
        //ログイン状態を解除
        let ud = UserDefaults.standard
        ud.set(false, forKey: "LoginStatus")
        ud.synchronize()
    }
退会
            let user = NCMBUser.current()
            user?.deleteInBackground({ (error) in
                if error != nil {
                    print("delete error")
                } else {
                    //ログアウト
                    self.syncronize()
                }
            })
ホーム画面
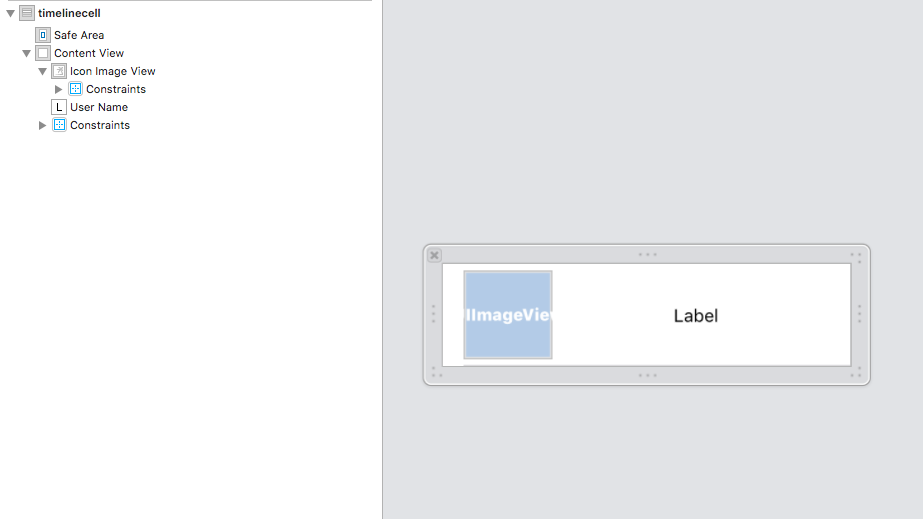
タイムライン表示
カスタムセル内にImageViewとLabelを配置。
viewDidLoad時にNCMBのユーザーを[NCMBUser]型の配列にまとめて格納。
    //NCMBUser配列の宣言
    var users = [NCMBUser]()

    //ユーザーを読み込む
    func loadUsers(searchText: String?) {
        let query = NCMBUser.query()
        // 自分を除外
        query?.whereKey("objectId", notEqualTo: false)

        // 検索ワードがある場合
        if let text = searchText {
            query?.whereKey("userName", equalTo: text)
        }

        // 新着ユーザー50人だけ拾う
        query?.limit = 50
        // 降順にソート
        query?.order(byDescending: "createDate")

        query?.findObjectsInBackground({ (result, error) in
            if error != nil {
                print(error)
            } else {
                // 取得した新着50件のユーザーを格納
                self.users = result as! [NCMBUser]
                print("users")
                print(self.users)
                self.tableView.reloadData()
            }
        })
    }
NCMBで取得したアイコン画像とユーザー名をそれぞれのセルにセット。
        //ユーザー名を取得
        if let _ = users[indexPath.row].userName {

            cell.userName.text = "@" + users[indexPath.row].userName
        }
        //アイコン画像を取得
        if let readData_icon = NCMBFile.file(withName: "icon " + users[indexPath.row].objectId, data: nil) as? NCMBFile {
            readData_icon.getDataInBackground { (data, error) in
                if error != nil {
                    print(error)
                } else {
                    cell.iconImageView.image = UIImage(data: data!)
                }
            }
        }
セルのタップ時
いずれかのセルをタップ時、indexPath.rowに対応するNCMBUserを遷移先の変数へ渡す。
    func tableView(_ tableView: UITableView, didSelectRowAt indexPath: IndexPath) {
        //DetailViewControllerのインスタンス
        let DVC = storyboard?.instantiateViewController(withIdentifier: "godetail") as! DetailViewController
        //選択したNCMBUserを渡す
        DVC.user = users[indexPath.row]
        self.navigationController?.pushViewController(DVC, animated: true)
        tableView.deselectRow(at: indexPath, animated: true)
    }
他ユーザーのマイページ
構造はマイページ画面とほぼ同じ。
ホームから渡されたNCMBUserで各データを取得し、各UI部品にセットしていく。
詳しくはマイページ画面を参照。
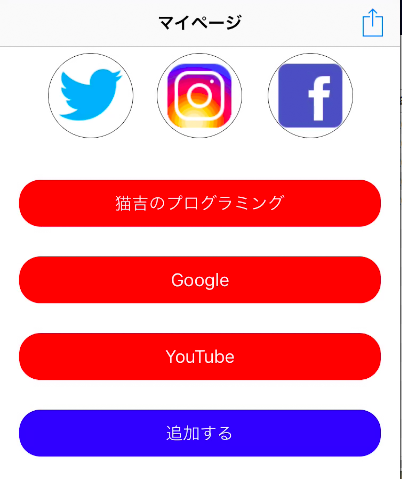
マイページ画面
NCMBUser.current()でログイン中のNCMBUserからデータを取得するだけ。
アイコン、テーマ画像、ユーザーラベル、プロフィール文
            //プロフィール
            if let _ = user!.object(forKey: "Profile") as? String {
                profileLabel.text = (user!.object(forKey: "Profile") as! String)
            }
            //ユーザーラベル
            userID.text = "@" + (user!.userName)!

            //NCMBから画像を取得
            if let readData_theme = NCMBFile.file(withName: "theme " + NCMBUser.current().objectId, data: nil) as? NCMBFile {
                //テーマ画像を取得
                readData_theme.getDataInBackground { (data, error) in
                    if error != nil {
                        self.themeImage.image = UIImage(named: "icons8-画像-100.png")
                        print(error)
                    } else {
                        self.themeImage.image = UIImage(data: data!)
                    }
                }
            } else {
                //代わりの画像を用意
                self.themeImage.image = UIImage(named: "icons8-画像-100.png")
            }

            if let readData_icon = NCMBFile.file(withName: "icon " + NCMBUser.current().objectId, data: nil) as? NCMBFile {
                //アイコン画像を取得
                readData_icon.getDataInBackground { (data, error) in
                    if error != nil {
                        self.iconImage.image = UIImage(named: "icons8-コンタクト-96.png")
                        print(error)
                    } else {
                        self.iconImage.image = UIImage(data: data!)
                    }
                }
            } else {
                //代わりの画像を用意
                self.iconImage.image = UIImage(named: "icons8-コンタクト-96.png")
            }
SNSリンク
TapGestureRecognizerを実装したImageView。
コードでタップジェスチャーを実装できず、TapGestureRecognizerを@IBActionで紐付け。
    @IBAction func twitterIconAction(_ sender: UITapGestureRecognizer) {
        name_sns = "twitter"
        if isEditMode == true {
            alert_sns()
        } else {
            openSNSLink(url: user!.object(forKey: "TwitterURL") as! String)
        }
    }
URLが設定されてなければ、半透明に。
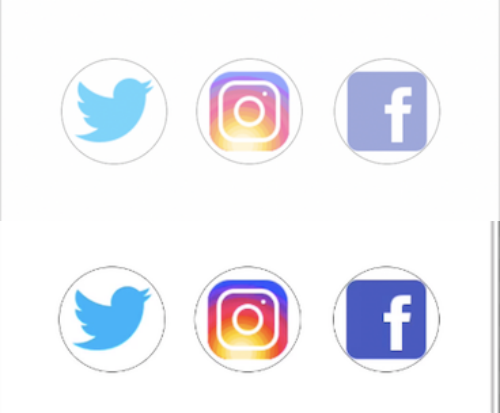
URLが設定されてるなら、タップするとURLを開く。
    //SNSのリンクをsafari経由で開く
    @objc func openSNSLink(url:String) {
        //http,httpsかを確認
        if url.prefix(7) == "http://" || url.prefix(8) == "https://" {
            //文字列をURLに変換
            let url = URL(string: url)!
            if UIApplication.shared.canOpenURL(url) {
                UIApplication.shared.open(url)
            }
        } else {}
    }
アイテム一覧(コメント、リンク)
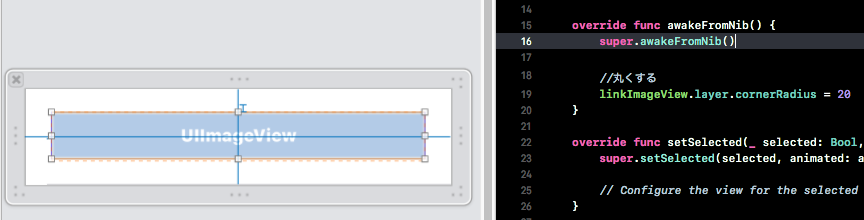
等間隔で表示するため、TableViewで実装。
POMU.MEのそれと似せるため、セル内にImageVIewを設置し、角丸と色を追加
(Viewの方が良かった気がする。)
コメントは文字列なので、タップしても変化なし。
リンクはSNSリンクと同様。
            //もしリンクならリンク先を開く
            //アイテム:[[String]]
            //[0]:コメント [1]:リンク
            if objects[indexPath.row][1] != "" {
                openSNSLink(url: objects[indexPath.row][1])
            } else {}
編集画面
“マイページを編集”をタップすると、編集画面に切り替わり、SNSリンクやアイテムの挙動が変化する。
        //編集画面ではない時
        if isEditMode == false {
            //"追加する"を表示
            objects.append(["追加する",""])
            //リンクカラーボタンを表示
            linkcolorButton.isHidden = false
            //imageViewをタップ可能にする
            themeImage.isUserInteractionEnabled = true
            iconImage.isUserInteractionEnabled = true
            //3つのSNSボタンをタップ可能にする
            twitterIcon.isUserInteractionEnabled = true
            instagramIcon.isUserInteractionEnabled = true
            facebookIcon.isUserInteractionEnabled = true
            //profileを編集可能に
            profileLabel.isEditable = true
            //tableView
            //"マイページを保存する"の表示を変更
            editUserPage.setTitle("マイページを保存", for: .normal)
            isEditMode = true
            //更新
            tableView.reloadData()
例えば、下記のそれぞれをタップすると
- アイコン,テーマ:ImagePickerController
- プロフィール:TextFieldの編集
- SNSリンク:URLの入力を要求するアラート
- アイテム:編集、削除のアラート
が起動する。
再び”マイページを編集”をタップすると、現在の状態をNCMBに保存する。
        } else {
            objects.remove(at: objects.count - 1)
            linkcolorButton.isHidden = true
            themeImage.isUserInteractionEnabled = false
            iconImage.isUserInteractionEnabled = false
            //3つのSNSリンクボタンにタップジェスチャーを追加
            twitterIcon.isUserInteractionEnabled = false
            instagramIcon.isUserInteractionEnabled = false
            facebookIcon.isUserInteractionEnabled = false
            profileLabel.isEditable = false
            editUserPage.setTitle("マイページを編集", for: .normal)
            isEditMode = false
            //更新
            self.tableView.reloadData()
            //NCMBに画像を保存
            //画像(file)
            let themeImageData = UIImage.pngData(self.themeImage.image!)
            let iconImageData = UIImage.pngData(self.iconImage.image!)
            let themeImageFile = NCMBFile.file(withName: "theme " + NCMBUser.current().objectId, data: themeImageData()) as! NCMBFile
            let iconImageFile = NCMBFile.file(withName: "icon " + NCMBUser.current().objectId, data: iconImageData()) as! NCMBFile
            //テーマ画像を保存
            themeImageFile.saveInBackground({ (error) in
                if error != nil {
                    print(error)
                } else {}
            })
            //アイコン画像を保存
            iconImageFile.saveInBackground({ (error) in
                if error != nil {
                    print(error)
                } else {}
            })
            //アイテムカラー(文字列)を取得
            confirmColor1()
            //NCMBにユーザー情報を保存
            let user = NCMBUser.current()
            user?.setObject(profileLabel.text, forKey: "Profile")
            user?.setObject(twitterURL, forKey: "TwitterURL")
            user?.setObject(instagramURL, forKey: "InstagramURL")
            user?.setObject(facebookURL, forKey: "FacebookURL")
            user?.setObject(objects, forKey: "Item")
            user?.setObject(itemColor_Save, forKey: "ItemColor")
            user?.saveInBackground({ (error) in
                if error != nil {
                    print(error)
                } else {}
            })

        }
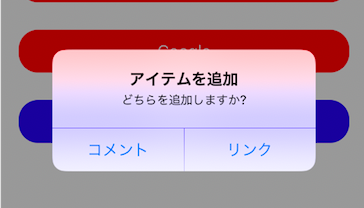
アイテムの追加
ユーザーに”アイテムを追加できること”を明示するために、編集画面の時にのみ”追加する”が最下部に表示される。
“追加する”をタップすると、
- コメント
- リンク
どちらを追加するかのアラートが出る。
アイテムカラーの設定
アイテムの背景色をtableViewに表示された14色のいずれかに変更可能。

    //セルの色
    let color:[UIColor] = [UIColor.black,
                           UIColor.darkGray,
                           UIColor.lightGray,
                           UIColor.gray,
                           UIColor.red,
                           UIColor.green,
                           UIColor.blue,
                           UIColor.cyan,
                           UIColor.yellow,
                           UIColor.magenta,
                           UIColor.orange,
                           UIColor.purple,
                           UIColor.brown]
アイテムカラーの保存
アイテムカラーはUIColorで保存しても、rgbaの謎の値?で保存されてしまい取得できない。
なので、UIColorの値をSwitch文で比較し、対応する文字列をUIColorのラベルとして保存する。
    //選択したセルの色(文字列)を取得
    func confirmColor1() {
        switch itemColor {
        case UIColor.black:
            itemColor_Save = "black"
        case UIColor.darkGray:
            itemColor_Save = "darkGray"
        case UIColor.lightGray:
            itemColor_Save = "lightGray"
        case UIColor.gray:
            itemColor_Save = "gray"
        case UIColor.red:
            itemColor_Save = "red"
        case UIColor.green:
            itemColor_Save = "green"
        case UIColor.blue:
            itemColor_Save = "blue"
        case UIColor.cyan:
            itemColor_Save = "cyan"
        case UIColor.yellow:
            itemColor_Save = "yellow"
        case UIColor.magenta:
            itemColor_Save = "magenta"
        case UIColor.orange:
            itemColor_Save = "orange"
        case UIColor.purple:
            itemColor_Save = "purple"
        case UIColor.brown:
            itemColor_Save = "brown"
        default:
            itemColor_Save = "white"
            break
        }
    }
NCMBから取得する際も同様。
    //選択したセルの色(文字列)からセルの色(UIColor)を取得
    func confirmColor2() {
        switch itemColor_Save {
        case "black":
            itemColor = UIColor.black
        case "darkGray":
            itemColor = UIColor.darkGray
        case "lightGray":
            itemColor = UIColor.lightGray
        case "gray":
            itemColor = UIColor.gray
        case "red":
            itemColor = UIColor.red
        case "green":
            itemColor = UIColor.green
        case "blue":
            itemColor = UIColor.blue
        case "cyan":
            itemColor = UIColor.cyan
        case "yellow":
            itemColor = UIColor.yellow
        case "magenta":
            itemColor = UIColor.magenta
        case "orange":
            itemColor = UIColor.orange
        case "purple":
            itemColor = UIColor.purple
        case "brown":
            itemColor = UIColor.brown
        default:
            itemColor = UIColor.white
            break
        }
    }
お問い合わせ画面
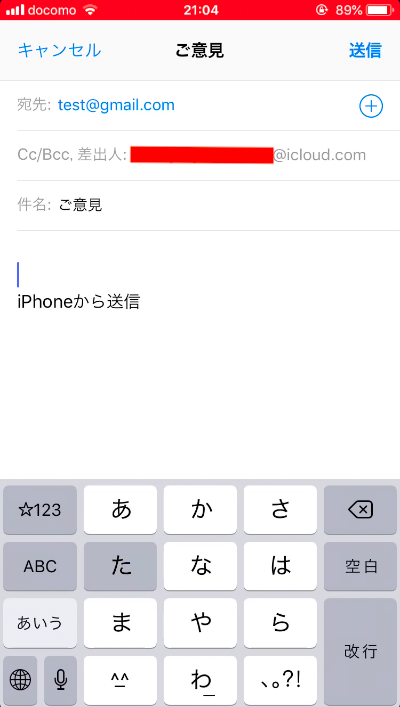
MFMailComposeViewControllerを使い、簡単に実装できた。
    @IBAction func contactForm(_ sender: Any) {
        if MFMailComposeViewController.canSendMail() {
            let mail = MFMailComposeViewController()
            mail.setToRecipients(["test@gmail.com"])
            mail.setSubject("ご意見")
            mail.setMessageBody("", isHTML: false)
            mail.mailComposeDelegate = self
            self.navigationController?.present(mail, animated: true, completion: nil)
        } else {
            let alert = UIAlertController(title: "No Mail Accounts", message: "Please set up mail accounts", preferredStyle: .alert)
            let dismiss = UIAlertAction(title: "OK", style: .cancel, handler: nil)
            alert.addAction(dismiss)
            self.present(alert, animated: true, completion: nil)
        }
    }

    func mailComposeController(_ controller: MFMailComposeViewController, didFinishWith result: MFMailComposeResult, error: Error?) {

        controller.dismiss(animated: true, completion: nil)

    }
エラー処理はもっと細かく記述すべきだろうけど、参考になった動画では上記だけだった。
↓
MFMailComposeViewController (Xcode 9, iOS 11, Swift 4)
iOS Beginner: Send Email using MFMailComposer (Swift 4 + Xcode9)
解決できなかった点
実は今回作ったサンプルは100%の出来ではなく、未解決の点があります。
画像の向きが勝手に変わる
アイコン画像をホームやマイページで読み込む際、なぜか90度,180度に回転してしまうのです。

下記をググって記述しましたが、効果なし。
    //画像が回転しないように加工
    func translate(from image: UIImage) -> UIImage? {
        guard let cgImage1 = image.cgImage else { return nil }
        let ciImage = CIImage(cgImage: cgImage1)
        let ciContext = CIContext(options: nil)

        /* CIImageを使用した画像編集処理 */
        guard let cgImage2: CGImage = ciContext.createCGImage(image, from: image.extent) else { return nil }
        let result = UIImage(cgImage: cgImage2, scale: 0.4, orientation: image.imageOrientation)
        return result
    }
データの読み込みが遅すぎる
起動して、ホーム画面で他ユーザーのデータをNCMBから全て取得するまで最大20秒もかかってしまう。
マイページでもアイテムとプロフィールはすぐに読み込めても、肝心のアイコンやテーマ画像の読み込みが極端に遅い。
おかげで、まだ読み込みがされてない時にNCMBにマイページを保存する際、アイコンとテーマのImageViewに設定されるはずの画像がまだ格納されてないので、found nil、というエラーが発生。
考えられる原因は、メールアドレスやパスワードなど不必要なものまで取得しようとし、目的のデータが表示されるまで大きなタイムラグが発生しているから。
次にNIftyCloudを扱うときは、クエリで必要なデータを指定するべきなのか。
開発をしてみて
やはりデータベースやバックエンドを取り入れるとアプリ開発の幅がグンと広がります。
SNSやTrelloのように僕らが当たり前に利用しているアプリってクラウドやサーバーとの連携が当たり前に実装されてるので、データベースが実装されてないアプリは全然すごくないって感じです。
Firebaseで経験済みですが、バックエンドの構築は簡単じゃないのは残念だなと思いました。
いざ初心者が、
「クラウド共有アプリ作ってみたい!!」
と思っても、
- マニュアル不足
- ググっても記事は古い
- 一般書籍にも載ってない
という欠点があり、
- udemyやスクールで習う
- 独学で学ぶ
の2択しか選べないのですから。
むしろ、バックエンドを使えないとAppStoreで★がつくようなアプリなんて作れません。
今回のサンプルなんて欠陥だらけで酷い出来ですが、まともにデータベースを実装できたのは良い経験でした。
もっともっと腕を磨けば人気アプリを真似れるんじゃないか、と舞い上がるほどに。
CocoaPodもアプリ開発の幅を広げるものですが、どうしても初心者には難易度が高いです。
ですから、今後はFirebaseやNiftyCloudの記事が増えて欲しいと願っています。
終わりに
バックエンドならAWSやFirebaseが定番で、NiftyCloudの経験はあまり役立たないように思えます。
TwitterでもmBaaSに関する内容のツイートで、AWSのmBaaSだけに触れられていました。
スクールのメンターも、
「Firebaseを扱えるようになってほしい」
と仰るぐらいだからNiftyCloudに頼りきりは良くないのかなと。
とはいえ、バックエンドの経験としてまずはNiftyCloudから入った方がすんなりFirebaseに移れるとは思います。