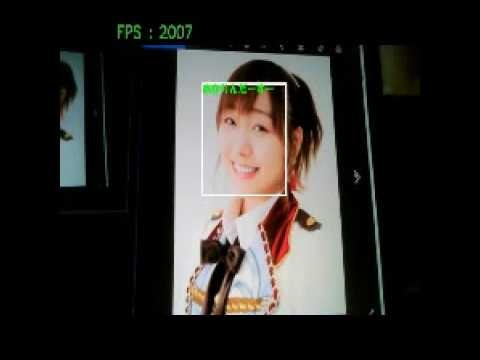
昨夜とほぼ同様だが、以前収集したAKBメンバーの顔を学習して、顔識別したら名前を表示するようにした。
最終的には、顔識別したら音声で「おはよう、うわんさん」みたいなことをやろうと思っていますが、今回は表示までで記事にします。
やったこと
・AKBメンバーの顔学習
・組み込んで名前表示する
・結果
・AKBメンバーの顔学習
学習は以前総選挙メンバー学習のときに利用したアプリとデータを使用しました。
データ読込は以下のコードを使っています。
・face_recognition/getDataSet.py
./train_images
     |--0
     |   1.jpg ...
     |--1
     .
     .
今回は、
name_list=['まゆゆ','さっしー','きたりえ','じゅりな','おぎゆか','あかりんだーすー']
の人たちの顔写真を利用いたしました。
顔写真の抽出は以下で実施しています。ここでも以下を使っています。
cascade_path = "/Users/user/haarcascade/haarcascade_frontalface_alt2.xml"
・DataManage/face_detect.py
学習はvgg16のFinetuningです。
・face_recognition/akb_VGG16.py
100epochの時点で以下のようなval_lossとval_accです。
学習データが少ないのでこれ以上学習しても精度が上がるわけもないので、これで動画になったときの精度を見たいと思います。
いずれにしても静的識別というレベルでは、6人の顔認識はほぼ出来ていると思います。
Train on 360 samples, validate on 60 samples
Epoch 1/1
360/360 [==============================] - 4s 12ms/step - loss: 2.7682e-04 - acc: 1.0000 - val_loss: 0.4305 - val_acc: 0.9167
・組み込んで名前表示する
今回作成したアプリはいかに置きました。
・face_recognition/recognize_vgg16_camera.py
まず、識別した後の名前は前回はvgg16の表示を利用しましたが、それが使えないので、以下のように変更しました。
すなわち、学習のフォルダに合わせて名前リストを作成し、それを識別結果に合わせて表示することとしました。
def yomikomi(model,img):
name_list=['まゆゆ','さっしー','きたりえ','じゅりな','おぎゆか','あかりんだーすー']
x = image.img_to_array(img)
x = np.expand_dims(x, axis=0)
preds = model.predict(x)
index=np.argmax(preds)
print(index,name_list[index])
return name_list[index]
modelは学習で利用したmodelを使います。
def model_definition():
    batch_size = 2
    num_classes = 6
    img_rows, img_cols=224,224
    input_tensor = Input((img_rows, img_cols, 3))
    # 学習済みのVGG16をロード
    # 構造とともに学習済みの重みも読み込まれる
    vgg16 = VGG16(weights='imagenet', include_top=False, input_tensor=input_tensor)

    # FC層を構築
    top_model = Sequential()
    top_model.add(Flatten(input_shape=vgg16.output_shape[1:])) #vgg16,vgg19,InceptionV3, ResNet50
    top_model.add(Dense(256, activation='relu'))
    top_model.add(Dropout(0.5))
    top_model.add(Dense(num_classes, activation='softmax'))

    # VGG16とFCを接続
    model = Model(input=vgg16.input, output=top_model(vgg16.output))
    model.summary()
    # 新たに学習した重みを読み込む
    model.load_weights('params_model_VGG16L3_i_100.hdf5')
    return model
日本語の表示を動画中にするのが少し大変です。
この技術は以前QRコードの日本語を画面に表示させるときに利用しました。
【参考】
・Python + OpenCV でWindowsの日本語フォントを描画する
ということで、以下のように変更します。
※変更を理解するのに必要な部分だけ記載します
def main():
    #カスケード分類器の特徴量を取得する
    cascade = cv2.CascadeClassifier(cascade_path)
    color = (255, 255, 255) #白
    ...
    model=model_definition()
    ## Use HGS創英角ゴシックポップ体標準 to write Japanese.
    fontpath ='C:\Windows\Fonts\HGRPP1.TTC' # Windows10 だと C:\Windows\Fonts\ 以下にフォントがあります。
    font = ImageFont.truetype(fontpath, 16) # フォントサイズが32
    font0 = cv2.FONT_HERSHEY_SIMPLEX #fps表示に利用
    while True:
        b,g,r,a = 0,255,0,0 #B(青)・G(緑)・R(赤)・A(透明度)
        ...
        #グレースケール変換
        image_gray = cv2.cvtColor(frame, cv2.COLOR_BGR2GRAY)
        facerect = cascade.detectMultiScale(image_gray, scaleFactor=1.1, minNeighbors=2, minSize=(30, 30))
        img=frame
        if len(facerect) > 0:
            #検出した顔を囲む矩形の作成
            for rect in facerect:
                y,x=tuple(rect[0:2])
                y2,x2=tuple(rect[0:2]+rect[2:4])
                print(y,x,y2,x2)
                cv2.rectangle(frame, tuple(rect[0:2]),tuple(rect[0:2]+rect[2:4]), color, thickness=2)
                roi = frame[y:y2, x:x2]  #frame[y:y+h, x:x+w]
                try:
                    roi = cv2.resize(roi, (int(224), 224))
                    #cv2.imshow('roi',roi) #確認のために表示
                    txt=yomikomi(model,roi)
                    #print("txt",txt) #確認のために表示
                except:
                    txt=""
                    continue
                img_pil = Image.fromarray(frame) # 配列の各値を8bit(1byte)整数型(0~255)をPIL Imageに変換。
                draw = ImageDraw.Draw(img_pil) # drawインスタンスを生成
                position = (y, x) # テキスト表示位置
                draw.text(position, txt, font = font , fill = (b, g, r, a) ) # drawにテキストを記載 fill:色 BGRA (RGB)
                img = np.array(img_pil) # PIL を配列に変換
        cv2.imshow('test',img)
        key = cv2.waitKey(1)&0xff
        if is_video=="True":
            img_dst = cv2.resize(img, (int(224), 224)) #1280x960
            out.write(img_dst)
            print(is_video)
結果
ここまでやったが、どうも精度が悪い。
もともと傾いていると顔さえ認識できないが、さらに認識しても誰なのかの識別がどうもできない。
以下に「あかりんだーすーさん」の画像を変化させて見せた時の記録された動画を貼っておく。
face recognition by vgg16

※画像をクリックするとYouTube動画につながります
まとめ
・顔画像を学習してカメラ動画で顔識別してみた
・識別結果の日本語を動画に貼り付けた
・静的識別結果はいいはずなのに精度が悪い理由が不明である