はじめに
Nuxt(Vue)で本記事のような内容は見受けられなかったので、皆さんのお役に立てれば幸いです。
また、本記事はVuetifyを使用しています。
では、さっそく内容に迫っていきましょう。
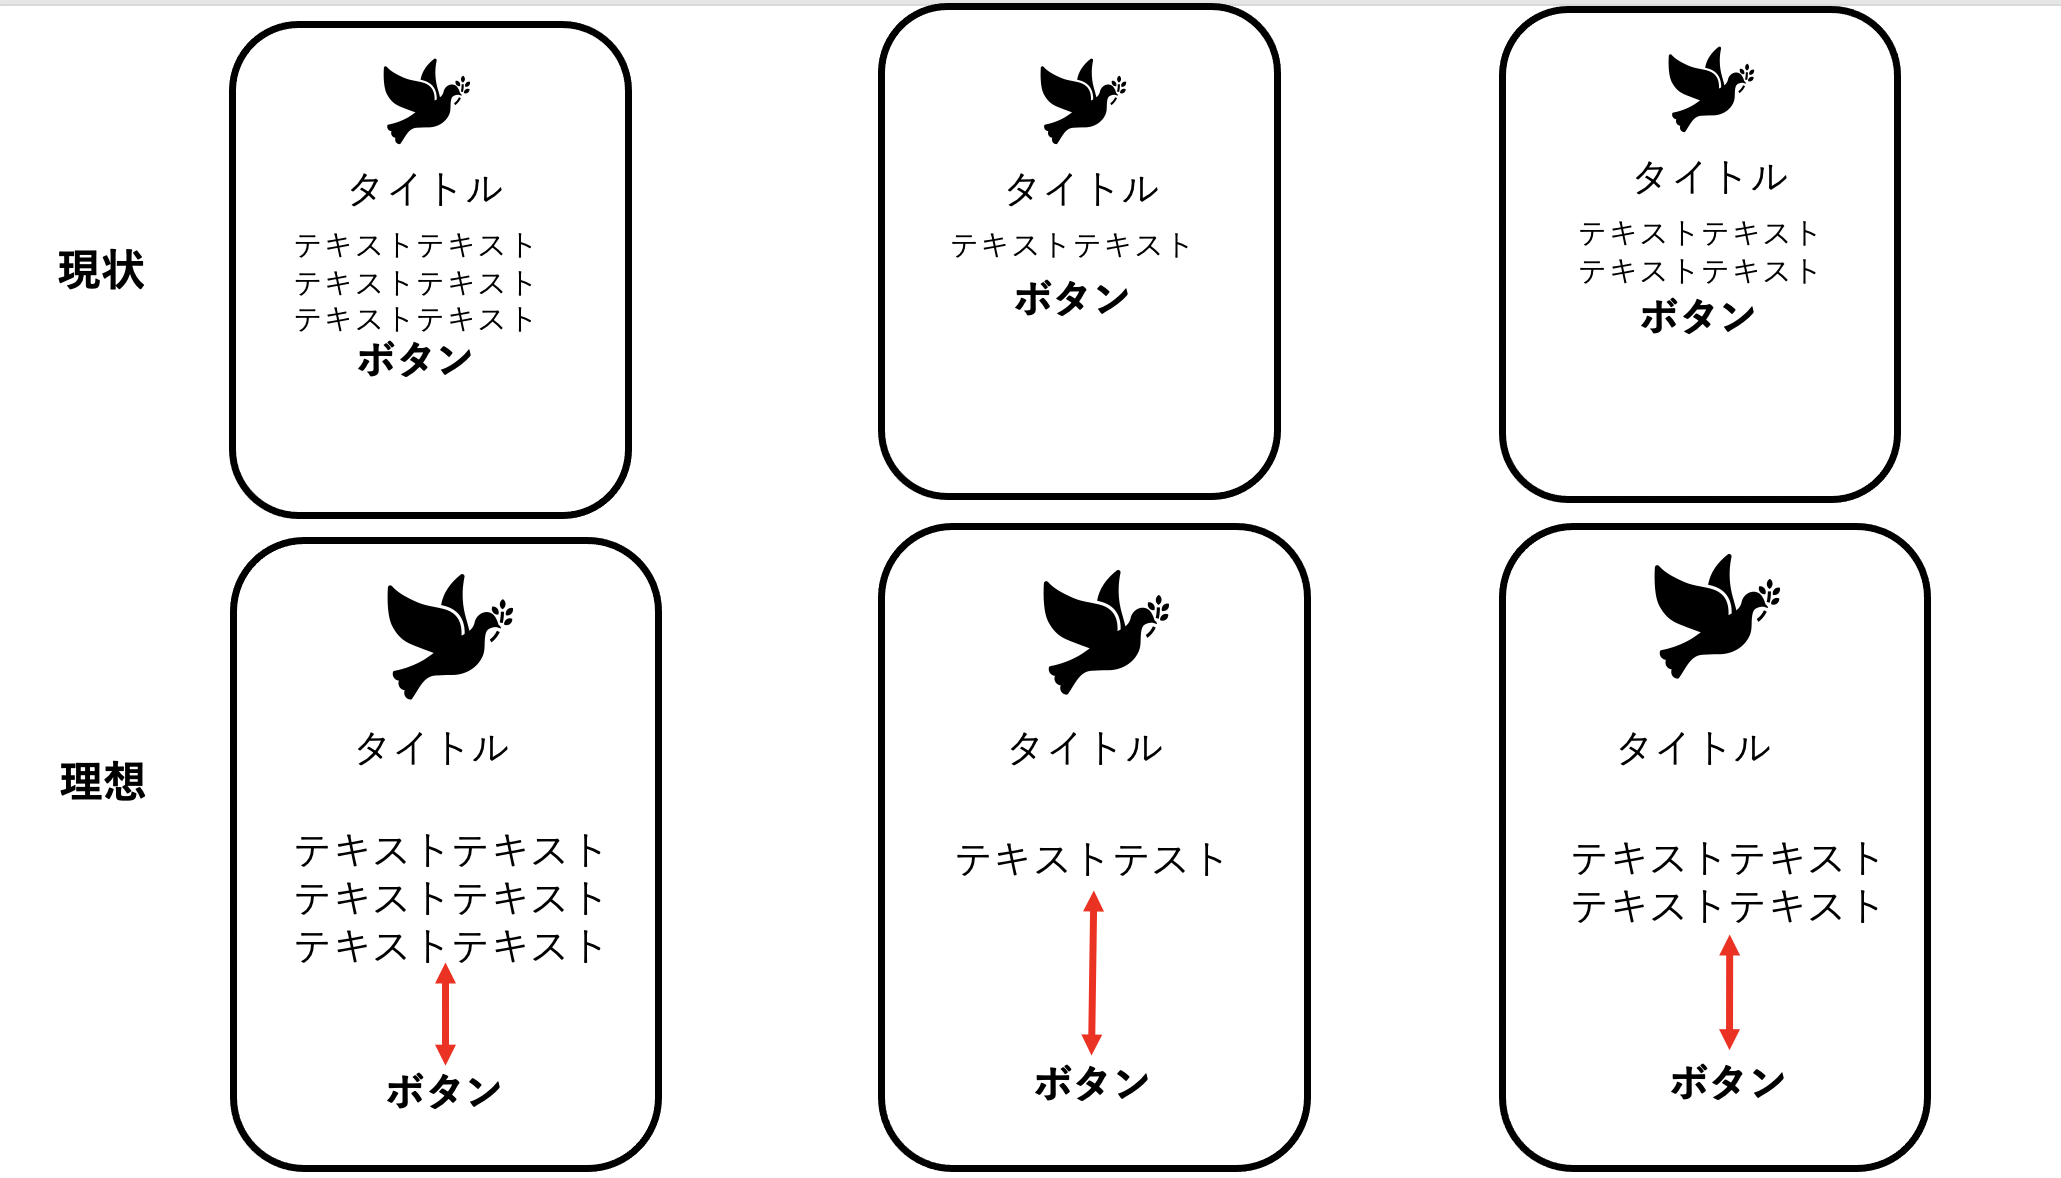
最終イメージ
スタート
<v-row>
        <v-col
          v-for="(item, i) in items"
          :key="i"
          class="d-flex"
          cols="12"
          sm="6"
          md="6"
          lg="4"
        >
          <v-card
            outlined
            max-width="100%"
            height="100%"
            class="d-flex flex-column"
          >
            <v-img :src="item.img" style="max-height:214px" height="214px" />
            <v-card-title
              class="justify-center"
              v-text="item.title"
            />
            <v-card-text
              :style="'font-size:0.9rem'"
              height="100%"
              v-html="item.text"
            />
            <v-spacer />
            <v-card-actions class="mb-7">
              <a :href="item.link" target="_blank" style="text-decoration: none">
                <v-btn
                  text
                  color="primary"
                  class="mb-5"
                  :style="'font-size:1.0rem'"
                >
                  <span>{{ item.description }}</span>
                </v-btn>
              </a>
            </v-card-actions>
          </v-card>
        </v-col>
      </v-row>
* ポイントはv-cardにclass="d-flex flex-column"を付与させることでv-spacerが上手く動作します。
export default {
  data () {
    return {
      items: [
        {
          title: 'ネーム1',
          text: 'テキス1トテキスト1テキスト1テキスト1テキスト1。',
          img: '/images/image1',
          link: 'https://?????????',
          description: 'ボタンの中身',
        },        {
          title: 'ネーム2',
          text: 'テキス2トテキスト2テキスト2テキスト2テキスト2。',
          img: '/images/image2',
          link: 'https://?????????',
          description: 'ボタンの中身',
        },        {
          title: 'ネーム3',
          text: 'テキス3トテキスト3テキスト3テキスト3テキスト3。',
          img: '/images/image3',
          link: 'https://?????????',
          description: 'ボタンの中身',
        }
      ]
    }
  }
}
おわりに
v-cardにclass="d-flex flex-column"を付与させることでv-spacerが上手く実装することができました。
少しでもお役手に立てればLGTMをお願い致します🙇♂️
