はじめに
AWSのハンズオンシリーズにある下記を実施した。
細かい画面操作と、CodeCommitではなくgithubを使いたかったため、この辺りを変更したバージョンを記述する。
ハンズオンに記載されている箇所は転記しない。
githubへソースをpush
CodeCommitではなく、Githubを使うためその辺り設定する。
そのため、ハンズオンにある下記はこちらで代用する
モジュール1 ステップ2〜3
Macとgithubの連携
SSHキーの設定はこちらの記事を参考にした。
Mac GitHub SSH接続設定
リポジトリの作成
githubにて「wildrydes-site」というリポジトリをパブリックで作成した。
作成したリポジトリのクローン
下記をローカル環境で実施
このとき、リポジトリを作成したいディレクトリに移動しておく。
git clone <作成したリポジトリのSSH URL>
リソースのクローン
今回ハンズオンで使うAWSが用意しているソースを先ほどクローンしたリポジトリにクローンする。
(ややこしいですが。。。)
AWSのCLIを使うが、これも設定が必要となる。
AWS コマンドラインインターフェイスの公式
ドキュメント(設定)
上記が準備できたら以下を実施
cd wildrydes-site/
aws s3 cp s3://wildrydes-us-east-1/WebApplication/1_StaticWebHosting/website ./ --recursive --profile <AWS CLIで設定したIAMユーザ名>
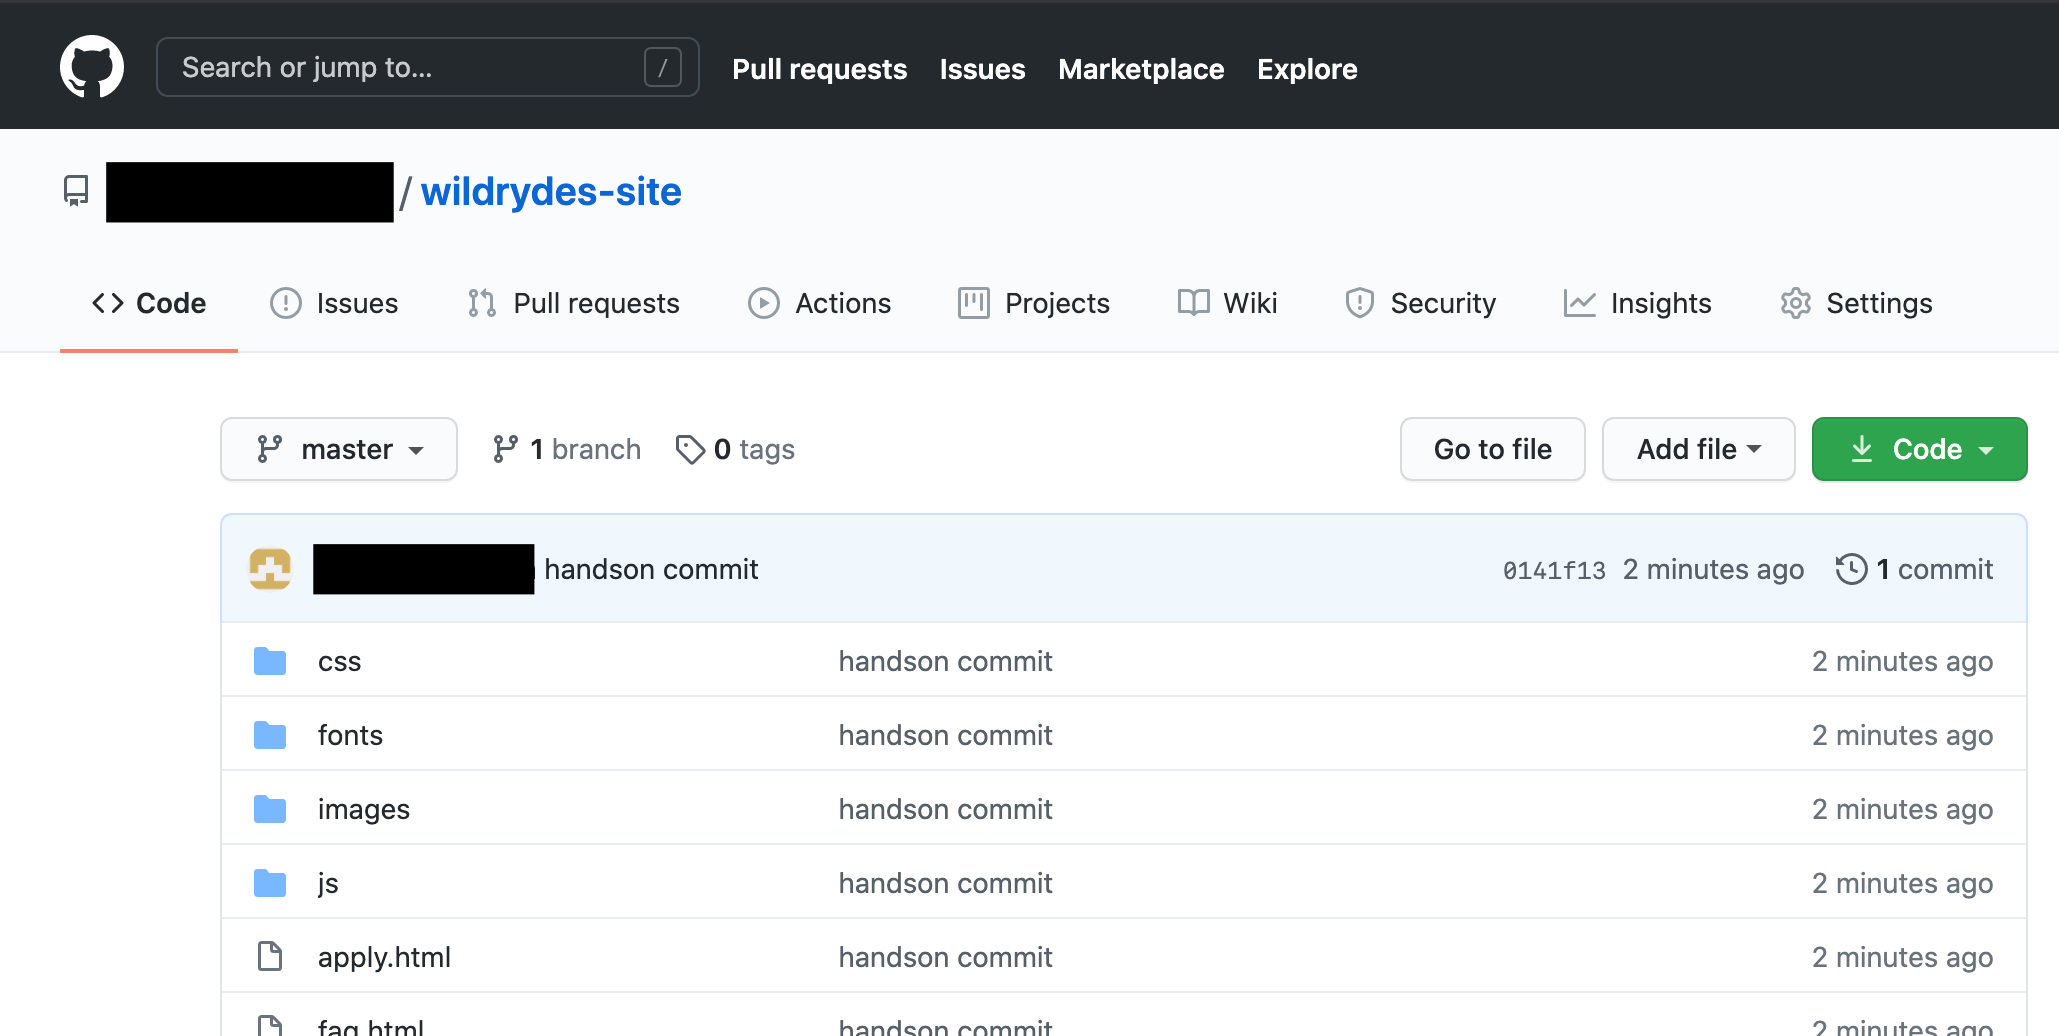
githubにpushする
git add .
git commit -m "handson commit"
git push <作成したリポジトリのSSH URL> master
下記のように無事、githubにAWSが準備したソースがpushされた。
Amplifyコンソールでウェブホスティングを有効にする
ハンズオンにある下記をgithubで代用する
モジュール1 ステップ4
また、画面仕様が変更されているのでこのあたりも記載する。
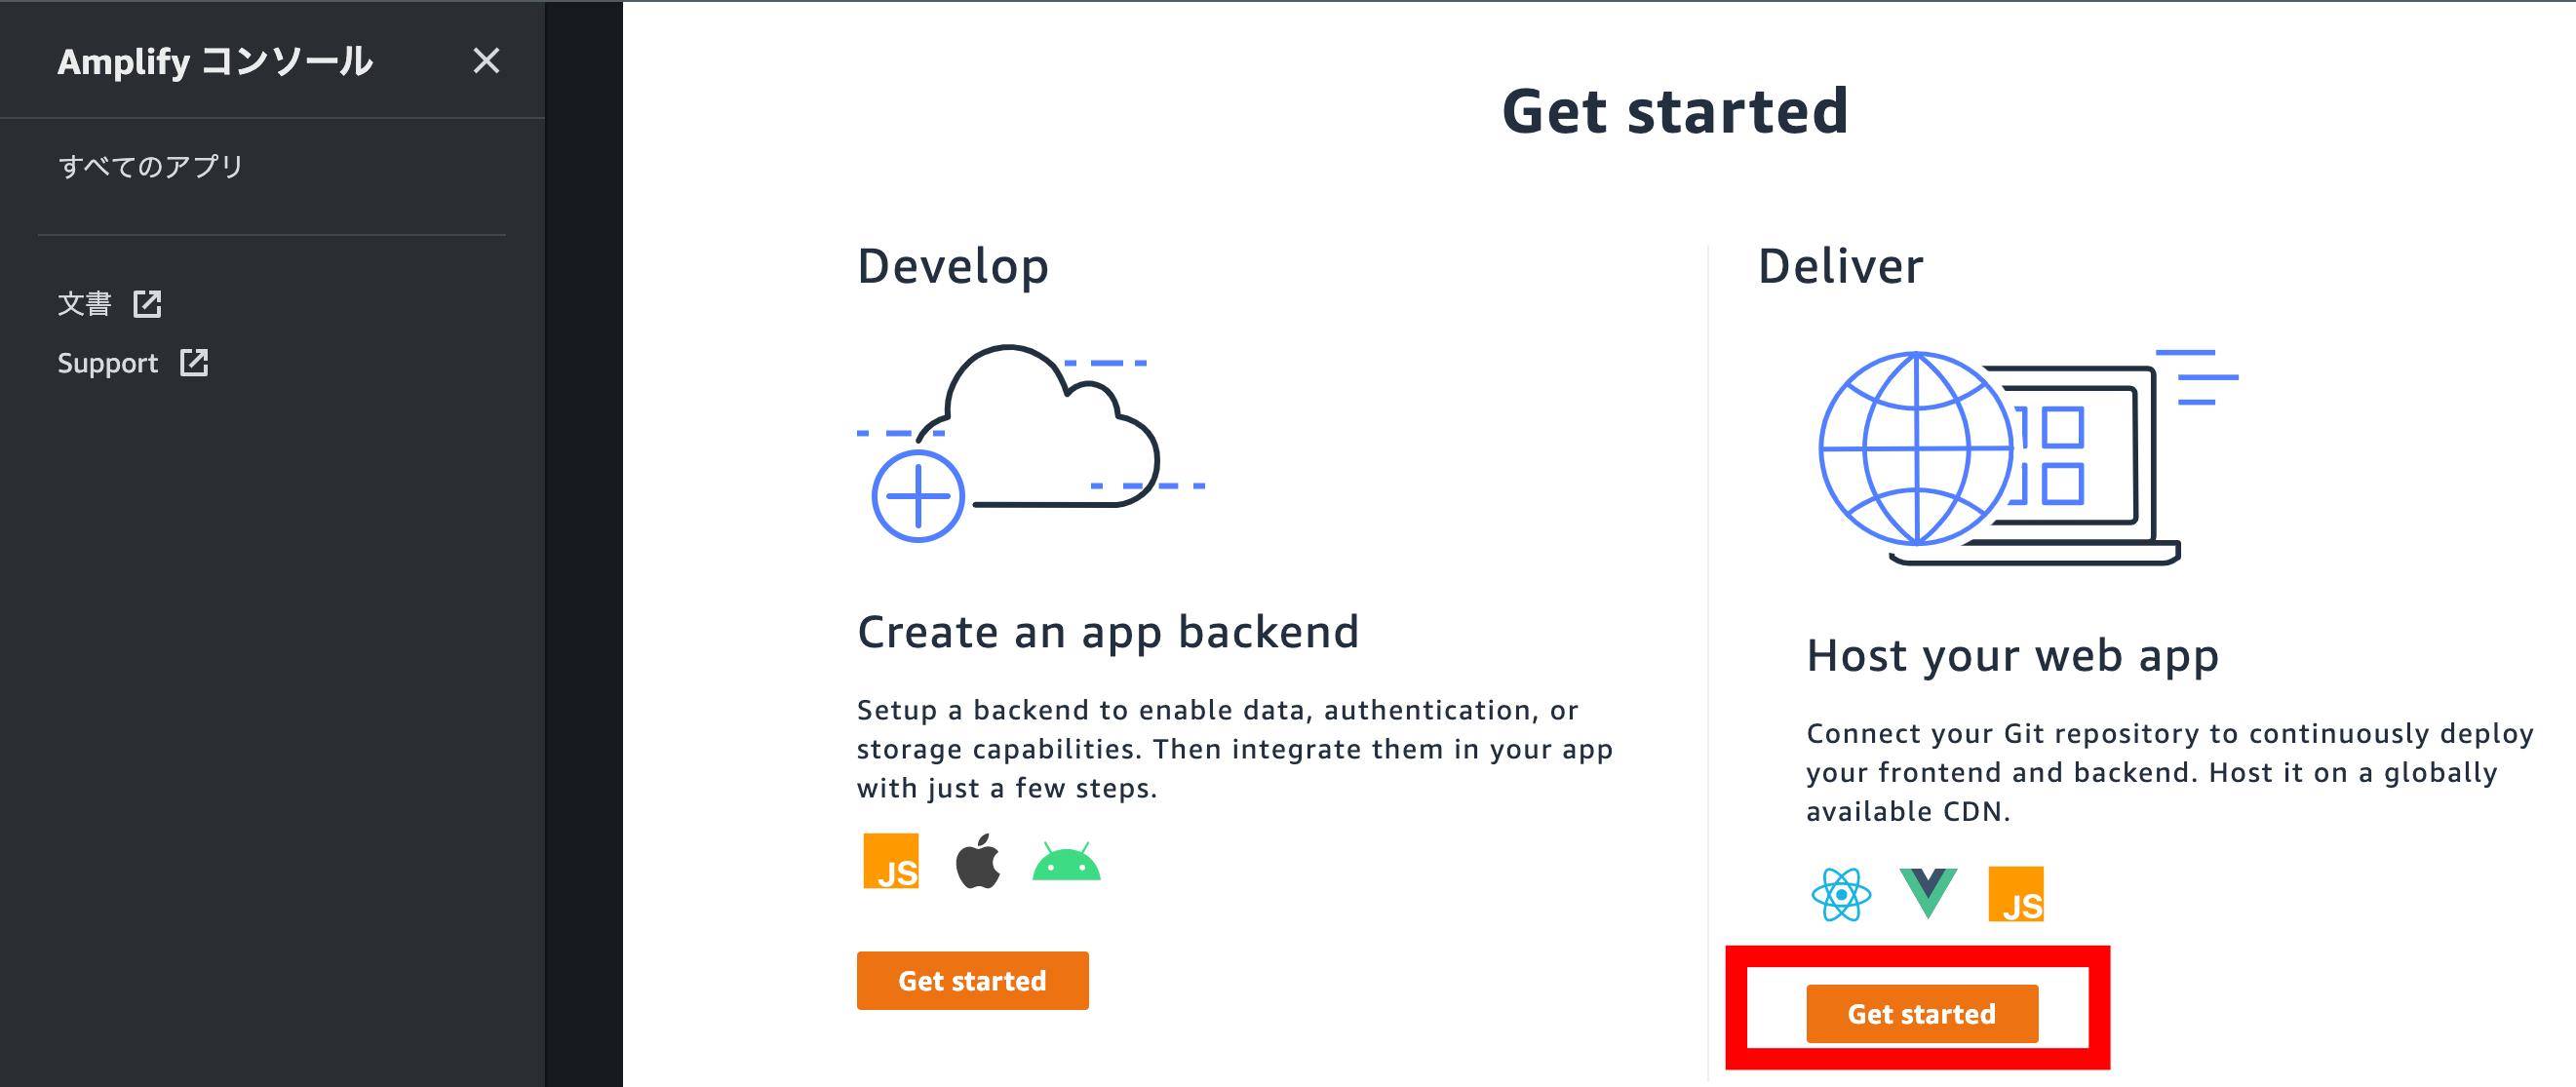
Amplifyを始める
下記の「Host your web app」の[Get started]をクリック
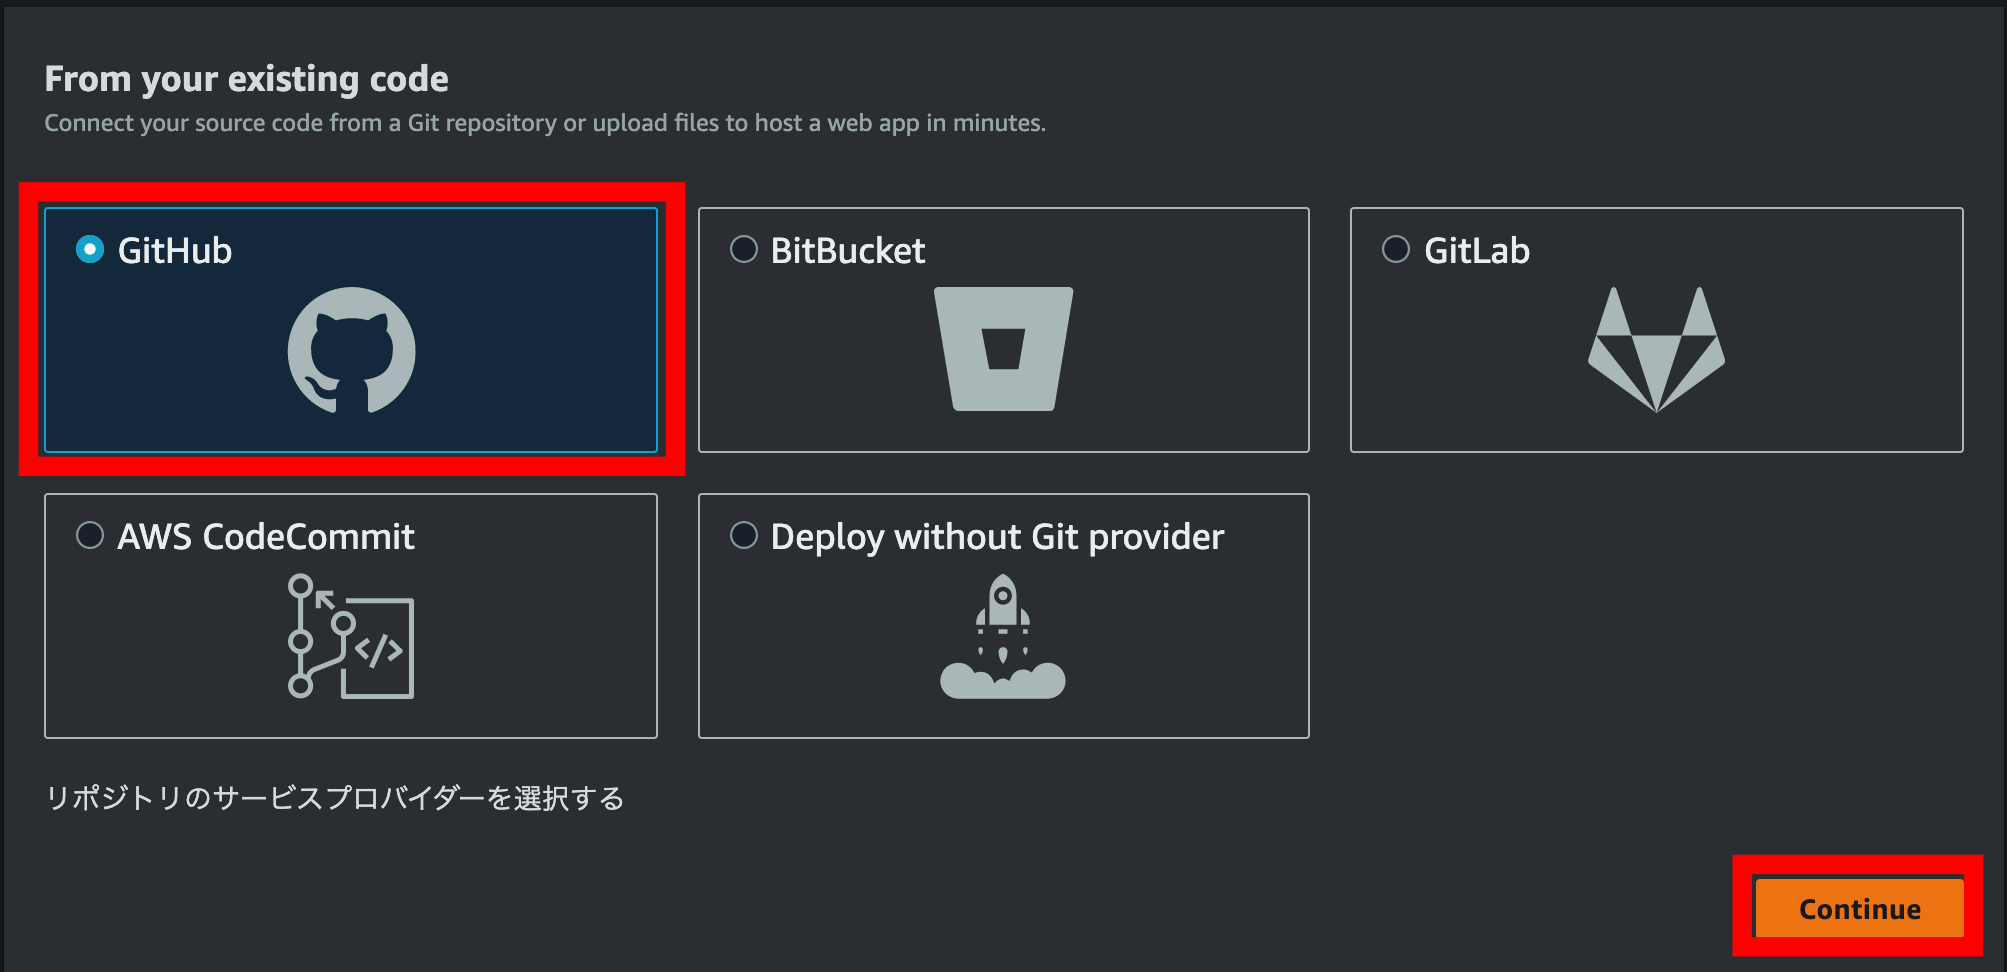
Githubをクリックして、続ける
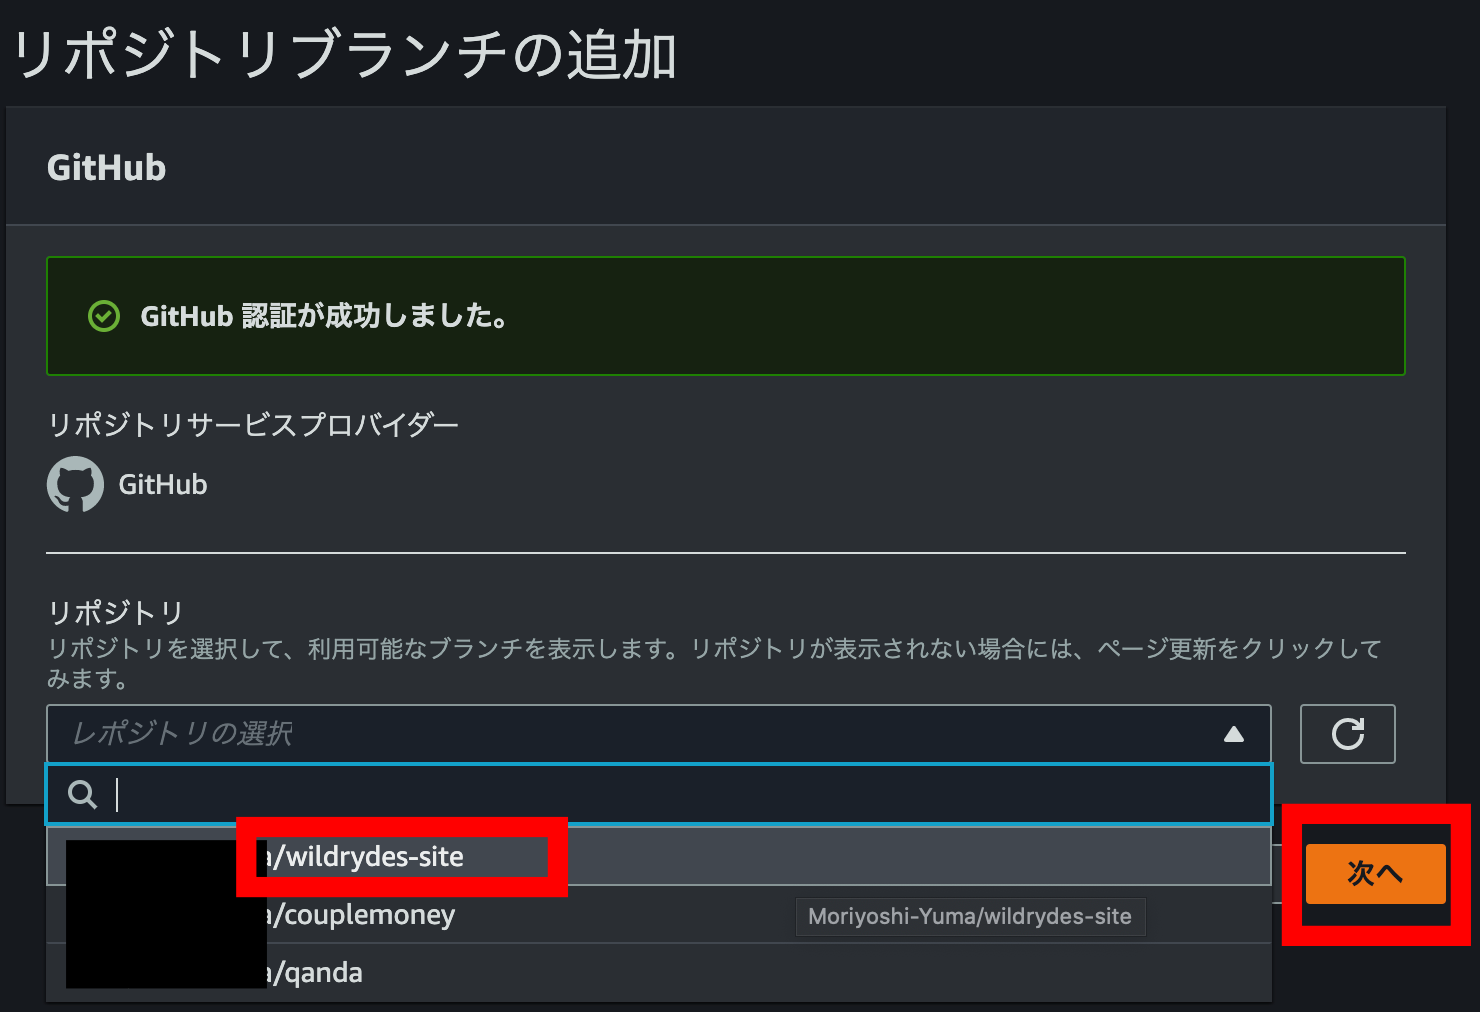
Amplifyとgithubを連携する
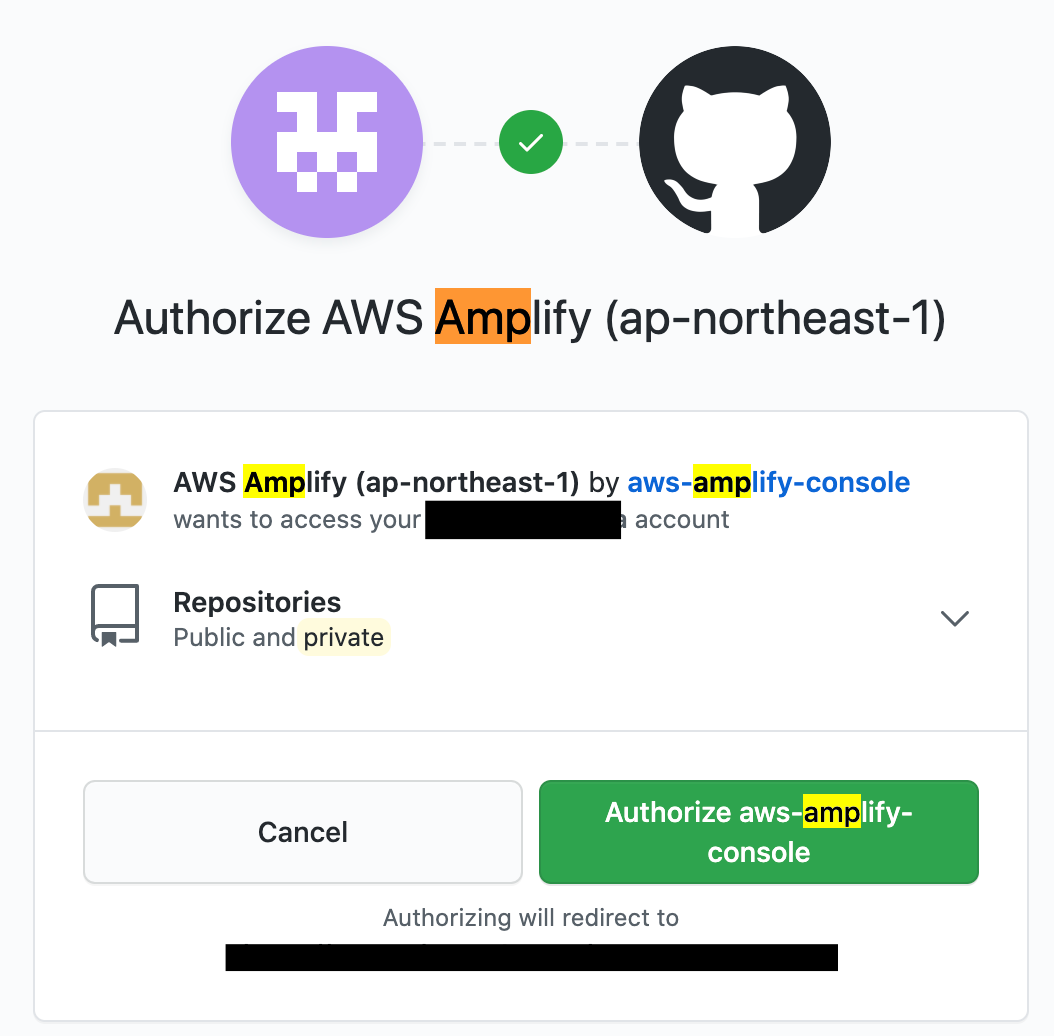
先ほど作成したリポジトリを選択して続ける
ブランチや[ビルド設定の構成]ページは全てデフォルトのままにして、次へ進む。
最後の確認ページで[保存とデプロイ]を選択する。
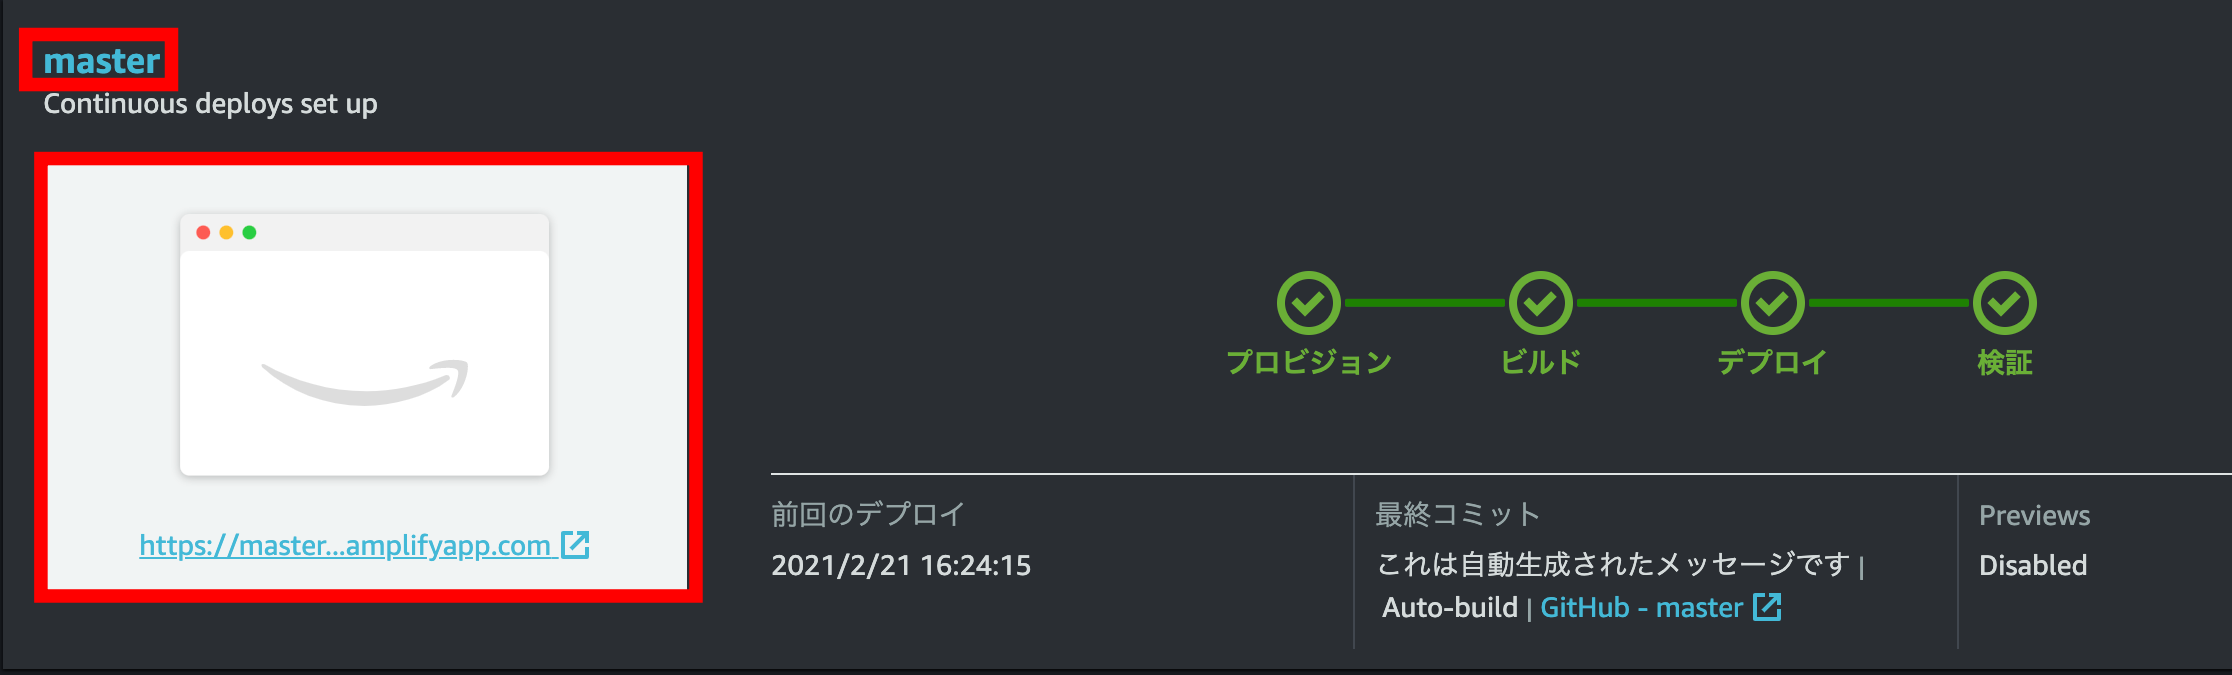
完了したら、WildRydesサイトをローンチするためにサイトのイメージをクリックして画面を確認できます。
また、[master]のリンクをクリックすると、ブランチに関連するビルドとデプロイの詳細、そして、さまざまなデバイスのアプリのスクリーンショットが表示されます。
ユーザーのアカウントを管理
対象サービス:Amazon Cognito
ハンズオンにある下記を実施する
モジュール2
サーバーレスサービスバックエンド
対象サービス:AWS Lambda と Amazon DynamoDB
ハンズオンにある下記を実施する
モジュール3
lambdaの作成の箇所でハンズオンと異なる点を記載する。
ランタイムの選択
Node.js 14.xを選択した
コード
requestUnicorn.jsが見つからなかったため、下記の内容に書き換えた
const randomBytes = require('crypto').randomBytes;

const AWS = require('aws-sdk');

const ddb = new AWS.DynamoDB.DocumentClient();

const fleet = [
    {
        Name: 'Bucephalus',
        Color: 'Golden',
        Gender: 'Male',
    },
    {
        Name: 'Shadowfax',
        Color: 'White',
        Gender: 'Male',
    },
    {
        Name: 'Rocinante',
        Color: 'Yellow',
        Gender: 'Female',
    },
];

exports.handler = (event, context, callback) => {
    if (!event.requestContext.authorizer) {
      errorResponse('Authorization not configured', context.awsRequestId, callback);
      return;
    }

    const rideId = toUrlString(randomBytes(16));
    console.log('Received event (', rideId, '): ', event);

    // Because we're using a Cognito User Pools authorizer, all of the claims
    // included in the authentication token are provided in the request context.
    // This includes the username as well as other attributes.
    const username = event.requestContext.authorizer.claims['cognito:username'];

    // The body field of the event in a proxy integration is a raw string.
    // In order to extract meaningful values, we need to first parse this string
    // into an object. A more robust implementation might inspect the Content-Type
    // header first and use a different parsing strategy based on that value.
    const requestBody = JSON.parse(event.body);

    const pickupLocation = requestBody.PickupLocation;

    const unicorn = findUnicorn(pickupLocation);

    recordRide(rideId, username, unicorn).then(() => {
        // You can use the callback function to provide a return value from your Node.js
        // Lambda functions. The first parameter is used for failed invocations. The
        // second parameter specifies the result data of the invocation.

        // Because this Lambda function is called by an API Gateway proxy integration
        // the result object must use the following structure.
        callback(null, {
            statusCode: 201,
            body: JSON.stringify({
                RideId: rideId,
                Unicorn: unicorn,
                UnicornName: unicorn.Name,
                Eta: '30 seconds',
                Rider: username,
            }),
            headers: {
                'Access-Control-Allow-Origin': '*',
            },
        });
    }).catch((err) => {
        console.error(err);

        // If there is an error during processing, catch it and return
        // from the Lambda function successfully. Specify a 500 HTTP status
        // code and provide an error message in the body. This will provide a
        // more meaningful error response to the end client.
        errorResponse(err.message, context.awsRequestId, callback)
    });
};

// This is where you would implement logic to find the optimal unicorn for
// this ride (possibly invoking another Lambda function as a microservice.)
// For simplicity, we'll just pick a unicorn at random.
function findUnicorn(pickupLocation) {
    console.log('Finding unicorn for ', pickupLocation.Latitude, ', ', pickupLocation.Longitude);
    return fleet[Math.floor(Math.random() * fleet.length)];
}

function recordRide(rideId, username, unicorn) {
    return ddb.put({
        TableName: 'Rides',
        Item: {
            RideId: rideId,
            User: username,
            Unicorn: unicorn,
            UnicornName: unicorn.Name,
            RequestTime: new Date().toISOString(),
        },
    }).promise();
}

function toUrlString(buffer) {
    return buffer.toString('base64')
        .replace(/\+/g, '-')
        .replace(/\//g, '_')
        .replace(/=/g, '');
}

function errorResponse(errorMessage, awsRequestId, callback) {
  callback(null, {
    statusCode: 500,
    body: JSON.stringify({
      Error: errorMessage,
      Reference: awsRequestId,
    }),
    headers: {
      'Access-Control-Allow-Origin': '*',
    },
  });
}
保存について
関数にある[Deploy]をクリックし、OKが出ると完了

RESTful API
対象サービス:Amazon API Gateway
ハンズオンにある下記を実施する
モジュール4
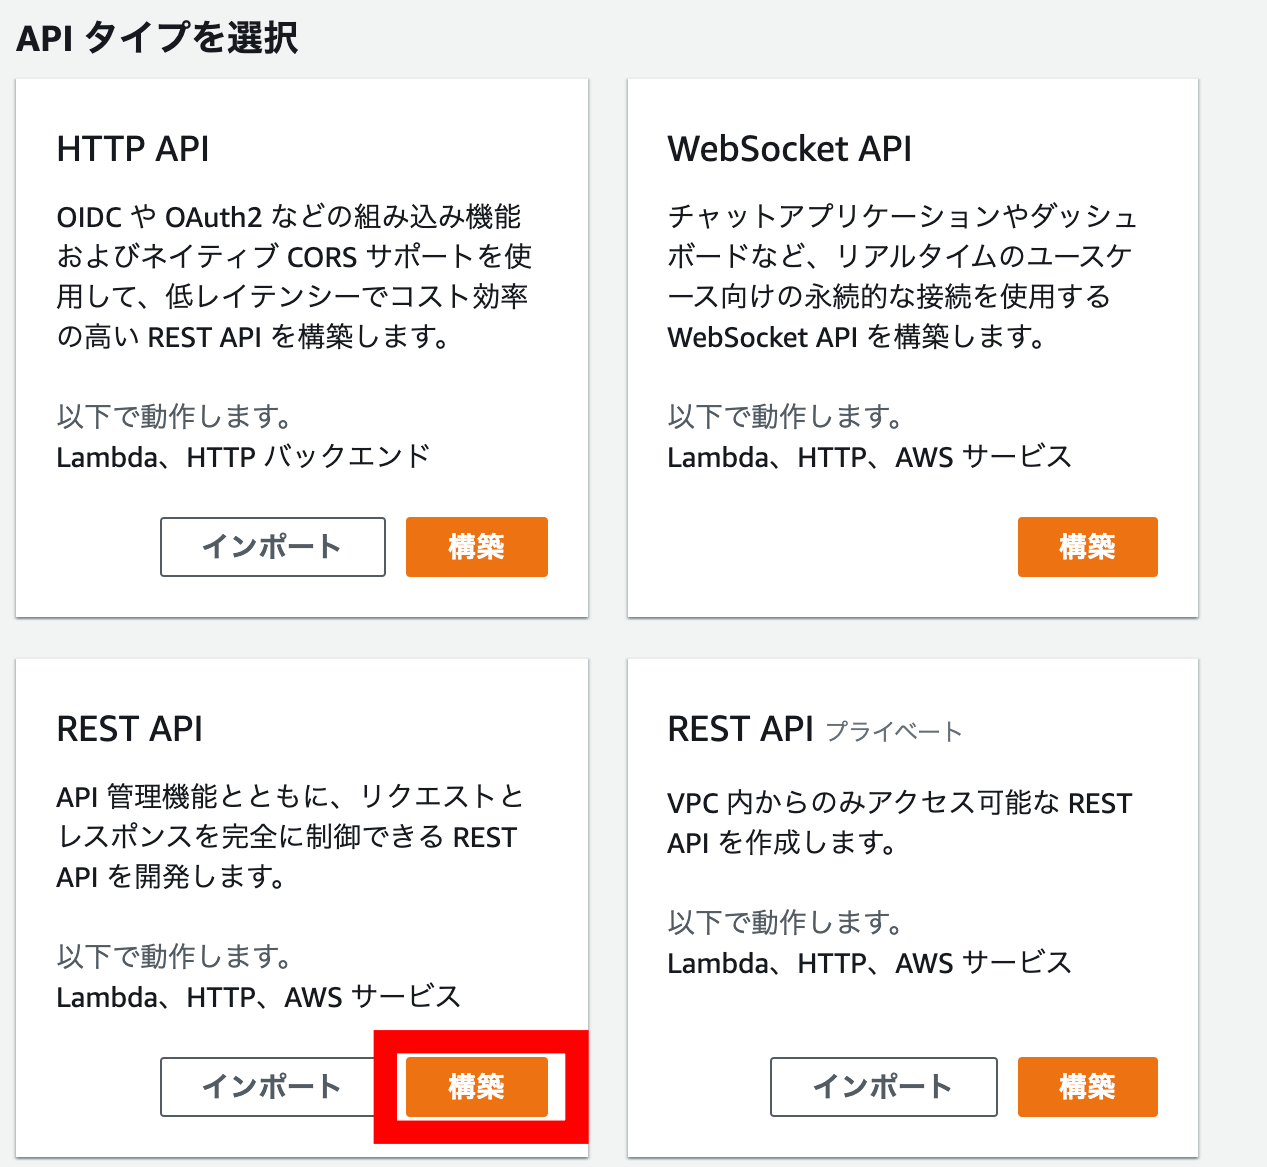
作成
ステップ1の作成がわかりにくいので、簡単に記載する。
下記から新たに作成する。
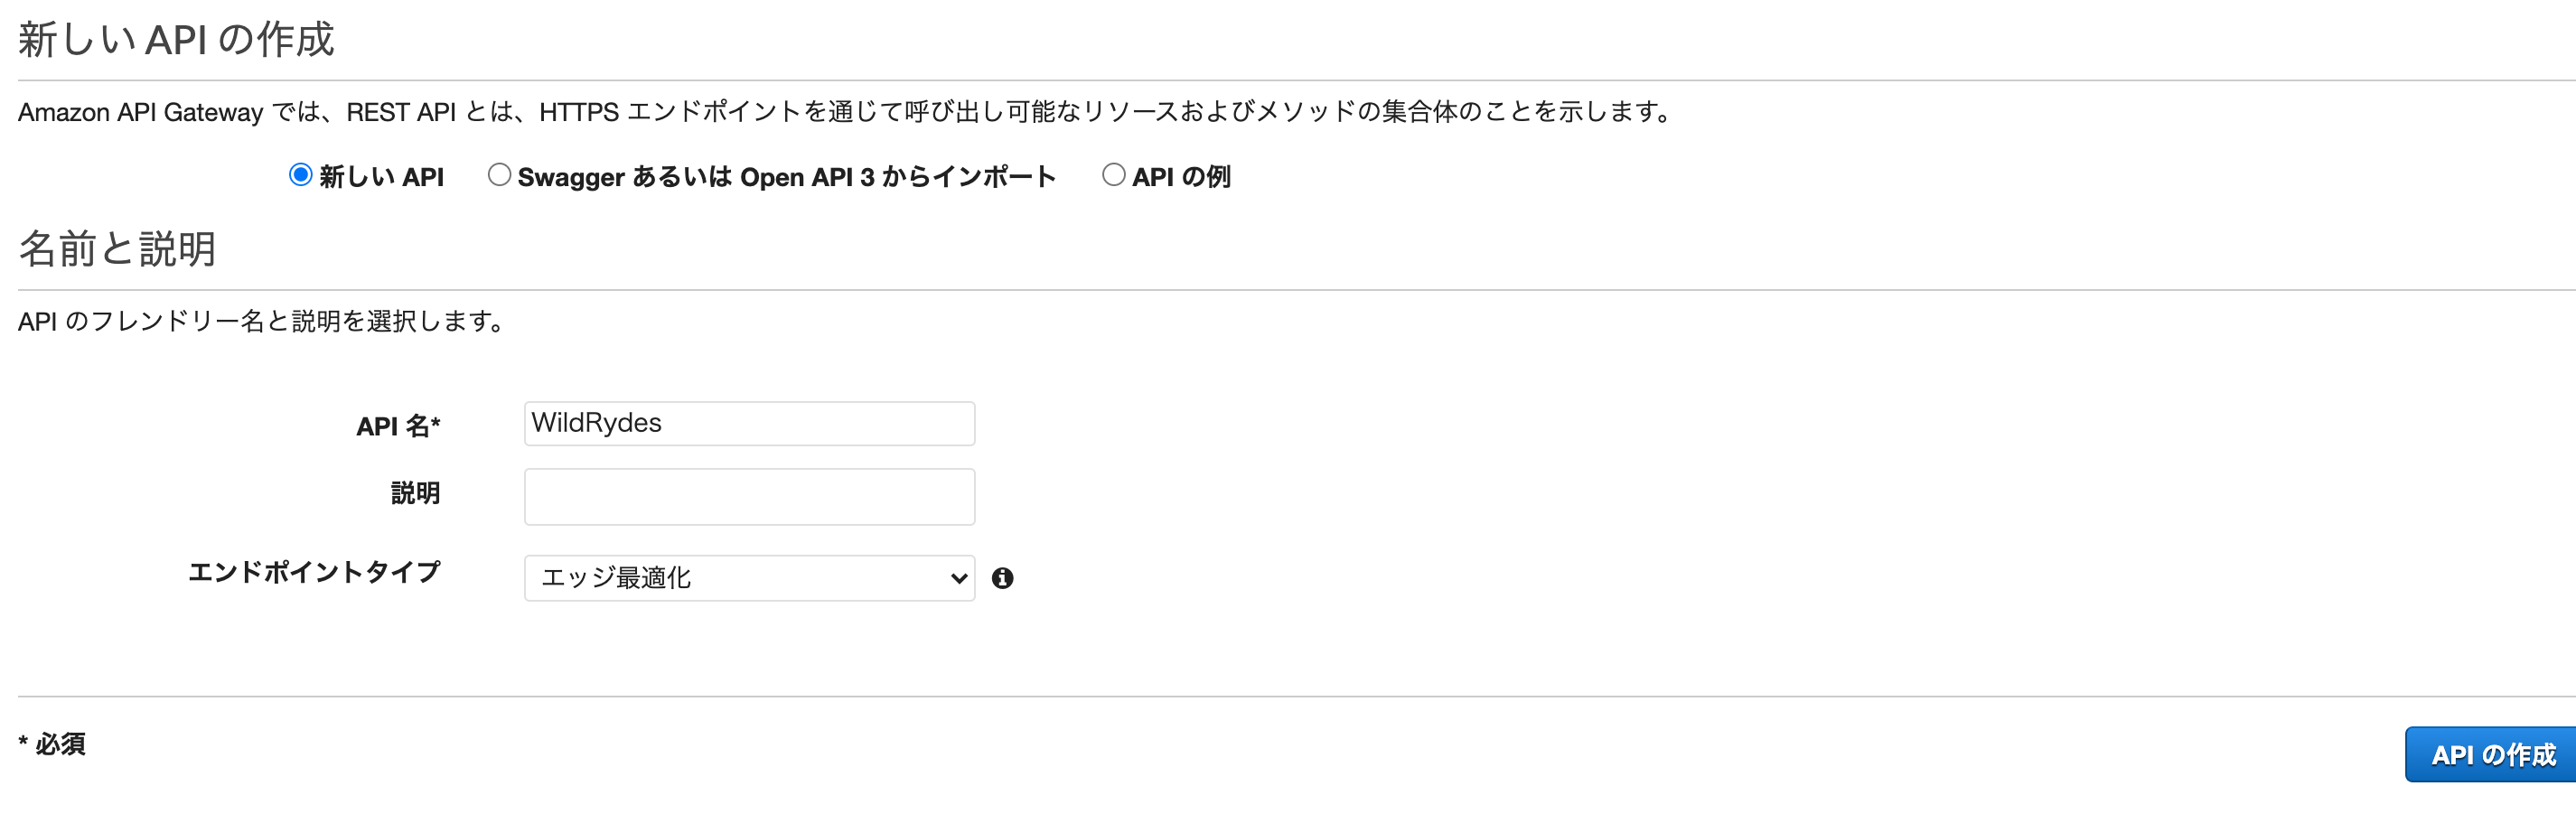
あとはハンズオンの手順通りに実施すると、うまくできた。
さいごに
作成したリソースは削除し忘れないようにする!!