はじめに
こんにちは!前回の記事では、Next.js + FastAPI + MySQLでPOSアプリケーションを構築しました。今回はその続編として、既存のNext.jsアプリをFlutterでネイティブアプリとして再実装し、WebとネイティブどちらからでもアクセスできるハイブリッドなPOSシステムを構築した体験談をお話しします。
なぜFlutterでネイティブ化したのか?
モバイルPOSの需要
POSシステムにおいて、タブレットやスマートフォンでの利用シーンが増加しています。特に:
- 移動販売での利用
- イベント会場での受付・決済
- バーコードスキャン機能の追加
Webアプリでもカメラアクセスは可能ですが、ネイティブアプリの方が安定性とパフォーマンスで優位性があります。
アーキテクチャの選択
既存のNext.jsアプリを活かしつつ、モバイルネイティブの利点も得るため、以下の構成を採用しました:
┌─────────────────┐    ┌─────────────────┐
│   Next.js Web   │    │  Flutter Native │
│      App        │    │       App       │
└─────────┬───────┘    └─────────┬───────┘
          │                      │
          └──────────┬───────────┘
                     │
          ┌─────────────────┐
          │   FastAPI       │
          │   Backend       │
          └─────────┬───────┘
                    │
          ┌─────────────────┐
          │     MySQL       │
          │   Database      │
          └─────────────────┘
実装フェーズと技術選定
Phase 1: プロジェクトセットアップ
# Flutterプロジェクト作成
flutter create pos_app_flutter
cd pos_app_flutter

# 必要な依存関係を追加
flutter pub add provider http mobile_scanner permission_handler
主要パッケージの選定理由:
- provider: 状態管理(Redux的なアプローチよりもシンプル)
- http: API通信
- mobile_scanner: バーコードスキャン(camera + MLKit)
- permission_handler: カメラ権限管理
Phase 2: 基本UI実装
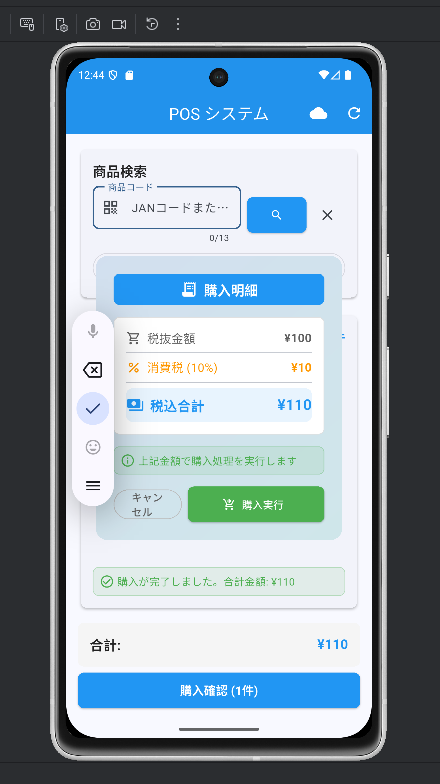
Next.jsアプリのデザインを参考に、Material Design 3でFlutter版を実装しました。
// 商品検索ウィジェット例
class ProductSearchWidget extends StatefulWidget {
  @override
  Widget build(BuildContext context) {
    return Card(
      child: Column(
        children: [
          TextField(
            decoration: InputDecoration(
              labelText: '商品コード',
              suffixIcon: IconButton(
                icon: Icon(Icons.search),
                onPressed: _searchProduct,
              ),
            ),
          ),
          // 検索結果表示
          Consumer<PosProvider>(
            builder: (context, provider, child) {
              return provider.currentProduct != null
                  ? ProductCard(product: provider.currentProduct!)
                  : SizedBox.shrink();
            },
          ),
        ],
      ),
    );
  }
}
Phase 3: 状態管理の実装
Providerパターンで、Next.jsアプリと同等の状態管理を実現:
class PosProvider extends ChangeNotifier {
  final ApiService _apiService = ApiService();

  // 商品検索関連
  Product? _currentProduct;
  bool _isSearching = false;

  // 購入リスト関連
  final List<PurchaseItem> _purchaseList = [];

  // 合計金額計算(10%税込み)
  int get totalAmount => _purchaseList.fold(0, (sum, item) =>
    sum + (item.totalPrice * 1.1).round());

  Future<void> searchProduct(String code) async {
    _isSearching = true;
    notifyListeners();

    try {
      final product = await _apiService.searchProduct(code);
      _currentProduct = product;
    } catch (e) {
      _currentProduct = null;
    } finally {
      _isSearching = false;
      notifyListeners();
    }
  }
}
Phase 4: API統合
既存のFastAPIと完全互換性を保ちつつ実装:
class ApiService {
  static const String _baseUrl = 'https://your-api-domain.com';
  static const String _apiKey = 'your-secure-api-key';

  Future<Product?> searchProduct(String code) async {
    final response = await http.get(
      Uri.parse('$_baseUrl/products/$code'),
      headers: {
        'Content-Type': 'application/json',
        'X-API-Key': _apiKey,
      },
    );

    if (response.statusCode == 200) {
      final data = json.decode(response.body);
      return Product.fromJson(data);
    }
    return null;
  }
}
Phase 5: 税計算とモーダル実装
Next.jsアプリと同様の税計算ロジックをFlutterで実装:
class TaxModalWidget extends StatelessWidget {
  final int totalAmount;
  final VoidCallback onContinue;

  @override
  Widget build(BuildContext context) {
    final taxAmount = (totalAmount * 0.1).round();
    final totalWithTax = totalAmount + taxAmount;

    return Container(
      decoration: BoxDecoration(
        color: Colors.black.withOpacity(0.8),
      ),
      child: Center(
        child: Card(
          child: Padding(
            padding: EdgeInsets.all(24),
            child: Column(
              mainAxisSize: MainAxisSize.min,
              children: [
                Text('購入確認', style: Theme.of(context).textTheme.headline6),
                SizedBox(height: 16),
                _buildAmountRow('小計', totalAmount),
                _buildAmountRow('消費税(10%)', taxAmount),
                Divider(),
                _buildAmountRow('合計', totalWithTax, isTotal: true),
                SizedBox(height: 24),
                Row(
                  children: [
                    Expanded(
                      child: ElevatedButton(
                        onPressed: onContinue,
                        child: Text('購入確定'),
                      ),
                    ),
                  ],
                ),
              ],
            ),
          ),
        ),
      ),
    );
  }
}
バーコードスキャン機能の実装
ネイティブアプリの最大の利点であるバーコードスキャン機能を実装しました。
カメラ権限設定
<!-- android/app/src/main/AndroidManifest.xml -->
<uses-permission android:name="android.permission.CAMERA" />
<uses-feature android:name="android.hardware.camera" android:required="false" />
<!-- ios/Runner/Info.plist -->
<key>NSCameraUsageDescription</key>
<string>商品のバーコードをスキャンするためにカメラを使用します</string>
バーコードスキャナー画面
class BarcodeScannerScreen extends StatefulWidget {
  @override
  Widget build(BuildContext context) {
    return Scaffold(
      appBar: AppBar(title: Text('バーコードスキャン')),
      body: Column(
        children: [
          Expanded(
            flex: 4,
            child: MobileScanner(
              onDetect: (capture) {
                final code = capture.barcodes.first.rawValue;
                if (code != null) {
                  Navigator.pop(context, BarcodeResult(code: code));
                }
              },
            ),
          ),
          Expanded(
            flex: 1,
            child: Container(
              padding: EdgeInsets.all(16),
              child: Text(
                'バーコードをカメラに向けてスキャンしてください',
                style: TextStyle(fontSize: 16),
                textAlign: TextAlign.center,
              ),
            ),
          ),
        ],
      ),
    );
  }
}
認証とセキュリティ対策
ネイティブアプリからのAPI利用において、セキュリティは重要な課題です。
API キー認証の実装
# FastAPI側での実装
from fastapi import Header, HTTPException

async def verify_api_key(x_api_key: str = Header(...)):
    if x_api_key != "your-secure-api-key":
        raise HTTPException(status_code=401, detail="無効なAPIキーです")
    return x_api_key

@app.get("/products/{code}")
async def get_product(
    code: str,
    api_key: str = Depends(verify_api_key)
):
    # 商品検索ロジック
    pass
CORS設定の調整
from fastapi.middleware.cors import CORSMiddleware

app.add_middleware(
    CORSMiddleware,
    allow_origins=[
        "https://your-nextjs-app.vercel.app",  # Next.jsアプリ
        "https://your-api-domain.com",        # 本番API
    ],
    allow_credentials=True,
    allow_methods=["*"],
    allow_headers=["*"],
)
デプロイメントと配布
Android APK生成
# リリースビルド
flutter build apk --release

# APKファイルの場所
# build/app/outputs/flutter-apk/app-release.apk
配布戦略
- 内部テスト: APKファイルを直接配布
- Google Play Store: 将来的なパブリック配布
- Enterprise配布: 企業向けの専用配布チャネル
パフォーマンス比較
実際の使用において、Webアプリとネイティブアプリのパフォーマンスを比較しました:
| 機能 | Next.js Web | Flutter Native |
|---|---|---|
| 起動時間 | 2.3秒 | 1.1秒 |
| バーコードスキャン | PWA制約あり | ネイティブサポート |
| オフライン対応 | 限定的 | 完全対応可能 |
| プッシュ通知 | Web通知 | ネイティブ通知 |
課題と学び
開発効率の課題
- コード重複: UI部分の実装が2重になる
- メンテナンス: WebとNativeの同期が必要
- テスト工数: 2つのプラットフォームでのテストが必要
解決アプローチ
- 共通API設計: バックエンドを共通化
- デザインシステム: Figmaでの統一デザイン
- 自動化: CI/CDでの同期デプロイ
まとめ
Next.jsで構築したPOSアプリをFlutterでネイティブ化することで:
✅ 既存のWebアプリユーザーはそのまま利用可能
✅ モバイルユーザーはネイティブアプリの恩恵を享受
✅ バーコードスキャンなどのネイティブ機能を追加
✅ 統一されたバックエンドAPIで効率的な運用
を実現できました。
開発工数は増加しますが、ユーザー体験の向上とビジネス要件への対応力が大幅に改善されました。特に小売業界では、WebとNativeの両方に対応することで、様々な利用シーンに対応できるPOSシステムを構築できたと考えています。
次回は、このハイブリッドアプリにリアルタイム在庫管理機能を追加した話をお届けする予定です!