npx create-next-app --example with-reduxで生成されるサンプルコードを用いNextjs14とReduxについて学んでみた。
読んで欲しい人
- Redux を使ってみたい
- Nextjsを使った事があるがAppRouterの仕組みが分かっていない
- Reduxを最新のNextjsと一緒に使ってみたい
Nextjs とは
Next.jsは、Reactアプリケーションをより簡単に、より高速に構築するためのフレームワーク
3つの特徴
- 複数のレンダリング方法を持っている(サーバーサイド・クライアントサイド どちらも可能)
- フォルダ名でそのままルーティングが行える (PageRouter・AppRouter)
- API Routesなどバックエンド処理の作成が可能!
AppRouter
Next.js の v13.4からの新機能
- これまでのNext.jsはpagesディレクトリに作成したファイル名やディレクトリ名がそのまま URL のパスになっていた
- これからはappディレクトリ配下にディレクトリを作りファイル名はpage.jsxで書くことでURLのパスになる
ファイルの名前に意味を持つものも多くあるよ👇👇👇
Redux とは
ReactJSが扱うUIのstate(状態)を管理をするためのフレームワーク
Reduxはstateを管理するためのライブラリーなので、React以外にもAngularJSやjQueryなどと併せて使用することもできるが、Reactと使用するのが一番相性がいい
相関図で理解を深める

まずUIを見てみる。UIに対して$10を入金する操作をした場合を考えよう
- UIで行った変更はClickEventとしてEventHandlerに届く
- 届いたEvent(type:入金or出金,payload:金額)を変更&保存するためにStoreに送る必要がある
- その処理の流れをActionをStoreへDispatch(送信)するという
- ActionをもとにReducerと呼ばれる関数がStateを更新
- 最後に更新後のStateがUIに届く
重要な用語
- Dispatch Storeにイベントが発生したことを知らせる役割
- Action アプリケーション上で起こったイベント(ユーザーがボタンを押すなど)
- Store Reduxアプリケーションの状態を保持するオブジェクト
- Reducer StateとActionオブジェクトを受け取り、新しいStateを返す関数
今回のサンプルではreduxが推奨しているredux-toolkitを使用している
サンプルコードを見てみよう
npm run devを実行し http://localhost:3000/ を開くと以下のページが出現
主な機能
- +/-ボタン : 数字を1ずつ増やす、または減らす
- AddAmount : 左に表示された数値分値を変更
- AddAsync : 非同期で、左に表示された数値分値を変更
- Add If Odd : 値が奇数の場合のみ、左に表示された数値分値を変更
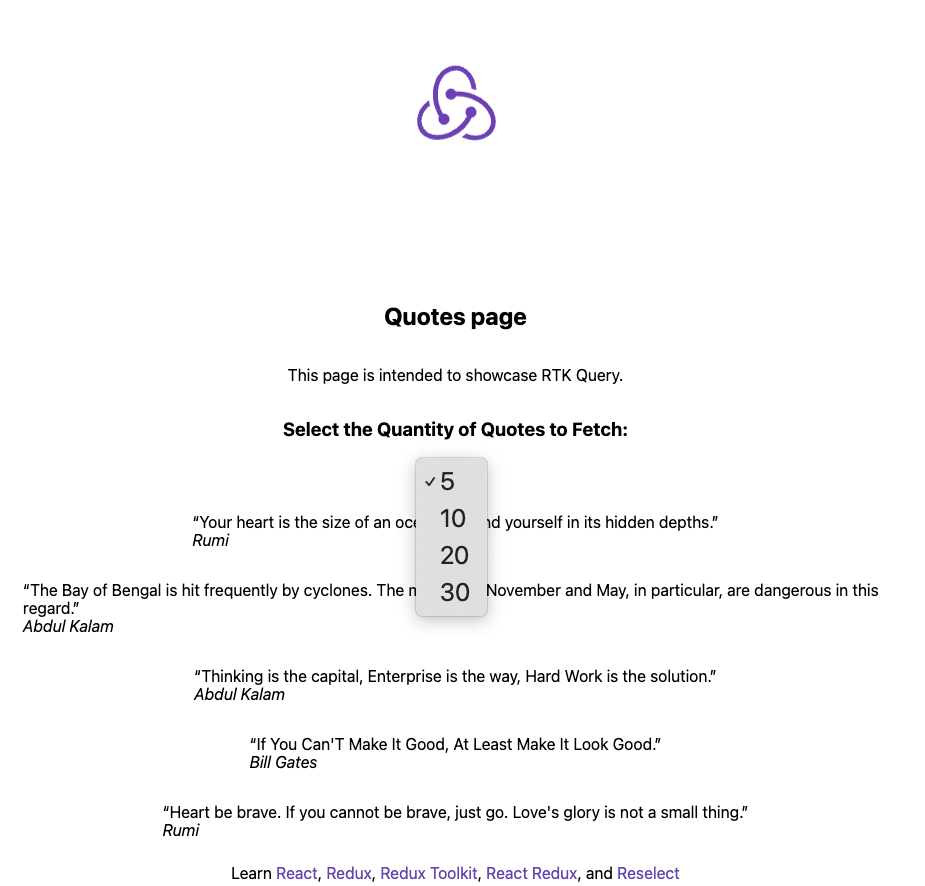
Quotesを押すと別ページへ
指定した数の格言が表示される
ディレクトリ構成
重要なポイントを示す
appフォルダ
- app直下の
page.tsx,layout.tsxは特別 StoreProvider.tsx- apiフォルダは「」を示す
libフォルダ
Reduxに関連するファイルが多い
createAppSlice.tshooks.tsstore.ts
実際の構成
.
├── README.md
├── app
│   ├── StoreProvider.tsx
│   ├── api
│   │   └── counter
│   ├── components
│   │   ├── Nav.tsx
│   │   ├── counter
│   │   └── quotes
│   ├── icon.ico
│   ├── layout.tsx
│   ├── page.tsx
│   ├── quotes
│   │   └── page.tsx
│   ├── styles
│   │   ├── globals.css
│   │   └── layout.module.css
│   └── verify
│       └── page.tsx
├── lib
│   ├── createAppSlice.ts
│   ├── features
│   │   ├── counter
│   │   └── quotes
│   ├── hooks.ts
│   └── store.ts
├── next-env.d.ts
├── next.config.mjs
├── package-lock.json
├── package.json
├── public
│   └── logo.svg
└── tsconfig.json
ここからが本番 コードを読み解く
app/layout.tsx
code
import Image from "next/image";
import type { ReactNode } from "react";
import { StoreProvider } from "./StoreProvider";
import { Nav } from "./components/Nav";

import "./styles/globals.css";
import styles from "./styles/layout.module.css";

interface Props {
  readonly children: ReactNode;
}

export default function RootLayout({ children }: Props) {
  return (
    <StoreProvider>
      <html lang="en">
        <body>
          <section className={styles.container}>
            <Nav />

            <header className={styles.header}>
              <Image
                src="/logo.svg"
                className={styles.logo}
                alt="logo"
                width={100}
                height={100}
              />
            </header>

            <main className={styles.main}>{children}</main>

            <footer className={styles.footer}>
              <span>Learn </span>
              <a
                className={styles.link}
                href="https://reactjs.org"
                target="_blank"
                rel="noopener noreferrer"
              >
                React
              </a>
              <span>, </span>
              <a
                className={styles.link}
                href="https://redux.js.org"
                target="_blank"
                rel="noopener noreferrer"
              >
                Redux
              </a>
              <span>, </span>
              <a
                className={styles.link}
                href="https://redux-toolkit.js.org"
                target="_blank"
                rel="noopener noreferrer"
              >
                Redux Toolkit
              </a>
              <span>, </span>
              <a
                className={styles.link}
                href="https://react-redux.js.org"
                target="_blank"
                rel="noopener noreferrer"
              >
                React Redux
              </a>
              ,<span> and </span>
              <a
                className={styles.link}
                href="https://reselect.js.org"
                target="_blank"
                rel="noopener noreferrer"
              >
                Reselect
              </a>
            </footer>
          </section>
        </body>
      </html>
    </StoreProvider>
  );
}
アプリケーションのルートレイアウトを定義しているファイル。
StoreProviderで全体を囲むことによってReduxストアをアプリケーション全体に提供している。
また、ナビゲーション、ヘッダー、メインコンテンツ、フッターなどのレイアウト構造が定義されている。
app/page.tsx
code
import type { Metadata } from "next";
import { Counter } from "./components/counter/Counter";

export default function IndexPage() {
  return <Counter />;
}

export const metadata: Metadata = {
  title: "Redux Toolkit",
};
アプリケーションのルートページを定義しているファイル。
Counterコンポーネントをレンダリングしている。
metadataオブジェクトでページのタイトルを設定。
app/StoreProvider.tsx
code
"use client";
import type { AppStore } from "@/lib/store";
import { makeStore } from "@/lib/store";
import { setupListeners } from "@reduxjs/toolkit/query";
import type { ReactNode } from "react";
import { useEffect, useRef } from "react";
import { Provider } from "react-redux";

interface Props {
  readonly children: ReactNode;
}

export const StoreProvider = ({ children }: Props) => {
  const storeRef = useRef<AppStore | null>(null);

  if (!storeRef.current) {
    // Create the store instance the first time this renders
    storeRef.current = makeStore();
  }

  useEffect(() => {
    if (storeRef.current != null) {
      // configure listeners using the provided defaults
      // optional, but required for `refetchOnFocus`/`refetchOnReconnect` behaviors
      const unsubscribe = setupListeners(storeRef.current.dispatch);
      return unsubscribe;
    }
  }, []);

  return <Provider store={storeRef.current}>{children}</Provider>;
};
Reduxストアをアプリケーション全体に提供するためのプロバイダーコンポーネントを定義しているファイル。
プロバイダーはクライアント側の処理になるため"use client"を使用。
makeStore関数を使用してストアを作成し、storeRefに保持。
setupListenersを使用して、リスナーを設定。
→setupListenersはアプリケーションの初期化時に一度だけ呼び出される。
→setupListenersを呼び出すことで、refetchOnFocusやrefetchOnReconnectなどの機能が有効になる。
- refetchOnFocus:ウィンドウがフォーカスを取り戻したときに、サブスクライブされているすべてのクエリを自動的に再フェッチする機能→ユーザーが別のタブやアプリケーションから戻ってきたときに、最新のデータを取得することが可能になる
- refetchOnReconnect:ネットワーク接続が復活したときに、サブスクライブされているすべてのクエリを自動的に再フェッチする機能→ネットワーク接続が切断され再接続されたときに、最新のデータを取得することが可能
lib/store.ts
code
import type { Action, ThunkAction } from "@reduxjs/toolkit";
import { combineSlices, configureStore } from "@reduxjs/toolkit";
import { counterSlice } from "./features/counter/counterSlice";
import { quotesApiSlice } from "./features/quotes/quotesApiSlice";

// `combineSlices` automatically combines the reducers using
// their `reducerPath`s, therefore we no longer need to call `combineReducers`.
const rootReducer = combineSlices(counterSlice, quotesApiSlice);
// Infer the `RootState` type from the root reducer
export type RootState = ReturnType<typeof rootReducer>;

// `makeStore` encapsulates the store configuration to allow
// creating unique store instances, which is particularly important for
// server-side rendering (SSR) scenarios. In SSR, separate store instances
// are needed for each request to prevent cross-request state pollution.
export const makeStore = () => {
  return configureStore({
    reducer: rootReducer,
    // Adding the api middleware enables caching, invalidation, polling,
    // and other useful features of `rtk-query`.
    middleware: (getDefaultMiddleware) => {
      return getDefaultMiddleware().concat(quotesApiSlice.middleware);
    },
  });
};

// Infer the return type of `makeStore`
export type AppStore = ReturnType<typeof makeStore>;
// Infer the `AppDispatch` type from the store itself
export type AppDispatch = AppStore["dispatch"];
export type AppThunk<ThunkReturnType = void> = ThunkAction<
  ThunkReturnType,
  RootState,
  unknown,
  Action
>;
Reduxストアの設定を行っているファイル。
combineSlicesを使用して、counterSliceとquotesApiSliceのReducerを自動的に結合。
makeStore関数でストアを作成し、ミドルウェアを設定。
quotesApiSliceのミドルウェアを追加。
RootState、AppStore、AppDispatch、AppThunkの型を定義
ここで出てくる重要な要素 Sliceとは??
関連するstateとactionを1つのファイルにまとめて管理できるもの...
つまりstateの初期値、stateを更新するためのreducer、actionを一括で定義できるもの
Redux ToolkitのcreateSlice関数を使うことで、actionのtype定数やaction creatorを自動で生成してくれる!
createAppSlice.ts
code
import { asyncThunkCreator, buildCreateSlice } from "@reduxjs/toolkit";

// `buildCreateSlice` allows us to create a slice with async thunks.
export const createAppSlice = buildCreateSlice({
  creators: { asyncThunk: asyncThunkCreator },
});
buildCreateSliceを使用して、カスタマイズしたSliceを利用できるようにする
今回は非同期処理を含むアクションをディスパッチするためのThunkを用いたSliceを作成する
作成したSliceの名前はCreaateSlice
*補足:Thunkは、評価を遅延させるために式をラップする関数のこと
Redux Thunkは、このThunkの概念をReduxで利用できるようにするミドルウェア
使用例)APIリクエストを送信し、そのレスポンスに基づいてアクションをディスパッチするような場合に便利
lib/features/counter/counterSlice.ts
code
import { createAppSlice } from "@/lib/createAppSlice";
import type { AppThunk } from "@/lib/store";
import type { PayloadAction } from "@reduxjs/toolkit";
import { fetchCount } from "./counterAPI";

export interface CounterSliceState {
  value: number;
  status: "idle" | "loading" | "failed";
}

const initialState: CounterSliceState = {
  value: 0,
  status: "idle",
};

// If you are not using async thunks you can use the standalone `createSlice`.
export const counterSlice = createAppSlice({
  name: "counter",
  // `createSlice` will infer the state type from the `initialState` argument
  initialState,
  // The `reducers` field lets us define reducers and generate associated actions
  reducers: (create) => ({
    increment: create.reducer((state) => {
      // Redux Toolkit allows us to write "mutating" logic in reducers. It
      // doesn't actually mutate the state because it uses the Immer library,
      // which detects changes to a "draft state" and produces a brand new
      // immutable state based off those changes
      state.value += 1;
    }),
    decrement: create.reducer((state) => {
      state.value -= 1;
    }),
    // Use the `PayloadAction` type to declare the contents of `action.payload`
    incrementByAmount: create.reducer(
      (state, action: PayloadAction<number>) => {
        state.value += action.payload;
      },
    ),
    // The function below is called a thunk and allows us to perform async logic. It
    // can be dispatched like a regular action: `dispatch(incrementAsync(10))`. This
    // will call the thunk with the `dispatch` function as the first argument. Async
    // code can then be executed and other actions can be dispatched. Thunks are
    // typically used to make async requests.
    incrementAsync: create.asyncThunk(
      async (amount: number) => {
        const response = await fetchCount(amount);
        // The value we return becomes the `fulfilled` action payload
        return response.data;
      },
      {
        pending: (state) => {
          state.status = "loading";
        },
        fulfilled: (state, action) => {
          state.status = "idle";
          state.value += action.payload;
        },
        rejected: (state) => {
          state.status = "failed";
        },
      },
    ),
  }),
  // You can define your selectors here. These selectors receive the slice
  // state as their first argument.
  selectors: {
    selectCount: (counter) => counter.value,
    selectStatus: (counter) => counter.status,
  },
});

// Action creators are generated for each case reducer function.
export const { decrement, increment, incrementByAmount, incrementAsync } =
  counterSlice.actions;

// Selectors returned by `slice.selectors` take the root state as their first argument.
export const { selectCount, selectStatus } = counterSlice.selectors;

// We can also write thunks by hand, which may contain both sync and async logic.
// Here's an example of conditionally dispatching actions based on current state.
export const incrementIfOdd =
  (amount: number): AppThunk =>
  (dispatch, getState) => {
    const currentValue = selectCount(getState());

    if (currentValue % 2 === 1 || currentValue % 2 === -1) {
      dispatch(incrementByAmount(amount));
    }
  };
createAppSlice.tsで作成したcreateSliceを用いてcounterに関連するReduxスライスを定義
まず、スライスのパラメータにはvalue と status を持つようにインターフェースと初期値を定義
アクションとそれに対応するステート更新ロジックを定義
reducersフィールド : スライスのリデューサーを定義
increment、decrement、incrementByAmountは、同期的なリデューサー
PayloadActionは、Redux Toolkitが提供する型で、actionのペイロード(追加のデータ)の型を定義する
incrementByAmount部分の説明
actionがディスパッチされると、指定された数値がpayloadとしてreducerに渡され、その値だけステートのvalueが増加
incrementAsyncは、非同期のThunk
これは、fetchCount関数を使用してAPIリクエストを行い、レスポンスに基づいて
状態を更新(fetchCount関数に関してはcounterAPI.tsを参照)
Thunkは、pending、fulfilled、rejectedの3つのステータスを持ち、それぞれの状態に応じて状態を更新
selectors フィールド : スライスのセレクター関数を定義
これらのセレクターは、スライスの状態を受け取り、必要な情報を返す
counterSlice.actions 各リデューサーに対応するアクションクリエイターを生成
counterSlice.selectors 定義したセレクター関数を取得
incrementIfOddは手動で作成したThunkの例
selectCount(getState())で取得した現在の状態に基づいて奇数の場合にのみ、incrementByAmountアクションをディスパッチする
lib/features/quotes/quotesApiSlice.ts
RTK Queryとは?
Redux Toolkitに含まれるAdd On
データフェッチおよびキャッシュツールで、自分でロジックを書く必要がなくなる
Webアプリケーションの多くは、サーバーからデータをフェッチして、データを表示させます。また、そのデータを更新し、更新したデータをサーバーに送信し、クライアント上のキャッシュされたデータをサーバー上のデータと同期させます。
createApiとは? createSliceとの関係
createApiはcreateSliceの上に構築されているもの
createApiは、APIとのデータのやり取りを管理するためのエンドポイントを定義し、定義されたエンドポイントに対応するReact hooksを自動生成する
code
// Need to use the React-specific entry point to import `createApi`
import { createApi, fetchBaseQuery } from "@reduxjs/toolkit/query/react";

interface Quote {
  id: number;
  quote: string;
  author: string;
}

interface QuotesApiResponse {
  quotes: Quote[];
  total: number;
  skip: number;
  limit: number;
}

// Define a service using a base URL and expected endpoints
export const quotesApiSlice = createApi({
  baseQuery: fetchBaseQuery({ baseUrl: "https://dummyjson.com/quotes" }),
  reducerPath: "quotesApi",
  // Tag types are used for caching and invalidation.
  tagTypes: ["Quotes"],
  endpoints: (build) => ({
    // Supply generics for the return type (in this case `QuotesApiResponse`)
    // and the expected query argument. If there is no argument, use `void`
    // for the argument type instead.
    getQuotes: build.query<QuotesApiResponse, number>({
      query: (limit = 10) => `?limit=${limit}`,
      // `providesTags` determines which 'tag' is attached to the
      // cached data returned by the query.
      providesTags: (result, error, id) => [{ type: "Quotes", id }],
    }),
  }),
});

// Hooks are auto-generated by RTK-Query
// Same as `quotesApiSlice.endpoints.getQuotes.useQuery`
export const { useGetQuotesQuery } = quotesApiSlice;
createApiは、APIスライスを作成するための関数
fetchBaseQueryは、APIリクエストを送信するためのベースクエリ関数
Quoteインターフェース : APIから返される引用オブジェクトの型を表す
QuotesApiResponseインターフェース : APIレスポンスの型 quotesは引用オブジェクトの配列、totalは全引用数、skipはスキップした引用数、limitは取得する引用数を表す
createApi関数を使用して、quotesApiSliceを作成
この関数内では、ベースクエリ、リデューサーパス、タグタイプ、エンドポイントを指定
baseQuery : fetchBaseQuery関数を使用して、APIのベースURLを指定
reducerPathオプション : 生成されるAPIスライスのreducerが、Reduxのルートステートオブジェクト内のどのパスに配置されるかを指定するもの
つまりreducerPath: "quotesApi"と指定することで、このAPIスライスによって管理されるステートは、Reduxのルートステート内のstate.quotesApiというパスに配置される
tagTypes : キャッシュと無効化に使用するタグタイプを指定している
getQuotesエンドポイントが'Quotes'タグを提供することを指定
endpoints : APIエンドポイントを定義
ここでは、getQuotesクエリを定義
getQuotesクエリは、limitパラメータを受け取り、APIリクエストのクエリ文字列を生成
戻り値の型はQuotesApiResponse、クエリ引数の型はnumber
providesTags : クエリの結果にタグを付けるために使用
ここでは、"Quotes"タグとidを使用
useGetQuotesQueryフックを自動生成している
このフックは、コンポーネント内で使用して、APIからデータを取得することが可能
lib/hooks.ts
code
// This file serves as a central hub for re-exporting pre-typed Redux hooks.
import { useDispatch, useSelector, useStore } from "react-redux";
import type { AppDispatch, AppStore, RootState } from "./store";

// Use throughout your app instead of plain `useDispatch` and `useSelector`
export const useAppDispatch = useDispatch.withTypes<AppDispatch>();
export const useAppSelector = useSelector.withTypes<RootState>();
export const useAppStore = useStore.withTypes<AppStore>();
このファイルは、型付きのReduxフックを再エクスポートするための中心的なハブとして機能している
hooks.tsファイルの主な目的は、TypeScriptを使用する際に型安全性を提供すること
JavaScriptで開発している場合、このファイルは不要
JavaScriptにはTypeScriptのような静的型付けがないため、useDispatch、useSelector、useStoreをそのまま使用できる
react-reduxからuseDispatch、useSelector、useStoreをインポート
./storeからAppDispatch、AppStore、RootStateの型をインポート
useAppDispatchは、useDispatchをAppDispatch型で型付けしたもの
useAppSelectorは、useSelectorをRootState型で型付けしたもの
useAppStoreは、useStoreをAppStore型で型付けしたもの
lib/features/counter/counterAPI.ts
code
// A mock function to mimic making an async request for data
export const fetchCount = async (amount = 1) => {
  const response = await fetch("http://localhost:3000/api/counter", {
    method: "POST",
    headers: { "Content-Type": "application/json" },
    body: JSON.stringify({ amount }),
  });
  const result: { data: number } = await response.json();

  return result;
};
カウンターに関連するAPIリクエストを行うためのモックファイル
fetchCount 関数は、指定された amount の値を使用して /api/counter エンドポイントにPOSTリクエストを送信し、レスポンスを返す
fetchCount関数は、amountという引数を受け取る(デフォルト値は1)
関数はasyncキーワードを使用して定義されているため、非同期的に実行される
app/api/counter/route.ts
code
import type { NextRequest } from "next/server";
import { NextResponse } from "next/server";

interface Context {
  params: undefined;
}

export async function POST(request: NextRequest, context: Context) {
  const body: { amount: number } = await request.json();
  const { amount = 1 } = body;

  // simulate IO latency
  await new Promise((resolve) => setTimeout(resolve, 500));

  return NextResponse.json({ data: amount });
}
Next.jsのAPIルートを定義しているファイル
NextRequestとNextResponseをインポート
Contextインターフェースを定義し、paramsプロパティを持たせる
POST関数を定義し、NextRequestとContextを引数として受け取る
request.json()を使用して、リクエストボディからJSONデータを取得
amountプロパティをリクエストボディから取得し、デフォルト値として1を設定
setTimeoutを使用して、IO遅延をシミュレートしています。500ミリ秒の遅延を導入
NextResponse.json()を使用して、amountの値をJSONレスポンスとして返す
つまり
route.tsファイルでは、/api/counterエンドポイントに対するPOSTリクエストを処理
fetchを使用してhttp://localhost:3000/api/counterにPOSTリクエストを送信し、amountの値を設定
counterSlice.ts内で、fetchCount関数を呼び出し、返された値を使用してステートを更新