はじめに
今回はNatML for UnityというものをUnityに導入してハンドトラッキングのモデルを動かしていきたいと思います。
また、この記事内の情報やコードは株式会社サイバーエージェントの山本優威さんの記事を参考にさせていただきました。(引用の許可は取りました。)
山本優威さんの記事:https://qiita.com/Yui_Yamamoto/items/bbb023d2a7c4c4832d46
今回の動作環境は
- Windows10
- Unity 2021.3.15f1
- NatML 1.0.9
です。
よろしくお願いします。
NatML for Unityとは
NatML for Unityの公式ページに飛ぶと
NatML is a cross-platform machine learning runtime for Unity Engine. It allows you to run ML models in your app, opening up possibilities in your user experience.
(NatML は、Unity Engine 用のクロスプラットフォームの機械学習ランタイムです。アプリで ML モデルを実行できるため、ユーザー エクスペリエンスの可能性が広がります。)
※ユーザーエクスペリエンス(UX) : 製品やサービスなどを利用して得られる「ユーザー体験」
と書かれています。
NatMLの使い方次第でUXの可能性が広げることが出来るらしいです。
先ほどの公式ページのリンク先下部に書かれている通りNatMLは様々な特徴があるらしいです。
いろいろ書かれているので日本語訳をして読んでみてください。
簡単に一言でまとめると
簡単に導入できるし処理も早いよ
って感じです。
導入
先ほどの公式ページのGetting Startedを読み進めると行けるらしいですがかみ砕いて説明していきます。
1.新規で空のプロジェクトを作成
Unityのバージョンは前述したとおりUnity 2021.3.15f1です。
3dでも2dでもどちらでもいいです。
2.Packagesフォルダの中にあるmanifest.jsonの"scopedRegistries" と "dependencies”を書きかえる
先ほど作ったプロジェクトのエクスプローラーを開き、Packagesフォルダの中にあるmanifest.jsonを開いて以下を追記します。
manifest.json
{
  "scopedRegistries": [
   {
    "name": "NatML",
    "url": "https://registry.npmjs.com",
    "scopes": ["ai.natml"]
   }
  ],
  "dependencies": {
    "ai.natml.natml": "1.0.19",
    ...
  }
}
上のコードを追記したらmanifest.jsonがこうなるはずです。
manifest.json
{
  "scopedRegistries": [
   {
    "name": "NatML",
    "url": "https://registry.npmjs.com",
    "scopes": ["ai.natml"]
   }
  ],
  "dependencies": {
    "com.unity.collab-proxy": "1.15.15",
    "com.unity.feature.development": "1.0.1",
    "com.unity.ide.rider": "3.0.13",
    "com.unity.ide.visualstudio": "2.0.14",
    "com.unity.ide.vscode": "1.2.5",
    "com.unity.test-framework": "1.1.31",
    "com.unity.textmeshpro": "3.0.6",
    "com.unity.timeline": "1.6.4",
    "com.unity.ugui": "1.0.0",
    "com.unity.visualscripting": "1.7.6",
    "com.unity.modules.ai": "1.0.0",
    "com.unity.modules.androidjni": "1.0.0",
    "com.unity.modules.animation": "1.0.0",
    "com.unity.modules.assetbundle": "1.0.0",
    "com.unity.modules.audio": "1.0.0",
    "com.unity.modules.cloth": "1.0.0",
    "com.unity.modules.director": "1.0.0",
    "com.unity.modules.imageconversion": "1.0.0",
    "com.unity.modules.imgui": "1.0.0",
    "com.unity.modules.jsonserialize": "1.0.0",
    "com.unity.modules.particlesystem": "1.0.0",
    "com.unity.modules.physics": "1.0.0",
    "com.unity.modules.physics2d": "1.0.0",
    "com.unity.modules.screencapture": "1.0.0",
    "com.unity.modules.terrain": "1.0.0",
    "com.unity.modules.terrainphysics": "1.0.0",
    "com.unity.modules.tilemap": "1.0.0",
    "com.unity.modules.ui": "1.0.0",
    "com.unity.modules.uielements": "1.0.0",
    "com.unity.modules.umbra": "1.0.0",
    "com.unity.modules.unityanalytics": "1.0.0",
    "com.unity.modules.unitywebrequest": "1.0.0",
    "com.unity.modules.unitywebrequestassetbundle": "1.0.0",
    "com.unity.modules.unitywebrequestaudio": "1.0.0",
    "com.unity.modules.unitywebrequesttexture": "1.0.0",
    "com.unity.modules.unitywebrequestwww": "1.0.0",
    "com.unity.modules.vehicles": "1.0.0",
    "com.unity.modules.video": "1.0.0",
    "com.unity.modules.vr": "1.0.0",
    "com.unity.modules.wind": "1.0.0",
    "com.unity.modules.xr": "1.0.0",
    "ai.natml.natml": "1.0.19"
  }
}
Unityに戻るとなんかメッセージがでてきますがReadMoreでもキャンセルでもどっちでもいいです。
ProjectSettingsが勝手に開かれますが(開かれない場合は開いてください)以下のようにNatMLが表示されていたら大丈夫です。
※もしここで
ArgumentException: Illegal byte sequence encounted in the input.
みたいなエラーが起きてProjectSettingsに何も表示されなかったりProjectSettingsのウィンドウが閉じれないとかが起こったら場合はこちらを読んでみてください。私はこれで躓きました…。
ProjectウィンドウのPackages以下にも
このようにNatMLが入っていることがわかります。
これで導入は終わりです。次はモデルを動かすための手順を書いていきます。
NatML Hubのモデルを動かす
NatMLでは自作のモデルを動かすことが出来ます。
が、今回はNatML側が用意しているモデルを使っていきます。NatML側で用意されているモデルを使用したい場合はNatML Hubから導入方法をよく確認しましょう。
1.UnityとNatML Hubを連携させる
NatML Hubのモデルを使用するにはアクセスキーを取得する必要があるので、**NatML HubのHP**からサインアップしアカウントを登録します。
右上のLoginからログインページに飛びます。
アカウントの作成に成功したら先ほどの右上のLoginのところが自分のアカウント名になっているので(なっていない場合は再ログインしてみてください)そこを押し、「User > Profile」からAccess Keyが確認できるのでコピーします。
そしたらProjectSettingsのNatMLの欄を開き、Access Keyを入力します。
これでモデルを導入できるようになりました。
2.モデルを動かすためのコードを書く
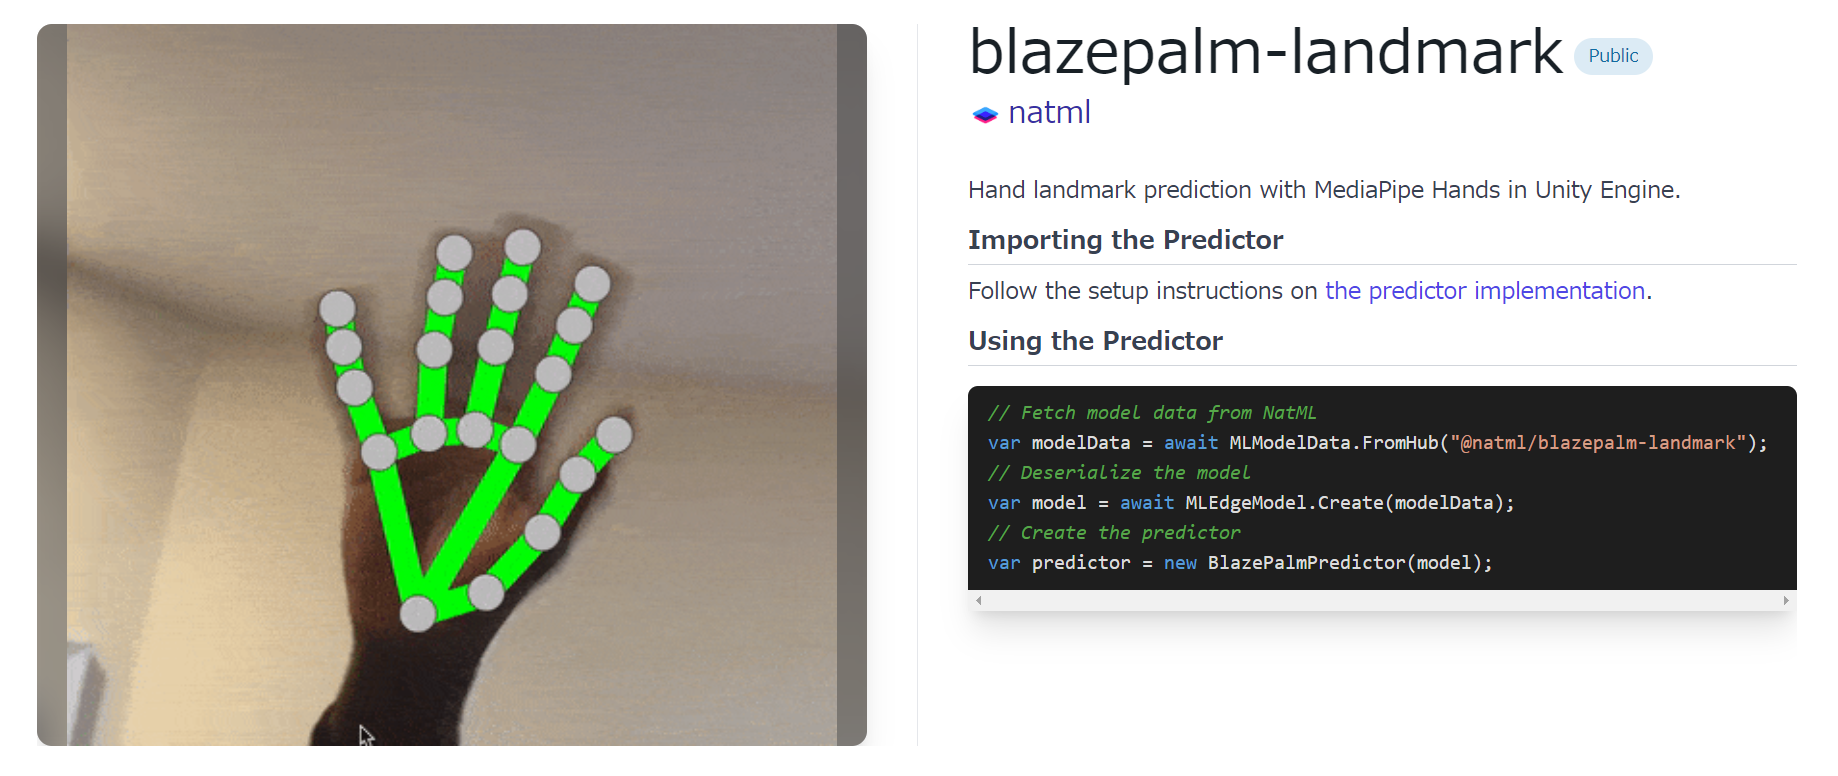
今回はハンドトラッキングが可能になるVisionの**「blazepalm-landmark」**のモデルを動かしていきます。
上画像の
the predictor implementation.
からGithubのページに飛ぶことが出来るのでそちらを参考に導入していきます。
BlazePalmのREADME.mdを確認してみると対応しているUnityバージョンと環境、Predictor導入のリンクがあります。今回は特にバージョンや環境に問題はなさそうなのでこのまま進みます。
Predictor導入のリンクを見るとmanifest.jsonに追加するものがあるのでそれを確認し、追加します。
manifest.json
{
  "dependencies": {
    "ai.natml.vision.blazepalm": "1.0.0"
  }
}
そしたら以下のスクリプトを作成していくのですがおそらく何個かエラーを吐きます。
その対処法はこの後述べます。
まずTestHandTrackingクラス
using UnityEngine;
using NatML.Devices;
using NatML.Devices.Outputs;
using NatML.Vision;
using NatML.Visualizers;

namespace NatML
{
    [MLModelDataEmbed("@natml/blazepalm-detector"), MLModelDataEmbed("@natml/blazepalm-landmark")]
    public class TestHandTracking : MonoBehaviour
    {
        /// <summary>
        /// Visualizer
        /// </summary>
        [Header(@"UI"), SerializeField]
        private BlazePalmVisualizer visualizer;

        /// <summary>
        /// Pipeline
        /// </summary>
        private BlazePalmPipeline pipeline;

        /// <summary>
        /// CameraDevice
        /// </summary>
        private CameraDevice cameraDevice;

        /// <summary>
        /// CameraDeviceで写したものをTextureに変換したもの
        /// </summary>
        private TextureOutput previewTextureOutput;

        private void OnDisable() => pipeline?.Dispose();

        private async void Start()
        {
            // カメラが許可されているか
            var permissionStatus = await MediaDeviceQuery.RequestPermissions<CameraDevice>();

            // 許可されていない場合はreturn
            if (permissionStatus != PermissionStatus.Authorized) return;

            // カメラ取得
            var query = new MediaDeviceQuery(MediaDeviceCriteria.CameraDevice);
            cameraDevice = query.current as CameraDevice;

            // カメラで写したものをTextureに変換
            previewTextureOutput = new TextureOutput();
            cameraDevice.StartRunning(previewTextureOutput);
            var previewTexture = await previewTextureOutput;
            visualizer.image = previewTexture;

            // BlazePalm detectorとpredictorをNatML Hubから取得しPipelineの作成
            var detectorModelData = await MLModelData.FromHub("@natml/blazepalm-detector");
            var predictorModelData = await MLModelData.FromHub("@natml/blazepalm-landmark");
            pipeline = new BlazePalmPipeline(detectorModelData, predictorModelData);
        }

        private void Update()
        {
            // Pipelineが作成されているか
            if (pipeline == null) return;

            // カメラで写している情報から手を予測
            var hands = pipeline.Predict(previewTextureOutput.texture);

            // 予測した情報を描画
            visualizer.Render(hands);
        }
    }
}
次にBlazePalmVisualizerクラス
using System.Collections.Generic;
using System.Linq;
using UnityEngine;
using UnityEngine.UI;
using UnityEngine.UI.Extensions;
using NatML.Vision;

namespace NatML.Visualizers
{
    [RequireComponent(typeof(RawImage), typeof(AspectRatioFitter))]
    public sealed class BlazePalmVisualizer : MonoBehaviour
    {
        [SerializeField]
        private Image keypoint;

        [SerializeField]
        private UILineRenderer bones;

        private RawImage rawImage;
        private AspectRatioFitter aspectFitter;
        private readonly List<GameObject> currentHands = new List<GameObject>();

        public Texture2D image
        {
            get => rawImage.texture as Texture2D;
            set
            {
                rawImage.texture = value;
                aspectFitter.aspectRatio = (float)value.width / value.height;
            }
        }

        void Awake()
        {
            rawImage = GetComponent<RawImage>();
            aspectFitter = GetComponent<AspectRatioFitter>();
        }

        /// <summary>
        /// KeyPointの追加
        /// </summary>
        private void AddKeypoint(Vector2 point)
        {
            // KeyPointの生成
            var prefab = Instantiate(keypoint, transform);
            prefab.gameObject.SetActive(true);
            // pointの座標にKeyPointを移動
            var prefabTransform = prefab.transform as RectTransform;
            var imageTransform = rawImage.transform as RectTransform;

            prefabTransform.anchorMin = 0.5f * Vector2.one;
            prefabTransform.anchorMax = 0.5f * Vector2.one;
            prefabTransform.pivot = 0.5f * Vector2.one;
            prefabTransform.anchoredPosition = Rect.NormalizedToPoint(imageTransform.rect, point);

            currentHands.Add(prefab.gameObject);
        }

        /// <summary>
        /// KeyPointとboneの描画
        /// </summary>
        public void Render(params BlazePalmPredictor.Hand[] hands)
        {
            // 現在のKeyPoint削除
            foreach (var t in currentHands)
            {
                Destroy(t.gameObject);
            }

            currentHands.Clear();

            // 描画
            var segments = new List<Vector2[]>();
            foreach (var hand in hands)
            {
                // Keypoints
                foreach (var p in hand.keypoints)
                {
                    AddKeypoint((Vector2)p);
                }

                // Bones
                segments.AddRange(new List<Vector3[]>
                {
                    new[]
                    {
                        hand.keypoints.wrist, hand.keypoints.thumbCMC, hand.keypoints.thumbMCP, hand.keypoints.thumbIP,
                        hand.keypoints.thumbTip
                    },
                    new[]
                    {
                        hand.keypoints.wrist, hand.keypoints.indexMCP, hand.keypoints.indexPIP, hand.keypoints.indexDIP,
                        hand.keypoints.indexTip
                    },
                    new[]
                    {
                        hand.keypoints.middleMCP, hand.keypoints.middlePIP, hand.keypoints.middleDIP,
                        hand.keypoints.middleTip
                    },
                    new[]
                    {
                        hand.keypoints.ringMCP, hand.keypoints.ringPIP, hand.keypoints.ringDIP, hand.keypoints.ringTip
                    },
                    new[]
                    {
                        hand.keypoints.wrist, hand.keypoints.pinkyMCP, hand.keypoints.pinkyPIP, hand.keypoints.pinkyDIP,
                        hand.keypoints.pinkyTip
                    },
                    new[]
                    {
                        hand.keypoints.indexMCP, hand.keypoints.middleMCP, hand.keypoints.ringMCP,
                        hand.keypoints.pinkyMCP
                    },
                }.Select(points => points.Select(p => GetFixedPoint(p)).ToArray()));
            }

            bones.Points = null;
            bones.Segments = segments;
        }
        private Vector2 GetFixedPoint(Vector2 vec)
        {
            return new Vector2(vec.x * Screen.width - Screen.width / 2, vec.y * Screen.height - Screen.height / 2);
        }
    }
}
おそらくエラーをはいていると思います。
はいてない方はここは飛ばして次の3に進んでください。
~エラーの解決方法~
またmanifest.jsonに追加をします。
"dependencies": {
    "ai.natml.natdevice": "1.3.1"
  }
これでTestHandTrackingクラスのエラーが消えます。
次にUILineRendererを使えるようにパッケージをダウンロードします。
https://bitbucket.org/UnityUIExtensions/unity-ui-extensions/downloads/
こちらのサイトに飛び、
上から二つめの
UnityUIExtensions-2019-6.unitypackage
をダウンロードします。
ダウンロードが完了したらUnityにインポートします。
これでUILineRendererが使えるようになったのでBlazePalmVisualizerクラスのエラーが消えます。
これですべてのエラーが消えたと思います。
3.Unityで準備する
最後にUnityのHierarchyをいじっていきます。
空のオブジェクト(TrackingManager)を作成し、TestHandTrackingクラスをアタッチします。
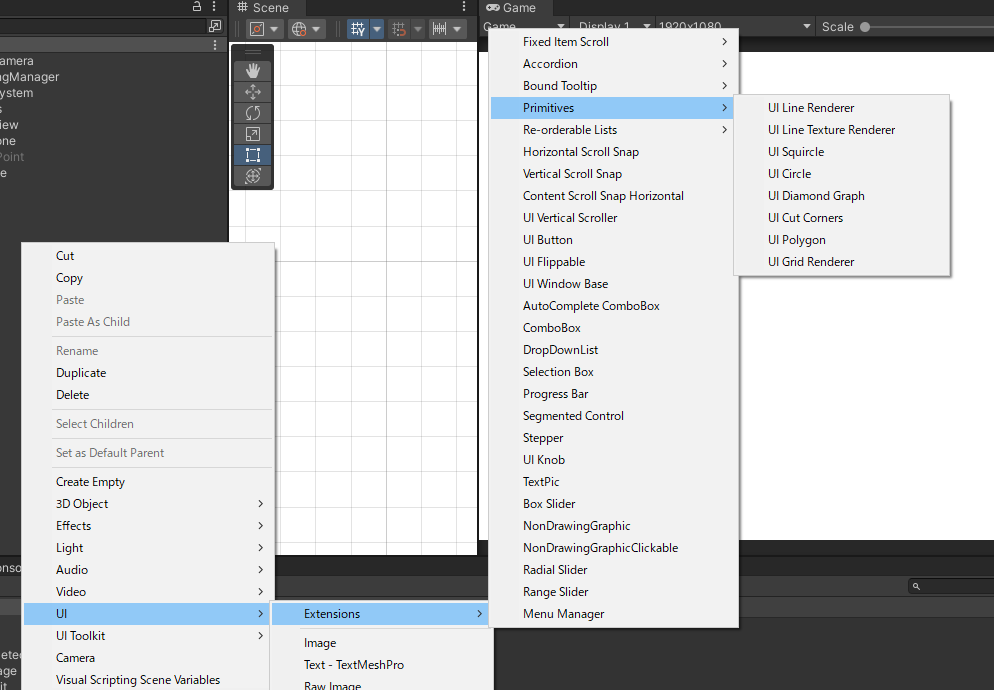
次にRawImage(Preview)を作成し、BlazePalmVisualizerクラスをアタッチし、その子オブジェクトにUILineRenderer(Bone)を作成します。
UILineRendererはここにあります。
そしたらCanvasの中にImage(KeyPoint)を作成し、非表示にしておきます。
そうするとHierarchyがこうなっているはずです。
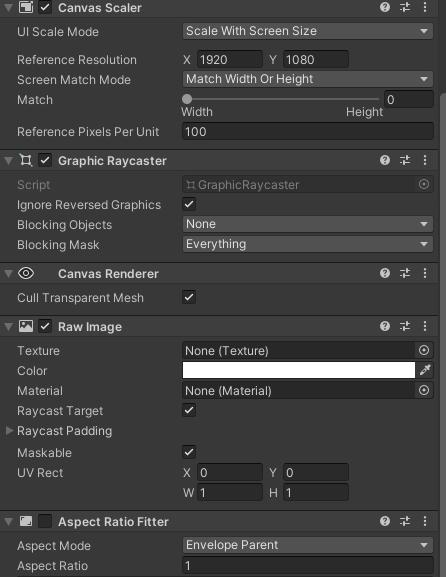
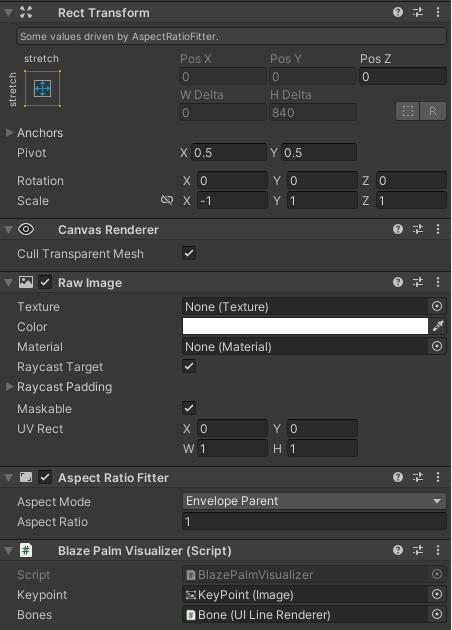
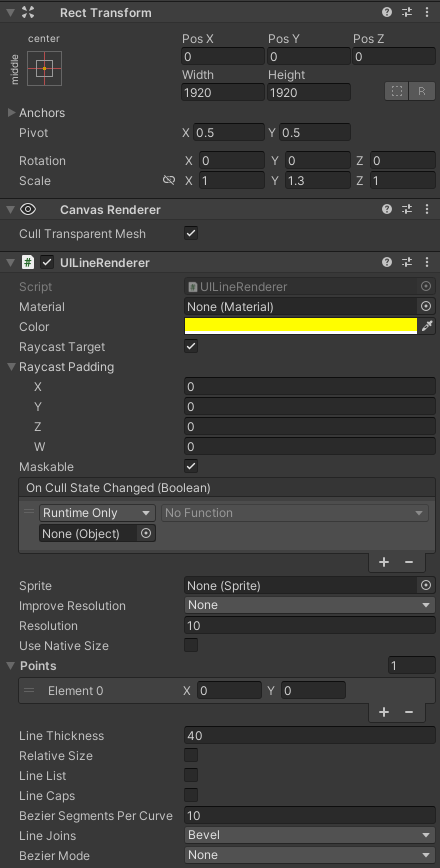
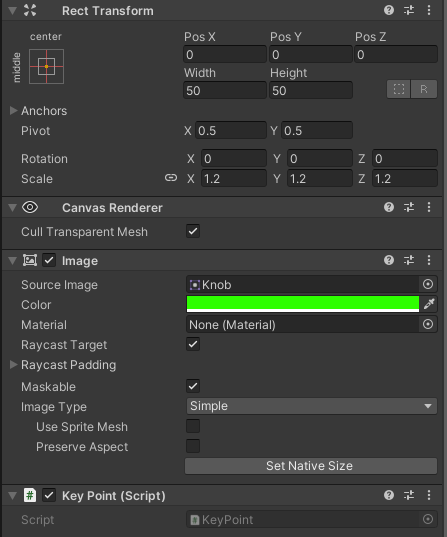
Canvas内オブジェクトのInspectorを一応お見せしますがそれぞれでお好みの設定(KeyPointの大きさとか色とか)をしてください。
Canvas
Preview
Bone
KeyPoint
こんな感じで設定してゲームを開始してみると、
しっかりとハンドトラッキングが出来ていることがわかります。
これでNatML for Unityの導入及びモデルの導入の完了です。
最後に
今回NatML for Unityを導入していろいろできることが広がるなと思いました。
これで仮想空間(?)を利用したゲームが作れたらめちゃくちゃ面白そうだなと思っていろいろ今試しています。
また、これを導入していく過程で今まで触れてこなかった技術領域の話を聞くことが出来てすごく面白かったです。
今回これを導入するうえでアドバイスやヘルプをしてくれた方にとても感謝しています。
ありがとうございました。
以上です。最後まで見ていただきありがとうございました!!


