最近Boostの導入を別PCでしたのですが、VS2019での記事を見つけなかったので今回はBoostの導入記事を書こうかと思います。
Boostって何?
Boostは簡単に言えば先駆的な開発者がよく使っているライブラリですね。どんな機能あるんだ?と言われるとまあたくさんあります。例えばxmlパーサー、乱数、jsonなどほんとにたくさんあります。おそらく今まで作ってきた関数や機能がBoostに存在している可能性も多くあります。なのでぜひ導入してみてください。
導入方法
まずは公式のダウンロードページに飛びます。
Boost
ここに行ってBoostをダウンロードします。
windows版のzipファイルをインストールしましょう。(別に解凍できれば7zなどの別のでもいいです。)
もし旧バージョンが欲しい場合はversionhistoryから欲しいバージョンを取ってきましょう。
深刻な問題がない限りは最新で大丈夫です。

インストールしたら解凍しましょう。
できればCドライブ直下かライブラリをまとめているフォルダがあればそこに入れることお勧めします。
この後、フルパスを入力するとき長いフルパスだと面倒だからです。
この記事ではC直下の時のフルパスで解説します。
(ちなみに解凍時間はそこそこかかります)
そしたらコマンドプロンプト(この後cmdと記述します)を管理者として起動します。
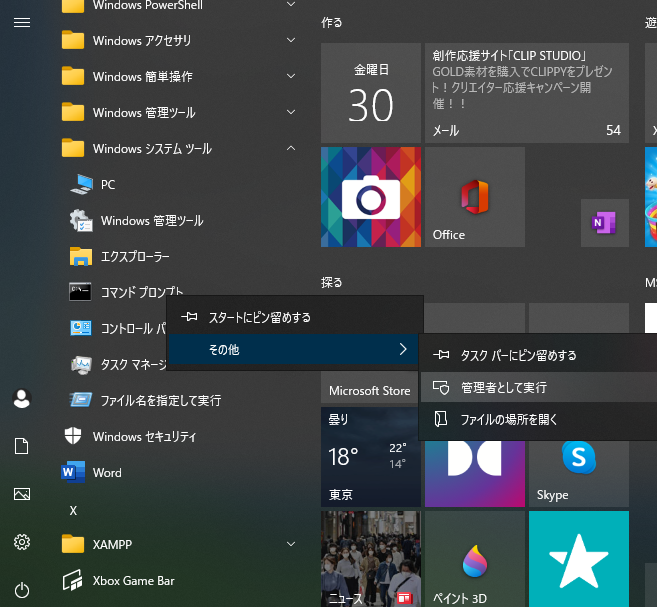
cmdを起動したらこちらのコマンドを記入してください。
cd C:\boost_1_76_0
まずはディレクトリを置いているフォルダに合わせます。
(バージョンによってファイル名が違う場合があります。ファイルパスは自身がインストールしたバージョンに合わせておいてください。)
そしたらbootstrap.batと入力し、バッチファイルを起動してください。こちらでビルドをします。
bootstrap.bat
割とすぐ終わります。
そしたらb2.exeが制作されていると思います。
C:\boost_1_76_0\tools\build\src\engine>copy /b .\b2.exe .\bjam.exe
        1 個のファイルをコピーしました。

Generating Boost.Build configuration in project-config.jam for msvc...

Bootstrapping is done. To build, run:

    .\b2

To adjust configuration, edit 'project-config.jam'.
Further information:

    - Command line help:
    .\b2 --help

    - Getting started guide:
    http://boost.org/more/getting_started/windows.html

    - Boost.Build documentation:
    http://www.boost.org/build/
こんな感じになれば大丈夫だと思います。
b2.exeが確認できたら次にこのコマンドをcmdに入れます。
x86
b2.exe toolset=msvc-14.1 link=static runtime-link=static,shared --build-dir=build/x86 address-model=32 -j5 install --includedir=C:\boost_1_76_0\include --libdir=C:\boost_1_76_0\stage\lib\x86
x64
b2.exe toolset=msvc-14.1 link=static runtime-link=static,shared --build-dir=build/x64 address-model=64 -j5 install --includedir=C:\boost_1_76_0\include --libdir=C:\boost_1_76_0\stage\lib\x64
こちらもインストールしたバージョンによって一部変更してください。
こちらはライブラリが制作されます。
こちらもそこそこ時間がかかります。
必要なほうのライブラリを制作してください。
わからないって人はどっちともしといて損はないのでやっておいてください。
ライブラリを制作したらcmdは終了しても大丈夫です。
VS2019の設定
ここからの設定はプロジェクトを毎回作った際に設定しないといけませんので気を付けてください。
そしたらとりあえず何か適当なコンソールアプリケーションを制作してください。
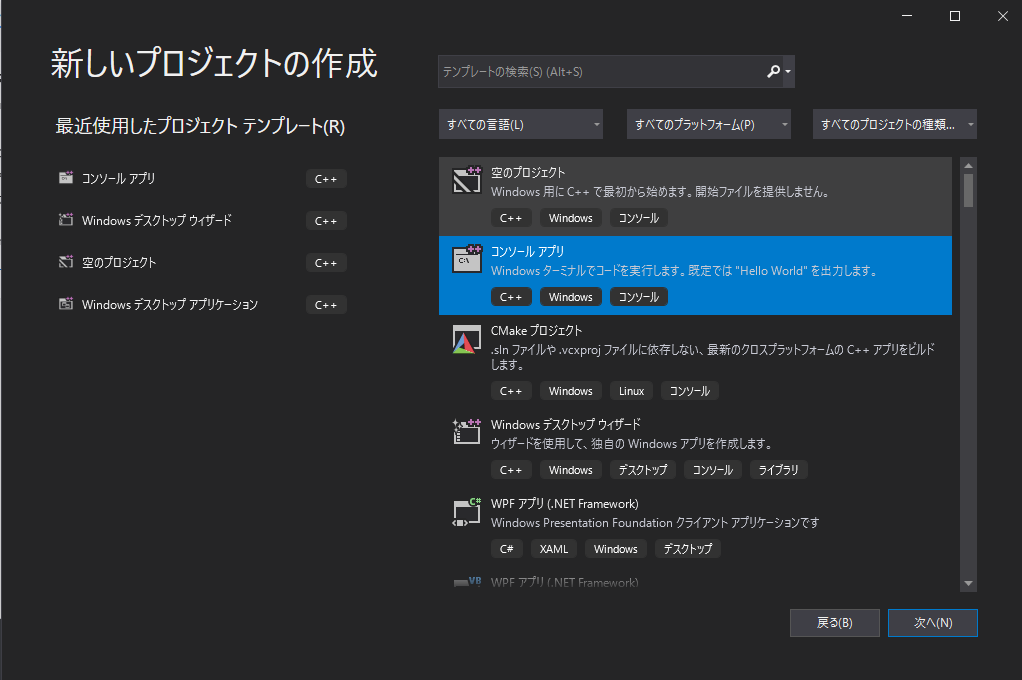
そしたら次はプロジェクトのプロパティを設定します。
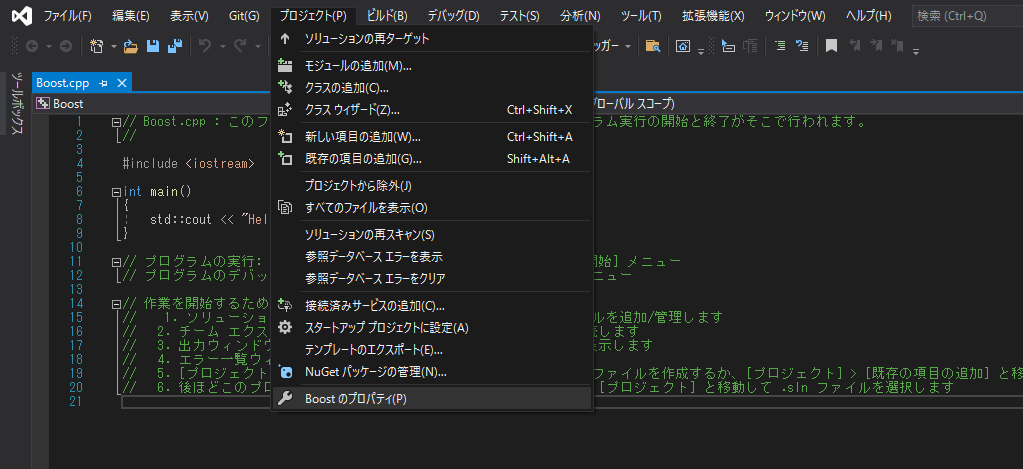
そしたらプロパティにincludeと使用するライブラリを設定していきます。
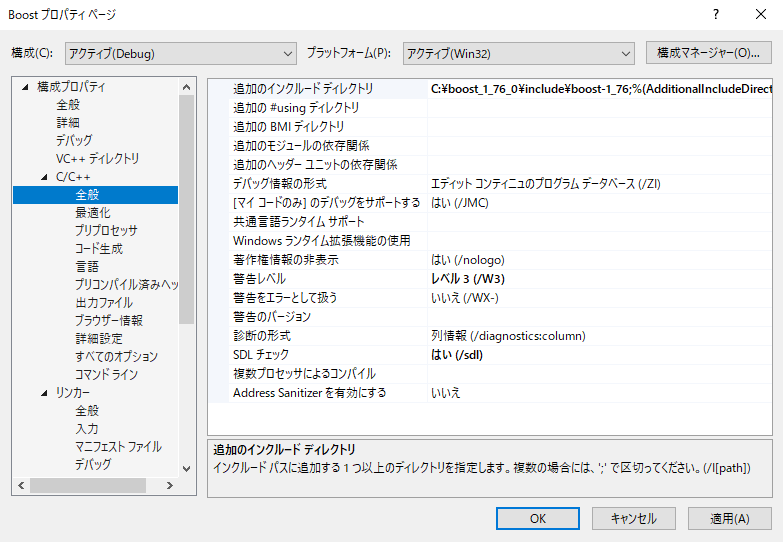
c++の全般の追加のincludeライブラリにこちらを記入してください。
C:\boost_1_76_0\include\boost-1_76
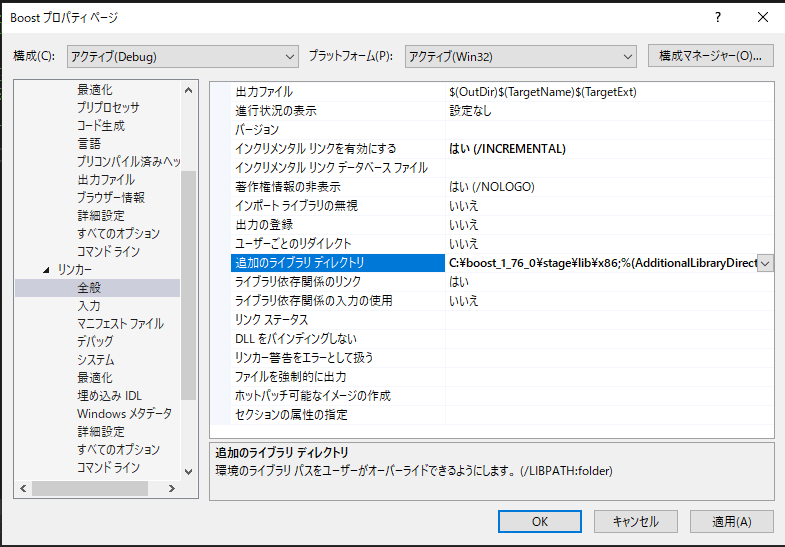
最後にリンカーの全般の追加のライブラリディレクトリにこちらを入力してください。
C:\boost_1_76_0\stage\lib\x86
これができれば設定は終了です。
試しにtestコードを記入しましょう。
testcode1
# include <iostream>
# include <boost/version.hpp>

int main() {
    std::cout << "boostバージョン : " << BOOST_VERSION << "\n";
    std::cout << "boostライブラリバージョン : " << BOOST_LIB_VERSION << "\n";
    return 0;
}
結果
boostバージョン:107600
boostライブラリバージョン:1_76
このような感じでバージョンが表示されると思います。
追加でもう一つ動かしてみましょう。
testcode2
# include <vector>
# include <string>
# include <boost/property_tree/ptree.hpp>
# include <boost/property_tree/xml_parser.hpp>
# include <boost/foreach.hpp>

struct Boost_Test {
    std::string name1;
    std::string name2;
};

int main()
{
    std::vector<Boost_Test> books;
    books.reserve(2);
    Boost_Test test;
    test.name1 = "BoostTest1";
    test.name2 = "100";
    books.push_back(test);
    test.name1 = "BoostTest2";
    test.name2 = "200";
    books.push_back(test);

    using boost::property_tree::ptree;

    ptree pt;
    BOOST_FOREACH(const Boost_Test & data, books) {
        ptree& child = pt.add("list.data", "");
        child.put("<xmlattr>.name1", data.name1);
        child.put("<xmlattr>.name2", data.name2);
    }

    using namespace boost::property_tree::xml_parser;
    const int indent = 2;
    write_xml("test.xml", pt, std::locale(),
        xml_writer_make_settings<std::string>(' ', indent));
}
結果<test.xml>
<?xml version="1.0" encoding="utf-8"?>
<list>
  <data name1="BoostTest1" name2="100"/>
  <data name1="BoostTest2" name2="200"/>
</list>
実行したらtest.xmlがフォルダに出力され上のようなデータが表示されます。
いわゆるxmlパーサーを使って書き出しをしてみました。
このような形で実装できますので是非導入してみてください。
