前置き
- FCMコンソールからのPush通知が実装済みからの追加要件という内容です。
- 今回の記事では送信方法としてPostmanを使用しております。
- なるべく細かく書くつもりですが、後半になるにつれ適当になる可能性があります。
概要
iOS10から追加された Notification Service Extension を利用する。
これは「送信されたペイロード」 -> 「端末に表示」 までの間の部分をあれこれ出来る。
そのため表示される前に画像を読み込んで、それを表示させるといった流れを行える。
目次
- Notification Service Extension追加
- Notification Service Extension用のProvisioningファイルを用意
- Notification Service Extension編集
- 送信
Notification Service Extension追加
- XcodeメニューバーのFile -> New -> Target
-
Notification Service Extensionを選択 -> Next

- Product Nameを入力(ex: NotificationService) -> Finish
「MainProjectのBundleIdentifier.上記ProductName」という形式のBundleIdentifierとなる。
言わずともこれは後述するProvisioningファイルのBundle IDとなる。
- ダイアログが出たらActivateを選択
-
NotificationServiceExtensionディレクトリ配下にNotificationService.swiftとInfo.plistがあるものが追加されていればOK
NotificationService.swiftには下記2つのメソッドが既存で作成されている。
override func didReceive(_ request: UNNotificationRequest, withContentHandler contentHandler: @escaping (UNNotificationContent) -> Void) {
    ///省略
}
override func serviceExtensionTimeWillExpire() {
    ///省略
}
Notification Service Extension用のProvisioningファイルを用意
MainAppと異なるBundleIdentifierをもつTargetが追加されたため、
これに対してProvisioningファイルを用意する必要がある。
- AppleDeveloper SignIn
-
Certificates, Identifiers & Profiles->Identifiers-> 「+」押下

- App IDs 選択 -> Continue
- 各項目入力 -> 作成
Description: NotificationServiceExtension
Bundle ID: 「MainProjectのBundleIdentifier.先程のProductName」
※コピーするとエラーが出ることがあるようで、その場合は手動入力をする必要がある。
-
Certificates, Identifiers & Profiles->Profiles-> 「+」押下 -
App Store-> 先ほど作成したApp IDs選択 -> メインと同じCertificateファイルで作成 - 作成すると既存Provisioningファイルが無効になるため Edit -> Save をし更新する。
- xcodeに戻る。
- XcodeメニューバーのXcode -> Preferences -> Download Manual Profiles より先ほど作成したProvisioningファイルをDL
- 各TARGETSに適切なProvisioningProfileを選択

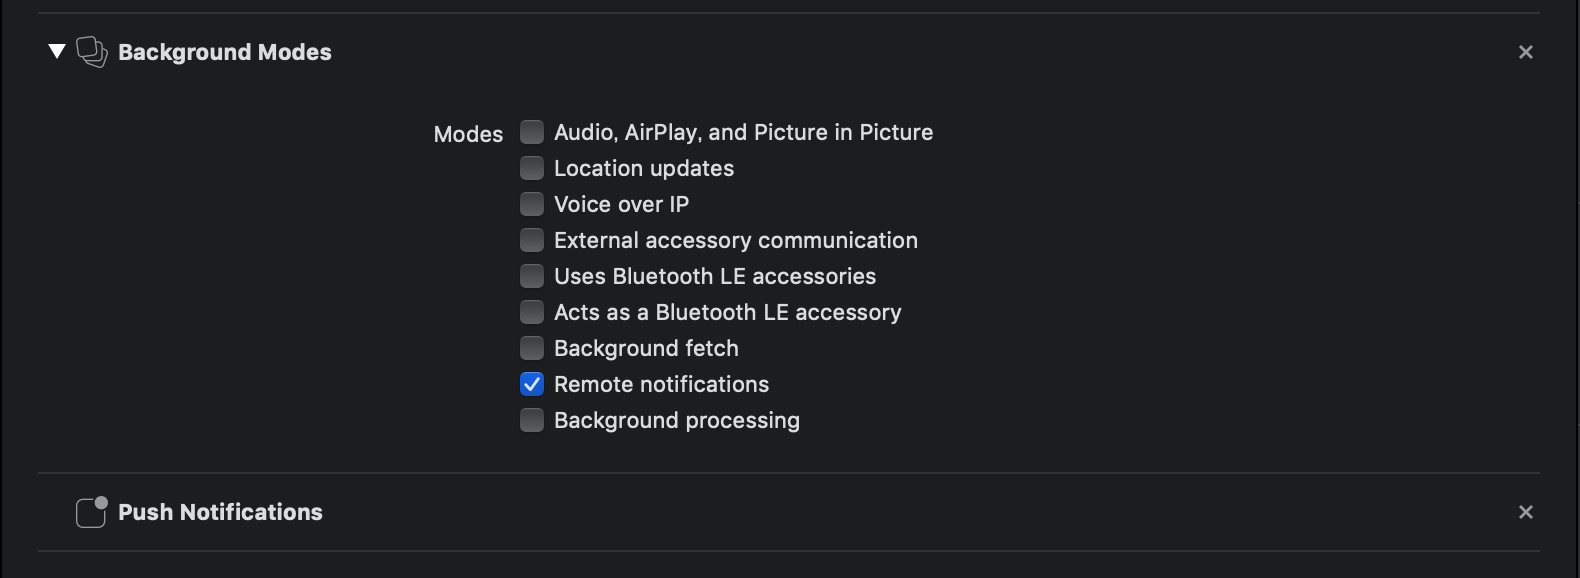
- MainAppの
Signing & CapabilitiesにBackground Modesを追加
Notification Service Extension編集
override func didReceive(_ request: UNNotificationRequest, withContentHandler contentHandler: @escaping (UNNotificationContent) -> Void) {

    self.contentHandler = contentHandler
    bestAttemptContent = (request.content.mutableCopy() as? UNMutableNotificationContent)

    self.realmWrite(request: request, bestAttemptContent: bestAttemptContent)

    if let imageUrl = request.content.userInfo["image_url"] as? String {
        let session = URLSession(configuration: URLSessionConfiguration.default)
        let task = session.dataTask(with: URL(string: imageUrl)!, completionHandler: {[weak self](data, response, error) in
            do {
                if let writePath = NSURL(fileURLWithPath:NSTemporaryDirectory())
                    .appendingPathComponent("tmp.jpg") {
                    try data?.write(to: writePath)
                    let identifier = "hogehoge"

                    if let bestAttemptContent = self?.bestAttemptContent {
                        let attachment = try UNNotificationAttachment(identifier: identifier, url: writePath, options: nil)
                        bestAttemptContent.attachments = [attachment]
                        contentHandler(bestAttemptContent)
                    }
                } else {
                    if let bestAttemptContent = self?.bestAttemptContent {
                        contentHandler(bestAttemptContent)
                    }
                }
            } catch let error as NSError {
                print(error.localizedDescription)

                if let bestAttemptContent = self?.bestAttemptContent {
                    contentHandler(bestAttemptContent)
                }
            }
        })
        task.resume()
    } else {
        if let bestAttemptContent = self.bestAttemptContent {
            contentHandler(bestAttemptContent)
        }
    }
}

override func serviceExtensionTimeWillExpire() {
    if let contentHandler = contentHandler, let bestAttemptContent =  bestAttemptContent {
        // 実行時間をすぎた場合の救済
        contentHandler(bestAttemptContent)
    }
}
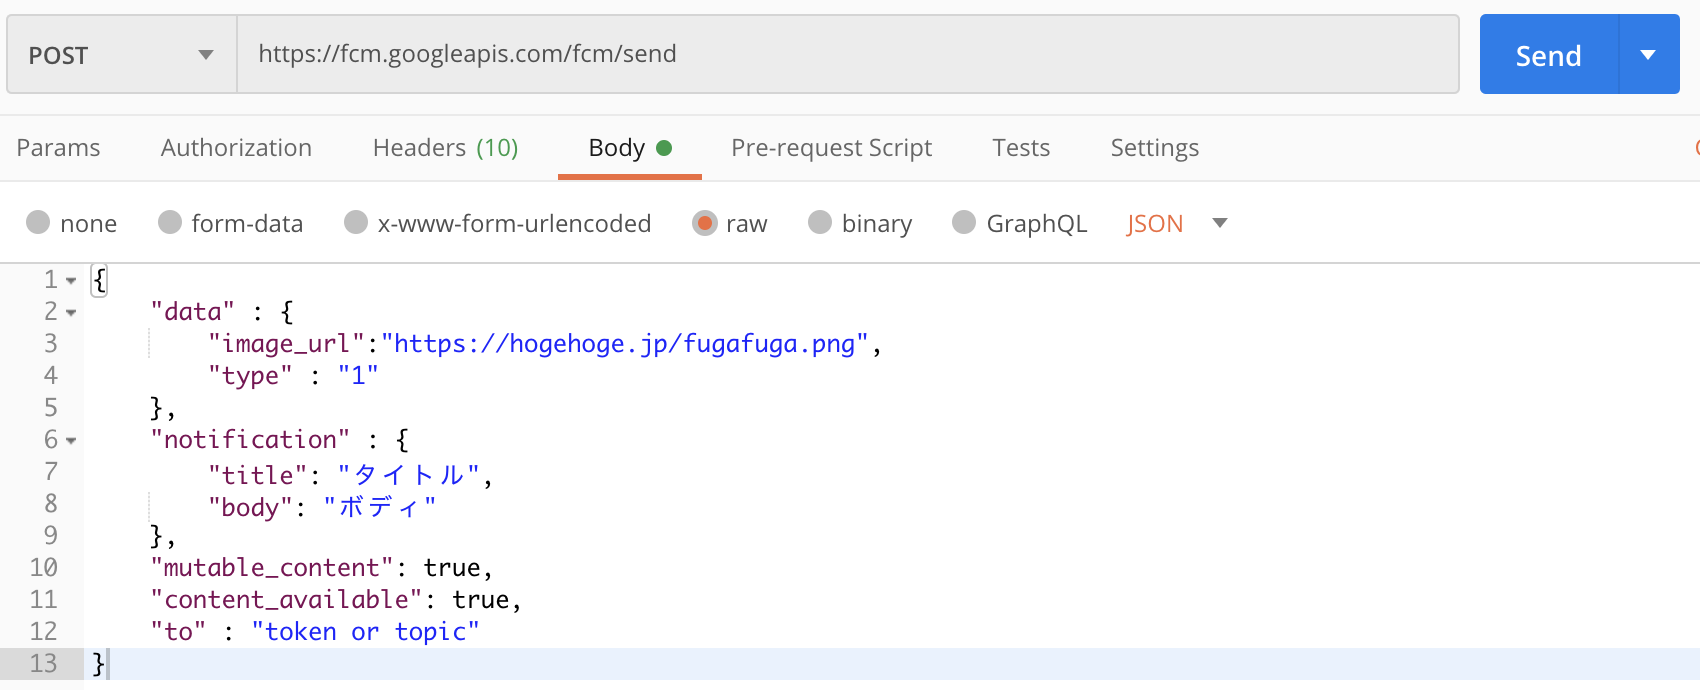
送信
送り先
POST: https://fcm.googleapis.com/fcm/send
Header
Content-Type:application/json
Authorization:key=xxxxxxxxxxxxxxxxxxxxxxxxxxxxxxxxxxxxxx

- Firebase
- 歯車アイコン -> プロジェクト設定 -> CloudMessaging
- サーバーキーのトークンをコピー
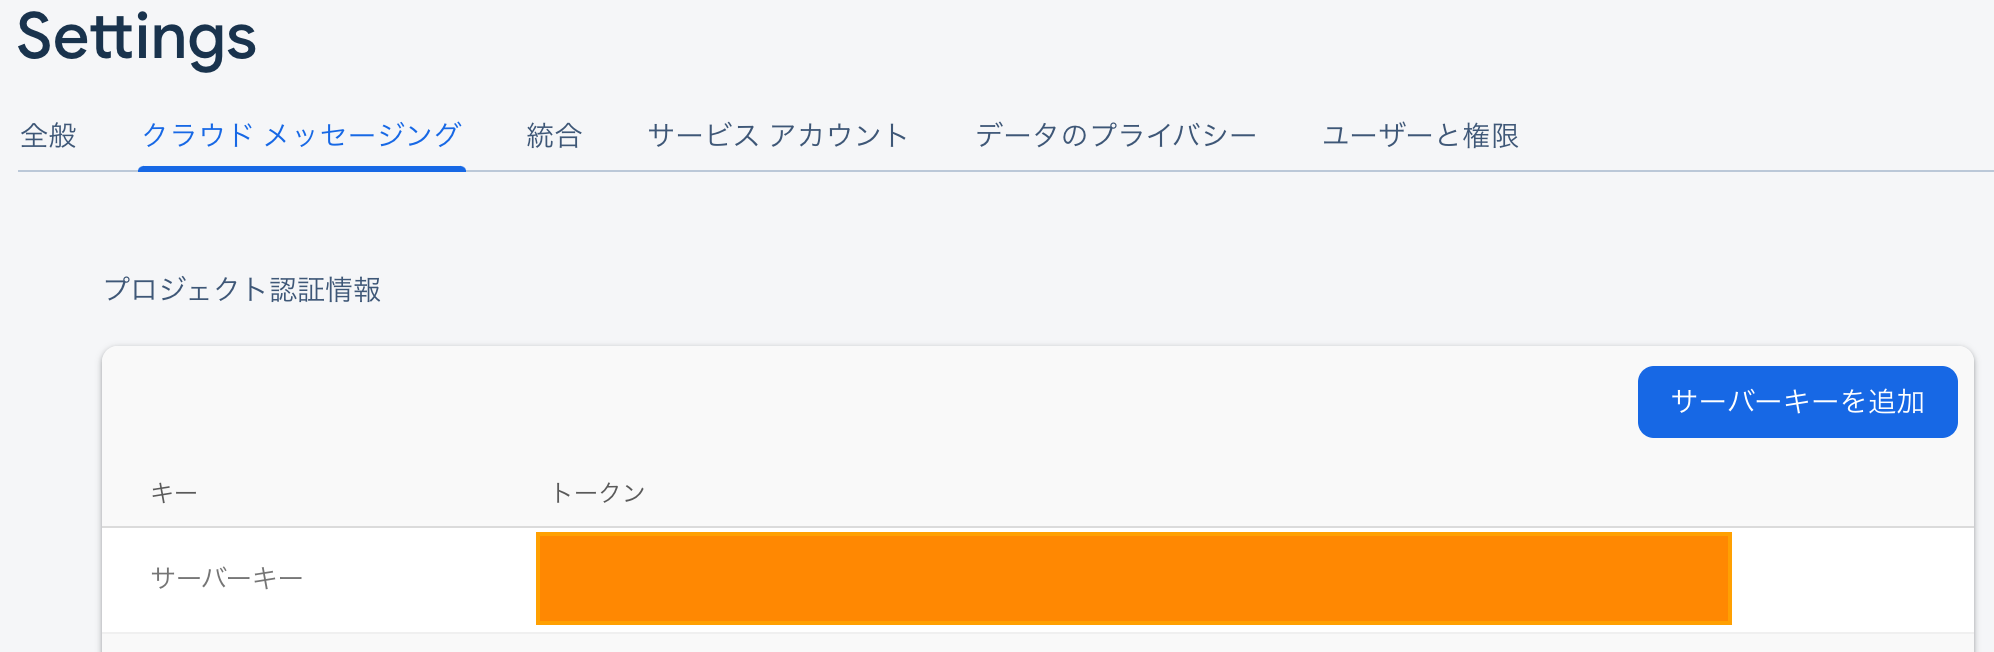
- 「xxxxxxxxxxxxxxxxxxxxxxxxxxxxxxxxxxxxxx」をコピーしたトークンに変更
Body
{
    "data" : {
        "image_url":"https://hogehoge.jp/fugafuga.png",
    	"type" : "1"
    },
    "notification" : {
    	"title": "タイトル",
        "body": "ボディ"
	},
	"mutable_content": true,
	"content_available": true,
    "to" : "token or topic"
}
Key:toに指定するもの
- 少しAppDelegateに追加
extension AppDelegate: MessagingDelegate {
    func messaging(_ messaging: Messaging, didReceiveRegistrationToken fcmToken: String) {
        print("fcmToken:\(fcmToken)")
        Messaging.messaging().subscribe(toTopic: "/topics/global") { error in
            if let error = error {
                print("TopicErrorRegistError: \(error)")
            }
        }
    }
}
この状態でビルドし、コンソールに表示されたものを利用。
- デバイス単体に送りたい場合は
fcmToken:xxxxxxxxxxxxxxxxxのxxxxxxxxxxxxxxxxx部分 - topic購読している全デバイスに送りたい場合は
/topics/global
toTopicはお好きなもので。
いざ!送信!!
届かなかった方はコメントください。
追記
Debug
NotificationServiceがきちんと走っている??
と気になりDebugで止めたい場合はMainAppをビルドし一旦メインをデバイスに流した後、NotificationServiceを指定してビルドすることで可能

脱線
今回の内容と少し違いますが
AppGroupsを利用することでMainとPushに共通データを持つことが可能。
例えば通知を見逃したユーザのために、通知履歴などをアプリに実装。
~流れ~
- 通知を送る
-
NotificationService.swiftにてRealm等に保存処理(SharingPath) -
MainAppにてSharingPathを元に通知Appにて保存したデータを共有Realmから読み取る - データを元に履歴List画面作成
jsonのdataに任意の値(この記事でいうtype)を追加するなどすれば、履歴リストからタップし、画面遷移なども行えますね!
需要がありそうなら細かく書きますが、、
こんなこともできますよーという話でした。