対象となる読者
- micro-ROSを初めて使う人
- m5stackにROS2のtopicを送りたい人
参考記事
上記の記事を参考にm5stackへtopicを送信するデモをトライ
micro-ROSの準備
この記事を書いている時にはjazzyが最新バージョン
micro-ROSのセットアップ
source /opt/ros/$ROS_DISTRO/setup.bash

mkdir uros_ws && cd uros_ws

git clone -b $ROS_DISTRO https://github.com/micro-ROS/micro_ros_setup.git src/micro_ros_setup

rosdep update && rosdep install --from-paths src --ignore-src -y

colcon build

source install/local_setup.bash
micro-ROS-Agentのbuild
m5にtopicを送るためにAgentのbuildを実施
$ ros2 run micro_ros_setup create_agent_ws.sh
...
=== ./uros/drive_base (git) ===
=== ./uros/micro-ROS-Agent (git) ===
=== ./uros/micro_ros_msgs (git) ===
#All required rosdeps installed successfully
$ ros2 run micro_ros_setup build_agent.sh
Building micro-ROS Agent
Starting >>> micro_ros_msgs
Finished <<< micro_ros_msgs [1.32s]
Starting >>> micro_ros_agent
Finished <<< micro_ros_agent [0.28s]

Summary: 2 packages finished [1.80s]
buildしたAgentをROS2に認識させる
$ source install/local_setup.bash
terminalを複数立ち上げている場合は各terminalで上記コマンドの実行が必要
m5stack側の設定
Platform IOを使った書き方にトライ
platformio.iniの設定
m5stack-core-esp32に書き込むことを想定した設定ファイル
[env:m5stack-core-esp32]
platform = espressif32
board = m5stack-core-esp32
framework = arduino
upload_port = COM3
lib_deps =
	coryjfowler/mcp_can@^1.5.1
	m5stack/M5Stack@^0.4.6
	https://github.com/NITKK-ROS-Team/micro_ros_arduino_simpler.git#main
    https://github.com/micro-ROS/micro_ros_arduino.git
	Wire
build_flags =
	-L ./.pio/libdeps/micro_ros_arduino/src/esp32/
	-l microros
build_flagsの設定を忘れるとbuildが通らないので注意
subscriberのコード
今回はUSB接続によるSerial通信を想定
参考記事のコードからWi-Fi設定をコメントアウトした版
//
// micro-ROS subscriber sample program
// for M5Stack
//
#include <M5Stack.h>
#include <micro_ros_arduino.h>
#include <stdio.h>
#include <rcl/rcl.h>
#include <rcl/error_handling.h>
#include <rclc/rclc.h>
#include <rclc/executor.h>
#include <std_msgs/msg/int32.h>
rcl_subscription_t subscriber;
std_msgs__msg__Int32 msg;
rclc_executor_t executor;
rclc_support_t support;
rcl_allocator_t allocator;
rcl_node_t node;
rcl_timer_t timer;
//#define LED_PIN 13
#define RCCHECK(fn) { rcl_ret_t temp_rc = fn; if((temp_rc != RCL_RET_OK)){error_loop();}}
#define RCSOFTCHECK(fn) { rcl_ret_t temp_rc = fn; if((temp_rc != RCL_RET_OK)){}}
void error_loop(){
M5.Lcd.print("Error!!\n");
//while(1){
// digitalWrite(LED_PIN, !digitalRead(LED_PIN));
// delay(1000);
//}
}
void subscription_callback(const void * msgin)
{
const std_msgs__msg__Int32 * msg = (const std_msgs__msg__Int32 *)msgin;
//digitalWrite(LED_PIN, (msg->data == 0) ? LOW : HIGH);
M5.Lcd.printf("Data: %d\n", msg->data);
}
void setup() {
M5.begin();
M5.Power.begin();
M5.Lcd.setTextSize(2);
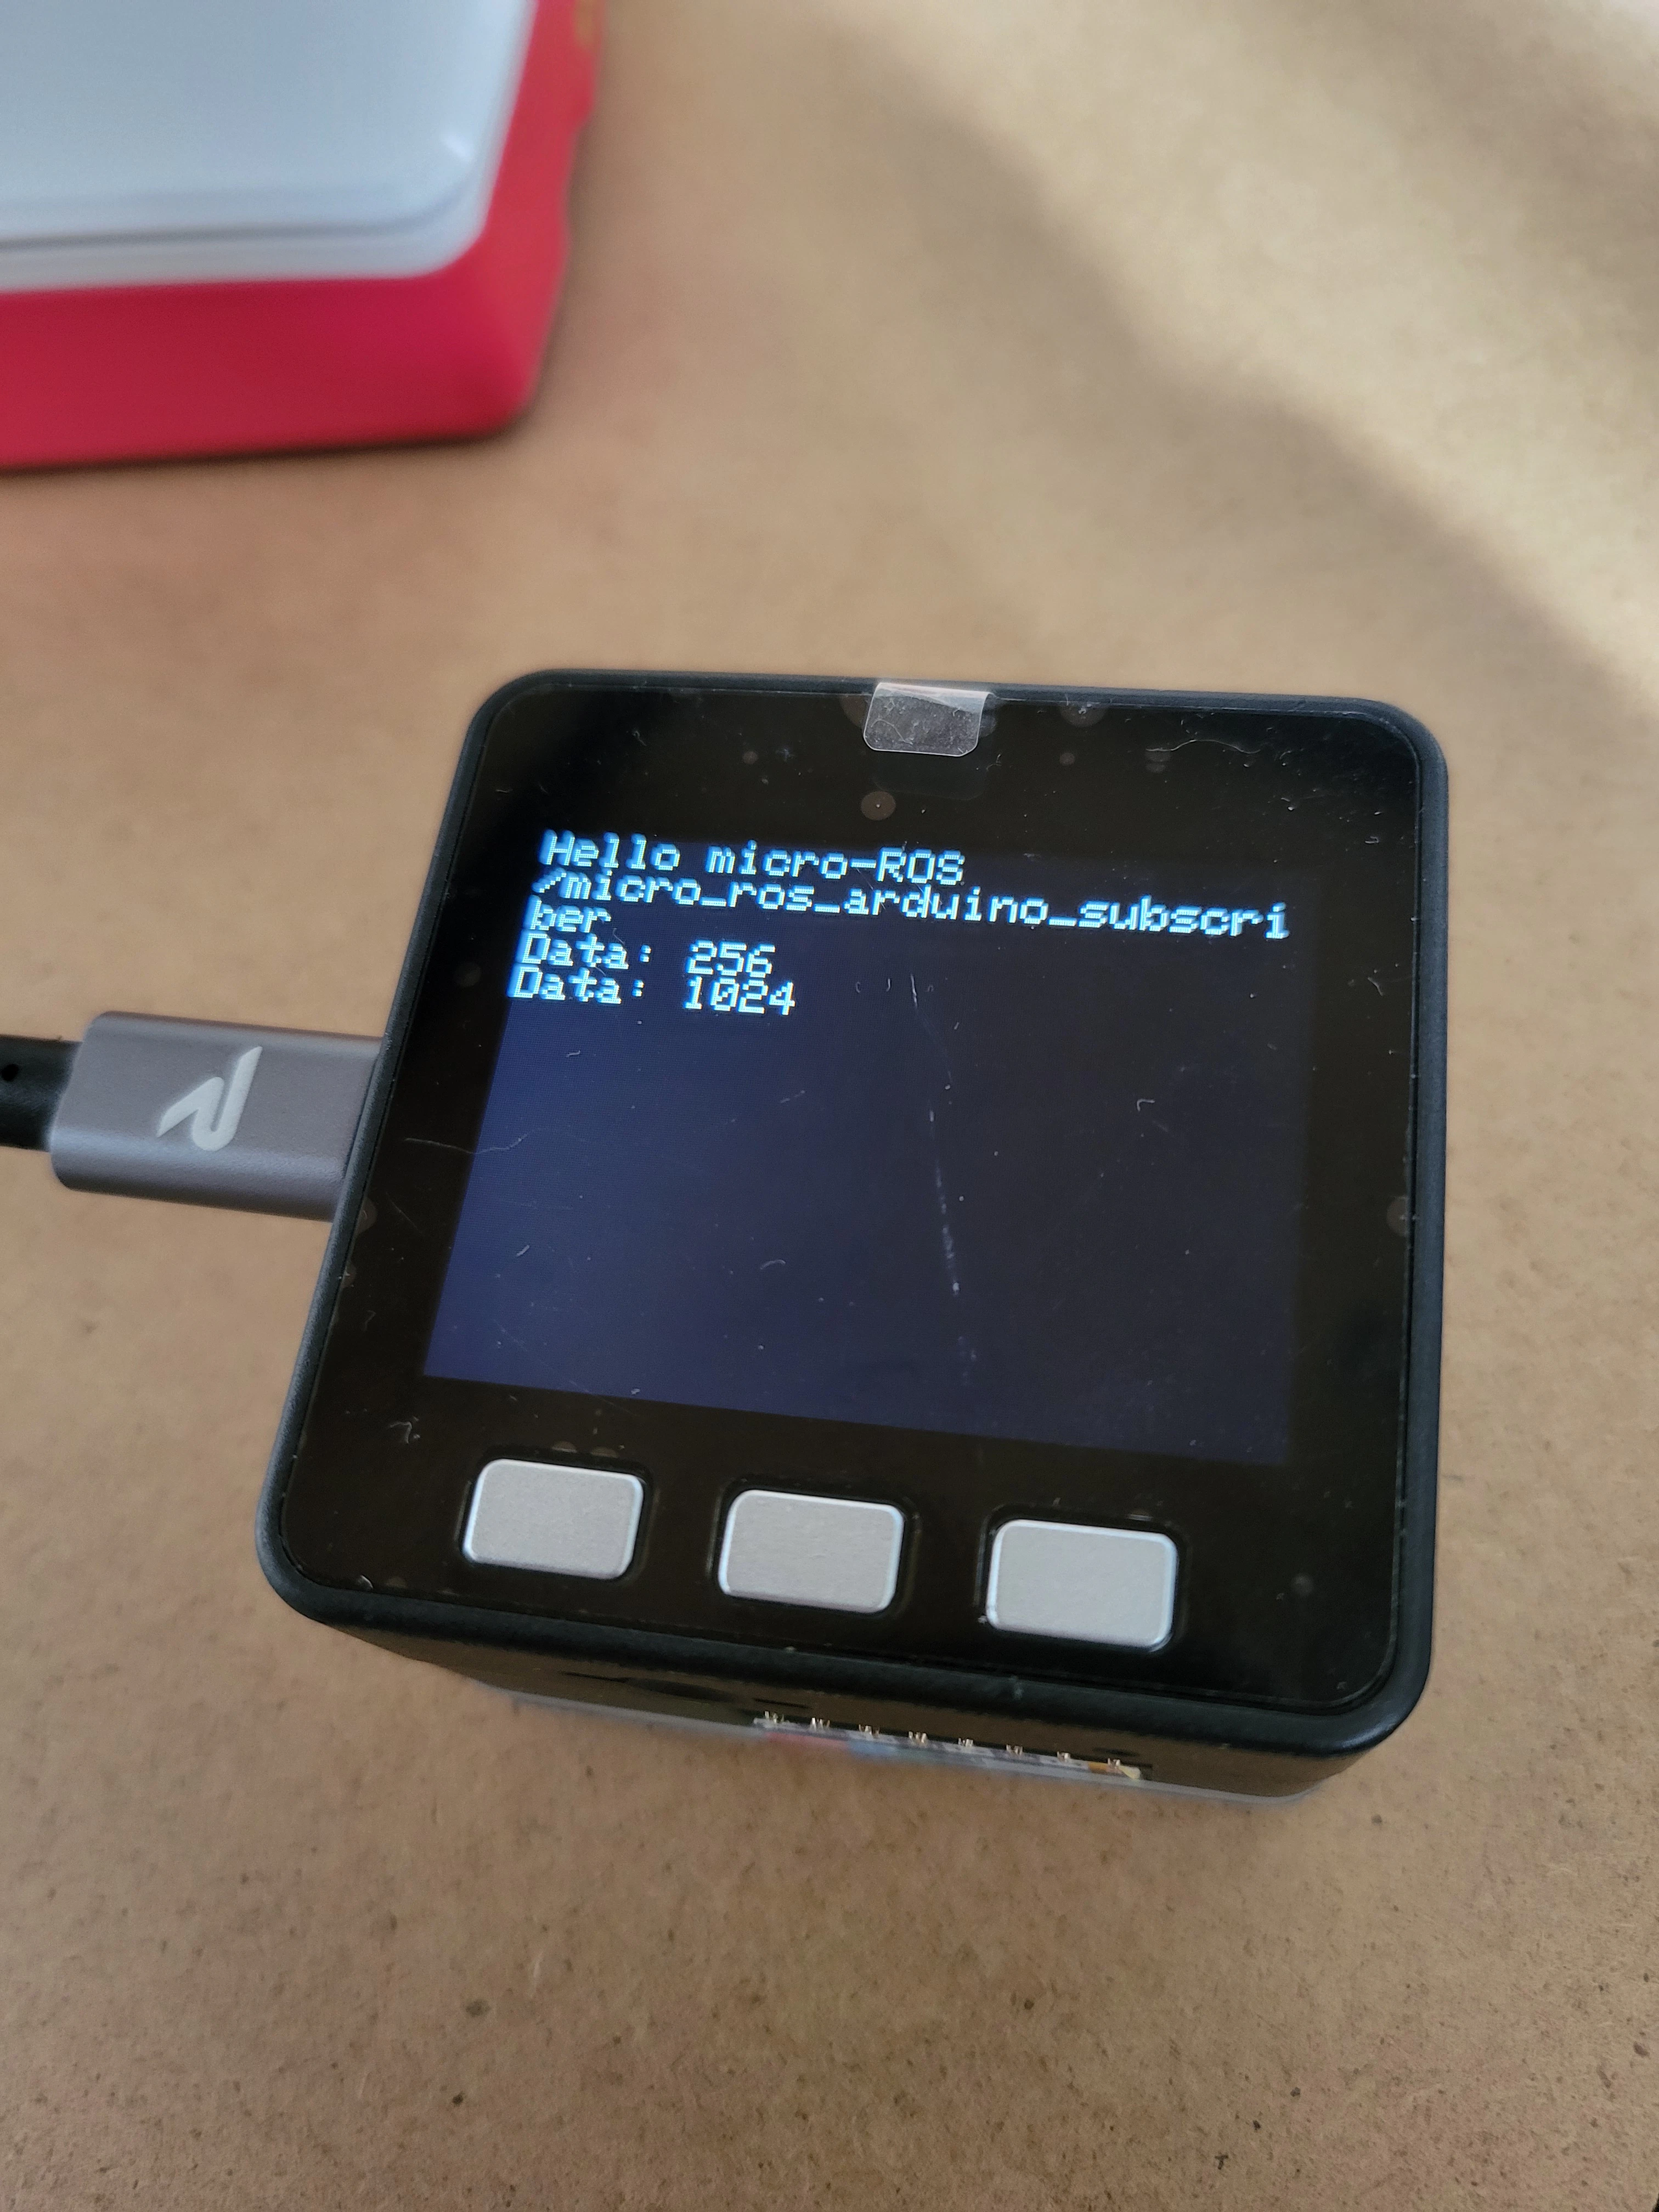
M5.Lcd.print("Hello micro-ROS\n");
M5.Lcd.print("/micro_ros_arduino_subscriber\n");
// for WiFi
// set_microros_wifi_transports("SSID", "PASS", "192.168.xxx.xxx", 8888);
// for USB
set_microros_transports();
//pinMode(LED_PIN, OUTPUT);
//digitalWrite(LED_PIN, HIGH);
delay(2000);
allocator = rcl_get_default_allocator();
//create init_options
RCCHECK(rclc_support_init(&support, 0, NULL, &allocator));
// create node
RCCHECK(rclc_node_init_default(&node, "micro_ros_arduino_node", "", &support));
// create subscriber
RCCHECK(rclc_subscription_init_default(
&subscriber,
&node,
ROSIDL_GET_MSG_TYPE_SUPPORT(std_msgs, msg, Int32),
"micro_ros_arduino_subscriber"));
// create executor
RCCHECK(rclc_executor_init(&executor, &support.context, 1, &allocator));
RCCHECK(rclc_executor_add_subscription(&executor, &subscriber, &msg, &subscription_callback, ON_NEW_DATA));
}
void loop() {
delay(100);
RCCHECK(rclc_executor_spin_some(&executor, RCL_MS_TO_NS(100)));
}
デモ
m5stackをつないだ際にできるディレクトリの確認(今回は/dev/ttyACM0)
書き込み権限の追加
$ sudo chmod 666 /dev/ttyACM0
USBを抜き差しするとここの設定が切れるのでUSERをgroupに追加しておくと楽
$ sudo usermod -aG dialout $USER
Agentの起動
$ ros2 run micro_ros_agent micro_ros_agent serial --dev /dev/ttyACM0
topicの送信
$ ros2 topic pub --once /micro_ros_arduino_subscriber std_msgs/Int32 "data: 256"
publisher: beginning loop
publishing #1: std_msgs.msg.Int32(data=256)
ちゃんと通信ができていると以下のような結果がm5stackに出てくる
感想
PlatformIOでコードを書くのが初めてで必要なライブラリのインストールが大変だった.micro-ROSのbuildもちょこちょこErrorでちゃったので困った.そういうときは最悪rebootしてやり直せば何とかなる.