1. はじめに
enPiTに向けて,今までWebアプリケーション開発に触れたことの無い自分が,Rails開発環境の構築にチャレンジし,やり方をまとめてみました。
目標は以下の通りです。
Windows上で、
- VirtualBoxとVagrantで仮想マシンを構築する
- Rails5の環境を構築する
- Github上にpushできるようにする
- HerokuにRailsアプリケーションをデプロイできるようにする
2. 構築する環境
windows8.1上で,以下の環境を立てました。
| 種類 | バージョン |
|---|---|
| VirtualBox | 5.1.22 |
| Vagrant | 1.9.6 |
| Ubuntu | 16.04.2 xenial |
| Rails | 5.1.2 |
| Ruby | 2.4.1 |
| rbenv | 1.1.1 |
| Node.js | 8.0.0 |
3. 仮想マシンを構築する
3.1 VirtualBoxのインストール
下記のURLから,"windows hosts"を選んでダウンロードし,VirtualBoxをインストールしましょう。
https://www.virtualbox.org/wiki/Downloads
3.2 Vagrantのインストール
下記のURLから,Windows64bitもしくは32bitを選んでダウンロードし,Vagrantをインストールしましょう。
(再起動が求められます)
https://www.vagrantup.com/downloads.html
3.3 Vagrantのセットアップ
VirtualBoxとVagrantのインストールが終わったら,いよいよ仮想マシンを作ります。
まずは,適当にプロジェクト用のディレクトリを作成し,Vagrantfileを作成しましょう。
$ cd 作業用ディレクトリ
$ vagrant init
作業用ディレクトリに'Vagrantfile'ができるので,エディタでVagrantfileを以下のように書き替えます。
Vagrant.configure("2") do |config|
  config.vm.box = "bento/ubuntu-16.04"
  config.ssh.insert_key = false
  config.vm.network "private_network", ip: "192.168.33.10"
  config.vm.network "forwarded_port", guest: 3000, host: 3000
  config.vm.synced_folder "./workspace", "/home/vagrant/workspace"
end
synced_folder(ホスト側のOSとゲスト側のOSの共有ディレクトリworkspace)を作成します。
$ mkdir workspace
以下の2つのディレクトリの中身が共有されます
- ホスト側 Windows : (作業用ディレクトリ/workspace)
- ゲスト側 仮想マシン(Ubuntu) : (/home/vagrant/workspace)
以上の設定が終わったら,VMを立ち上げましょう。
$ vagrant up
VMが立ち上がったら,接続しましょう。
$ vagrant ssh
もし,通常のSSH接続をしたい場合は,以下のコマンドを入力して設定を書き替える必要があります。
SSH接続の設定$ vagrant ssh-config --host 192.168.33.10
設定を書き替えたら,SSHコマンドでも接続できるようになります。
SSH接続$ ssh 192.168.33.10
3.4 Ubuntuのセットアップ
VMが立ち上がったら,パッケージのアップデートと必要なパッケージをインストールします。
    $ sudo apt-get -y update
    $ sudo apt-get -y install git-core curl zlib1g-dev build-essential libssl-dev libreadline-dev libyaml-dev libsqlite3-dev sqlite3 libxml2-dev libxslt1-dev libcurl4-openssl-dev python-software-properties libffi-dev
以上で,仮想マシンの構築は終わりです。
4. Railsアプリケーション開発環境を構築する
4.1 rubyのインストール
rbenvでRubyのインストールを行います。併せて,ruby-build のインストールも行います。
まずは,rbenvのインストール。
$ git clone git://github.com/sstephenson/rbenv.git .rbenv
$ echo 'export PATH="$HOME/.rbenv/bin:$PATH"' >> ~/.bashrc
$ echo 'eval "$(rbenv init -)"' >> ~/.bashrc
$ exec $SHELL
続いて,ruby-build のインストール
$ mkdir -p ~/.rbenv/plugins
$ cd ~/.rbenv/plugins
$ git clone git://github.com/sstephenson/ruby-build.git
最後に,ruby 2.4.1のインストール
rbenv install 2.4.1
環境でruby2.4.1を使うようにします
rbenv global 2.4.1
インストールと設定がうまくいっているか確認しましょう。
ruby -v
ruby 2.4.1p111 (2017-03-22 revision 58053) [x86_64-linux]みたいなのが表示されれば,rubyのインストールは完了です。
4.2 Railsのインストール
以下のコマンドで,Rails5.1.2 をインストールします。
$ gem install rails --version="~> 5.1.2"
$ rbenv rehash
インストールできているかを確認しましょう。
$ rails -v
Rails 5.1.2と出力されれば,Railsのインストールは完了です。
4.3 Node.jsのインストール
以下のコマンドで,Node.jsを入れておきましょう。
$ sudo apt-get install -y nodejs npm
$ sudo npm cache clean
$ sudo npm install n -g
$ sudo n stable
$ sudo ln -sf /usr/local/bin/node /usr/bin/node
インストールできているか確認
$ node -v
v.8.0.0が出力されれば(7/15日時点)Node.jsのインストールは完了です。
4.4 Railsアプリケーションの起動
これまでのセットアップが終わったら,実際にRailsアプリケーションを作ってみましょう。
作業用ディレクトリ(workspace)に移動します。
$ cd /home/vagrant/workspace
Railsアプリケーションを作成します。
$ rails new hoge
作成したアプリケーションのディレクトリに移動し,Railsサーバを起動します。
$ cd hoge
$ rails server
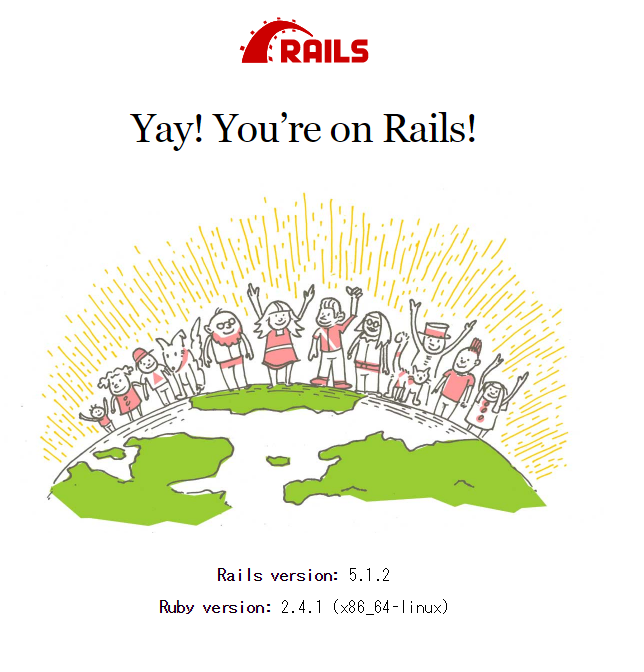
ブラウザ上で,localhost:3000を入力すると,下図のようなページが表示されます。
ちなみに,windows上の作業用ディレクトリ(Vagrantfileとかがあるところ)内の,workspaceフォルダには,作成したrailsアプリケーションが共有された状態で入っています。
なので,Windows上の使い慣れたエディタでコーディングしたいときは,このフォルダ内にあるファイルを編集すると,仮想マシン上の作業用ディレクトリ(/home/vagrant/workspace)の中身も自動的に書き替わります。
5. Githubの設定とPUSH
5.1 gitの設定
Githubのアカウントをあらかじめ作っておきましょう。
gitのインストール
$ sudo apt-get install git
gitに,Githubアカウントのユーザ名とメールアドレスを設定しましょう。
$ git config --global user.name "ユーザ名"
$ git config --global user.email "メールアドレス"
設定できているか確認します。
$ git config --list
5.2 sshの設定
Githubにssh接続するためには,鍵の登録が必要です。
まずは,SSH鍵を生成します。
$ cd ~/.ssh
$ ssh-keygen -t rsa     (何も入力せずに,3回エンターを押します)
id_rsa.pubというファイルがディレクトリ内に生成されるので,その中身の文字列すべてをコピーしておきましょう。
次に,コピーした鍵をGithubに設定します。
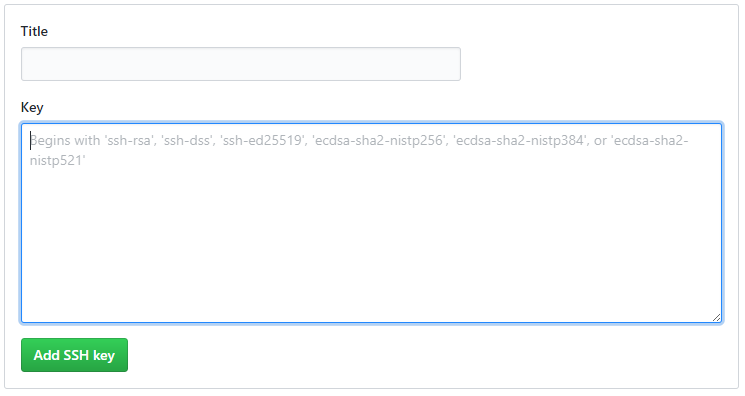
Githubのページの,Settings -> SSH and GPG keys を選んでいき,画面右上の緑色のボタン「New SSH Key」を押します。以下のようなページが出てくるので,Keyの中に先ほどコピーしたid_rsa.pubの中身をペーストします。その後,「Add SSH Key」を押すと,GithubにSSH鍵が追加されます。
GithubにSSH鍵を設定したら,接続できるか確認します。
$ ssh -T git@github.com
接続してもいいかどうかを聞いてくるので,yesを入力します。
Hi ユーザー名~ みたいなのが出力されれば設定完了です。
5.3 gitによるバージョン管理とGithubへのPUSH
4.4で作成したRailsアプリケーションのバージョン管理と,Github上のリモートリポジトリへのPUSHを行います。
- gitリポジトリをローカルに作成し,commitします。
$ cd /home/vagrant/workspace/hoge
$ git init
$ git add .
$ git commit -m "Initialize repository"
- github上で,"hoge"リポジトリを作成しましょう
- リモートリポジトリを追加して,pushします
$ git remote add origin git@github.com:(アカウント名)/hoge.git
$ git push -u origin master
Github上に作成したhogeリポジトリに,ローカルリポジトリがpushできていることを確認しましょう。
6. Herokuへのデプロイ
最後に,作成したRailsアプリケーションをHerokuにデプロイします。
6.1 Railsアプリケーションの書き替え
4.4で作成したアプリケーションの内容を少し書き替えます。
まずは,app>controllers内のapplication_controller.rbを書き替えます。
class ApplicationController < ActionController::Base
  protect_from_forgery with: :exception
end
class ApplicationController < ActionController::Base
  protect_from_forgery with: :exception
  def hello
    render html: "hello, world!"
  end
end
次に,Config内のroutes.rbを書き替えます。
Rails.application.routes.draw do
  # For details on the DSL available within this file, see http://guides.rubyonrails.org/routing.html
end
Rails.application.routes.draw do
  root 'application#hello'
  # For details on the DSL available within this file, see http://guides.rubyonrails.org/routing.html
end
最後に,本番環境用の設定を加えるために,Gemfileを以下のように書き替えます。
source 'https://rubygems.org'

git_source(:github) do |repo_name|
  repo_name = "#{repo_name}/#{repo_name}" unless repo_name.include?("/")
  "https://github.com/#{repo_name}.git"
end


# Bundle edge Rails instead: gem 'rails', github: 'rails/rails'
gem 'rails', '~> 5.1.2'
# Use sqlite3 as the database for Active Record
# gem 'sqlite3'
# Use Puma as the app server
gem 'puma', '~> 3.7'
# Use SCSS for stylesheets
gem 'sass-rails', '~> 5.0'
# Use Uglifier as compressor for JavaScript assets
gem 'uglifier', '>= 1.3.0'
# See https://github.com/rails/execjs#readme for more supported runtimes
# gem 'therubyracer', platforms: :ruby

# Use CoffeeScript for .coffee assets and views
gem 'coffee-rails', '~> 4.2'
# Turbolinks makes navigating your web application faster. Read more: https://github.com/turbolinks/turbolinks
gem 'turbolinks', '~> 5'
# Build JSON APIs with ease. Read more: https://github.com/rails/jbuilder
gem 'jbuilder', '~> 2.5'
# Use Redis adapter to run Action Cable in production
# gem 'redis', '~> 3.0'
# Use ActiveModel has_secure_password
# gem 'bcrypt', '~> 3.1.7'

# Use Capistrano for deployment
# gem 'capistrano-rails', group: :development

group :development, :test do
  gem 'sqlite3', '1.3.13'
  gem 'byebug',  '9.0.6', platform: :mri
end

group :development do
  # Access an IRB console on exception pages or by using <%= console %> anywhere in the code.
  gem 'web-console', '>= 3.3.0'
  gem 'listen', '>= 3.0.5', '< 3.2'
  # Spring speeds up development by keeping your application running in the background. Read more: https://github.com/rails/spring
  gem 'spring'
  gem 'spring-watcher-listen', '~> 2.0.0'
end

group :production do
  gem 'pg', '0.20.0'
end
Gemfileの内容を変更したので,新しくインストールします。
また,内容を書き替えたので,commitしておきます。
$ bundle install --without production
$ git add .
$ git commit -m "add hello"
6.2 Heroku Toolbeltのインストールと設定
herokuへデプロイするためのアプリケーション「Heroku Toolbelt」を以下の手順でインストールし,設定します。
- herokuのアカウントを作成しておきましょう
- 以下のコマンドで,Heroku Toolbeltをインストールします
$ wget -qO- https://cli-assets.heroku.com/install-ubuntu.sh | sh
3.Herokuアカウントを設定
$ heroku login
$ heroku keys:add
メールアドレスとパスワードを入力します
SSH鍵のアップロードを求められるので,yesを選択します
6.3 Herokuへのデプロイ
heroku toolbeltの設定が終わったら,ついにHerokuへのデプロイができます。
Railsアプリケーションのディレクトリ内に移動し,Heroku上にリポジトリを作成します。
無事にリポジトリが作成できたら,ローカルリポジトリをpushします。
$ cd /home/vagrant/workspace/hoge
$ heroku create
$ git push heroku master
最後に,heroku create時に表示されたURL(~herokuapp.com)にアクセスし,ページ上に"hello, world!"と
表示されれば,デプロイ完了です。