はじめに
どうも。水無月せきなです。
今回は、FastAPIのチュートリアルを読んだメモ書きとなります。
開発環境は、前回の記事で使用した環境を使いまわしています。
本題
セットアップ
下記のコマンドを実行して必要な者をインストールする。
pip install fastapi
pip install "uvicorn[standard]"
最初のステップ
ルーティングを定義する。
from fastapi import FastAPI

## FastAPIはStarletteを継承している
app = FastAPI()


@app.get("/")
async def root():
    return {"message": "Hello World"}
サーバーを起動する
uvicorn main:app --reload
※上記コードでのmainはルーティングを定義しているモジュール名、appはFastAPIのインスタンス変数の名前にする(一敗)
この状態でhttp://127.0.0.1:8000/にアクセスすると、レスポンスが表示される。
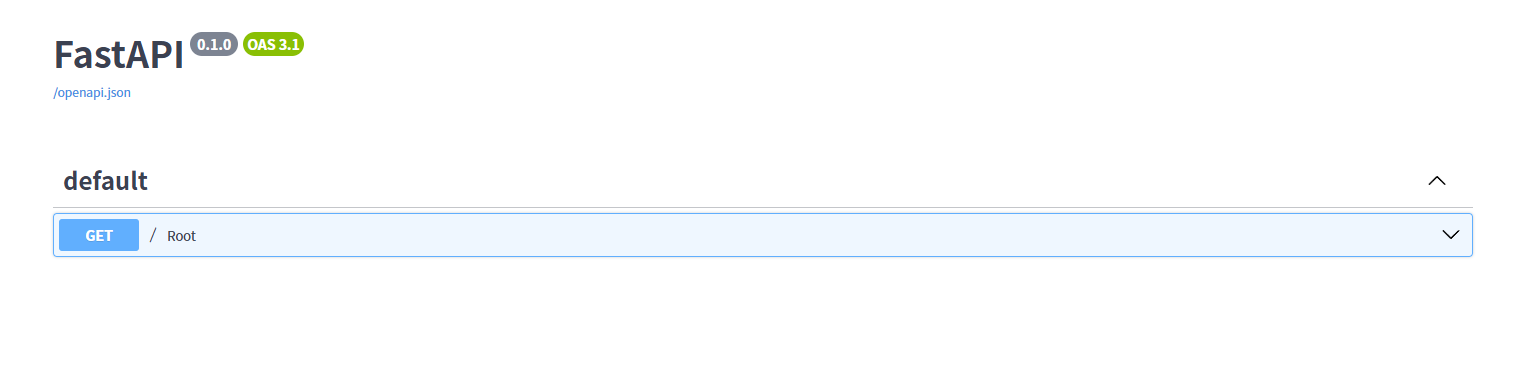
http://127.0.0.1:8000/docsにアクセスすると、APIのドキュメントページが表示される。
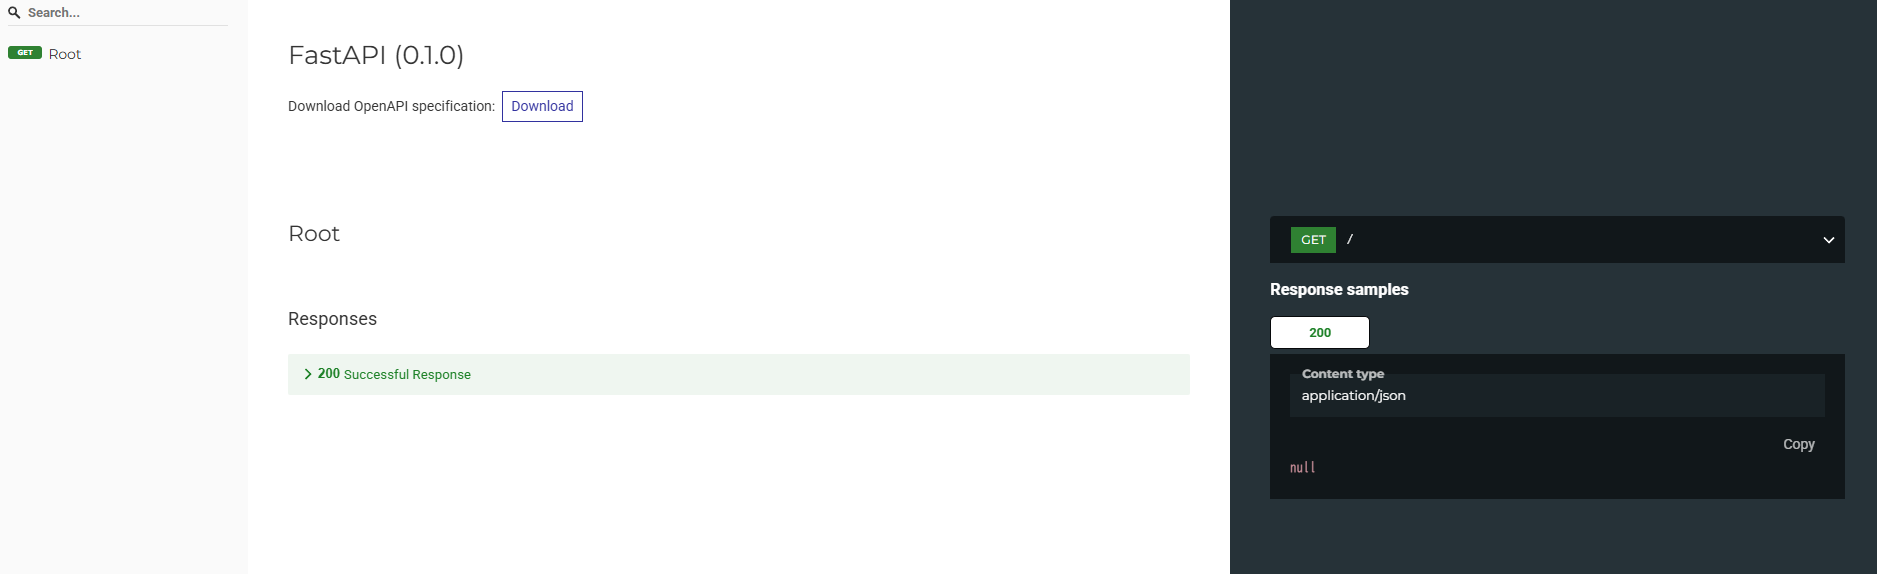
http://127.0.0.1:8000/redocにアクセスすると、違う形のドキュメントページが表示される。
便利。OpenAPIのスキーマも生成しているらしい。
ルーティングは関数のデコレータで定義する
@app.get("/")
async def root():
パスパラメータ
フォーマット文字列と同様のフォーマットでパスパラメータの宣言と受け取りをする。
from fastapi import FastAPI

app = FastAPI()

@app.get("/items/{item_id}")
async def read_item(item_id):
    return {"item_id": item_id}
{item_id}で指定したパラメータが、そのままitem_idで渡ってくる。
アノテーションで型を付けることも可能。
エディタ上で補完される他に、リクエストを受ける時に自動で変換される。
from fastapi import FastAPI

app = FastAPI()

@app.get("/items/{item_id}")
async def read_item(item_id: int):
    return {"item_id": item_id}
この状態でhttp://127.0.0.1:8000/items/fooにアクセスすると、パースのエラーが返ってくる(データのバリデーションはPydanticによるもの)。
もちろん、ドキュメントも更新される。
同じようなパスを複数宣言するとどうなるのか?
結論:先に定義されているものが呼ばれる。
from fastapi import FastAPI

app = FastAPI()

@app.get("/users/me")
async def read_user_me():
    return {"user_id": "the current user"}

@app.get("/users/{user_id}")
async def read_user(user_id: str):
    return {"user_id": user_id}
上記のコードで、read_user()が先に定義されていると、http://127.0.0.1:8000/users/meへのリクエストはuser_idがmeと解釈されてしまう。
受け取る値を定義したい
結論:Enumを使う。
from enum import Enum

from fastapi import FastAPI


class ModelName(str, Enum):
    alexnet = "alexnet"
    resnet = "resnet"
    lenet = "lenet"

app = FastAPI()

@app.get("/models/{model_name}")
async def get_model(model_name: ModelName):
    # 受け取った後の処理
定義外の値が来るとエラーになる。
パスを含むパスパラメータ
/files/{file_path}というパスがあり、file_pathでhome/johndoe/myfile.txtのようなパスを受け取る場合。
結論:/files/{file_path:path}のように指定する。
from fastapi import FastAPI

app = FastAPI()

@app.get("/files/{file_path:path}")
async def read_file(file_path: str):
    return {"file_path": file_path}
OpenAPIはこのようなケースをサポートしていないものの、Starletteのオプションで実現している。
/files/{file_path:path}の:pathの部分で、パスの表現にマッチすることを宣言。
ただ、上記の書き方だと、files/home/johndoe/myfile.txtの場合はhome/johndoe/myfile.txtになってしまうので、頭のスラッシュが欲しい時は二重にスラッシュを付けたfiles//home/johndoe/myfile.txtにする必要があったりする。
クエリパラメータ
パスパラメータではない関数パラメータを定義すると、自動でクエリパラメータになる。
パスパラメータと同様に、Enumで値を定義することもできる。
from fastapi import FastAPI

app = FastAPI()

fake_items_db = [{"item_name": "Foo"}, {"item_name": "Bar"}, {"item_name": "Baz"}]


@app.get("/items/")
async def read_item(skip: int = 0, limit: int = 10, q: str | None = None):
    results = fake_items_db[skip : skip + limit]
    if q:
        results.append({"item_name": q})
    return results
バリデーション等のサポートはパスパラメータと同じ。
ちなみに、デフォルト値の有無によってパラメータの挙動が変わる。
| デフォルト値 | 必須/任意 |
|---|---|
| あり | 任意 |
| None | オプション |
| 無し | 必須 |
bool型を定義した時の変換
trueになる値(1・true・on・yes)は大文字小文字など関係なくTrueに変換され、それ以外はFalseになる。
複数のパスパラメータとクエリパラメータ
パスパラメータとクエリパラメータは同時に宣言可能(複数可)。
そして、引数における順序は関係ない(名前で判断する)。
リクエストボディ
リクエストボディを宣言するために、Pydanticモデルを使用する。
そうして作成したモデルで引数の型を宣言することで、FastAPIによってリクエストボディから変換される。
from fastapi import FastAPI
from pydantic import BaseModel


class Item(BaseModel):
    name: str
    description: str | None = None
    price: float
    tax: float | None = None

app = FastAPI()

@app.post("/items/")
async def create_item(item: Item):
    return item
クエリパラメータの時と同様に、属性のデフォルト値の有無によって必須・任意・オプションが決められる。
ちなみに、ボディパラメータをオプションにすることもできる。
パラメータとリクエストボディの混在
パスパラメータ・クエリパラメータとリクエストボディを同時に用いることは可能。
認識の仕方は下記の通り。
- パスで宣言されていればパスパラメータ
-
int・float・strといった単数型であればクエリパラメータ - Pydanticモデルで宣言されると、リクエストボディ
クエリパラメータと文字列の検証
パラメータに対する追加の情報とバリデーションの仕方。
Queryで宣言してチェックをかける。
from typing import Annotated

from fastapi import FastAPI, Query

app = FastAPI()

@app.get("/items/")
async def read_items(q: Annotated[str | None, Query(min_length=3, max_length=50, pattern="^fixedquery$")] = None):
    results = {"items": [{"item_id": "Foo"}, {"item_id": "Bar"}]}
    if q:
        results.update({"q": [{"item_id": q}]})
    return results
複数の値を受け取る
Queryで宣言することで、複数の値を受け取ることができる。
リスト型を受け取る場合はQueryで宣言しないとリクエストボディとして解釈されてしまう。
from typing import Annotated

from fastapi import FastAPI, Query

app = FastAPI()

@app.get("/items/")
async def read_items(q: Annotated[list[str] | None, Query()] = None):
    query_items = {"q": q}
    return query_items
http://localhost:8000/items/?q=foo&q=barにアクセスすると、{"q":["foo","bar"]}が返ってくる。
パスパラメータと数値の検証
パスパラメータに関しても、クエリパラメータと同様にバリデーションとメタデータの追加を行える。
この時、Pathを使用する。
from typing import Annotated

from fastapi import FastAPI, Path, Query

app = FastAPI()


@app.get("/items/{item_id}")
async def read_items(
    item_id: Annotated[int, Path(title="The ID of the item to get")],
    q: Annotated[int | None, Query(alias="item-query")] = None,
):
    results = {"item_id": item_id}
    if q:
        results.update({"q": q})
    return results
数値の検証
| パターン | 意味 | 備考 |
|---|---|---|
| gt | より大きい |
greater than |
| ge | 以上 |
greater than or equal |
| le | 以下 |
less than or equal |
| lt | より小さい |
less than |
クエリパラメータモデル
複数のクエリパラメータで構成されるグループをPydanticモデルで表現する方法。
モデルで表現することで、バリデーションやメタデータの宣言を一度に行える。
from typing import Annotated, Literal

from fastapi import FastAPI, Query
from pydantic import BaseModel, Field

app = FastAPI()


class FilterParams(BaseModel):
    model_config = {"extra": "forbid"}

    limit: int = Field(100, gt=0, le=100)
    offset: int = Field(0, ge=0)
    order_by: Literal["created_at", "updated_at"] = "created_at"
    tags: list[str] = []


@app.get("/items/")
async def read_items(filter_query: Annotated[FilterParams, Query()]):
    return filter_query
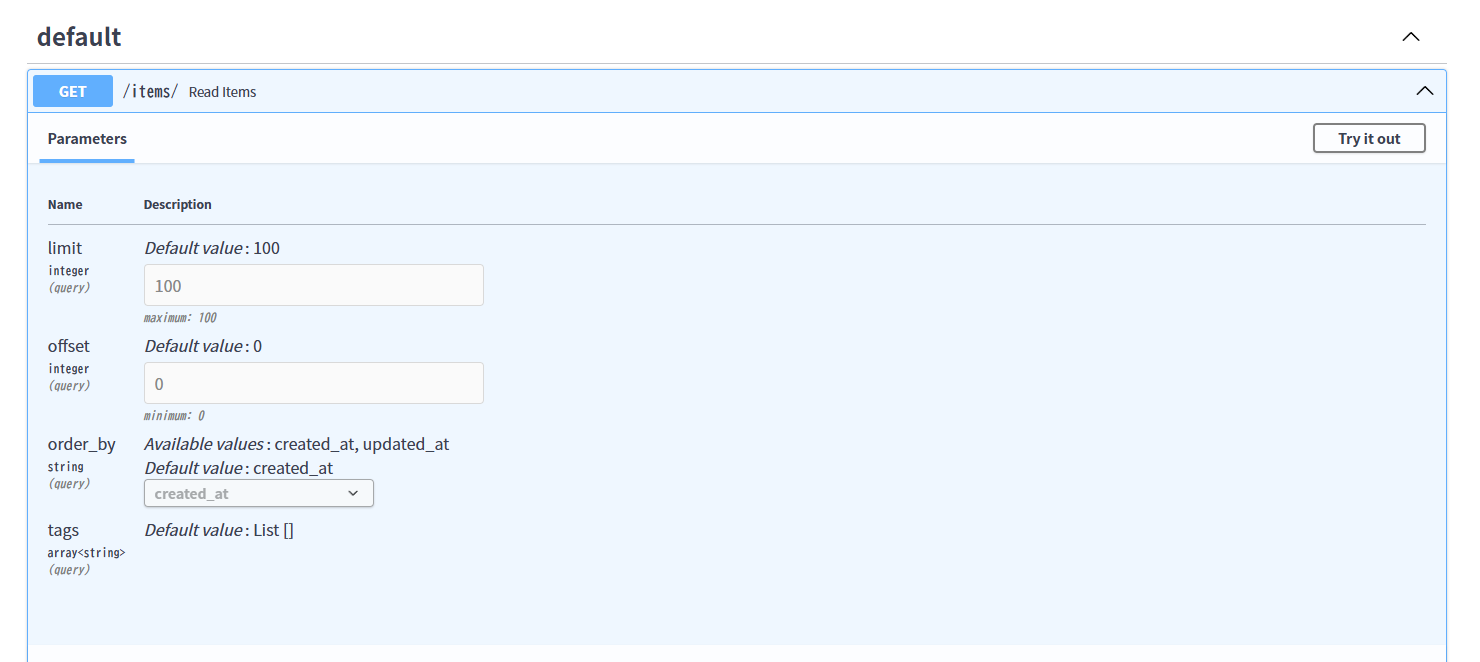
model_config = {"extra": "forbid"}を設定すると、定義されていないクエリパラメータが来た時はエラーになる(設定しないとそのまま通る)。
定義すると、ドキュメントは下記のようになる。
ボディ - 複数のパラメータ
複数のボディパラメータを受け取ることも可能。
また、intなどの単数型でボディパラメータを受け取りたい場合、そのままだとクエリパラメータと解釈されてしまうため、Bodyを使用する。
from typing import Annotated

from fastapi import Body, FastAPI
from pydantic import BaseModel

app = FastAPI()


class Item(BaseModel):
    name: str
    description: str | None = None
    price: float
    tax: float | None = None

class User(BaseModel):
    username: str
    full_name: str | None = None

@app.put("/items/{item_id}")
async def update_item(
    item_id: int, item: Item, user: User, importance: Annotated[int, Body()]
):
    results = {"item_id": item_id, "item": item, "user": user, "importance": importance}
    return results
Bodyのembedパラメータ
ボディパラメータが一つのみの場合、通常は下記のようなボディが期待される。
{
    "name": "Foo",
    "description": "hoge",
}
キーと値の組み合わせのJson(複数のボディパラメータを指定した時と同じ)を期待する場合は、Bodyのembedパラメータを使用する。
{
    "item": {
        "name": "Foo",
        "description": "hoge",
    }
}
ボディ - フィールド
Pydanticモデルの内部(フィールド)のバリデーションについて。
PydanticのFieldを使用する。使用できるパラメータはQueryなどと同様。
from typing import Annotated

from fastapi import Body, FastAPI
from pydantic import BaseModel, Field

app = FastAPI()

class Item(BaseModel):
    name: str
    description: str | None = Field(
        default=None, title="The description of the item", max_length=300
    )
    price: float = Field(gt=0, description="The price must be greater than zero")
    tax: float | None = None

@app.put("/items/{item_id}")
async def update_item(item_id: int, item: Annotated[Item, Body(embed=True)]):
    results = {"item_id": item_id, "item": item}
    return results
ボディ - ネストされたモデル
別のPydanticモデルを属性の型として使用できる。
また、型をネストして使用することもできる。
これらの場合でも、変換・バリデーション・ドキュメント化をしてくれる。
from fastapi import FastAPI
from pydantic import BaseModel

app = FastAPI()


class Image(BaseModel):
    url: str
    name: str


class Item(BaseModel):
    name: str
    description: str | None = None
    price: float
    tax: float | None = None
    tags: set[str] = set()
    image: Image | None = None


@app.put("/items/{item_id}")
async def update_item(item_id: int, item: Item):
    results = {"item_id": item_id, "item": item}
    return results
スキーマの追加 - 例
Jsonスキーマに情報を追加する方法。
Pydanticのschema_extraや、Field・Queryの引数に渡すことで可能。
追加データ型
strなどの一般型以外で使用できる、UUIDなどのデータ型の紹介。
詳細は省略します。
クッキーのパラメータ
Cookieを使用して、Queryなどと同様にクッキーのパラメータも定義できる。
Cookieを使用しないと、クエリパラメータとして解釈されてしまうので要注意。
from typing import Annotated

from fastapi import Cookie, FastAPI

app = FastAPI()

@app.get("/items/")
async def read_items(ads_id: Annotated[str | None, Cookie()] = None):
    return {"ads_id": ads_id}
ヘッダーのパラメータ
Headerを使用して、Queryなどと同様にヘッダーのパラメータも定義できる。
Headerを使用しないと、クエリパラメータとして解釈されてしまうので要注意。
同じヘッダーで複数の値を持つ場合は、listで定義する。
Header独自の機能として、変数名の_を-に自動的に変換してヘッダーを抽出する。
from typing import Annotated

from fastapi import FastAPI, Header

app = FastAPI()

@app.get("/items/")
async def read_items(user_agent: Annotated[str | None, Header()] = None, x_token: Annotated[list[str] | None, Header()] = None):
    return {"User-Agent": user_agent, "X-Token": x_token}
クッキーパラメータモデル
クエリパラメータ―をまとめたのと同様に、クッキーパラメーターもPydanticモデルでまとめることができる。
model_config = {"extra": "forbid"}を設定すると、定義されていないパラメータが来た時はエラーになる(設定しないとそのまま通る)。
from typing import Annotated

from fastapi import Cookie, FastAPI
from pydantic import BaseModel

app = FastAPI()

class Cookies(BaseModel):
    model_config = {"extra": "forbid"}

    session_id: str
    fatebook_tracker: str | None = None
    googall_tracker: str | None = None

@app.get("/items/")
async def read_items(cookies: Annotated[Cookies, Cookie()]):
    return cookies
ヘッダーパラメーターモデル
クエリパラメータ―をまとめたのと同様に、ヘッダーパラメーターもPydanticモデルでまとめることができる。
model_config = {"extra": "forbid"}を設定すると、定義されていないパラメータが来た時はエラーになる(設定しないとそのまま通る)。
from typing import Annotated

from fastapi import FastAPI, Header
from pydantic import BaseModel

app = FastAPI()

class CommonHeaders(BaseModel):
    model_config = {"extra": "forbid"}

    host: str
    save_data: bool
    if_modified_since: str | None = None
    traceparent: str | None = None
    x_tag: list[str] = []

@app.get("/items/")
async def read_items(headers: Annotated[CommonHeaders, Header()]):
    return headers
レスポンスモデル
パスを定義するデコレータのresponse_modelパラメータを使用することで、レスポンスのモデルを宣言できる。
Pydanticモデル単体の他、Pydanticモデルのlistにすることも可能。
これにより、データの変換やスキーマの作成、レスポンスデータの制限などがFastAPIで処理される。
from typing import Any

from fastapi import FastAPI
from pydantic import BaseModel, EmailStr

app = FastAPI()


class UserIn(BaseModel):
    username: str
    password: str
    email: EmailStr
    full_name: str | None = None


class UserOut(BaseModel):
    username: str
    email: EmailStr
    full_name: str | None = None


@app.post("/user/", response_model=UserOut)
async def create_user(user: UserIn) -> Any:
    return user
上記のコードの場合、引数と同じuserを返しているが、response_modelでUserOutを指定しているので、FastAPI側で属性がフィルタリングされる。
モデルにデフォルト値を定義していて、レスポンスからデフォルト値を省きたい場合は、デコレータのresponse_model_exclude_unsetパラメータを使う。
(デフォルト値と同じ値が設定された場合は、その属性をレスポンスに含めてくれる)
モデル - より詳しく
複数のモデルを使用する時のあれこれについて。
Pydanticモデルは.dict()でモデルデータを取得できるので、そこから別のモデルを作ることもできる。
dict = sample.dict()
temp = SomeClass(**dict)
ただ、実際に書くと.dict()は非推奨であるメッセージが出たため、今後はmodel_dumpにする必要がありそう。
レスポンスの戻り値
Unionで戻すこともでき、この場合、OpenAPI上はanyOfになる。
また、オブジェクトのリストで返すこともできるし、Pydanticのモデルではなく辞書型で返すこともできる。
レスポンスステータスコード
レスポンスのモデルを指定するのと同様に、ステータスコードもデコレータの引数で宣言できる。
from fastapi import FastAPI

app = FastAPI()

@app.post("/items/", status_code=201)
async def create_item(name: str):
    return {"name": name}
これはデフォルト値としての扱いで、異なる値を返すこともできそう。
フォームデータ
Jsonではなくフォームで受け取る場合は、Formを使う。
(python-multipartが必要)
Queryなどと同様のバリデーションやメタデータの設定が可能。
Form Models
フォームで受け取るデータをPydanticモデルで定義できる。
model_config = {"extra": "forbid"}を設定すると、定義されていないパラメータが来た時はエラーになる(設定しないとそのまま通る)。
from typing import Annotated

from fastapi import FastAPI, Form
from pydantic import BaseModel

app = FastAPI()


class FormData(BaseModel):
    username: str
    password: str
    model_config = {"extra": "forbid"}


@app.post("/login/")
async def login(data: Annotated[FormData, Form()]):
    return data
Request Files
クライアントからアップロードされるファイルを、Fileで定義できる。
from typing import Annotated

from fastapi import FastAPI, File, UploadFile

app = FastAPI()


@app.post("/files/")
async def create_file(file: Annotated[bytes, File()]):
    return {"file_size": len(file)}


@app.post("/uploadfile/")
async def create_upload_file(file: UploadFile):
    return {"filename": file.filename}
FastAPI側でファイルを読み取り、bytesとして受け取る。
この場合、ファイル全体がメモリ上に展開されるため、場合によってはUploadFileにする必要がある。
UploadFileの利点
-
File()を引数のデフォルト値としなくて良い - 上限値までメモリ上に載せられ、残りはディスク上に載る
- ファイルのメタデータにアクセスできる
-
fileのようなasyncインターフェースを持つ -
SpooledTemporaryFileオブジェクトを取得できるので、他ライブラリとの連携が容易
複数のファイルを受け取る場合はlistで受け取れる。
また、File()はQueryなどのように追加のメタデータを定義でき、これはUploadFileの場合でも使える。
@app.post("/uploadfile/")
async def create_upload_file(
        files: Annotated[
        list[UploadFile], File(description="Multiple files as UploadFile")
    ],
):
    return {"filenames": [file.filename for file in files]}
リクエストフォームとファイル
FormとFileを同時に使用する場合についての説明。
引数で定義するだけなので省略。
エラーハンドリング
HTTPレスポンスでエラー(400番台)をクライアントに返すには、HTTPExceptionを使用する。
HTTPExceptionは、APIに関連するデータを追加したPythonの例外オブジェクト。
例外のハンドラー
例外発生時のハンドラーについて、カスタムのものを定義することや、デフォルトをオーバーライドすることができる。
例外ハンドラーの定義は、@app.exception_handlerのデコレータで行う。
※サンプル通りのコードだと上書きの動作を確認できなかった
例外ハンドラーは、StarletteのHTTPExceptionのハンドラーも登録しておくと良い(Starletteが発生させたエラーをキャッチできる)
Path Operationの設定
デコレータ関数の引数で設定できるもの
| 引数 | 内容 | 型 | 備考 |
|---|---|---|---|
| status_code | レスポンスのステータスコード | int | FastAPIのstatusといった定数値を使用可能 |
| tags | タグ | list[str] | ドキュメントでのグルーピング |
| summary | 概要 | str | ドキュメントに表示する概要 |
| description | 詳細 | str | ドキュメントに表示する詳細 |
| respnse_description | 詳細 | str | レスポンスに関する詳細 |
| deprecated | 詳細 | bool | 非推奨であることを示す |
※descriptionに関しては、docstring内に書いてもOK
JSON互換エンコーダ
データ型をJSON(と互換のあるもの)へ変換するために、jsonable_encoderを提供している。
ボディ - 更新
PUT/PATCHでの更新に関する説明。
Pydanticの.dict(exclude_unset=True)もしくは.copy()とupdateパラメータによる部分的更新のやり方がある。
依存関係 - 最初のステップ
FastAPIにおける依存性注入(DI)のやり方。
期待する引数を持つ関数を別で作成し、参照する関数にDepends()で注入する。
from typing import Annotated
from fastapi import Depends, FastAPI

app = FastAPI()

async def common_parameters(q: str | None = None, skip: int = 0, limit: int = 100):
    return {"q": q, "skip": skip, "limit": limit}

@app.get("/items/")
async def read_items(commons: Annotated[dict, Depends(common_parameters)]):
    return commons
依存関係としてのクラス
FastAPIの依存性注入は、呼び出し可能であるか・パラメータ定義を確認しているので、Pythonのクラスも注入できる。
from typing import Annotated

from fastapi import Depends, FastAPI

app = FastAPI()

fake_items_db = [{"item_name": "Foo"}, {"item_name": "Bar"}, {"item_name": "Baz"}]

class CommonQueryParams:
    def __init__(self, q: str | None = None, skip: int = 0, limit: int = 100):
        self.q = q
        self.skip = skip
        self.limit = limit

@app.get("/items/")
async def read_items(commons: Annotated[CommonQueryParams, Depends(CommonQueryParams)]):
    response = {}
    if commons.q:
        response.update({"q": commons.q})
    items = fake_items_db[commons.skip : commons.skip + commons.limit]
    response.update({"items": items})
    return response
Depends()のパラメータと引数で受け取る先が同じ型の場合、Depends()のパラメータを省略することも可能。
# これを
async def read_items(commons: Annotated[CommonQueryParams, Depends(CommonQueryParams)]):

# ↓
# こう
async def read_items(commons: Annotated[CommonQueryParams, Depends()]):
サブ依存関係
依存が連鎖するものも、FastAPI は自動的に依存性を解決してくれる。
また、一つの依存関係が何度も呼ばれる場合は、一度だけ評価してキャッシュを生成し、以降はそのキャッシュで解決する。この動作は、Depends()のuse_cache=Falseで無効化できる。
path operationデコレータの依存関係
ルーティング関数が依存先の戻り値を必要としない、あるいは依存先が戻り値を返さない場合、デコレータのdependenciesパラメータにDepends()のlistを渡すこともできる。
from fastapi import Depends, FastAPI, Header, HTTPException

app = FastAPI()


async def verify_token(x_token: str = Header()):
    if x_token != "fake-super-secret-token":
        raise HTTPException(status_code=400, detail="X-Token header invalid")

async def verify_key(x_key: str = Header()):
    if x_key != "fake-super-secret-key":
        raise HTTPException(status_code=400, detail="X-Key header invalid")
    return x_key

@app.get("/items/", dependencies=[Depends(verify_token), Depends(verify_key)])
async def read_items():
    return [{"item": "Foo"}, {"item": "Bar"}]
Global Dependencies
アプリケーション全体に依存関係を追加するということもできる。
前節の例を踏まえると、下記の通り。
# FastAPI()の引数で設定する
app = FastAPI(dependencies=[Depends(verify_token), Depends(verify_key)])
yieldを持つ依存関係
yieldを持つ依存関係があっても、正しく処理される。複数の依存関係でyieldがある場合でも、正しい順番で行われる。
ただし、yield後の処理はレスポンス送信後・例外ハンドラー後に呼ばれるため、HTTPExceptionは発生させられない。
セキュリティ入門
セキュリティに関する用語の説明がメイン。
詳細は省略。
セキュリティ - 最初の一歩
OAuthで認証をする方法。
from typing import Annotated

from fastapi import Depends, FastAPI
from fastapi.security import OAuth2PasswordBearer

app = FastAPI()

oauth2_scheme = OAuth2PasswordBearer(tokenUrl="token")

@app.get("/items/")
async def read_items(token: Annotated[str, Depends(oauth2_scheme)]):
    return {"token": token}
トークンの存在チェックまで行われるため、実装側でトークンの有無を確認する必要はない。
現在のユーザーの取得
ユーザー取得を例に実装。
詳細は省略。
Simple OAuth2 with Password and Bearer
ユーザー取得を例にした実装の後半。
OAuth2PasswordRequestFormとしてユーザー名とパスワードで認証する方法。
パスワード(およびハッシュ化)によるOAuth2、JWTトークンによるBearer
前節までの流れを踏まえて、JWTを使用する形で再実装。
ちなみに、JWTのsubキーはアプリ全体で一意の識別子を持つ文字列らしい。
PyJWTからPython-joseに移行したらしいのですが、コードでインポートエラーになっていたので一部書き換えました。
コード
from datetime import datetime, timedelta, timezone
from typing import Annotated

from jose import jwt, JWTError
from fastapi import Depends, FastAPI, HTTPException, status
from fastapi.security import OAuth2PasswordBearer, OAuth2PasswordRequestForm
from passlib.context import CryptContext
from pydantic import BaseModel

# to get a string like this run:
# openssl rand -hex 32
SECRET_KEY = "09d25e094faa6ca2556c818166b7a9563b93f7099f6f0f4caa6cf63b88e8d3e7"
ALGORITHM = "HS256"
ACCESS_TOKEN_EXPIRE_MINUTES = 30


fake_users_db = {
    "johndoe": {
        "username": "johndoe",
        "full_name": "John Doe",
        "email": "johndoe@example.com",
        "hashed_password": "$2b$12$EixZaYVK1fsbw1ZfbX3OXePaWxn96p36WQoeG6Lruj3vjPGga31lW",
        "disabled": False,
    }
}


class Token(BaseModel):
    access_token: str
    token_type: str


class TokenData(BaseModel):
    username: str


class User(BaseModel):
    username: str
    email: str | None = None
    full_name: str | None = None
    disabled: bool | None = None


class UserInDB(User):
    hashed_password: str


pwd_context = CryptContext(schemes=["bcrypt"], deprecated="auto")

oauth2_scheme = OAuth2PasswordBearer(tokenUrl="token")

app = FastAPI()


def verify_password(plain_password, hashed_password):
    return pwd_context.verify(plain_password, hashed_password)


def get_password_hash(password):
    return pwd_context.hash(password)


def get_user(db, username: str):
    if username in db:
        user_dict = db[username]
        return UserInDB(**user_dict)


def authenticate_user(fake_db, username: str, password: str):
    user = get_user(fake_db, username)
    if not user:
        return False
    if not verify_password(password, user.hashed_password):
        return False
    return user


def create_access_token(data: dict, expires_delta: timedelta | None = None):
    to_encode = data.copy()
    if expires_delta:
        expire = datetime.now(timezone.utc) + expires_delta
    else:
        expire = datetime.now(timezone.utc) + timedelta(minutes=15)
    to_encode.update({"exp": expire})
    encoded_jwt = jwt.encode(to_encode, SECRET_KEY, algorithm=ALGORITHM)
    return encoded_jwt


async def get_current_user(token: Annotated[str, Depends(oauth2_scheme)]):
    credentials_exception = HTTPException(
        status_code=status.HTTP_401_UNAUTHORIZED,
        detail="Could not validate credentials",
        headers={"WWW-Authenticate": "Bearer"},
    )
    try:
        payload = jwt.decode(token, SECRET_KEY, algorithms=[ALGORITHM])
        username = payload.get("sub")
        if username is None:
            raise credentials_exception
        token_data = TokenData(username=username)
    except JWTError:
        raise credentials_exception
    user = get_user(fake_users_db, username=token_data.username)
    if user is None:
        raise credentials_exception
    return user


async def get_current_active_user(
    current_user: Annotated[User, Depends(get_current_user)],
):
    if current_user.disabled:
        raise HTTPException(status_code=400, detail="Inactive user")
    return current_user


@app.post("/token")
async def login_for_access_token(
    form_data: Annotated[OAuth2PasswordRequestForm, Depends()],
) -> Token:
    user = authenticate_user(fake_users_db, form_data.username, form_data.password)
    if not user:
        raise HTTPException(
            status_code=status.HTTP_401_UNAUTHORIZED,
            detail="Incorrect username or password",
            headers={"WWW-Authenticate": "Bearer"},
        )
    access_token_expires = timedelta(minutes=ACCESS_TOKEN_EXPIRE_MINUTES)
    access_token = create_access_token(
        data={"sub": user.username}, expires_delta=access_token_expires
    )
    return Token(access_token=access_token, token_type="bearer")


@app.get("/users/me/", response_model=User)
async def read_users_me(
    current_user: Annotated[User, Depends(get_current_active_user)],
):
    return current_user


@app.get("/users/me/items/")
async def read_own_items(
    current_user: Annotated[User, Depends(get_current_active_user)],
):
    return [{"item_id": "Foo", "owner": current_user.username}]
ミドルウェア
リクエストが処理される前やレスポンス生成後に動作する関数。
ちなみに、yieldを持つ依存関係のyield後のコードおよびバックグラウンドタスクはミドルウェアの後に実行される。
ミドルウェアの作成は、@app.middleware("http")デコレータで行う。
@app.middleware("http")
async def add_process_time_header(request: Request, call_next):
ミドルウェアの関数は、requestとcall_next(リクエストを処理し、レスポンスを返す関数)を引数として受け取る。
CORS (オリジン間リソース共有)
FastAPIが提供するCORSMiddlewareを使用して、CORSの実装ができる。
CORSMiddlewareのデフォルトではCORSに制限をかける内容になっているため、必要なオリジン・メソッド・ヘッダーに関して明示的に有効化する必要がある。
from fastapi import FastAPI
from fastapi.middleware.cors import CORSMiddleware

app = FastAPI()

origins = [
    "http://localhost:8080",
]

app.add_middleware(
    CORSMiddleware,
    allow_origins=origins,
    allow_credentials=True,
    allow_methods=["*"],
    allow_headers=["*"],
)

@app.get("/")
async def main():
    return {"message": "Hello World"}
SQL (Relational) Databases
FastAPIでRDBを扱う際に使える、SQLModelの紹介。
class Hero(SQLModel, table=True):
    id: int | None = Field(default=None, primary_key=True)
    name: str = Field(index=True)
    age: int | None = Field(default=None, index=True)
    secret_name: str
table=Trueでデータベース上のテーブルであることを示し、Field()で初期値やインデックスなどを指定。
DBへの接続はengineで行う。
sqlite_file_name = "database.db"
sqlite_url = f"sqlite:///{sqlite_file_name}"

connect_args = {"check_same_thread": False}
engine = create_engine(sqlite_url, connect_args=connect_args)
テーブルの作成はSQLModel.metadata.create_all(engine)でできる。
マイグレーションは別であるっぽい?
def create_db_and_tables():
    SQLModel.metadata.create_all(engine)
データの変更を追跡するsessionはyieldとdependencyでリクエスト単位となるようにしている。
def get_session():
    with Session(engine) as session:
        yield session


SessionDep = Annotated[Session, Depends(get_session)]
SQLModelはPydanticモデルでもあるので、同様の型アノテーションが可能。
CREATE・READ・DELETE
# モデル定義と接続用のセッションの作成は別

# CREATE
# ここでの`model`は生成済みのインスタンス
session.add(model)

# READ(一覧・ページネーション)
# ここでの`model`はクラス名
models = session.exec(select(model).offset(offset).limit(limit)).all()

# READ(単体)
# ここでの`model`はクラス名
model = session.get(model, id)

# DELETE
# ここでの`model`は生成済みのインスタンス
session.delete(model)
DBのテーブルとして情報は持つが、APIの応答に含めたくない場合などは、table=Trueを付けないモデルを定義することで対応できる。
# ベースとなるモデル
class HeroBase(SQLModel):
    name: str = Field(index=True)
    age: int | None = Field(default=None, index=True)

# テーブル定義
class Hero(HeroBase, table=True):
    id: int | None = Field(default=None, primary_key=True)
    secret_name: str

# secret_nameは公開しない
class HeroPublic(HeroBase):
    id: int
Bigger Applications - Multiple Files
より一般的な、複数ファイルでアプリケーションを構成する場合について。
同じFastAPIアプリケーションの中でルーティングの関数を別モジュールに分離する場合は、別モジュール側でAPIRouterを使用してルーティングを定義し、メインのFastAPI使用時にインクルードして読み込む。
インクルードする際に、include_routerの引数でprefixやtagsを指定することもできる。
from fastapi import FastAPI
from .routers import users

app = FastAPI()

app.include_router(users.router)
各ルーティングで共通するものがある場合、APIRouter()の引数に渡すことで一括して定義できる。
router = APIRouter(
    prefix="/items",
    tags=["items"],
    dependencies=[Depends(get_token_header)],
    responses={404: {"description": "Not found"}},
)
.include_router()で同じルーターを違うprefixで呼ぶことが可能。
/api/v1や/api/v2みたいな分け方が可能になる。
また、APIRouterから別のAPIRouterをインクルードすることもできる。
バックグラウンドタスク
レスポンスを返した後に実行するバックグラウンドタスク(例:メール通知など)の定義の仕方。
from fastapi import BackgroundTasks, FastAPI

app = FastAPI()

def write_notification(email: str, message=""):
    with open("log.txt", mode="w") as email_file:
        content = f"notification for {email}: {message}"
        email_file.write(content)

@app.post("/send-notification/{email}")
async def send_notification(email: str, background_tasks: BackgroundTasks):
    background_tasks.add_task(write_notification, email, message="some notification")
    return {"message": "Notification sent in the background"}
- バックグラウンドで実行される関数を定義
-
BackgroundTasksをルーティング関数の引数に設定する - .add_task()で、バックグラウンド関数を引数と一緒に
BackgroundTasksへ渡す
Depends()による依存性の注入も可能。
メタデータとドキュメントのURL
メタデータの設定のカスタマイズについて。
FastAPIの引数で渡すことで、タイトル・説明・バージョンなどを自動APIドキュメントでカスタマイズして表示できる。
ちなみに、タグのメタデータを渡した場合、タグの並び順はメタデータでの定義順になる。
app = FastAPI(
    title="title",
    description="詳細",
    summary="summary",
    version="0.0.1",
    terms_of_service="http://example.com/terms/",
    contact={
        "name": "Deadpoolio the Amazing",
        "url": "http://x-force.example.com/contact/",
        "email": "dp@x-force.example.com",
    },
    license_info={
        "name": "Apache 2.0",
        "url": "https://www.apache.org/licenses/LICENSE-2.0.html",
    },
    openapi_tags=[
        {
            "name": "users",
            "description": "Operations with users. The **login** logic is also here.",
        },
    ],
)
※ドキュメントの自動生成を止める場合
次の二つの方法がある。
-
openapi_url=Noneにして、OpenAPIのスキーマ生成を無効にする- スキーマ自体が生成されないため、ドキュメントも生成されない
-
docs_url=Noneもしくはredoc_url=Noneを指定する- Swagger UI・ReDocの生成を個別に制御できる
静的ファイル
ディレクトリにある静的ファイルを読み込む方法。
StaticFilesを使用してマウントする。
from fastapi import FastAPI
from fastapi.staticfiles import StaticFiles

app = FastAPI()

app.mount("/static", StaticFiles(directory="static"), name="static")
mount()の第一引数が参照する時のパス、StaticFilesの第一引数がディレクトリの名前、第二引数はFastAPIが内部で使用する名称。
テスト
テストはHTTPXベース。
TestClientを使用し、pytestによるテストが可能。
from fastapi import FastAPI
from fastapi.testclient import TestClient

app = FastAPI()

@app.get("/")
async def read_main():
    return {"msg": "Hello World"}

client = TestClient(app)

def test_read_main():
    response = client.get("/")
    assert response.status_code == 200
    assert response.json() == {"msg": "Hello World"}
※チュートリアル上はpytestのインストールのみ触れているものの、HTTPXのインポートエラーが起きたため、HTTPXのインストールも要りそう
デバッグ
デバッグについての情報。
Run→Add Configuration→Python DebugerでFastAPIを選ぶと良さそう?
参考資料